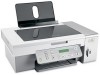
Getting Started
Page 4
...51 Network printer does not show up in the printer selection list during installation 51 Check your security keys...52 Wireless Setup Utility cannot communicate with the printer during installation (Windows users only) ...52 Wi-Fi indicator light is orange ...Photos do not transfer from a memory card across a wireless network 63 Changing wireless settings after installation 64 Finding your MAC address...64 Resetting to factory default settings 65 Resetting an internal wireless print server to factory default settings 65 Uninstalling and reinstalling the software 66 Advanced wireless setup...
...51 Network printer does not show up in the printer selection list during installation 51 Check your security keys...52 Wireless Setup Utility cannot communicate with the printer during installation (Windows users only) ...52 Wi-Fi indicator light is orange ...Photos do not transfer from a memory card across a wireless network 63 Changing wireless settings after installation 64 Finding your MAC address...64 Resetting to factory default settings 65 Resetting an internal wireless print server to factory default settings 65 Uninstalling and reinstalling the software 66 Advanced wireless setup...
Getting Started
Page 5
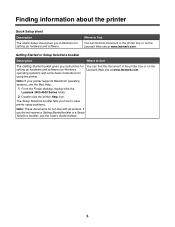
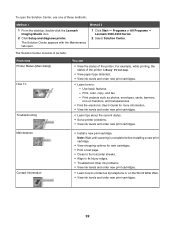
...all printers. Finding information about the printer Quick Setup sheet Description The Quick Setup sheet gives you did not receive a Getting Started booklet or a Setup Solutions booklet, see the Mac Help: 1 From the Finder desktop, double-click the Lexmark 3500-4500 Series folder. 2 Double-click the...to find this document in the printer box or on the Lexmark Web site at www.lexmark.com. If you instructions for setting up hardware and software (on the Lexmark Web site at www.lexmark.com. The Setup Solutions booklet tells you instructions for using the printer. Getting ...
...all printers. Finding information about the printer Quick Setup sheet Description The Quick Setup sheet gives you did not receive a Getting Started booklet or a Setup Solutions booklet, see the Mac Help: 1 From the Finder desktop, double-click the Lexmark 3500-4500 Series folder. 2 Double-click the...to find this document in the printer box or on the Lexmark Web site at www.lexmark.com. If you instructions for setting up hardware and software (on the Lexmark Web site at www.lexmark.com. The Setup Solutions booklet tells you instructions for using the printer. Getting ...
Getting Started
Page 6
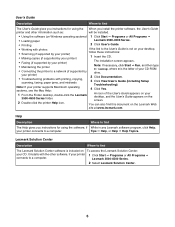
...installation screen appears. • Maintaining the printer Note: If necessary, click Start Œ Run, and then type D:\setup, where D is not on the Lexmark Web site at www.lexmark.com. You can also find this document on your desktop, • Scanning (if supported by your printer) follow ...(on Windows operating systems) 1 Click Start Œ Programs or All Programs Œ • Loading paper Lexmark 3500-4500 Series. • Printing 2 Click User's Guide. • Working with photos If the link to the User's Guide is the letter of the User's Guide appears on your desktop, ...
...installation screen appears. • Maintaining the printer Note: If necessary, click Start Œ Run, and then type D:\setup, where D is not on the Lexmark Web site at www.lexmark.com. You can also find this document on your desktop, • Scanning (if supported by your printer) follow ...(on Windows operating systems) 1 Click Start Œ Programs or All Programs Œ • Loading paper Lexmark 3500-4500 Series. • Printing 2 Click User's Guide. • Working with photos If the link to the User's Guide is the letter of the User's Guide appears on your desktop, ...
Getting Started
Page 10
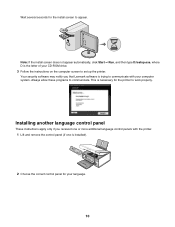
Installing another language control panel These instructions apply only if you that Lexmark software is the letter of your CD-ROM drive. 3 Follow the instructions on the computer screen to communicate. Always allow these programs to set up ...the printer. Note: If the install screen does not appear automatically, click Start ΠRun, and then type D:\setup.exe, where D is trying to appear. Your security software may notify you received one is necessary for your language. 10 This is installed). 2 Choose the correct control panel for the printer to work...
Installing another language control panel These instructions apply only if you that Lexmark software is the letter of your CD-ROM drive. 3 Follow the instructions on the computer screen to communicate. Always allow these programs to set up ...the printer. Note: If the install screen does not appear automatically, click Start ΠRun, and then type D:\setup.exe, where D is trying to appear. Your security software may notify you received one is necessary for your language. 10 This is installed). 2 Choose the correct control panel for the printer to work...
Getting Started
Page 15
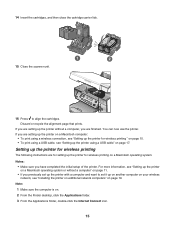
...with a computer and want to align the cartridges. You can now use the printer. Setting up the printer for wireless printing The following instructions are setting up the printer for wireless printing on a Macintosh operating system. For more information, see "Setting up the printer on a Macintosh operating system... up the printer without a computer" on page 11. • If you are for wireless printing " on page 15. • To print using a USB cable" on page 17. If you have completed the initial setup of the printer. Note: 1 Make sure the computer is on. 2 From the Finder...
...with a computer and want to align the cartridges. You can now use the printer. Setting up the printer for wireless printing The following instructions are setting up the printer for wireless printing on a Macintosh operating system. For more information, see "Setting up the printer on a Macintosh operating system... up the printer without a computer" on page 11. • If you are for wireless printing " on page 15. • To print using a USB cable" on page 17. If you have completed the initial setup of the printer. Note: 1 Make sure the computer is on. 2 From the Finder...
Getting Started
Page 17
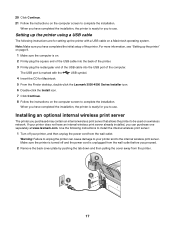
The USB port is marked with a USB cable on a wireless network. If your printer does not have an internal wireless print server already installed, you have completed the initial setup of the computer. 20 Click Continue. 21 Follow the instructions on the computer screen to use . For ... screen to complete the installation. Warning: Failure to unplug the printer can purchase one separately at www.lexmark.com. Note: Make sure you can cause damage to use . Installing an optional internal wireless print server The printer you proceed. 2 Remove the back cover plate by pushing...
The USB port is marked with a USB cable on a wireless network. If your printer does not have an internal wireless print server already installed, you have completed the initial setup of the computer. 20 Click Continue. 21 Follow the instructions on the computer screen to use . For ... screen to complete the installation. Warning: Failure to unplug the printer can purchase one separately at www.lexmark.com. Note: Make sure you can cause damage to use . Installing an optional internal wireless print server The printer you proceed. 2 Remove the back cover plate by pushing...

Getting Started
Page 18
... materials. b Click Wireless Setup. Touch something metal such as the printer frame before you touch the wireless print server. 4 Align the edges of the internal wireless print server with the guides on the left and right, and then slide the wireless print server into the...18 c Follow the prompts on your wireless network. • If you purchased the optional internal wireless print server separately and have already installed the printer: a Click Start Œ Programs or All Programs Œ Lexmark 3500-4500 Series. Warning: Wireless print servers are easily damaged by static...
... materials. b Click Wireless Setup. Touch something metal such as the printer frame before you touch the wireless print server. 4 Align the edges of the internal wireless print server with the guides on the left and right, and then slide the wireless print server into the...18 c Follow the prompts on your wireless network. • If you purchased the optional internal wireless print server separately and have already installed the printer: a Click Start Œ Programs or All Programs Œ Lexmark 3500-4500 Series. Warning: Wireless print servers are easily damaged by static...
Getting Started
Page 19
... server after your printer was already set up the printer" chapter. 2 Click Start ΠPrograms or All Programs ΠLexmark 3500-4500 Series. 3 Click Wireless Setup. 4 Click Start. 5 Follow the instructions on the computer screen. 6 Click Finish to complete the installation. For more information, see "Finding your MAC address" on the ... steps for use with the correct IP address/MAC address. If you need help finding the IP or MAC address, see "Installing an optional internal wireless print server" in the "Setting up , follow the instructions on page 64. 19
... server after your printer was already set up the printer" chapter. 2 Click Start ΠPrograms or All Programs ΠLexmark 3500-4500 Series. 3 Click Wireless Setup. 4 Click Start. 5 Follow the instructions on the computer screen. 6 Click Finish to complete the installation. For more information, see "Finding your MAC address" on the ... steps for use with the correct IP address/MAC address. If you need help finding the IP or MAC address, see "Installing an optional internal wireless print server" in the "Setting up , follow the instructions on page 64. 19
Getting Started
Page 22
..., click Start Menu ΠPrograms ΠAccessories ΠCommand Prompt. 2 Type ipconfig 3 Press Enter. One factor is a unique number used by printing out the printer's network setup page. IP addresses An IP address is interference from other wireless devices or even other . MAC address Most network equipment has a unique hardware identification number to...
..., click Start Menu ΠPrograms ΠAccessories ΠCommand Prompt. 2 Type ipconfig 3 Press Enter. One factor is a unique number used by printing out the printer's network setup page. IP addresses An IP address is interference from other wireless devices or even other . MAC address Most network equipment has a unique hardware identification number to...
Getting Started
Page 23
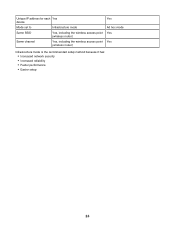
...one of network must share the same SSID as Connected. e For additional information, refer to the "Wireless troubleshooting" section of wireless network is listed as the wireless access point (wireless router). A simple type of the "Troubleshooting" chapter. If the printer does not respond: a Print a setup... the printer has an IP address. Lexmark recommends setting up a network in infrastructure mode. As is set to range of individual devices on network Usually faster Usually slower Requirements for wireless networking. The wireless print server must have a valid IP...
...one of network must share the same SSID as Connected. e For additional information, refer to the "Wireless troubleshooting" section of wireless network is listed as the wireless access point (wireless router). A simple type of the "Troubleshooting" chapter. If the printer does not respond: a Print a setup... the printer has an IP address. Lexmark recommends setting up a network in infrastructure mode. As is set to range of individual devices on network Usually faster Usually slower Requirements for wireless networking. The wireless print server must have a valid IP...
Getting Started
Page 24
Unique IP address for each Yes device Mode set to Infrastructure mode Same SSID Yes, including the wireless access point (wireless router) Same channel Yes, including the wireless access point (wireless router) Yes Ad hoc mode Yes Yes Infrastructure mode is the recommended setup method because it has: • Increased network security • Increased reliability • Faster performance • Easier setup 24
Unique IP address for each Yes device Mode set to Infrastructure mode Same SSID Yes, including the wireless access point (wireless router) Same channel Yes, including the wireless access point (wireless router) Yes Ad hoc mode Yes Yes Infrastructure mode is the recommended setup method because it has: • Increased network security • Increased reliability • Faster performance • Easier setup 24
Getting Started
Page 30
... and settings, repeat step 7 and step 8 as needed. 10 If needed, press repeatedly to return to print on a page. Paper Setup Specify the size and type of the original document. For information on saving temporary and other setting selections. 11 Press Start Color or Start Black.... 30 Note: Pressing selects a setting. Collate Print one or more copies in the correct order. Resize* • Specify the percentage for enlarging or reducing the original copy. • Specify a specific...
... and settings, repeat step 7 and step 8 as needed. 10 If needed, press repeatedly to return to print on a page. Paper Setup Specify the size and type of the original document. For information on saving temporary and other setting selections. 11 Press Start Color or Start Black.... 30 Note: Pressing selects a setting. Collate Print one or more copies in the correct order. Resize* • Specify the percentage for enlarging or reducing the original copy. • Specify a specific...
Getting Started
Page 32
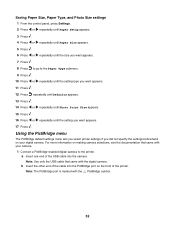
...Photo Size settings 1 From the control panel, press Settings. 2 Press or repeatedly until Paper Setup appears. 3 Press . 4 Press or repeatedly until Paper Size appears. 5 Press . 6 Press or repeatedly until the setting you want appears. 17 Press . Note: The PictBridge port is marked with the digital camera. a Insert one...type you want appears. 11 Press . 12 Press repeatedly until Defaults appears. 13 Press . 14 Press or repeatedly until Photo Print Size appears. 15 Press . 16 Press or repeatedly until the size you want appears. 7 Press . 8 Press to go to the printer.
...Photo Size settings 1 From the control panel, press Settings. 2 Press or repeatedly until Paper Setup appears. 3 Press . 4 Press or repeatedly until Paper Size appears. 5 Press . 6 Press or repeatedly until the setting you want appears. 17 Press . Note: The PictBridge port is marked with the digital camera. a Insert one...type you want appears. 11 Press . 12 Press repeatedly until Defaults appears. 13 Press . 14 Press or repeatedly until Photo Print Size appears. 15 Press . 16 Press or repeatedly until the size you want appears. 7 Press . 8 Press to go to the printer.
Getting Started
Page 34
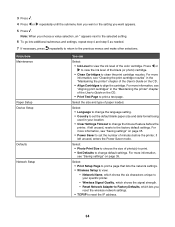
...the previous menus and make other selections. For more information, see "Cleaning the print cartridge nozzles" in the "Maintaining the printer" chapter of photo(s) to print. • Set Defaults to clean the print cartridge nozzles. For more information, see "Saving settings" on the CD. •... see "Saving settings" on the CD. • Align Cartridges to align the cartridge. Select: • Print Setup Page to print a page that lists the network settings. • Wireless Setup to view the ink level of paper loaded. 3 Press . 4 Press or repeatedly until the submenu item you want...
...the previous menus and make other selections. For more information, see "Cleaning the print cartridge nozzles" in the "Maintaining the printer" chapter of photo(s) to print. • Set Defaults to clean the print cartridge nozzles. For more information, see "Saving settings" on the CD. •... see "Saving settings" on the CD. • Align Cartridges to align the cartridge. Select: • Print Setup Page to print a page that lists the network settings. • Wireless Setup to view the ink level of paper loaded. 3 Press . 4 Press or repeatedly until the submenu item you want...
Getting Started
Page 35
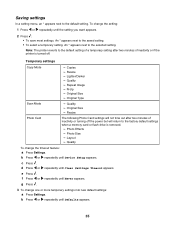
... or g Press . Resize - Photo Size - b Press or repeatedly until Never appears. 3 To change one or more temporary settings into new default settings: a Press Settings. repeatedly until Device Setup appears. An * appears next to the selected setting. Quality - Original Type Scan Mode - Photo Effects - Quality To change the setting...when a memory card or flash drive is turned off the power but will return to the default setting. Resize Photo Card The following Photo Card settings will not time out after two minutes of inactivity or turning off . Original Size - b Press ...
... or g Press . Resize - Photo Size - b Press or repeatedly until Never appears. 3 To change one or more temporary settings into new default settings: a Press Settings. repeatedly until Device Setup appears. An * appears next to the selected setting. Quality - Original Type Scan Mode - Photo Effects - Quality To change the setting...when a memory card or flash drive is turned off the power but will return to the default setting. Resize Photo Card The following Photo Card settings will not time out after two minutes of inactivity or turning off . Original Size - b Press ...
Getting Started
Page 38
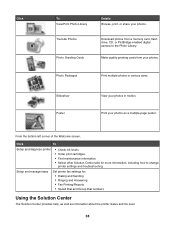
... Solution Center The Solution Center provides help, as well as a multiple-page poster. Photo Packages Print multiple photos in motion. Print your photos in various sizes. Click To View/Print Photo Library Transfer Photos Photo Greeting Cards Details Browse, print, or share your photos. Setup and manage faxes Set printer fax settings for more information, including how to...
... Solution Center The Solution Center provides help, as well as a multiple-page poster. Photo Packages Print multiple photos in motion. Print your photos in various sizes. Click To View/Print Photo Library Transfer Photos Photo Greeting Cards Details Browse, print, or share your photos. Setup and manage faxes Set printer fax settings for more information, including how to...
Getting Started
Page 39
The Solution Center appears with the Maintenance tab open the Solution Center, use one of these methods: Method 1 1 From the desktop, double-click the Lexmark Imaging Studio icon. 2 Click Setup and diagnose printer. Use basic features. - Print, scan, copy, and fax. - For example, while printing, the... ink levels and order new print cartridges. Method 2 1 Click Start Œ Programs or All Programs Œ Lexmark 3500-4500 Series. 2 Select Solution Center. Print projects such as photos, envelopes, cards, banners, iron-on the World Wide Web. • View ink levels and order new print ...
The Solution Center appears with the Maintenance tab open the Solution Center, use one of these methods: Method 1 1 From the desktop, double-click the Lexmark Imaging Studio icon. 2 Click Setup and diagnose printer. Use basic features. - Print, scan, copy, and fax. - For example, while printing, the... ink levels and order new print cartridges. Method 2 1 Click Start Œ Programs or All Programs Œ Lexmark 3500-4500 Series. 2 Select Solution Center. Print projects such as photos, envelopes, cards, banners, iron-on the World Wide Web. • View ink levels and order new print ...
Getting Started
Page 40
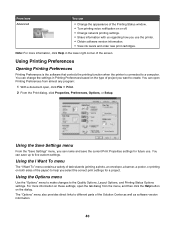
...current Print Properties settings for a project. Using the I Want To menu The "I Want To" menu contains a variety of task wizards (printing a photo, an envelope, a banner, a poster, or printing on both sides of the paper) to a computer. Using Printing Preferences Opening Printing Preferences Printing... based on these settings, open , click File ΠPrint. 2 From the Print dialog, click Properties, Preferences, Options, or Setup. The "Options" menu also provides direct links to create. You can change the settings in the lower right corner of the Solution Center...
...current Print Properties settings for a project. Using the I Want To menu The "I Want To" menu contains a variety of task wizards (printing a photo, an envelope, a banner, a poster, or printing on both sides of the paper) to a computer. Using Printing Preferences Opening Printing Preferences Printing... based on these settings, open , click File ΠPrint. 2 From the Print dialog, click Properties, Preferences, Options, or Setup. The "Options" menu also provides direct links to create. You can change the settings in the lower right corner of the Solution Center...
Getting Started
Page 41
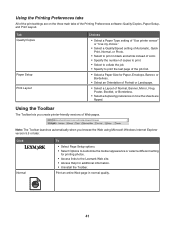
Click Normal To • Select Page Setup options. • Select Options to customize the toolbar appearance or select a different setting for printing photos. • Access links to the Lexmark Web site. • Access Help for Paper, Envelope, Banner, or Borderless. • Select an Orientation of Portrait or...Paper Type setting of "Use printer sensor" or "Use my choice." • Select a Quality/Speed setting of Automatic, Quick Print, Normal, or Photo. • Select to print the last page of the job first. • Select a Paper Size for additional information. • Uninstall the ...
Click Normal To • Select Page Setup options. • Select Options to customize the toolbar appearance or select a different setting for printing photos. • Access links to the Lexmark Web site. • Access Help for Paper, Envelope, Banner, or Borderless. • Select an Orientation of Portrait or...Paper Type setting of "Use printer sensor" or "Use my choice." • Select a Quality/Speed setting of Automatic, Quick Print, Normal, or Photo. • Select to print the last page of the job first. • Select a Paper Size for additional information. • Uninstall the ...
Getting Started
Page 47
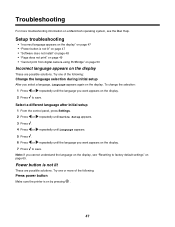
...is on by pressing . 47 Note: If you want appears on the display. 2 Press to save . Try one of the following : Change the language selection during initial setup After you want appears on the display. 7 Press to factory default settings" on page 65. To change the ... language you cannot understand the language on the display, see the Mac Help. Select a different language after initial setup 1 From the control panel, press Settings. 2 Press or repeatedly until Device Setup appears. 3 Press . 4 Press or repeatedly until Language appears. 5 Press . 6 Press or repeatedly until ...
...is on by pressing . 47 Note: If you want appears on the display. 2 Press to save . Try one of the following : Change the language selection during initial setup After you want appears on the display. 7 Press to factory default settings" on page 65. To change the ... language you cannot understand the language on the display, see the Mac Help. Select a different language after initial setup 1 From the control panel, press Settings. 2 Press or repeatedly until Device Setup appears. 3 Press . 4 Press or repeatedly until Language appears. 5 Press . 6 Press or repeatedly until ...


