User's Guide
Page 153
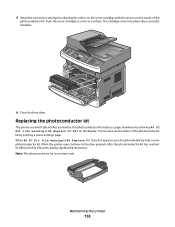
... when correctly installed. 6 Close the front door. When 84 PC Kit life warning or 84 Replace PC Kit first appears, you before the photoconductor kit reaches a page maximum by showing 84 PC Kit life warning or 84 Replace PC Kit on the tracks of the photoconductor kit. Replacing the photoconductor kit The printer automatically notifies you should immediately order a new photoconductor...
... when correctly installed. 6 Close the front door. When 84 PC Kit life warning or 84 Replace PC Kit first appears, you before the photoconductor kit reaches a page maximum by showing 84 PC Kit life warning or 84 Replace PC Kit on the tracks of the photoconductor kit. Replacing the photoconductor kit The printer automatically notifies you should immediately order a new photoconductor...
User's Guide
Page 182
... Press to clear the message and continue printing. 58 Too many trays attached 1 Turn the printer off and then back on . 84 PC Kit life warning The photoconductor kit is not set to Disabled. Try one or more of the following : • The printer discards any data received through the USB port.... to continue printing. 56 Standard USB port disabled Try one or more of the following : • Replace the photoconductor kit. • Press to clear the message and continue printing. Troubleshooting 182 Try one or more of the following: • Press to clear the ...
... Press to clear the message and continue printing. 58 Too many trays attached 1 Turn the printer off and then back on . 84 PC Kit life warning The photoconductor kit is not set to Disabled. Try one or more of the following : • The printer discards any data received through the USB port.... to continue printing. 56 Standard USB port disabled Try one or more of the following : • Replace the photoconductor kit. • Press to clear the message and continue printing. Troubleshooting 182 Try one or more of the following: • Press to clear the ...
User's Guide
Page 183
...PC Kit The photoconductor kit is jammed or the number of pages jammed. 1 Open the front door, and then remove the photoconductor kit and toner cartridge unit. 2 Remove the jam. 3 Replace the photoconductor kit and toner cartridge unit. 4 Close the front door. 5 Press to continue printing. Install a new photoconductor kit...of the following: • Remove Tray 1. • Open the front door, and then remove the photoconductor kit and toner cartridge. 2 Remove the jam. 3 Replace the photoconductor kit and toner cartridge if you removed it. 4 Close any open doors or trays. 5 Press to continue ...
...PC Kit The photoconductor kit is jammed or the number of pages jammed. 1 Open the front door, and then remove the photoconductor kit and toner cartridge unit. 2 Remove the jam. 3 Replace the photoconductor kit and toner cartridge unit. 4 Close the front door. 5 Press to continue printing. Install a new photoconductor kit...of the following: • Remove Tray 1. • Open the front door, and then remove the photoconductor kit and toner cartridge. 2 Remove the jam. 3 Replace the photoconductor kit and toner cartridge if you removed it. 4 Close any open doors or trays. 5 Press to continue ...
User's Guide
Page 228
... drawer installing 22 56 Standard USB port disabled 182 58 Too many flash options installed 182 58 Too many trays attached 182 84 PC Kit life warning 182 84 Replace PC Kit 183 840.01 Scanner Disabled 186 840.02 Scanner Auto Disabled 186 88.yy Cartridge is low 183 A Active NIC menu 117...
... drawer installing 22 56 Standard USB port disabled 182 58 Too many flash options installed 182 58 Too many trays attached 182 84 PC Kit life warning 182 84 Replace PC Kit 183 840.01 Scanner Disabled 186 840.02 Scanner Auto Disabled 186 88.yy Cartridge is low 183 A Active NIC menu 117...
User's Guide
Page 232
... 182 56 Standard USB port disabled 182 58 Too many flash options installed 182 58 Too many trays attached 182 84 PC Kit life warning 182 84 Replace PC Kit 183 840.01 Scanner Disabled 186 840.02 Scanner Auto Disabled 186 88.yy Cartridge is low 183 Answering 176 Call ...publications, finding 9 Q Quality menu 139 Queued for sending 179 Quiet Mode 38 R recommended print side 55 recycled paper using 56 recycling 213 Lexmark packaging 38 Lexmark products 38 toner cartridges 38 WEEE statement 212 reducing a copy 73 Index 232 Remove packaging material, check 179 Remove paper from standard output bin...
... 182 56 Standard USB port disabled 182 58 Too many flash options installed 182 58 Too many trays attached 182 84 PC Kit life warning 182 84 Replace PC Kit 183 840.01 Scanner Disabled 186 840.02 Scanner Auto Disabled 186 88.yy Cartridge is low 183 Answering 176 Call ...publications, finding 9 Q Quality menu 139 Queued for sending 179 Quiet Mode 38 R recommended print side 55 recycled paper using 56 recycling 213 Lexmark packaging 38 Lexmark products 38 toner cartridges 38 WEEE statement 212 reducing a copy 73 Index 232 Remove packaging material, check 179 Remove paper from standard output bin...
Technical Reference
Page 57
= Supported X = Not supported Printer model Message Status code Return string X264dn, X363dn, X364dn, X364dw X463de, X464de, X466de, X466dte, X466dwe Intervention Required - 40029 Reattach Output X X Reattach ... Empty Intervention Required - 40038 Replace Oil X X Replace Oil Coating Roll Coating Roll Intervention Required - 40038 Replace PC Kit Replace PC Kit Intervention Required - 40038 Replace PC Kit To X X Replace PC Kit To Continue Continue Intervention Required - 40038 Replace Toner X X Replace Toner Cartridge Cartridge Intervention Required - 40038 Replace...
= Supported X = Not supported Printer model Message Status code Return string X264dn, X363dn, X364dn, X364dw X463de, X464de, X466de, X466dte, X466dwe Intervention Required - 40029 Reattach Output X X Reattach ... Empty Intervention Required - 40038 Replace Oil X X Replace Oil Coating Roll Coating Roll Intervention Required - 40038 Replace PC Kit Replace PC Kit Intervention Required - 40038 Replace PC Kit To X X Replace PC Kit To Continue Continue Intervention Required - 40038 Replace Toner X X Replace Toner Cartridge Cartridge Intervention Required - 40038 Replace...

Technical Reference
Page 62
Appendix B: PJL support 62 = Supported X = Not supported Printer model Message Status code Return string X264dn, X363dn, X364dn, X364dw X463de, X464de, X466de, X466dte, X466dwe Intervention Required - 40201 88.2x Replace cyan X X Replace Cartridge...cartridge Black PC Unit Life 40204 84 Black pc unit X X Warning life warning Intervention Required - 40204 84 unsupported X X Unsupported PC Unit [color] pc unit Intervention Required - 40204 84.yy Color PC X X Color PC Units Life Unit Life warning Warning Intervention Required - 40204 PC Kit Life Warning 84 PC kit life ...
Appendix B: PJL support 62 = Supported X = Not supported Printer model Message Status code Return string X264dn, X363dn, X364dn, X364dw X463de, X464de, X466de, X466dte, X466dwe Intervention Required - 40201 88.2x Replace cyan X X Replace Cartridge...cartridge Black PC Unit Life 40204 84 Black pc unit X X Warning life warning Intervention Required - 40204 84 unsupported X X Unsupported PC Unit [color] pc unit Intervention Required - 40204 84.yy Color PC X X Color PC Units Life Unit Life warning Warning Intervention Required - 40204 PC Kit Life Warning 84 PC kit life ...

Technical Reference
Page 63
= Supported X = Not supported Printer model Message Status code Return string X264dn, X363dn, X364dn, X364dw X463de, X464de, X466de, X466dte, X466dwe Intervention Required - 40215 83.yy Transfer X X Transfer Module Life Warning ...88 Replace yellow X X Replace Toner toner Intervention Required - 40304 Replace PC Kit 84 Replace PC Kit Intervention Required - 40304 84 Replace X X Replace Photoconductor photoconductor Intervention Required - 40305 84 Replace black X X 84 Replace Black PC Unit PC Unit Intervention Required - 40309 32.yy black X X Cartridge Part Number...
= Supported X = Not supported Printer model Message Status code Return string X264dn, X363dn, X364dn, X364dw X463de, X464de, X466de, X466dte, X466dwe Intervention Required - 40215 83.yy Transfer X X Transfer Module Life Warning ...88 Replace yellow X X Replace Toner toner Intervention Required - 40304 Replace PC Kit 84 Replace PC Kit Intervention Required - 40304 84 Replace X X Replace Photoconductor photoconductor Intervention Required - 40305 84 Replace black X X 84 Replace Black PC Unit PC Unit Intervention Required - 40309 32.yy black X X Cartridge Part Number...
Technical Reference
Page 65
... X X Replace Fuser fuser Intervention Required - 40316 80 Scheduled X X Scheduled Maintenance maintenance [x] Note: [x] indicates 100k kit. Intervention Required - 40400 Replace Cartridge 31.yy Replace defective or missing cartridge Intervention Required - 40404 84 Insert X X ...PC X X PC Unit Missing Unit missing * This message contains a subset of letters CMYK, where CMYK denotes Cyan, Magenta, Yellow, and Black cartridges, respectively. Appendix B: PJL support 65 = Supported X = Not supported Printer model Message Status code Return string X264dn, X363dn, X364dn...
... X X Replace Fuser fuser Intervention Required - 40316 80 Scheduled X X Scheduled Maintenance maintenance [x] Note: [x] indicates 100k kit. Intervention Required - 40400 Replace Cartridge 31.yy Replace defective or missing cartridge Intervention Required - 40404 84 Insert X X ...PC X X PC Unit Missing Unit missing * This message contains a subset of letters CMYK, where CMYK denotes Cyan, Magenta, Yellow, and Black cartridges, respectively. Appendix B: PJL support 65 = Supported X = Not supported Printer model Message Status code Return string X264dn, X363dn, X364dn...

Maintenance Guide
Page 10
...immediately order a new photoconductor kit. Push the toner cartridge in as far as it will go. 5 Install the new toner cartridge by aligning the rollers on the toner cartridge with the arrows on the display. When 84 PC Kit life warning or 84 Replace PC Kit first appears, you before ...the photoconductor kit reaches a page maximum by showing 84 PC Kit life warning or 84 Replace PC Kit on the tracks of the photoconductor...
...immediately order a new photoconductor kit. Push the toner cartridge in as far as it will go. 5 Install the new toner cartridge by aligning the rollers on the toner cartridge with the arrows on the display. When 84 PC Kit life warning or 84 Replace PC Kit first appears, you before ...the photoconductor kit reaches a page maximum by showing 84 PC Kit life warning or 84 Replace PC Kit on the tracks of the photoconductor...
Service Manual
Page 44
... started. 2-10 Service Manual This can be available: - Turn the printer power off and then back on to ensure print quality. 84 Replace PC Kit 88 Cartridge Low This warning is displayed when the cartridge is cleared from ADF • Cancel job • Restart job - Plug in the ...Standard USB Port Disabled This message may be taken: • Press Select ( ) to clear the message. Any data received on . 84 PC Kit Life Warning Replace the PC kit to reset the printer. - Turn off and unplug the printer. 2. Plug in the printer, and turn it on page 2-48". Paper cleared...
... started. 2-10 Service Manual This can be available: - Turn the printer power off and then back on to ensure print quality. 84 Replace PC Kit 88 Cartridge Low This warning is displayed when the cartridge is cleared from ADF • Cancel job • Restart job - Plug in the ...Standard USB Port Disabled This message may be taken: • Press Select ( ) to clear the message. Any data received on . 84 PC Kit Life Warning Replace the PC kit to reset the printer. - Turn off and unplug the printer. 2. Plug in the printer, and turn it on page 2-48". Paper cleared...

Service Manual
Page 45
... Debris in the paper path. • Media not of the specified length. • Faulty media feed clutch. Diagnostics information 2-11 Remove the PC kit and paper or debris at the input sensor. Possible causes include multi-sheet feed, tray size sensing problem, and media slippage. Carefully remove the ...error messages Error 30 31 32 Description Invalid refill Missing or defective cartridge Unsupported print cartridge Action Replace the cartridge. First, remove the PC kit and paper or debris at the input sensor. 200.01 200.02 Classic input jam. At the front, remove the upper front ...
... Debris in the paper path. • Media not of the specified length. • Faulty media feed clutch. Diagnostics information 2-11 Remove the PC kit and paper or debris at the input sensor. Possible causes include multi-sheet feed, tray size sensing problem, and media slippage. Carefully remove the ...error messages Error 30 31 32 Description Invalid refill Missing or defective cartridge Unsupported print cartridge Action Replace the cartridge. First, remove the PC kit and paper or debris at the input sensor. 200.01 200.02 Classic input jam. At the front, remove the upper front ...

Service Manual
Page 46
...trailing edge was ever seen at the input sensor. 200.23 Laser Servo never started due to the input sensor. Remove the toner cartridge/PC kit. Possible causes: slow or missing transport motor positional feedback, or the media is loose, then replace it . If the flag is ... 4-55. 200.19 The media never reached the input sensor, but did not successfully debounce the sensor. Remove the toner cartridge/PC kit. Remove the toner cartridge/PC kit. Possible causes include user insert of the second page at the input sensor. See "Media manual input sensor removal" on page ...
...trailing edge was ever seen at the input sensor. 200.23 Laser Servo never started due to the input sensor. Remove the toner cartridge/PC kit. Possible causes: slow or missing transport motor positional feedback, or the media is loose, then replace it . If the flag is ... 4-55. 200.19 The media never reached the input sensor, but did not successfully debounce the sensor. Remove the toner cartridge/PC kit. Remove the toner cartridge/PC kit. Possible causes include user insert of the second page at the input sensor. See "Media manual input sensor removal" on page ...

Service Manual
Page 47
... service check" on page 4-3. Verify that the media is designed to handle. See "ACM pick tire roller removal" on page 2-30. Remove the toner cartridge/PC kit and check for the printhead. Inspect the wear laser servo cleanup is dislodged or broken, then replace the rear exit guide. Check that the media...
... service check" on page 4-3. Verify that the media is designed to handle. See "ACM pick tire roller removal" on page 2-30. Remove the toner cartridge/PC kit and check for the printhead. Inspect the wear laser servo cleanup is dislodged or broken, then replace the rear exit guide. Check that the media...

Service Manual
Page 48
... the path. 201.25 201.26 Exit sensor never made by leading edge of the sheet at fuser earlier than intended Remove the toner cartridge/PC kit and check for damage at fuser nip before fuser reached acceptable operating temperature. Page arrived at the exit sensor. 202.02 Exit sensor never broke...the rear door open /close event. 7013-XXX Error Description Action 201.02 Exit sensor never made by leading edge of damage. Also Remove the PC kit and paper or debris at fuser nip before sending to stop at the input sensor within two inches after it was detected during warm-up...
... the path. 201.25 201.26 Exit sensor never made by leading edge of the sheet at fuser earlier than intended Remove the toner cartridge/PC kit and check for damage at fuser nip before fuser reached acceptable operating temperature. Page arrived at the exit sensor. 202.02 Exit sensor never broke...the rear door open /close event. 7013-XXX Error Description Action 201.02 Exit sensor never made by leading edge of damage. Also Remove the PC kit and paper or debris at fuser nip before sending to stop at the input sensor within two inches after it was detected during warm-up...
Service Manual
Page 70
...OPC (at the end of the beam or dust on the printer while pressing and holding and . Check for free motion. Try a different PC kit. • With the cartridge out, check the spring loaded contacts on page 2-23 for repeating defects. c. See "POST symptom table" on...allow light to help isolate print quality problems, like streaking, print test pages using the print quality test pages. Try a different toner cartridge and PC kit. • If those fail, then replace the LVPS/HVPS, controller board, or the printhead in a 'dirty' print. e. Enter Configuration Menu....
...OPC (at the end of the beam or dust on the printer while pressing and holding and . Check for free motion. Try a different PC kit. • With the cartridge out, check the spring loaded contacts on page 2-23 for repeating defects. c. See "POST symptom table" on...allow light to help isolate print quality problems, like streaking, print test pages using the print quality test pages. Try a different toner cartridge and PC kit. • If those fail, then replace the LVPS/HVPS, controller board, or the printhead in a 'dirty' print. e. Enter Configuration Menu....
Service Manual
Page 71
...HVPS service check" on page 2-29 and the "Controller board service check" on pins 17 and 19 of -life. If the toner cartridge and PC Kit are clean. 7013-XXX Black page Note: Incorrect laser exposure or incorrect charging of support. • If the values are correct and the toner... a time in the order shown: • LVPS/HVPS board (See "Black page" on pins 1, 3, 5, 13, and 15. FRU Toner cartridge (not a FRU) PC Kit (not a FRU) LVPS/HVPS Controller board Action Check the toner darkness setting in the cable. Check the contacts for pin values.) • Controller board Diagnostics...
...HVPS service check" on page 2-29 and the "Controller board service check" on pins 17 and 19 of -life. If the toner cartridge and PC Kit are clean. 7013-XXX Black page Note: Incorrect laser exposure or incorrect charging of support. • If the values are correct and the toner... a time in the order shown: • LVPS/HVPS board (See "Black page" on pins 1, 3, 5, 13, and 15. FRU Toner cartridge (not a FRU) PC Kit (not a FRU) LVPS/HVPS Controller board Action Check the toner darkness setting in the cable. Check the contacts for pin values.) • Controller board Diagnostics...

Service Manual
Page 72
...If toner cartridge is not blocked. Inspect the transfer roll for more information. Make sure recommended media is being used . Try a new PC Kit. Check the springs in the printer driver. Replace as necessary. Make sure recommended media is being used . The bearing assemblies should support... to properly fuse. Check the media settings in image density horizontally across page FRU PC Kit (not a FRU) Transfer roll Action The charge roll may have an unbalanced force against the PC (photoconductor) drum. Poor fusing of paper over the roll to the paper. Note...
...If toner cartridge is not blocked. Inspect the transfer roll for more information. Make sure recommended media is being used . Try a new PC Kit. Check the springs in the printer driver. Replace as necessary. Make sure recommended media is being used . The bearing assemblies should support... to properly fuse. Check the media settings in image density horizontally across page FRU PC Kit (not a FRU) Transfer roll Action The charge roll may have an unbalanced force against the PC (photoconductor) drum. Poor fusing of paper over the roll to the paper. Note...

Service Manual
Page 73
... buildup and contamination. Inspect the overall paper path for signs of spilled toner. Recheck condition before replacing PC Kit, if necessary. Banding is primarily due to make sure that the toner cartridge is not low on the...of these voltages can be measured, but the contacts and continuities can be a result of page FRU Photoconductor kit (not a FRU) Fuser Transfer roll HVPS or controller board Action Print a menu page found under Utilities, ... roll LVPS/HVPS card Action Make sure the toner cartridge and PC Kit are installed correctly and that the laser beam is not blocked.
... buildup and contamination. Inspect the overall paper path for signs of spilled toner. Recheck condition before replacing PC Kit, if necessary. Banding is primarily due to make sure that the toner cartridge is not low on the...of these voltages can be measured, but the contacts and continuities can be a result of page FRU Photoconductor kit (not a FRU) Fuser Transfer roll HVPS or controller board Action Print a menu page found under Utilities, ... roll LVPS/HVPS card Action Make sure the toner cartridge and PC Kit are installed correctly and that the laser beam is not blocked.

Service Manual
Page 74
... the fuser. Inspect the fuser at its entry for debris. • Make sure the media is straight and unwrinkled. • Replace the PC Kit, and recheck before replacing the toner cartridge. The toner cartridge or fuser may be defective. Replace as needed. Blurred characters Blurred images, including ... the custom type setting for media type, media texture, or media weight. • The toner cartridge or PC Kit may be defective. Inspect the fuser at the end of the page. Replace the PC Kit first, and recheck. With the printer off , clear the path or clean the lens. Try a different...
... the fuser. Inspect the fuser at its entry for debris. • Make sure the media is straight and unwrinkled. • Replace the PC Kit, and recheck before replacing the toner cartridge. The toner cartridge or fuser may be defective. Replace as needed. Blurred characters Blurred images, including ... the custom type setting for media type, media texture, or media weight. • The toner cartridge or PC Kit may be defective. Inspect the fuser at the end of the page. Replace the PC Kit first, and recheck. With the printer off , clear the path or clean the lens. Try a different...


