User's Guide
Page 3
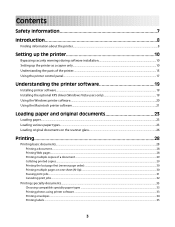
... software installation 10 Setting up the printer as a copier only...10 Understanding the parts of the printer...15 Using the printer control panel...17 Understanding the printer software 19 Installing printer software...19 Installing the optional XPS driver (Windows Vista users only 19 Using the Windows printer software...20 Using the Macintosh printer software...21 Loading paper and original...
... software installation 10 Setting up the printer as a copier only...10 Understanding the parts of the printer...15 Using the printer control panel...17 Understanding the printer software 19 Installing printer software...19 Installing the optional XPS driver (Windows Vista users only 19 Using the Windows printer software...20 Using the Macintosh printer software...21 Loading paper and original...
User's Guide
Page 4
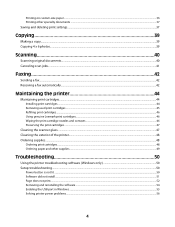
... automatically...42 Maintaining the printer 44 Maintaining print cartridges...44 Installing print cartridges...44 Removing used print cartridges...45 Refilling print cartridges...46 Using genuine Lexmark print cartridges...46 Wiping the... print cartridge nozzles and contacts ...46 Preserving the print cartridges ...47 Cleaning the scanner glass...47 Cleaning the exterior of the printer...48 Ordering supplies...48 Ordering print cartridges ...48 Ordering paper and other supplies...49 Troubleshooting 50 Using the printer troubleshooting software (Windows...
... automatically...42 Maintaining the printer 44 Maintaining print cartridges...44 Installing print cartridges...44 Removing used print cartridges...45 Refilling print cartridges...46 Using genuine Lexmark print cartridges...46 Wiping the... print cartridge nozzles and contacts ...46 Preserving the print cartridges ...47 Cleaning the scanner glass...47 Cleaning the exterior of the printer...48 Ordering supplies...48 Ordering print cartridges ...48 Ordering paper and other supplies...49 Troubleshooting 50 Using the printer troubleshooting software (Windows...

User's Guide
Page 19
Using the World Wide Web 1 Go to the Lexmark Web site at www.lexmark.com. 2 From the home page, navigate through the menu selection, and then click Drivers & Downloads. 3 Choose the printer and the printer driver for Windows Vista users. To use of the advanced XPS color and graphics features that automatically appears. 4 Double-click the...
Using the World Wide Web 1 Go to the Lexmark Web site at www.lexmark.com. 2 From the home page, navigate through the menu selection, and then click Drivers & Downloads. 3 Choose the printer and the printer driver for Windows Vista users. To use of the advanced XPS color and graphics features that automatically appears. 4 Double-click the...
User's Guide
Page 20
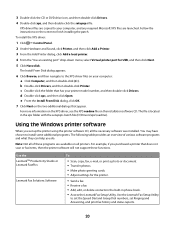
...You may have chosen to set the Speed Dial and Group Dial numbers, set up the printer using the printer software CD, all the necessary software was installed. Use the Lexmark Fax Setup Utility to install some additional programs. The following table provides an overview of these...with the setupxps batch file (D:\Drivers\xps\readme). Using the Windows printer software When you purchased a printer that does not scan or fax items, then the printer software will not support these programs are launched. Note: Not all printers. For example, if you set Ringing and Answering, and...
...You may have chosen to set the Speed Dial and Group Dial numbers, set up the printer using the printer software CD, all the necessary software was installed. Use the Lexmark Fax Setup Utility to install some additional programs. The following table provides an overview of these...with the setupxps batch file (D:\Drivers\xps\readme). Using the Windows printer software When you purchased a printer that does not scan or fax items, then the printer software will not support these programs are launched. Note: Not all printers. For example, if you set Ringing and Answering, and...
User's Guide
Page 28
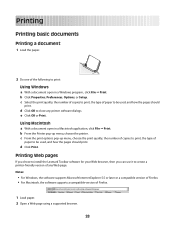
...printer. Printing Web pages If you chose to install the Lexmark Toolbar software for your Web browser, then you can use it to create a printer-friendly version of Firefox. 1 Load paper. 2 Open a Web page using a supported browser. 28 Notes: • For Windows..., the software supports Microsoft Internet Explorer 5.5 or later or a compatible version of Firefox. • For Macintosh, the software supports a compatible version of any printer software dialogs. b Click Properties, Preferences, Options, or Setup. Printing ...
...printer. Printing Web pages If you chose to install the Lexmark Toolbar software for your Web browser, then you can use it to create a printer-friendly version of Firefox. 1 Load paper. 2 Open a Web page using a supported browser. 28 Notes: • For Windows..., the software supports Microsoft Internet Explorer 5.5 or later or a compatible version of Firefox. • For Macintosh, the software supports a compatible version of any printer software dialogs. b Click Properties, Preferences, Options, or Setup. Printing ...

User's Guide
Page 29
... copies that you are printing multiple copies. 3 Select a print option to close any printer software dialogs. 5 Click OK or Print. Collated Not collated Using Windows 1 With a document open , click File ΠPrint. 2 From the Printer pop-up menu, choose the printer. 3 In the Copies field, enter the number of copies that you want to...
... copies that you are printing multiple copies. 3 Select a print option to close any printer software dialogs. 5 Click OK or Print. Collated Not collated Using Windows 1 With a document open , click File ΠPrint. 2 From the Printer pop-up menu, choose the printer. 3 In the Copies field, enter the number of copies that you want to...

User's Guide
Page 30
... multiple pages on one of the following: For Mac OS X version 10.5 a From the print options pop-up menu, choose the printer. 3 Do one sheet (N-Up) Using Windows 1 With a document open , click File ΠPrint. 2 Click Properties, Preferences, Options, or Setup. 3 From the Copies section... of page images to print on each page image to close any printer software dialogs. 5 Click OK or Print. b Select Reverse page order. 4 Click ...
... multiple pages on one of the following: For Mac OS X version 10.5 a From the print options pop-up menu, choose the printer. 3 Do one sheet (N-Up) Using Windows 1 With a document open , click File ΠPrint. 2 Click Properties, Preferences, Options, or Setup. 3 From the Copies section... of page images to print on each page image to close any printer software dialogs. 5 Click OK or Print. b Select Reverse page order. 4 Click ...
User's Guide
Page 31
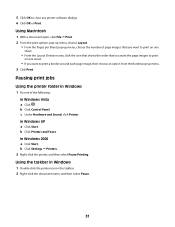
c Under Hardware and Sound, click Printer. In Windows XP a Click Start. b Click Printers and Faxes. b Click Settings Œ Printers. 2 Right-click the printer, and then select Pause Printing. In Windows 2000 a Click Start. b Click Control Panel. Using Macintosh 1 With a document open, click File Œ Print. ...the following: In Windows Vista a Click . Using the taskbar in Windows 1 Double-click the printer icon in Windows 1 Do one sheet. • If you want to close any printer software dialogs. 6 Click OK or Print. Pausing print jobs Using the printer folder in the taskbar...
c Under Hardware and Sound, click Printer. In Windows XP a Click Start. b Click Printers and Faxes. b Click Settings Œ Printers. 2 Right-click the printer, and then select Pause Printing. In Windows 2000 a Click Start. b Click Control Panel. Using Macintosh 1 With a document open, click File Œ Print. ...the following: In Windows Vista a Click . Using the taskbar in Windows 1 Double-click the printer icon in Windows 1 Do one sheet. • If you want to close any printer software dialogs. 6 Click OK or Print. Pausing print jobs Using the printer folder in the taskbar...
User's Guide
Page 32
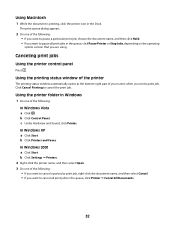
...print job, right-click the document name, and then select Cancel. • If you send a print job. In Windows XP a Click Start. b Click Settings Œ Printers. 2 Right-click the printer name, and then select Open. 3 Do one of the following: • If you want to pause a particular ...If you want to pause all print jobs in the queue, click Printer Œ Cancel All Documents. 32 b Click Control Panel. c Under Hardware and Sound, click Printer. Using the printing status window of the printer The printing status window automatically opens at the bottom-right part of the following : &#...
...print job, right-click the document name, and then select Cancel. • If you send a print job. In Windows XP a Click Start. b Click Settings Œ Printers. 2 Right-click the printer name, and then select Open. 3 Do one of the following: • If you want to pause a particular ...If you want to pause all print jobs in the queue, click Printer Œ Cancel All Documents. 32 b Click Control Panel. c Under Hardware and Sound, click Printer. Using the printing status window of the printer The printing status window automatically opens at the bottom-right part of the following : &#...
User's Guide
Page 33
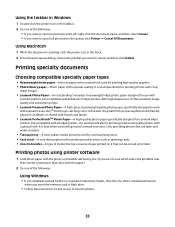
... paper with the paper.) 2 Do one of the following : Using Windows • If you insert the memory card or flash drive. • Follow the instructions on it that you want to cancel all brands of inkjet printers. It is used with genuine Lexmark evercolor 2 ink, providing photos that are not sure which side...
... paper with the paper.) 2 Do one of the following : Using Windows • If you insert the memory card or flash drive. • Follow the instructions on it that you want to cancel all brands of inkjet printers. It is used with genuine Lexmark evercolor 2 ink, providing photos that are not sure which side...
User's Guide
Page 34
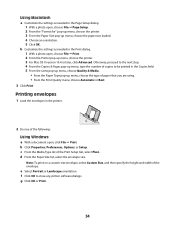
... 5 From the same pop-up menu, choose Quality & Media. • From the Paper Type pop-up menu, choose the type of the following: Using Windows a With a document open, click File Œ Print. Note: To print on a custom-size envelope, select Custom Size, and then specify the height and...Setup tab, select Plain. Otherwise, proceed to the next step. 4 From the Copies & Pages pop-up menu, type the number of copies to close any printer software dialogs. Using Macintosh a Customize the settings as needed in the Page Setup dialog. 1 With a photo open, choose File Œ Page Setup. 2 ...
... 5 From the same pop-up menu, choose Quality & Media. • From the Paper Type pop-up menu, choose the type of the following: Using Windows a With a document open, click File Œ Print. Note: To print on a custom-size envelope, select Custom Size, and then specify the height and...Setup tab, select Plain. Otherwise, proceed to the next step. 4 From the Copies & Pages pop-up menu, type the number of copies to close any printer software dialogs. Using Macintosh a Customize the settings as needed in the Page Setup dialog. 1 With a photo open, choose File Œ Page Setup. 2 ...
User's Guide
Page 35
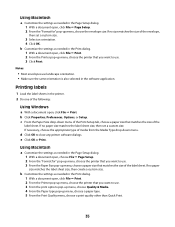
...matches the label sheet size, then set a custom size. 3 Select an orientation. 4 Click OK. If no size matches the size of the following: Using Windows a With a document open , click File ΠPage Setup. 2 From the "Format for " pop-up menu, choose the envelope size. e Click OK... a paper type. 5 From the Print Quality menu, choose a print quality other than Quick Print. 35 Printing labels 1 Load the label sheets in the printer. 2 Do one of the envelope, then set a custom size. b Click Properties, Preferences, Options, or Setup. Using Macintosh a Customize the settings as ...
...matches the label sheet size, then set a custom size. 3 Select an orientation. 4 Click OK. If no size matches the size of the following: Using Windows a With a document open , click File ΠPage Setup. 2 From the "Format for " pop-up menu, choose the envelope size. e Click OK... a paper type. 5 From the Print Quality menu, choose a print quality other than Quick Print. 35 Printing labels 1 Load the label sheets in the printer. 2 Do one of the envelope, then set a custom size. b Click Properties, Preferences, Options, or Setup. Using Macintosh a Customize the settings as ...
User's Guide
Page 36
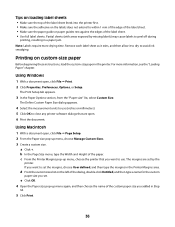
Using Windows 1 With a document open , click File ΠPage Setup. 2 From the Paper size pop-up menu,...the paper. For more drying time. If you want to use (inches or millimeters). 5 Click OK to close any printer software dialogs that you want to set the margins, choose User defined, and then type the margins in a paper jam... The Define Custom Paper Size dialog appears. 4 Select the measurement units to peel off during printing, resulting in the Printer Margins area. Printing on custom-size paper Before beginning these instructions, load the custom-size paper in Step 3d. 5 ...
Using Windows 1 With a document open , click File ΠPage Setup. 2 From the Paper size pop-up menu,...the paper. For more drying time. If you want to use (inches or millimeters). 5 Click OK to close any printer software dialogs that you want to set the margins, choose User defined, and then type the margins in a paper jam... The Define Custom Paper Size dialog appears. 4 Select the measurement units to peel off during printing, resulting in the Printer Margins area. Printing on custom-size paper Before beginning these instructions, load the custom-size paper in Step 3d. 5 ...

User's Guide
Page 37
... Windows XP, click Start ΠPrograms or All Programs, and then select the printer program folder from the list. 2 Click the program that you want to use. Using Macintosh 1 From the Finder desktop, double-click the printer folder. b Choose Library ΠPrinters ΠYYYY ΠLexmark,...and then click Save your current settings. 5 Select an empty location for your printer model. If the printer folder is the year that the printer was installed. Saving and deleting print settings Using Windows 1 With a document open software dialogs. For information about printing these documents, ...
... Windows XP, click Start ΠPrograms or All Programs, and then select the printer program folder from the list. 2 Click the program that you want to use. Using Macintosh 1 From the Finder desktop, double-click the printer folder. b Choose Library ΠPrinters ΠYYYY ΠLexmark,...and then click Save your current settings. 5 Select an empty location for your printer model. If the printer folder is the year that the printer was installed. Saving and deleting print settings Using Windows 1 With a document open software dialogs. For information about printing these documents, ...
User's Guide
Page 40
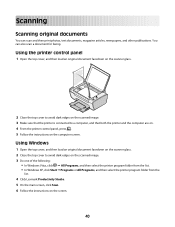
...original documents You can also scan a document for faxing. Using Windows 1 Open the top cover, and then load an original document facedown on the scanner glass. 2 Close the top cover to a computer, and that the printer is connected to avoid dark edges on the scanned image. 3 ... one of the following: • In Windows Vista, click Œ All Programs, and then select the printer program folder from the list. • In Windows XP, click Start Œ Programs or All Programs, and then select the printer program folder from the list. 4 Click Lexmark Productivity Studio. 5 On the main screen...
...original documents You can also scan a document for faxing. Using Windows 1 Open the top cover, and then load an original document facedown on the scanner glass. 2 Close the top cover to a computer, and that the printer is connected to avoid dark edges on the scanned image. 3 ... one of the following: • In Windows Vista, click Œ All Programs, and then select the printer program folder from the list. • In Windows XP, click Start Œ Programs or All Programs, and then select the printer program folder from the list. 4 Click Lexmark Productivity Studio. 5 On the main screen...
User's Guide
Page 41
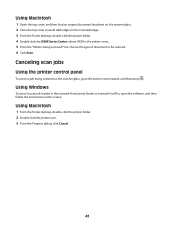
... the Finder desktop, double-click the printer folder. 2 Double-click the printer icon. 3 From the Progress dialog, click Cancel. 41 Using Windows To cancel a scan job started in the Lexmark Productivity Studio or Lexmark FastPics, open the software, and then follow the instructions on the scanner glass, go to the printer control panel, and then press...
... the Finder desktop, double-click the printer folder. 2 Double-click the printer icon. 3 From the Progress dialog, click Cancel. 41 Using Windows To cancel a scan job started in the Lexmark Productivity Studio or Lexmark FastPics, open the software, and then follow the instructions on the scanner glass, go to the printer control panel, and then press...
User's Guide
Page 42
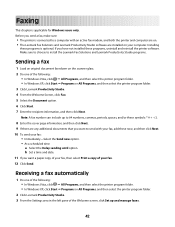
...Do one of the following : • In Windows Vista, click Œ All Programs, and then select the printer program folder. • In Windows XP, click Start Œ Programs or All Programs, and then select the printer program folder. 2 Click Lexmark Productivity Studio. 3 From the Settings area in ... pane of the following : • In Windows Vista, click Œ All Programs, and then select the printer program folder. • In Windows XP, click Start Œ Programs or All Programs, and then select the printer program folder. 3 Click Lexmark Productivity Studio. 4 From the Welcome Screen, ...
...Do one of the following : • In Windows Vista, click Œ All Programs, and then select the printer program folder. • In Windows XP, click Start Œ Programs or All Programs, and then select the printer program folder. 2 Click Lexmark Productivity Studio. 3 From the Settings area in ... pane of the following : • In Windows Vista, click Œ All Programs, and then select the printer program folder. • In Windows XP, click Start Œ Programs or All Programs, and then select the printer program folder. 3 Click Lexmark Productivity Studio. 4 From the Welcome Screen, ...
User's Guide
Page 50
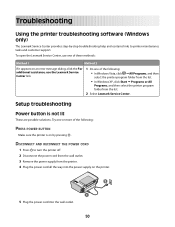
.... 2 Disconnect the power cord from the wall outlet. 3 Remove the power supply from the list. 2 Select Lexmark Service Center. Troubleshooting Using the printer troubleshooting software (Windows only) The Lexmark Service Center provides step-by pressing . To open the Lexmark Service Center, use one of these methods: Method 1 Method 2 If it appears on an error message...
.... 2 Disconnect the power cord from the wall outlet. 3 Remove the power supply from the list. 2 Select Lexmark Service Center. Troubleshooting Using the printer troubleshooting software (Windows only) The Lexmark Service Center provides step-by pressing . To open the Lexmark Service Center, use one of these methods: Method 1 Method 2 If it appears on an error message...
User's Guide
Page 51
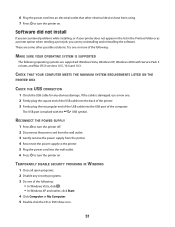
These are supported: Windows Vista, Windows XP, Windows 2000 with the USB symbol. RECONNECT THE POWER SUPPLY 1 Press to turn the printer off. 2 Disconnect the power cord from the wall outlet. 3 Gently remove the power supply from the printer. 4 Reconnect the power supply to the printer. 5 Plug the power cord ...Firmly plug the square end of the USB cable into the back of the printer. 3 Firmly plug the rectangular end of the USB cable into the USB port of the computer. TEMPORARILY DISABLE SECURITY PROGRAMS IN WINDOWS 1 Close all open programs. 2 Disable any obvious damage. 6 Plug the...
These are supported: Windows Vista, Windows XP, Windows 2000 with the USB symbol. RECONNECT THE POWER SUPPLY 1 Press to turn the printer off. 2 Disconnect the power cord from the wall outlet. 3 Gently remove the power supply from the printer. 4 Reconnect the power supply to the printer. 5 Plug the power cord ...Firmly plug the square end of the USB cable into the back of the printer. 3 Firmly plug the rectangular end of the USB cable into the USB port of the computer. TEMPORARILY DISABLE SECURITY PROGRAMS IN WINDOWS 1 Close all open programs. 2 Disable any obvious damage. 6 Plug the...
User's Guide
Page 52
... electrical devices have been removed. 1 2 1 2 3 Reinsert the cartridges. Page does not print These are possible solutions. CHECK PRINTER DEFAULT AND PAUSE SETTINGS Using Windows 1 Do one or more of the following : CHECK MESSAGES If an error message appears, then resolve the error before trying to ...the printer and plugged into a known working electrical outlet that the power cord is completed, enable the security software ...
... electrical devices have been removed. 1 2 1 2 3 Reinsert the cartridges. Page does not print These are possible solutions. CHECK PRINTER DEFAULT AND PAUSE SETTINGS Using Windows 1 Do one or more of the following : CHECK MESSAGES If an error message appears, then resolve the error before trying to ...the printer and plugged into a known working electrical outlet that the power cord is completed, enable the security software ...


