User's Guide
Page 4
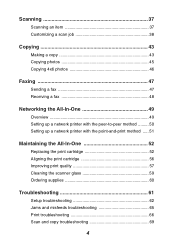
...-print method ..... 51 Maintaining the All-In-One 52 Replacing the print cartridge 52 Aligning the print cartridge 56 Improving print quality 57 Cleaning the scanner glass 59 Ordering supplies 60 Troubleshooting 61 Setup troubleshooting 62 Jams and misfeeds troubleshooting 65 Print troubleshooting 66 Scan and copy troubleshooting 69 4
...-print method ..... 51 Maintaining the All-In-One 52 Replacing the print cartridge 52 Aligning the print cartridge 56 Improving print quality 57 Cleaning the scanner glass 59 Ordering supplies 60 Troubleshooting 61 Setup troubleshooting 62 Jams and misfeeds troubleshooting 65 Print troubleshooting 66 Scan and copy troubleshooting 69 4
User's Guide
Page 9
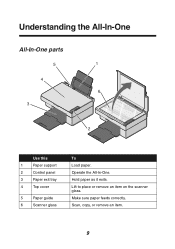
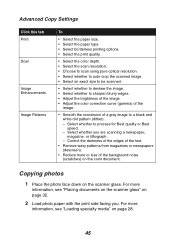
Lift to place or remove an item on the scanner glass. Hold paper as it exits. Make sure paper feeds correctly. Understanding the All-In-One All-In-One parts 5 1 4 6 3 2 Use this 1 Paper support 2 Control panel 3 Paper exit tray 4 Top cover 5 Paper guide 6 Scanner glass To Load paper. Scan, copy, or remove an item. 9 Operate the All-In-One.
Lift to place or remove an item on the scanner glass. Hold paper as it exits. Make sure paper feeds correctly. Understanding the All-In-One All-In-One parts 5 1 4 6 3 2 Use this 1 Paper support 2 Control panel 3 Paper exit tray 4 Top cover 5 Paper guide 6 Scanner glass To Load paper. Scan, copy, or remove an item. 9 Operate the All-In-One.
User's Guide
Page 10
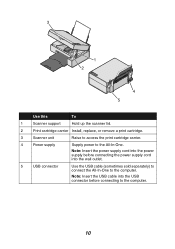
Note: Insert the USB cable into the USB connector before connecting the power supply cord into the power supply before connecting to the All-In-One. Note: Insert the power supply cord into the wall outlet. 5 USB connector Use the USB cable (sometimes sold separately) to connect the All-In-One to the computer. 3 1 2 4 5 Use this To 1 Scanner support Hold up the scanner lid. 2 Print cartridge carrier Install, replace, or remove a print cartridge. 3 Scanner unit Raise to access the print cartridge carrier. 4 Power supply Supply power to the computer. 10
Note: Insert the USB cable into the USB connector before connecting the power supply cord into the power supply before connecting to the All-In-One. Note: Insert the power supply cord into the wall outlet. 5 USB connector Use the USB cable (sometimes sold separately) to connect the All-In-One to the computer. 3 1 2 4 5 Use this To 1 Scanner support Hold up the scanner lid. 2 Print cartridge carrier Install, replace, or remove a print cartridge. 3 Scanner unit Raise to access the print cartridge carrier. 4 Power supply Supply power to the computer. 10
User's Guide
Page 15
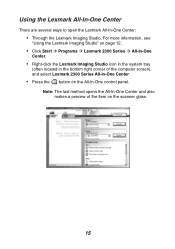
... There are several ways to open the Lexmark All-In-One Center: • Through the Lexmark Imaging Studio. For more information, see "Using the Lexmark Imaging Studio" on page 12. • Click Start Æ Programs Æ Lexmark 2300 Series Æ All-In-One Center. • Right-click the Lexmark Imaging Studio icon in the system... All-In-One control panel. Note: The last method opens the All-In-One Center and also makes a preview of the computer screen), and select Lexmark 2300 Series All-In-One Center. • Press the button on the...
... There are several ways to open the Lexmark All-In-One Center: • Through the Lexmark Imaging Studio. For more information, see "Using the Lexmark Imaging Studio" on page 12. • Click Start Æ Programs Æ Lexmark 2300 Series Æ All-In-One Center. • Right-click the Lexmark Imaging Studio icon in the system... All-In-One control panel. Note: The last method opens the All-In-One Center and also makes a preview of the computer screen), and select Lexmark 2300 Series All-In-One Center. • Press the button on the...
User's Guide
Page 32
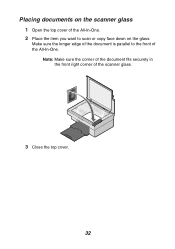
Note: Make sure the corner of the document fits securely in the front right corner of the All-In-One. Make sure the longer edge of the document is parallel to scan or copy face down on the scanner glass 1 Open the top cover of the All-In-One. 2 Place the item you want to the front of the scanner glass. 3 Close the top cover. 32 Placing documents on the glass.
Note: Make sure the corner of the document fits securely in the front right corner of the All-In-One. Make sure the longer edge of the document is parallel to scan or copy face down on the scanner glass 1 Open the top cover of the All-In-One. 2 Place the item you want to the front of the scanner glass. 3 Close the top cover. 32 Placing documents on the glass.
User's Guide
Page 37
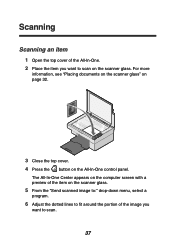
Scanning Scanning an item 1 Open the top cover of the image you want to scan on the All-In-One control panel. The All-In-One Center appears on the computer screen with a preview of the item on the scanner glass. 5 From the "Send scanned image to:" drop-down menu, select a program. 6 Adjust the dotted lines to fit around the portion of the All-In-One. 2 Place the item you want to scan. 37 For more information, see "Placing documents on the scanner glass" on page 32. 3 Close the top cover. 4 Press the button on the scanner glass.
Scanning Scanning an item 1 Open the top cover of the image you want to scan on the All-In-One control panel. The All-In-One Center appears on the computer screen with a preview of the item on the scanner glass. 5 From the "Send scanned image to:" drop-down menu, select a program. 6 Adjust the dotted lines to fit around the portion of the All-In-One. 2 Place the item you want to scan. 37 For more information, see "Placing documents on the scanner glass" on page 32. 3 Close the top cover. 4 Press the button on the scanner glass.
User's Guide
Page 40
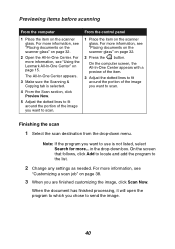
Note: If the program you are finished customizing the image, click Scan Now. in the drop-down menu. For more information, see "Using the Lexmark All-In-One Center" on page 32. 2 Press the button. The All-In-One Center appears. 3 Make sure the Scanning & Copying tab is not listed, ... the screen that follows, click Add to locate and add the program to send the image. 40 For more information, see "Placing documents on the scanner glass" on page 38. 3 When you want to scan. Previewing items before scanning From the computer 1 Place the item on the...
Note: If the program you are finished customizing the image, click Scan Now. in the drop-down menu. For more information, see "Using the Lexmark All-In-One Center" on page 32. 2 Press the button. The All-In-One Center appears. 3 Make sure the Scanning & Copying tab is not listed, ... the screen that follows, click Add to locate and add the program to send the image. 40 For more information, see "Placing documents on the scanner glass" on page 38. 3 When you want to scan. Previewing items before scanning From the computer 1 Place the item on the...
User's Guide
Page 42
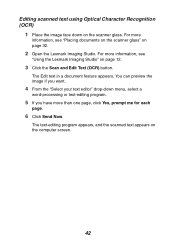
... the image face down menu, select a word-processing or text-editing program. 5 If you want. 4 From the "Select your text editor" drop-down on the scanner glass. The Edit text in a document feature appears. The text-editing program appears, and the scanned text appears on page 12. 3 Click the Scan and... one page, click Yes, prompt me for each page. 6 Click Send Now. You can preview the image if you have more information, see "Using the Lexmark Imaging Studio" on the computer screen. 42 For more information, see "Placing documents on the...
... the image face down menu, select a word-processing or text-editing program. 5 If you want. 4 From the "Select your text editor" drop-down on the scanner glass. The Edit text in a document feature appears. The text-editing program appears, and the scanned text appears on page 12. 3 Click the Scan and... one page, click Yes, prompt me for each page. 6 Click Send Now. You can preview the image if you have more information, see "Using the Lexmark Imaging Studio" on the computer screen. 42 For more information, see "Placing documents on the...

User's Guide
Page 43
For more information, see "Placing documents on the scanner glass" on the scanner glass. Copying Making a copy 1 Open the top cover of the All-In-One. 2 Place the item you want to copy on page 32. 3 Close the top cover. 4 Change copy settings as needed. For more information, see "Changing copy settings" on page 44. 5 Press the button. 43
For more information, see "Placing documents on the scanner glass" on the scanner glass. Copying Making a copy 1 Open the top cover of the All-In-One. 2 Place the item you want to copy on page 32. 3 Close the top cover. 4 Change copy settings as needed. For more information, see "Changing copy settings" on page 44. 5 Press the button. 43
User's Guide
Page 45
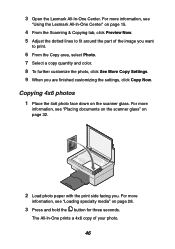
...) of the image. • Smooth the conversion of the background noise (scratches) on page 28. 45 For more information, see "Placing documents on the scanner glass" on the scanner glass. Copying photos 1 Place the photo face down on page 32. 2 Load photo paper with the print side facing you are scanning a newspaper...
...) of the image. • Smooth the conversion of the background noise (scratches) on page 28. 45 For more information, see "Placing documents on the scanner glass" on the scanner glass. Copying photos 1 Place the photo face down on page 32. 2 Load photo paper with the print side facing you are scanning a newspaper...
User's Guide
Page 46
...page 28. 3 Press and hold the button for three seconds. For more information, see "Loading specialty media" on the scanner glass. For more information, see "Using the Lexmark All-In-One Center" on page 32. 2 Load photo paper with the print side facing you are finished customizing the ...copy quantity and color. 8 To further customize the photo, click See More Copy Settings. 9 When you . For more information, see "Placing documents on the scanner glass" on page 15. 4 From the Scanning & Copying tab, click Preview Now. 5 Adjust the dotted lines to fit around the part of your photo. ...
...page 28. 3 Press and hold the button for three seconds. For more information, see "Loading specialty media" on the scanner glass. For more information, see "Using the Lexmark All-In-One Center" on page 32. 2 Load photo paper with the print side facing you are finished customizing the ...copy quantity and color. 8 To further customize the photo, click See More Copy Settings. 9 When you . For more information, see "Placing documents on the scanner glass" on page 15. 4 From the Scanning & Copying tab, click Preview Now. 5 Adjust the dotted lines to fit around the part of your photo. ...
User's Guide
Page 47
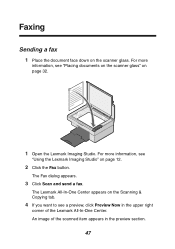
.... The Fax dialog appears. 3 Click Scan and send a fax. For more information, see "Placing documents on the scanner glass" on the Scanning & Copying tab. 4 If you want to see "Using the Lexmark Imaging Studio" on the scanner glass. An image of the scanned item appears in the upper right corner of the... Lexmark All-In-One Center. Faxing Sending a fax 1 Place the document face down on page 12. 2 Click the ...
.... The Fax dialog appears. 3 Click Scan and send a fax. For more information, see "Placing documents on the scanner glass" on the Scanning & Copying tab. 4 If you want to see "Using the Lexmark Imaging Studio" on the scanner glass. An image of the scanned item appears in the upper right corner of the... Lexmark All-In-One Center. Faxing Sending a fax 1 Place the document face down on page 12. 2 Click the ...
User's Guide
Page 52
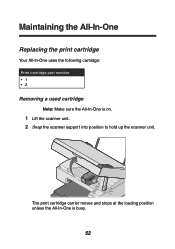
The print cartridge carrier moves and stops at the loading position unless the All-In-One is on. 1 Lift the scanner unit. 2 Snap the scanner support into position to hold up the scanner unit. Maintaining the All-In-One Replacing the print cartridge Your All-In-One uses the following cartridge: Print cartridge part number •1 •2 Removing a used cartridge Note: Make sure the All-In-One is busy. 52
The print cartridge carrier moves and stops at the loading position unless the All-In-One is on. 1 Lift the scanner unit. 2 Snap the scanner support into position to hold up the scanner unit. Maintaining the All-In-One Replacing the print cartridge Your All-In-One uses the following cartridge: Print cartridge part number •1 •2 Removing a used cartridge Note: Make sure the All-In-One is busy. 52
User's Guide
Page 55
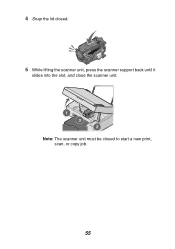
Note: The scanner unit must be closed . 5 While lifting the scanner unit, press the scanner support back until it slides into the slot, and close the scanner unit. 4 Snap the lid closed to start a new print, scan, or copy job. 55
Note: The scanner unit must be closed . 5 While lifting the scanner unit, press the scanner support back until it slides into the slot, and close the scanner unit. 4 Snap the lid closed to start a new print, scan, or copy job. 55
User's Guide
Page 56
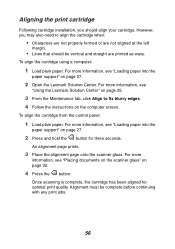
..., see "Using the Lexmark Solution Center" on page 25. 3 From the Maintenance tab, click Align to align the cartridge when: • Characters are not properly formed or are printed as wavy. An alignment page prints. 3 Place the alignment page onto the scanner glass. However, you should...using a computer: 1 Load plain paper. For more information, see "Loading paper into the paper support" on page 27. 2 Open the Lexmark Solution Center. Once scanning is complete, the cartridge has been aligned for three seconds. Alignment must be vertical and straight are not aligned at ...
..., see "Using the Lexmark Solution Center" on page 25. 3 From the Maintenance tab, click Align to align the cartridge when: • Characters are not properly formed or are printed as wavy. An alignment page prints. 3 Place the alignment page onto the scanner glass. However, you should...using a computer: 1 Load plain paper. For more information, see "Loading paper into the paper support" on page 27. 2 Open the Lexmark Solution Center. Once scanning is complete, the cartridge has been aligned for three seconds. Alignment must be vertical and straight are not aligned at ...
User's Guide
Page 59
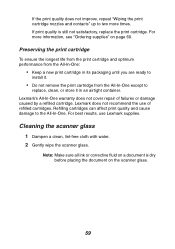
... • Do not remove the print cartridge from the All-In-One except to two more information, see "Ordering supplies" on the scanner glass. 59 Preserving the print cartridge To ensure the longest life from the print cartridge and optimum performance from the All-In-One: &#... install it in an airtight container. Cleaning the scanner glass 1 Dampen a clean, lint-free cloth with water. 2 Gently wipe the scanner glass. Lexmark's All-In-One warranty does not cover repair of refilled cartridges. Lexmark does not recommend the use Lexmark supplies. If print quality is dry before placing...
... • Do not remove the print cartridge from the All-In-One except to two more information, see "Ordering supplies" on the scanner glass. 59 Preserving the print cartridge To ensure the longest life from the print cartridge and optimum performance from the All-In-One: &#... install it in an airtight container. Cleaning the scanner glass 1 Dampen a clean, lint-free cloth with water. 2 Gently wipe the scanner glass. Lexmark's All-In-One warranty does not cover repair of refilled cartridges. Lexmark does not recommend the use Lexmark supplies. If print quality is dry before placing...
User's Guide
Page 65
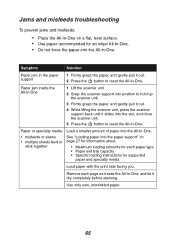
... exit tray capacity • Specific loading instructions for an inkjet All-In-One. • Do not force the paper into the slot, and close the scanner unit. 5 Press the button to reset the All-In-One. Paper jam inside the All-In-One 1 Lift the... scanner unit. 2 Snap the scanner support into position to hold up the scanner unit. 3 Firmly grasp the paper, and gently pull it out. 4 While lifting the scanner unit, press the scanner support back until it slides into the All-In-One. Jams and...
... exit tray capacity • Specific loading instructions for an inkjet All-In-One. • Do not force the paper into the slot, and close the scanner unit. 5 Press the button to reset the All-In-One. Paper jam inside the All-In-One 1 Lift the... scanner unit. 2 Snap the scanner support into position to hold up the scanner unit. 3 Firmly grasp the paper, and gently pull it out. 4 While lifting the scanner unit, press the scanner support back until it slides into the All-In-One. Jams and...
User's Guide
Page 69
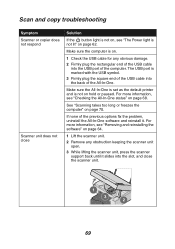
... information, see "Removing and reinstalling the software" on page 68. For more information, see "Checking the All-In-One status" on page 64. 1 Lift the scanner unit. 2 Remove any obvious damage. 2 Firmly plug the rectangular end of the USB cable into the USB port of the computer. Make sure the All... the button light is not on, see "The Power light is on. 1 Check the USB cable for any obstruction keeping the scanner unit open. 3 While lifting the scanner unit, press the scanner support back until it . If none of the All-In-One. The USB port is not on page 70. See "Scanning...
... information, see "Removing and reinstalling the software" on page 68. For more information, see "Checking the All-In-One status" on page 64. 1 Lift the scanner unit. 2 Remove any obvious damage. 2 Firmly plug the rectangular end of the USB cable into the USB port of the computer. Make sure the All... the button light is not on, see "The Power light is on. 1 Check the USB cable for any obstruction keeping the scanner unit open. 3 While lifting the scanner unit, press the scanner support back until it . If none of the All-In-One. The USB port is not on page 70. See "Scanning...

User's Guide
Page 70
Gently wipe the scanner glass with a new cartridge. Replace the print cartridge with a damp, clean, lint-free cloth. Symptom Solution Scanning takes too long or freezes the computer Close ... Be sure the document is placed face down on page 56. See "Aligning the print cartridge" on the scanner glass. To change the scanning resolution to a lower value: 1 Click Start Æ Programs Æ Lexmark 2300 Series Æ All-In-One Center. 2 From the Scan area, click See More Scan Settings. 3 Click Display...
Gently wipe the scanner glass with a new cartridge. Replace the print cartridge with a damp, clean, lint-free cloth. Symptom Solution Scanning takes too long or freezes the computer Close ... Be sure the document is placed face down on page 56. See "Aligning the print cartridge" on the scanner glass. To change the scanning resolution to a lower value: 1 Click Start Æ Programs Æ Lexmark 2300 Series Æ All-In-One Center. 2 From the Scan area, click See More Scan Settings. 3 Click Display...
User's Guide
Page 71
... cartridge with a new one. To check the ink cartridge level, open the Lexmark Solution Center. For more information, see "Loading paper into the All-In-One. See "Using the Lexmark Solution Center" on page 27. 1 Open the scanner unit. 2 Remove the print cartridge. The Ink Low warning occurs when the ... install a new cartridge, see "Removing a used cartridge" on page 52. Load more information, see "Replacing the print cartridge" on page 52. 3 Close the scanner unit. 4 If the blinking stops, reinstall the print cartridge. For more paper into the paper support" on page 25.
... cartridge with a new one. To check the ink cartridge level, open the Lexmark Solution Center. For more information, see "Loading paper into the All-In-One. See "Using the Lexmark Solution Center" on page 27. 1 Open the scanner unit. 2 Remove the print cartridge. The Ink Low warning occurs when the ... install a new cartridge, see "Removing a used cartridge" on page 52. Load more information, see "Replacing the print cartridge" on page 52. 3 Close the scanner unit. 4 If the blinking stops, reinstall the print cartridge. For more paper into the paper support" on page 25.

