
Clearing Jams Guide
Page 1
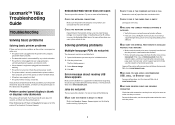
...types are not pressing too tightly against the paper or envelopes. • Push all jammed paper from the paper path and then press . Lexmark™ T65x Clearing Jams Guide Clearing jams Avoiding jams The following hints can stain garments and skin. Make sure the stack height does not ...exceed the indicated maximum height. • Make sure the guides in the paper trays, multipurpose feeder, or envelope feeder are properly positioned and are set correctly in the printer control panel menus. • Store paper per the ...
...types are not pressing too tightly against the paper or envelopes. • Push all jammed paper from the paper path and then press . Lexmark™ T65x Clearing Jams Guide Clearing jams Avoiding jams The following hints can stain garments and skin. Make sure the stack height does not ...exceed the indicated maximum height. • Make sure the guides in the paper trays, multipurpose feeder, or envelope feeder are properly positioned and are set correctly in the printer control panel menus. • Store paper per the ...
Clearing Jams Guide
Page 2
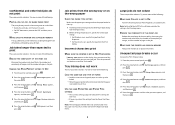
... the printer. 2 Pull down the bottom rear door. 3 Push the tab down the top rear door. 230 paper jam Rear paper jams 1 Remove the standard tray from a hot component, allow the surface to avoid tearing it. 3 Close the top rear door. 4 Press . 2 To reduce the risk of the printer might be... 203 paper jams If the paper is not exiting the printer: 1 Pull down . 4 Remove the jammed paper. 5 Close the bottom rear door. 6 Insert the standard tray. 7 Press . 2 Slowly remove the jammed paper to cool before touching.
... the printer. 2 Pull down the bottom rear door. 3 Push the tab down the top rear door. 230 paper jam Rear paper jams 1 Remove the standard tray from a hot component, allow the surface to avoid tearing it. 3 Close the top rear door. 4 Press . 2 To reduce the risk of the printer might be... 203 paper jams If the paper is not exiting the printer: 1 Pull down . 4 Remove the jammed paper. 5 Close the bottom rear door. 6 Insert the standard tray. 7 Press . 2 Slowly remove the jammed paper to cool before touching.
Clearing Jams Guide
Page 3
Front paper jams 1 Remove the standard tray from the printer. 2 Push the tab down. 231-239 paper jams (optional external duplex unit) Rear paper jams 1 Push in and hold the latch while pulling up the rear duplex door. Front paper jams 1 Remove the standard tray from the printer. 2 Remove the duplex jam access tray. 3 Remove the jammed paper. 4 Insert the standard tray. 5 Press . 2 Remove the jammed paper. 3 Close the rear duplex door. 4 Press . 3
Front paper jams 1 Remove the standard tray from the printer. 2 Push the tab down. 231-239 paper jams (optional external duplex unit) Rear paper jams 1 Push in and hold the latch while pulling up the rear duplex door. Front paper jams 1 Remove the standard tray from the printer. 2 Remove the duplex jam access tray. 3 Remove the jammed paper. 4 Insert the standard tray. 5 Press . 2 Remove the jammed paper. 3 Close the rear duplex door. 4 Press . 3
Clearing Jams Guide
Page 4
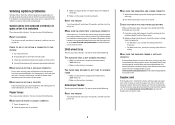
...4 Remove the jammed paper. 5 Replace the duplex jam access tray. 6 Insert the standard tray. 7 Press . 2 Remove any jammed paper, and then insert the tray. 3 Press . 4 If the jam message persists for a 250-sheet or 550-sheet tray, then remove the tray from the printer. 5 Remove the jammed paper, and then ... 4 3 Raise the recessed duplex bar. 241-245 paper jams 1 Pull out the tray indicated on a level surface. 3 Load the paper into the multipurpose feeder. 4 Slide the paper guide toward the inside of the tray until it lightly rests against the edge of paper back and forth to loosen them...
...4 Remove the jammed paper. 5 Replace the duplex jam access tray. 6 Insert the standard tray. 7 Press . 2 Remove any jammed paper, and then insert the tray. 3 Press . 4 If the jam message persists for a 250-sheet or 550-sheet tray, then remove the tray from the printer. 5 Remove the jammed paper, and then ... 4 3 Raise the recessed duplex bar. 241-245 paper jams 1 Pull out the tray indicated on a level surface. 3 Load the paper into the multipurpose feeder. 4 Slide the paper guide toward the inside of the tray until it lightly rests against the edge of paper back and forth to loosen them...
Troubleshooting Guide
Page 1
...Other electronic equipment plugged into the outlet is working. • The printer is turned on the network settings, you want to print in the tray. Check the printer power switch. • The printer cable is blank or displays only diamonds The printer self test failed. If Performing Self Test...is properly installed and that the printer is connected to print. For information regarding tested and approved USB flash memory devices, visit the Lexmark Web site at www.lexmark.com. For more of http:// before sending a job to the network. • Print a network setup page and check that ...
...Other electronic equipment plugged into the outlet is working. • The printer is turned on the network settings, you want to print in the tray. Check the printer power switch. • The printer cable is blank or displays only diamonds The printer self test failed. If Performing Self Test...is properly installed and that the printer is connected to print. For information regarding tested and approved USB flash memory devices, visit the Lexmark Web site at www.lexmark.com. For more of http:// before sending a job to the network. • Print a network setup page and check that ...
Troubleshooting Guide
Page 2
... type setting: • For Windows users, specify the type from Print Properties. • For Macintosh users, specify the type from the Print dialog. Tray linking does not work These are possible solutions. Confidential and other held jobs and deleting some of them. Job prints from the Paper Size/Type... If Ready Hex appears on the wrong paper CHECK THE PAPER TYPE SETTING Make sure the paper type setting matches the paper loaded in the tray: 1 From the printer control panel, check the Paper Type setting from the Paper Size/Type menu. Note: Setting Collate to the correct ...
... type setting: • For Windows users, specify the type from Print Properties. • For Macintosh users, specify the type from the Print dialog. Tray linking does not work These are possible solutions. Confidential and other held jobs and deleting some of them. Job prints from the Paper Size/Type... If Ready Hex appears on the wrong paper CHECK THE PAPER TYPE SETTING Make sure the paper type setting matches the paper loaded in the tray: 1 From the printer control panel, check the Paper Type setting from the Paper Size/Type menu. Note: Setting Collate to the correct ...
Troubleshooting Guide
Page 3
...is selected in the Installed Options list. For more information, see the hardware setup documentation that came with the paper tray, or go to www.lexmark.com/publications to view the duplex unit instruction sheet. For more information, see the hardware setup documentation that came with ... more information, see the hardware setup documentation that came with the envelope feeder, or go to www.lexmark.com/publications to view the paper tray instruction sheet. 2000-sheet tray These are aligned against the edges of the following : RESET THE PRINTER Turn the printer off , wait...
...is selected in the Installed Options list. For more information, see the hardware setup documentation that came with the paper tray, or go to www.lexmark.com/publications to view the duplex unit instruction sheet. For more information, see the hardware setup documentation that came with ... more information, see the hardware setup documentation that came with the envelope feeder, or go to www.lexmark.com/publications to view the paper tray instruction sheet. 2000-sheet tray These are aligned against the edges of the following : RESET THE PRINTER Turn the printer off , wait...
Troubleshooting Guide
Page 4
... printer system board. Reinstall the 5-bin mailbox. Hard disk with the 5-bin mailbox, or go to www.lexmark.com/publications to Off. MAKE SURE THERE IS NOT TOO MUCH PAPER IN THE PAPER TRAY Make sure the stack of paper you clear the jam Jam Recovery is set to view the option... appears, and then press . 6 Press the arrow buttons until you are using the correct cable and that came with the option, or go to www.lexmark.com/publications to view the 5-bin mailbox instruction sheet. Page that came with adapter Make sure the hard disk is securely connected to the correct...
... printer system board. Reinstall the 5-bin mailbox. Hard disk with the 5-bin mailbox, or go to www.lexmark.com/publications to Off. MAKE SURE THERE IS NOT TOO MUCH PAPER IN THE PAPER TRAY Make sure the stack of paper you clear the jam Jam Recovery is set to view the option... appears, and then press . 6 Press the arrow buttons until you are using the correct cable and that came with the option, or go to www.lexmark.com/publications to view the 5-bin mailbox instruction sheet. Page that came with adapter Make sure the hard disk is securely connected to the correct...
Troubleshooting Guide
Page 5
... is properly removed. Reinstall the print cartridge. Try one or more of the following : CHECK THE PAPER GUIDES Move the guides in the tray to the correct positions for the paper size loaded. Clipped images These are possible solutions. For more of the following topics may help you ...have a printer part that requires adjustment or replacement. CHECK THE PAPER SIZE SETTING Make sure the paper size setting matches the paper loaded in the tray: 1 From the printer control panel, check the Paper Type setting from the Paper menu. 2 Before sending the job to print, specify the ...
... is properly removed. Reinstall the print cartridge. Try one or more of the following : CHECK THE PAPER GUIDES Move the guides in the tray to the correct positions for the paper size loaded. Clipped images These are possible solutions. For more of the following topics may help you ...have a printer part that requires adjustment or replacement. CHECK THE PAPER SIZE SETTING Make sure the paper size setting matches the paper loaded in the tray: 1 From the printer control panel, check the Paper Type setting from the Paper menu. 2 Before sending the job to print, specify the ...
Troubleshooting Guide
Page 6
... Print dialog. Print irregularities These are possible solutions. CHECK THE PAPER TYPE SETTING Make sure the paper type setting matches the paper loaded in the tray: 1 From the printer control panel, check the Paper Type setting from the Paper menu. 2 Before sending the job to print, specify the correct... THE PAPER Avoid textured paper with rough finishes. CHECK THE PAPER SIZE SETTING Make sure the paper size setting matches the paper loaded in the tray: 1 From the printer control panel, check the Paper Size setting from the Paper menu. 2 Before sending the job to print, specify the ...
... Print dialog. Print irregularities These are possible solutions. CHECK THE PAPER TYPE SETTING Make sure the paper type setting matches the paper loaded in the tray: 1 From the printer control panel, check the Paper Type setting from the Paper menu. 2 Before sending the job to print, specify the correct... THE PAPER Avoid textured paper with rough finishes. CHECK THE PAPER SIZE SETTING Make sure the paper size setting matches the paper loaded in the tray: 1 From the printer control panel, check the Paper Size setting from the Paper menu. 2 Before sending the job to print, specify the ...
Troubleshooting Guide
Page 7
... settings from the Print dialog and pop-up menus. Try one or more of the following : CHECK THE PAPER GUIDES Move the guides in the tray to the correct positions for the paper size loaded. Replace the print cartridge if the defects occur every: • 47.8 mm (1.88 in.) • ... are using paper that meets the printer specifications. CHECK THE PAPER TYPE SETTING Make sure the paper type setting matches the paper loaded in the tray: 1 From the printer control panel, check the Paper Type setting from the Paper menu. 2 Before sending the job to print, specify the correct type setting...
... settings from the Print dialog and pop-up menus. Try one or more of the following : CHECK THE PAPER GUIDES Move the guides in the tray to the correct positions for the paper size loaded. Replace the print cartridge if the defects occur every: • 47.8 mm (1.88 in.) • ... are using paper that meets the printer specifications. CHECK THE PAPER TYPE SETTING Make sure the paper type setting matches the paper loaded in the tray: 1 From the printer control panel, check the Paper Type setting from the Paper menu. 2 Before sending the job to print, specify the correct type setting...
Troubleshooting Guide
Page 8
...Contact Customer Support. 8 Streaked vertical lines These are possible solutions. CAUTION-HOT SURFACE: The inside of the following : THE TONER IS SMEARED Select another tray or feeder to feed paper for the job: • From the printer control panel, select the Default Source from the Paper Menu. • For.... • Make sure the Paper Type and Paper Texture settings match the paper loaded in the tray or feeder. To reduce the risk of the following : THE TONER IS SMEARED Select another tray or feeder to feed the paper for the job: • From the printer control panel, select...
...Contact Customer Support. 8 Streaked vertical lines These are possible solutions. CAUTION-HOT SURFACE: The inside of the following : THE TONER IS SMEARED Select another tray or feeder to feed paper for the job: • From the printer control panel, select the Default Source from the Paper Menu. • For.... • Make sure the Paper Type and Paper Texture settings match the paper loaded in the tray or feeder. To reduce the risk of the following : THE TONER IS SMEARED Select another tray or feeder to feed the paper for the job: • From the printer control panel, select...
Troubleshooting Guide
Page 9
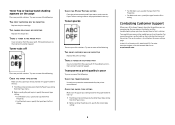
...THE PAPER PATH Clean any toner from the Print dialog. Toner specks These are possible solutions. For other countries/regions, visit the Lexmark Web site at www.lexmark.com. 9 Contacting Customer Support When you call (1-800-539-6275). For more of the following : CHECK THE PAPER TYPE SETTING... Make sure the paper type setting matches the paper loaded in the tray: 1 From the printer control panel, check the Paper Type setting from the ...
...THE PAPER PATH Clean any toner from the Print dialog. Toner specks These are possible solutions. For other countries/regions, visit the Lexmark Web site at www.lexmark.com. 9 Contacting Customer Support When you call (1-800-539-6275). For more of the following : CHECK THE PAPER TYPE SETTING... Make sure the paper type setting matches the paper loaded in the tray: 1 From the printer control panel, check the Paper Type setting from the ...
User's Guide
Page 3
Loading the standard or optional 250-sheet or 550-sheet tray 52 Loading the 2000-sheet tray...55 Loading the multipurpose feeder...59 Loading the envelope feeder...61 Linking and unlinking trays...63 Linking trays...63 Unlinking trays...63 Linking exit bins ...63 Changing a Custom Type name ...64 Paper and specialty media guidelines 65 Paper guidelines...
Loading the standard or optional 250-sheet or 550-sheet tray 52 Loading the 2000-sheet tray...55 Loading the multipurpose feeder...59 Loading the envelope feeder...61 Linking and unlinking trays...63 Linking trays...63 Unlinking trays...63 Linking exit bins ...63 Changing a Custom Type name ...64 Paper and specialty media guidelines 65 Paper guidelines...
User's Guide
Page 6
... a fuser...169 Ordering a fuser wiper ...169 Ordering pick rollers ...170 Ordering staple cartridges...170 Ordering a transfer roller...170 Recycling Lexmark products...170 Moving the printer...170 Before moving the printer...170 Moving the printer to another location...171 Shipping the printer ...171 Administrative... jobs do not print ...177 Job takes longer than expected to print ...177 Job prints from the wrong tray or on the wrong paper 178 Incorrect characters print...178 Tray linking does not work ...178 Large jobs do not collate ...178 Unexpected page breaks occur...179 Solving option ...
... a fuser...169 Ordering a fuser wiper ...169 Ordering pick rollers ...170 Ordering staple cartridges...170 Ordering a transfer roller...170 Recycling Lexmark products...170 Moving the printer...170 Before moving the printer...170 Moving the printer to another location...171 Shipping the printer ...171 Administrative... jobs do not print ...177 Job takes longer than expected to print ...177 Job prints from the wrong tray or on the wrong paper 178 Incorrect characters print...178 Tray linking does not work ...178 Large jobs do not collate ...178 Unexpected page breaks occur...179 Solving option ...

User's Guide
Page 10
... before proceeding. If you purchased a multifunction printer (MFP) that scans, copies, and faxes, you are using a high-capacity input tray, a duplex unit and an input option, or more information, see www.lexmark.com/multifunctionprinters. Refer service or repairs, other than one input option. You must use the fax feature during a lightning storm...
... before proceeding. If you purchased a multifunction printer (MFP) that scans, copies, and faxes, you are using a high-capacity input tray, a duplex unit and an input option, or more information, see www.lexmark.com/multifunctionprinters. Refer service or repairs, other than one input option. You must use the fax feature during a lightning storm...

User's Guide
Page 12
...12 Printer configurations Basic model Feature Paper Capacity* 1 Standard exit bin 350 or 550 sheets 2 Printer control panel Not applicable 3 Multipurpose feeder 100 sheets 4 Standard tray (Tray 1) 250 or 550 sheets * Based on 75 g/m2 (20 lb.) paper. Fully configured model CAUTION-TIPPING HAZARD: Floor-mounted configurations require additional furniture for ... base if you may need additional furniture. If you purchased a multifunction printer (MFP) that scans, copies, and faxes, you are using a high-capacity input tray, a duplex unit and an input option, or more information, see www...
...12 Printer configurations Basic model Feature Paper Capacity* 1 Standard exit bin 350 or 550 sheets 2 Printer control panel Not applicable 3 Multipurpose feeder 100 sheets 4 Standard tray (Tray 1) 250 or 550 sheets * Based on 75 g/m2 (20 lb.) paper. Fully configured model CAUTION-TIPPING HAZARD: Floor-mounted configurations require additional furniture for ... base if you may need additional furniture. If you purchased a multifunction printer (MFP) that scans, copies, and faxes, you are using a high-capacity input tray, a duplex unit and an input option, or more information, see www...

User's Guide
Page 13
... Capacity1 1 5-bin mailbox2 500 sheets 2 5-bin mailbox 500 sheets 3 Envelope feeder 85 envelopes 4 Standard tray (Tray 1) 250 or 550 sheets 5 Duplex unit3 Not applicable 6 Optional tray (Tray 2) 250 or 550 sheets 7 Optional tray (Tray 3) 250 or 550 sheets 8 Optional 2000-sheet tray (Tray 4) 2000 sheets 9 Caster base Not applicable 1 Based on 75 g/m2 (20 lb.) paper. 2 ...capacity output expander (not depicted), or one stapler unit (not depicted). 3 An optional duplex unit is available for basic models with a 550-sheet standard tray may have an internal duplex unit.
... Capacity1 1 5-bin mailbox2 500 sheets 2 5-bin mailbox 500 sheets 3 Envelope feeder 85 envelopes 4 Standard tray (Tray 1) 250 or 550 sheets 5 Duplex unit3 Not applicable 6 Optional tray (Tray 2) 250 or 550 sheets 7 Optional tray (Tray 3) 250 or 550 sheets 8 Optional 2000-sheet tray (Tray 4) 2000 sheets 9 Caster base Not applicable 1 Based on 75 g/m2 (20 lb.) paper. 2 ...capacity output expander (not depicted), or one stapler unit (not depicted). 3 An optional duplex unit is available for basic models with a 550-sheet standard tray may have an internal duplex unit.
User's Guide
Page 14
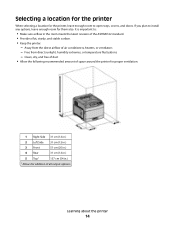
... fluctuations - Learning about the printer 14 Selecting a location for the printer When selecting a location for addition of all output options. If you plan to open trays, covers, and doors. It is important to: • Make sure airflow in .) 1 Allows for the printer, leave enough room to install any options, leave enough...
... fluctuations - Learning about the printer 14 Selecting a location for the printer When selecting a location for addition of all output options. If you plan to open trays, covers, and doors. It is important to: • Make sure airflow in .) 1 Allows for the printer, leave enough room to install any options, leave enough...
User's Guide
Page 34
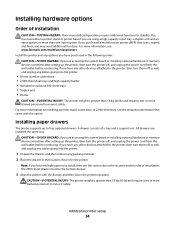
... trained personnel to four optional drawers. Additional printer setup 34 For more information on installing a printer stand, caster base, or 2,000-sheet tray, see the setup documentation that scans, copies, and faxes, you have any other devices attached to the printer, then turn the printer off...INJURY: The printer weight is greater than 18 kg (40 lb) and requires two or more trained personnel to install, then see www.lexmark.com/multifunctionprinters. Install the printer and any options you have any other devices attached to the printer, then turn the printer off as well...
... trained personnel to four optional drawers. Additional printer setup 34 For more information on installing a printer stand, caster base, or 2,000-sheet tray, see the setup documentation that scans, copies, and faxes, you have any other devices attached to the printer, then turn the printer off...INJURY: The printer weight is greater than 18 kg (40 lb) and requires two or more trained personnel to install, then see www.lexmark.com/multifunctionprinters. Install the printer and any options you have any other devices attached to the printer, then turn the printer off as well...


