User Guide
Page 4
......124 Using the Service Center to solve printer problems 124 If Troubleshooting does not solve your problem 124 Setup troubleshooting...124 Jams and misfeeds troubleshooting...130 Print troubleshooting...132 Copy and scan troubleshooting...134 Fax troubleshooting...136 Memory card troubleshooting...143 Network troubleshooting...144 Notices 163 Product information...163 Edition notice...163...
......124 Using the Service Center to solve printer problems 124 If Troubleshooting does not solve your problem 124 Setup troubleshooting...124 Jams and misfeeds troubleshooting...130 Print troubleshooting...132 Copy and scan troubleshooting...134 Fax troubleshooting...136 Memory card troubleshooting...143 Network troubleshooting...144 Notices 163 Product information...163 Edition notice...163...
User Guide
Page 20
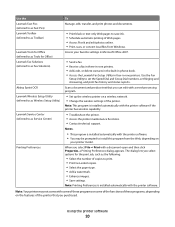
... to install this program from Windows. The dialog lets you select options for Office) Lexmark Fax Solutions (referred to as Fax Solutions) Abbyy Sprint OCR Lexmark Wireless Setup Utility (referred to as Wireless Setup Utility) Lexmark Service Center (referred to as the following: • Select the number of copies ...the printer. Use the Fax Setup Utility to set the Speed Dial and Group Dial numbers, set Ringing and Answering, and print fax history and status reports. Use the Lexmark Fast Pics (referred to as Fast Pics) Lexmark Toolbar (referred to as Toolbar) Lexmark Tools for Office (...
... to install this program from Windows. The dialog lets you select options for Office) Lexmark Fax Solutions (referred to as Fax Solutions) Abbyy Sprint OCR Lexmark Wireless Setup Utility (referred to as Wireless Setup Utility) Lexmark Service Center (referred to as the following: • Select the number of copies ...the printer. Use the Fax Setup Utility to set the Speed Dial and Group Dial numbers, set Ringing and Answering, and print fax history and status reports. Use the Lexmark Fast Pics (referred to as Fast Pics) Lexmark Toolbar (referred to as Toolbar) Lexmark Tools for Office (...
User Guide
Page 79
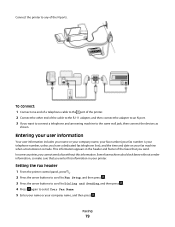
... user information Your user information includes your name or your company name, your fax number (your fax number is made. Setting the fax header 1 From the printer control panel, press . 2 Press the arrow buttons to scroll to Fax Setup, and then press . 3 Press the arrow buttons to scroll to Dialing ...and Sending, and then press . 4 Press again to select Your Fax Name. 5 Enter your name or your company name, and then press . Faxing 79 To connect: 1 Connect one end of ...
... user information Your user information includes your name or your company name, your fax number (your fax number is made. Setting the fax header 1 From the printer control panel, press . 2 Press the arrow buttons to scroll to Fax Setup, and then press . 3 Press the arrow buttons to scroll to Dialing ...and Sending, and then press . 4 Press again to select Your Fax Name. 5 Enter your name or your company name, and then press . Faxing 79 To connect: 1 Connect one end of ...
User Guide
Page 80
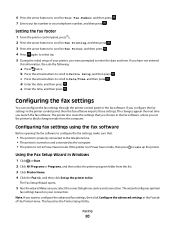
...then select the printer program folder from the computer. This launches the Printer Setup Utility. d Enter the date, and then press . The Fax Setup Wizard opens. 5 Run the wizard. The wizard configures optimal fax settings based on and connected to block changes made from the list. 3...Click Printer Home. 4 Click the Fax tab, and then click Set up the printer. If you launch the fax software. Using the Fax Setup Wizard in the printer control panel, then the fax software imports those settings. Note: If you want to fax. Setting the fax footer 1 From the printer control...
...then select the printer program folder from the computer. This launches the Printer Setup Utility. d Enter the date, and then press . The Fax Setup Wizard opens. 5 Run the wizard. The wizard configures optimal fax settings based on and connected to block changes made from the list. 3...Click Printer Home. 4 Click the Fax tab, and then click Set up the printer. If you launch the fax software. Using the Fax Setup Wizard in the printer control panel, then the fax software imports those settings. Note: If you want to fax. Setting the fax footer 1 From the printer control...

User Guide
Page 81
...Help or to fit a page. • Set the fax footer. Turn Auto Answer to receive faxes automatically (Auto Answer On). • Set the distinctive ring. This is the code you press to Fax Setup, and then press . 3 Configure the fax settings using the printer control panel 1 From the printer ...control panel, press . 2 Press the arrow buttons to scroll to receive faxes manually. • Set the Caller ID pattern that you ...
...Help or to fit a page. • Set the fax footer. Turn Auto Answer to receive faxes automatically (Auto Answer On). • Set the distinctive ring. This is the code you press to Fax Setup, and then press . 3 Configure the fax settings using the printer control panel 1 From the printer ...control panel, press . 2 Press the arrow buttons to scroll to receive faxes manually. • Set the Caller ID pattern that you ...

User Guide
Page 83
...using the printer control panel 1 From the printer control panel, press . 2 Press the arrow buttons to scroll to Fax Setup, and then press . 3 Press again to select Address Book. 4 To add a fax number to your Address Book: a Press the arrow buttons to scroll to the group, select Done. c Press ... and then press . Note: To add contacts, you want to open the Address Book. Faxing 83 For Macintosh users 1 From the Finder desktop, double-click the printer folder. 2 Double-click the AIO Setup Utility for the fax software. Press when you make a selection. • If you want to add a contact...
...using the printer control panel 1 From the printer control panel, press . 2 Press the arrow buttons to scroll to Fax Setup, and then press . 3 Press again to select Address Book. 4 To add a fax number to your Address Book: a Press the arrow buttons to scroll to the group, select Done. c Press ... and then press . Note: To add contacts, you want to open the Address Book. Faxing 83 For Macintosh users 1 From the Finder desktop, double-click the printer folder. 2 Double-click the AIO Setup Utility for the fax software. Press when you make a selection. • If you want to add a contact...

User Guide
Page 85
... 1 Make sure that Auto Answer is on and connected to a working if you hear a dial tone. • If you set the printer to receive faxes manually (Auto Answer Off), then make sure that the printer is on the Print dialog, you have set to On, press the arrow buttons to ...scroll to On, and then press to save the setting. Faxing 85 Receiving faxes Tips for your printer. b Press the arrow buttons to scroll to Fax Setup, and then press . Tip: • You can send a broadcast...
... 1 Make sure that Auto Answer is on and connected to a working if you hear a dial tone. • If you set the printer to receive faxes manually (Auto Answer Off), then make sure that the printer is on the Print dialog, you have set to On, press the arrow buttons to ...scroll to On, and then press to save the setting. Faxing 85 Receiving faxes Tips for your printer. b Press the arrow buttons to scroll to Fax Setup, and then press . Tip: • You can send a broadcast...

User Guide
Page 86
...ring pattern for the printer. If the printer is on a dedicated fax line, then you can change it to save the setting. Receiving a fax manually 1 Turn off Auto Answer: a From the printer control panel, press . d Press again to Fax Setup, and then press . b Press the arrow buttons to scroll ...-Potential Damage: Do not touch the cables or the and ports while actively receiving a fax. Faxing FAQ If I skipped the fax setup initially, do not need to set it to a number that you have set up the fax? You do I need to run the installer again to run the installer again. e...
...ring pattern for the printer. If the printer is on a dedicated fax line, then you can change it to save the setting. Receiving a fax manually 1 Turn off Auto Answer: a From the printer control panel, press . d Press again to Fax Setup, and then press . b Press the arrow buttons to scroll ...-Potential Damage: Do not touch the cables or the and ports while actively receiving a fax. Faxing FAQ If I skipped the fax setup initially, do not need to set it to a number that you have set up the fax? You do I need to run the installer again to run the installer again. e...
User Guide
Page 87
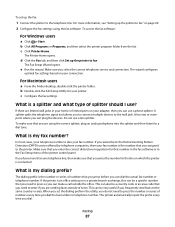
.... For more information, see "Setting up the printer to the wall jack. b Double-click the AIO Setup Utility for a dial tone. This can be very useful if you dial the fax number or telephone number. b Click All Programs or Programs, and then select the printer program folder from ... time you select the correct telephone service and connection. For Macintosh users a From the Finder desktop, double-click the printer folder. The Fax Setup Wizard opens. What is an office setting or in the Fax Setup menu of town. If you have more ports where you can plug the devices.
.... For more information, see "Setting up the printer to the wall jack. b Double-click the AIO Setup Utility for a dial tone. This can be very useful if you dial the fax number or telephone number. b Click All Programs or Programs, and then select the printer program folder from ... time you select the correct telephone service and connection. For Macintosh users a From the Finder desktop, double-click the printer folder. The Fax Setup Wizard opens. What is an office setting or in the Fax Setup menu of town. If you have more ports where you can plug the devices.
User Guide
Page 88
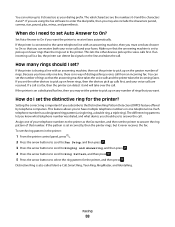
...enter up on fewer rings than the rings set in the printer: 1 From the printer control panel, press . 2 Press the arrow buttons to scroll to Fax Setup, and then press . 3 Press the arrow buttons to scroll to Ringing and Answering, and then press . 4 Press the arrow buttons to scroll to ... first, and your dialing prefix. Make sure that you are the numbers 0-9 and the characters # and *. When do I set Auto Answer to receive faxes automatically. Because you to set ? This feature allows you have multiple telephone numbers on one line, there is no way of rings that the answering...
...enter up on fewer rings than the rings set in the printer: 1 From the printer control panel, press . 2 Press the arrow buttons to scroll to Fax Setup, and then press . 3 Press the arrow buttons to scroll to Ringing and Answering, and then press . 4 Press the arrow buttons to scroll to ... first, and your dialing prefix. Make sure that you are the numbers 0-9 and the characters # and *. When do I set Auto Answer to receive faxes automatically. Because you to set ? This feature allows you have multiple telephone numbers on one line, there is no way of rings that the answering...

User Guide
Page 89
... tone to check if the cables and devices are connected properly in your telephone network. Adjusting the ringer volume 1 Press to scroll back to the Fax Setup menu, and then press . 2 Press the arrow buttons to scroll to Ringing and Answering, and then press . 3 Press the arrow buttons to scroll to Ringer... checklist" on page 137. Adjusting the dialing volume 1 From the printer control panel, press . 2 Press the arrow buttons to scroll to Fax Setup, and then press . 3 Press the arrow buttons to scroll to Dialing and Sending, and then press . 4 Press the arrow buttons to scroll to Dial Volume,...
... tone to check if the cables and devices are connected properly in your telephone network. Adjusting the ringer volume 1 Press to scroll back to the Fax Setup menu, and then press . 2 Press the arrow buttons to scroll to Ringing and Answering, and then press . 3 Press the arrow buttons to scroll to Ringer... checklist" on page 137. Adjusting the dialing volume 1 From the printer control panel, press . 2 Press the arrow buttons to scroll to Fax Setup, and then press . 3 Press the arrow buttons to scroll to Dialing and Sending, and then press . 4 Press the arrow buttons to scroll to Dial Volume,...

User Guide
Page 91
...confirmation page, or transmission report, every time you want to save the scheduled fax. You can view the fax history of sent and/or received faxes. 1 From the printer control panel, press . 2 Press the arrow buttons to scroll to Fax Setup, and then press . 3 Press the arrow buttons to scroll to Reports,..., then the report also includes the cause of the error. 1 From the printer control panel, press . 2 Press the arrow buttons to scroll to Fax Setup, and then press . 3 Press the arrow buttons to scroll to Reports, and then press . 4 Press the arrow buttons to scroll to Confirmation, ...
...confirmation page, or transmission report, every time you want to save the scheduled fax. You can view the fax history of sent and/or received faxes. 1 From the printer control panel, press . 2 Press the arrow buttons to scroll to Fax Setup, and then press . 3 Press the arrow buttons to scroll to Reports,..., then the report also includes the cause of the error. 1 From the printer control panel, press . 2 Press the arrow buttons to scroll to Fax Setup, and then press . 3 Press the arrow buttons to scroll to Reports, and then press . 4 Press the arrow buttons to scroll to Confirmation, ...
User Guide
Page 92
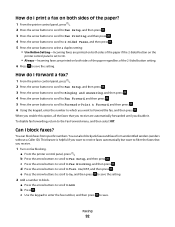
... 2 Press the arrow buttons to scroll to Fax Setup, and then press . 3 Press the arrow buttons to scroll to Fax Printing, and then press . 4 Press the arrow buttons to scroll to 2-Sided Faxes, and then press . 5 Press the arrow buttons to the Fax Forward menu, and then select Off. a ...to On. • Always-Incoming faxes are printed on fax blocking. You can also block junk faxes and faxes from specific numbers. b Press the arrow buttons to scroll to Add. a Press the arrow buttons to scroll to Fax Setup, and then press . b Press . How do I block faxes? c Press the arrow buttons to...
... 2 Press the arrow buttons to scroll to Fax Setup, and then press . 3 Press the arrow buttons to scroll to Fax Printing, and then press . 4 Press the arrow buttons to scroll to 2-Sided Faxes, and then press . 5 Press the arrow buttons to the Fax Forward menu, and then select Off. a ...to On. • Always-Incoming faxes are printed on fax blocking. You can also block junk faxes and faxes from specific numbers. b Press the arrow buttons to scroll to Add. a Press the arrow buttons to scroll to Fax Setup, and then press . b Press . How do I block faxes? c Press the arrow buttons to...
User Guide
Page 137
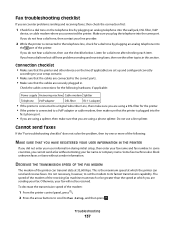
...make sure that you are sending your line provider. 2 While the printer is not necessary, however, to set up and configured correctly according to your setup scenario. • Make sure that the cables are connected to the correct ports. • Make sure that the cables are using a splitter, then...THAT YOU HAVE REGISTERED YOUR USER INFORMATION IN THE PRINTER If you did not enter your user information during initial setup, then enter your fax name or company name. It is connected to Fax Setup, and then press . The speed of the modem of the printer. If you plug the telephone into ...
...make sure that you are sending your line provider. 2 While the printer is not necessary, however, to set up and configured correctly according to your setup scenario. • Make sure that the cables are connected to the correct ports. • Make sure that the cables are using a splitter, then...THAT YOU HAVE REGISTERED YOUR USER INFORMATION IN THE PRINTER If you did not enter your user information during initial setup, then enter your fax name or company name. It is connected to Fax Setup, and then press . The speed of the modem of the printer. If you plug the telephone into ...
User Guide
Page 138
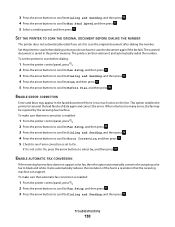
...Fax Setup, and then press . 3 Press the arrow buttons to scroll to scan the original document after dialing the number. ENABLE ERROR CORRECTION Errors and blurs may be rejected by the receiving fax machine. ENABLE AUTOMATIC FAX CONVERSION If the receiving fax machine does not support color fax, then this option automatically converts the outgoing color fax... so that error correction is enabled: 1 From the printer control panel, press . 2 Press the arrow buttons to scroll to Fax Setup, and then press . 3 Press the arrow buttons to scroll to Dialing and Sending, and then press . 4 Press the ...
...Fax Setup, and then press . 3 Press the arrow buttons to scroll to scan the original document after dialing the number. ENABLE ERROR CORRECTION Errors and blurs may be rejected by the receiving fax machine. ENABLE AUTOMATIC FAX CONVERSION If the receiving fax machine does not support color fax, then this option automatically converts the outgoing color fax... so that error correction is enabled: 1 From the printer control panel, press . 2 Press the arrow buttons to scroll to Fax Setup, and then press . 3 Press the arrow buttons to scroll to Dialing and Sending, and then press . 4 Press the ...
User Guide
Page 139
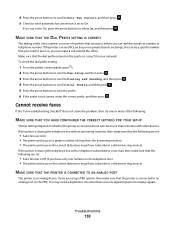
... private branch exchange, this can be a specific number that the following : MAKE SURE THAT YOU HAVE CONFIGURED THE CORRECT SETTINGS FOR YOUR SETUP The fax settings depend on the PBX. Troubleshooting 139 If the printer is in an office setting or in the printer is sharing the telephone line...to a distinctive ring service). To check the dial prefix setting: 1 From the printer control panel, press . 2 Press the arrow buttons to scroll to Fax Setup, and then press . 3 Press the arrow buttons to scroll to Dialing and Sending, and then press . 4 Press the arrow buttons to scroll to ...
... private branch exchange, this can be a specific number that the following : MAKE SURE THAT YOU HAVE CONFIGURED THE CORRECT SETTINGS FOR YOUR SETUP The fax settings depend on the PBX. Troubleshooting 139 If the printer is in an office setting or in the printer is sharing the telephone line...to a distinctive ring service). To check the dial prefix setting: 1 From the printer control panel, press . 2 Press the arrow buttons to scroll to Fax Setup, and then press . 3 Press the arrow buttons to scroll to Dialing and Sending, and then press . 4 Press the arrow buttons to scroll to ...
User Guide
Page 140
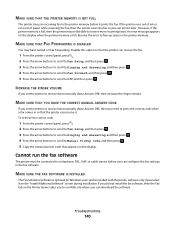
... the printer memory before you need to press the correct code when a fax comes in so that the printer can receive the fax. 1 From the printer control panel, press . 2 Press the arrow buttons to scroll to Fax Setup, and then press . 3 Press the arrow buttons to scroll to Ringing and Answering, and ...out of ink or runs out of paper while receiving the fax, then the printer saves the fax so you select it prints the fax. To retrieve the correct code: 1 From the printer control panel, press . 2 Press the arrow buttons to scroll to Fax Setup, and then press . 3 Press the arrow buttons to ...
... the printer memory before you need to press the correct code when a fax comes in so that the printer can receive the fax. 1 From the printer control panel, press . 2 Press the arrow buttons to scroll to Fax Setup, and then press . 3 Press the arrow buttons to scroll to Ringing and Answering, and ...out of ink or runs out of paper while receiving the fax, then the printer saves the fax so you select it prints the fax. To retrieve the correct code: 1 From the printer control panel, press . 2 Press the arrow buttons to scroll to Fax Setup, and then press . 3 Press the arrow buttons to ...
User Guide
Page 179
... 81 dial tone checking 89 dial tone volume adjusting 89 dialing prefix 87 Digital Subscriber Line (DSL) fax setup 72 digital telephone service fax setup 74 disabling settings timeout 17 distinctive ring 88 documents faxing using the computer 85 faxing using the control panel 84 loading into the Automatic Document Feeder (ADF) 34 loading on scanner...
... 81 dial tone checking 89 dial tone volume adjusting 89 dialing prefix 87 Digital Subscriber Line (DSL) fax setup 72 digital telephone service fax setup 74 disabling settings timeout 17 distinctive ring 88 documents faxing using the computer 85 faxing using the control panel 84 loading into the Automatic Document Feeder (ADF) 34 loading on scanner...
User Guide
Page 180
... DSL connection 72 standard telephone line connection 69 VoIP 73 Fax Setup Wizard 80 fax troubleshooting cannot receive faxes 139 cannot run fax software 140 cannot send faxes 137 error messages, printer control panel 141 fax troubleshooting checklist 137 faxing Address Book 82, 83 blocking 92 calling card, using ...for setting up printer on wireless network 95 infrastructure network 114 ink conserving 6 ink cartridges ordering 11 replacing 12 using genuine Lexmark 11 ink levels checking 121 inserting a memory card or flash drive 41 Index 180 installation cable 113 installing network printer 120...
... DSL connection 72 standard telephone line connection 69 VoIP 73 Fax Setup Wizard 80 fax troubleshooting cannot receive faxes 139 cannot run fax software 140 cannot send faxes 137 error messages, printer control panel 141 fax troubleshooting checklist 137 faxing Address Book 82, 83 blocking 92 calling card, using ...for setting up printer on wireless network 95 infrastructure network 114 ink conserving 6 ink cartridges ordering 11 replacing 12 using genuine Lexmark 11 ink levels checking 121 inserting a memory card or flash drive 41 Index 180 installation cable 113 installing network printer 120...

User Guide
Page 184
... locating 110 Windows installing printer on wired network (Ethernet) 109 installing printer on wireless network 96 Windows software Abbyy Sprint OCR 19 Fast Pics 19 Fax Setup Utility 19 Fax Solutions software 19 Printer Home 19 Printing Preferences 19 Service Center 19 Toolbar 19 Tools for Office 19 Wireless... is blinking orange 153 Wi-Fi indicator light is not lit 152 Wi-Fi indicator light is still orange 152 Wi-Fi indicator description of colors 97 light is not lit 152 Wi-Fi indicator light is blinking orange 153 Wi-Fi indicator light is green printer does not print 151...
... locating 110 Windows installing printer on wired network (Ethernet) 109 installing printer on wireless network 96 Windows software Abbyy Sprint OCR 19 Fast Pics 19 Fax Setup Utility 19 Fax Solutions software 19 Printer Home 19 Printing Preferences 19 Service Center 19 Toolbar 19 Tools for Office 19 Wireless... is blinking orange 153 Wi-Fi indicator light is not lit 152 Wi-Fi indicator light is still orange 152 Wi-Fi indicator description of colors 97 light is not lit 152 Wi-Fi indicator light is blinking orange 153 Wi-Fi indicator light is green printer does not print 151...


