
Quick Reference
Page 3
... usable in the multipurpose feeder. • Open a door or cover. • Send a print job from the computer. • Perform a power‑on reset with the main power switch. • Attach a device to wake the printer from a flash drive. Check the status of folders and file links. Connect a...Favorites, and the ones in the tree are available only when the printer is turned on, the display shows a basic screen, referred to as Imaging unit low or Cartridge Low. • Show intervention messages and the instructions on how to clear them. • Show a printer warning or error message...
... usable in the multipurpose feeder. • Open a door or cover. • Send a print job from the computer. • Perform a power‑on reset with the main power switch. • Attach a device to wake the printer from a flash drive. Check the status of folders and file links. Connect a...Favorites, and the ones in the tree are available only when the printer is turned on, the display shows a basic screen, referred to as Imaging unit low or Cartridge Low. • Show intervention messages and the instructions on how to clear them. • Show a printer warning or error message...
Quick Reference
Page 6
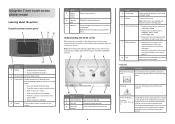
Note: Your home screen may vary depending on reset with the main power switch. • Attach a device to as the home screen. Printer IP address Example: 123.123.123.12 3 The IP address of ... numbers separated by periods. Understanding the home screen When the printer is located at the top left corner of the home screen and appears as Imaging unit low or Cartridge Low. • Show intervention messages and the instructions on how to clear them. 7 Status/Supplies • Show a printer warning or error message...
Note: Your home screen may vary depending on reset with the main power switch. • Attach a device to as the home screen. Printer IP address Example: 123.123.123.12 3 The IP address of ... numbers separated by periods. Understanding the home screen When the printer is located at the top left corner of the home screen and appears as Imaging unit low or Cartridge Low. • Show intervention messages and the instructions on how to clear them. 7 Status/Supplies • Show a printer warning or error message...
User's Guide
Page 299
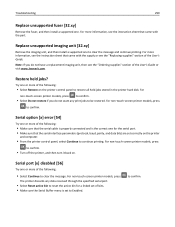
...or see the "Replacing supplies" section of the User's Guide. For more of the User's Guide or visit www.lexmark.com. Note: If you do not have a replacement imaging unit, then see the instruction sheet that came with the part. For non‑touch‑screen printer models, press to... confirm. • Select Do not restore if you do not want any data received through the specified serial port. • Select Reset active bin to reset the active...
...or see the "Replacing supplies" section of the User's Guide. For more of the User's Guide or visit www.lexmark.com. Note: If you do not have a replacement imaging unit, then see the instruction sheet that came with the part. For non‑touch‑screen printer models, press to... confirm. • Select Do not restore if you do not want any data received through the specified serial port. • Select Reset active bin to reset the active...


