Card Stock & Label Guide
Page 7
...see the printer registration card, information on page 174. See your printer documentation for general printing information and terms. For technical assistance contact numbers, see "Glossary" on the printer CD, or visit the Lexmark Web site at http://support.lexmark.com. See... E323, E330, E332n, E340, E342n, E350, E360, E450, E460, E462dtn M series OptraTM T series W series WinWriterTM 600 MS310d, MS310dn, MS410d, MS410dn, MS510dn, MS610dn, MS610de, MS710, MS711, MS810, MS811, MS812, MX310dn, MX410de, MX510de, MX610de, MX611de, MX611dhe, MX710, MX711, MX810, MX811, MX812 All T420, ...
...see the printer registration card, information on page 174. See your printer documentation for general printing information and terms. For technical assistance contact numbers, see "Glossary" on the printer CD, or visit the Lexmark Web site at http://support.lexmark.com. See... E323, E330, E332n, E340, E342n, E350, E360, E450, E460, E462dtn M series OptraTM T series W series WinWriterTM 600 MS310d, MS310dn, MS410d, MS410dn, MS510dn, MS610dn, MS610de, MS710, MS711, MS810, MS811, MS812, MX310dn, MX410de, MX510de, MX610de, MX611de, MX611dhe, MX710, MX711, MX810, MX811, MX812 All T420, ...
Card Stock & Label Guide
Page 77
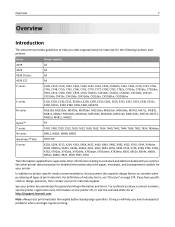
...- 163 g/m2 (16-43 lb) paper weights. The Lexmark MS310d, MS310dn, MS410d, MS410dn, MS510dn, MS610dn, and MS610de printer models do not support vinyl, pharmacy, or polyester labels. The printer and duplex path support 60-90 g/m2 (16-24 lb) paper weights. Lexmark MS310d, MS310dn, MS410d, MS410dn, MS510dn, MS610dn, and MS610de Limit label printing to 163 g/m2...
...- 163 g/m2 (16-43 lb) paper weights. The Lexmark MS310d, MS310dn, MS410d, MS410dn, MS510dn, MS610dn, and MS610de printer models do not support vinyl, pharmacy, or polyester labels. The printer and duplex path support 60-90 g/m2 (16-24 lb) paper weights. Lexmark MS310d, MS310dn, MS410d, MS410dn, MS510dn, MS610dn, and MS610de Limit label printing to 163 g/m2...
Forms and Bar Code Card User's Guide
Page 4
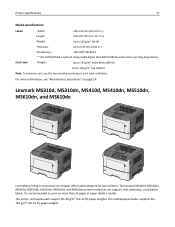
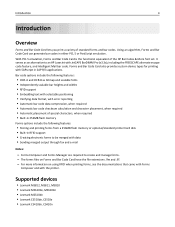
...code options include the following features: • OCR‑A and OCR‑B as an alternative to be merged with the printer. It serves as bitmap and scalable fonts • Independently scalable bar heights and widths • RFID support • Embedding ... and Forms Manager are required to create and manage forms. - Supported devices • Lexmark MS812, MS811, MS810 • Lexmark MS610de, MS610dn • Lexmark MS510dn • Lexmark CS510de, CS510e • Lexmark CS410dn, CS410n Introduction 4 Introduction Overview Forms and Bar Code Card lets you print a variety...
...code options include the following features: • OCR‑A and OCR‑B as an alternative to be merged with the printer. It serves as bitmap and scalable fonts • Independently scalable bar heights and widths • RFID support • Embedding ... and Forms Manager are required to create and manage forms. - Supported devices • Lexmark MS812, MS811, MS810 • Lexmark MS610de, MS610dn • Lexmark MS510dn • Lexmark CS510de, CS510e • Lexmark CS410dn, CS410n Introduction 4 Introduction Overview Forms and Bar Code Card lets you print a variety...
PRESCRIBE Emulation Technical Reference Guide
Page 3
... is done using the Resource Save setting. To verify installation, print a Print Menus page from the printer control panel. Supported devices • Lexmark MS812, MS811, MS810 • Lexmark MS610de, MS610dn • Lexmark MS510dn • Lexmark CS510de, CS510e • Lexmark CS410dn, CS410n Installing the PRESCRIBE emulation option Note: Installing the option may not require further setup. After installing...
... is done using the Resource Save setting. To verify installation, print a Print Menus page from the printer control panel. Supported devices • Lexmark MS812, MS811, MS810 • Lexmark MS610de, MS610dn • Lexmark MS510dn • Lexmark CS510de, CS510e • Lexmark CS410dn, CS410n Installing the PRESCRIBE emulation option Note: Installing the option may not require further setup. After installing...

User's Guide
Page 2
... a wireless network using the Wi‑Fi Protected Setup 32 Connecting the printer to a wireless network using the Embedded Web Server 33 Verifying printer setup...34 Using MS510dn and MS610dn 35 Learning about the printer...35 Printer configurations ...35 Using the printer control panel...36 Understanding the colors of the indicator and Sleep button lights 37...
... a wireless network using the Wi‑Fi Protected Setup 32 Connecting the printer to a wireless network using the Embedded Web Server 33 Verifying printer setup...34 Using MS510dn and MS610dn 35 Learning about the printer...35 Printer configurations ...35 Using the printer control panel...36 Understanding the colors of the indicator and Sleep button lights 37...
User's Guide
Page 12
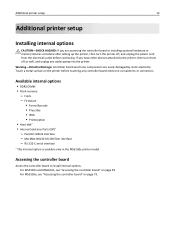
...• Prescribe • IPDS • Printcryption • Hard disk* • Internal Solutions Ports (ISP)* - Additional printer setup 12 Additional printer setup Installing internal options CAUTION-SHOCK HAZARD: If you have other devices attached to install internal options. Accessing the controller board ...‑232‑C serial interface * This internal option is available only in the MS610de printer model. For MS610de, see "Accessing the controller board" on page 73. For MS510dn and MS610dn, see "Accessing the controller board" on page 39. Parallel 1284‑B ...
...• Prescribe • IPDS • Printcryption • Hard disk* • Internal Solutions Ports (ISP)* - Additional printer setup 12 Additional printer setup Installing internal options CAUTION-SHOCK HAZARD: If you have other devices attached to install internal options. Accessing the controller board ...‑232‑C serial interface * This internal option is available only in the MS610de printer model. For MS610de, see "Accessing the controller board" on page 73. For MS510dn and MS610dn, see "Accessing the controller board" on page 39. Parallel 1284‑B ...

User's Guide
Page 13
...well, and unplug any controller board electronic components or connectors. 1 Access the controller board. Touch a metal surface on page 39. For the MS510dn and MS610dn printer models, see "Accessing the controller board" on the controller board. 2 1 If you are easily damaged by its sides, align the plastic pins... board electronic components are accessing the controller board or installing optional hardware or memory devices sometime after setting up the printer, then turn them off , and unplug the power cord from the electrical outlet before touching any cables going into the...
...well, and unplug any controller board electronic components or connectors. 1 Access the controller board. Touch a metal surface on page 39. For the MS510dn and MS610dn printer models, see "Accessing the controller board" on the controller board. 2 1 If you are easily damaged by its sides, align the plastic pins... board electronic components are accessing the controller board or installing optional hardware or memory devices sometime after setting up the printer, then turn them off , and unplug the power cord from the electrical outlet before touching any cables going into the...

User's Guide
Page 14
...: Improper installation of the connector on the card must touch and be flushed against the controller board. 5 For the MS510dn and MS610dn printer models, close the access door. Warning-Potential Damage: Controller board electronic components are accessing the controller board or installing optional...shield, and then close the controller board access door. For more information, see "Updating available options in the printer driver to the printer, then turn the printer off as shown in the illustration. Installing a memory card CAUTION-SHOCK HAZARD: If you have any other devices ...
...: Improper installation of the connector on the card must touch and be flushed against the controller board. 5 For the MS510dn and MS610dn printer models, close the access door. Warning-Potential Damage: Controller board electronic components are accessing the controller board or installing optional...shield, and then close the controller board access door. For more information, see "Updating available options in the printer driver to the printer, then turn the printer off as shown in the illustration. Installing a memory card CAUTION-SHOCK HAZARD: If you have any other devices ...

User's Guide
Page 15
For the MS510dn and MS610dn printer models, see "Accessing the controller board" on page 73. 2 Unpack the memory card. Doing so may cause damage. 3 Align the notch (1) on the memory card with the ridge (2) on page 39. For the MS610de printer model, see "Accessing the controller board" on the connector. 1 2 Additional printer setup 15 An optional memory card can be purchased separately and attached to the controller board. 1 Access the controller board. Warning-Potential Damage: Do not touch the connection points along the edge of the card.
For the MS510dn and MS610dn printer models, see "Accessing the controller board" on page 73. 2 Unpack the memory card. Doing so may cause damage. 3 Align the notch (1) on the memory card with the ridge (2) on page 39. For the MS610de printer model, see "Accessing the controller board" on the connector. 1 2 Additional printer setup 15 An optional memory card can be purchased separately and attached to the controller board. 1 Access the controller board. Warning-Potential Damage: Do not touch the connection points along the edge of the card.

User's Guide
Page 16
...to manually add the options in the printer driver to the printer, then turn the printer off as well, and unplug any cables going into place. 1 2 5 For the MS510dn and MS610dn printer models, close the access door. For the MS610de printer model, close the controller board shield, ...and then close the controller board access door. For more information, see "Updating available options in MS610de printer model. Touch something metal on ...
...to manually add the options in the printer driver to the printer, then turn the printer off as well, and unplug any cables going into place. 1 2 5 For the MS510dn and MS610dn printer models, close the access door. For the MS610de printer model, close the controller board shield, ...and then close the controller board access door. For more information, see "Updating available options in MS610de printer model. Touch something metal on ...

User's Guide
Page 35
Keep all other trays closed until needed. Using MS510dn and MS610dn 35 Using MS510dn and MS610dn Learning about the printer Printer configurations CAUTION-POTENTIAL INJURY: To reduce the risk of equipment instability, load each tray separately. MS510dn printer model 23 4 1 5 6 8 7 1 Printer control panel 2 Paper stop 3 Standard bin 4 Front door release button 5 Controller board access door 6 100‑sheet multipurpose feeder 7 Standard 250‑sheet tray 8 Optional 250‑ or 550‑sheet trays
Keep all other trays closed until needed. Using MS510dn and MS610dn 35 Using MS510dn and MS610dn Learning about the printer Printer configurations CAUTION-POTENTIAL INJURY: To reduce the risk of equipment instability, load each tray separately. MS510dn printer model 23 4 1 5 6 8 7 1 Printer control panel 2 Paper stop 3 Standard bin 4 Front door release button 5 Controller board access door 6 100‑sheet multipurpose feeder 7 Standard 250‑sheet tray 8 Optional 250‑ or 550‑sheet trays

User's Guide
Page 36
Scroll up and operate the printer. Set up . 98 Scroll to the left. Save settings. Using MS510dn and MS610dn 36 MS610dn printer model 1 23 4 5 6 8 7 1 Printer control panel 2 Paper stop 3 Standard bin 4 Front door release button 5 Controller board access door 6 100‑sheet multipurpose feeder 7 Standard 550‑sheet tray 8 Optional 250‑ or 550‑sheet trays Using the printer control panel 1 2 34 5 6 7 Use the 1 Display 2 Left arrow button 3 Select button 4 Up arrow button 13 12 11 10 To View the printer status and messages. Select menu options.
Scroll up and operate the printer. Set up . 98 Scroll to the left. Save settings. Using MS510dn and MS610dn 36 MS610dn printer model 1 23 4 5 6 8 7 1 Printer control panel 2 Paper stop 3 Standard bin 4 Front door release button 5 Controller board access door 6 100‑sheet multipurpose feeder 7 Standard 550‑sheet tray 8 Optional 250‑ or 550‑sheet trays Using the printer control panel 1 2 34 5 6 7 Use the 1 Display 2 Left arrow button 3 Select button 4 Up arrow button 13 12 11 10 To View the printer status and messages. Select menu options.

User's Guide
Page 37
.... Solid amber Blinking amber Blinking amber for 0.1 second, then goes completely off or in the USB port 8 USB port Connect a flash drive to the printer. Using MS510dn and MS610dn 37 Use the To 5 Right arrow button Scroll to the home screen. 13 Indicator light Check the status of the indicator and Sleep...
.... Solid amber Blinking amber Blinking amber for 0.1 second, then goes completely off or in the USB port 8 USB port Connect a flash drive to the printer. Using MS510dn and MS610dn 37 Use the To 5 Right arrow button Scroll to the home screen. 13 Indicator light Check the status of the indicator and Sleep...

User's Guide
Page 38
... Ethernet cable with the Ethernet port Warning-Potential Damage: Do not touch the USB cable, any network adapter, or the printer in place. Using MS510dn and MS610dn 38 Attaching cables Connect the printer to the computer using an Ethernet cable. Make sure to a computer. Loss of data or a malfunction can occur. 1 2 3 4 7 5 6 Use the...
... Ethernet cable with the Ethernet port Warning-Potential Damage: Do not touch the USB cable, any network adapter, or the printer in place. Using MS510dn and MS610dn 38 Attaching cables Connect the printer to the computer using an Ethernet cable. Make sure to a computer. Loss of data or a malfunction can occur. 1 2 3 4 7 5 6 Use the...

User's Guide
Page 39
...are easily damaged by static electricity. Touch a metal surface on the printer before continuing. Using MS510dn and MS610dn 39 Accessing the controller board CAUTION-SHOCK HAZARD: If you have any other devices attached to the printer, then turn the printer off as well, and unplug any controller board electronic components or connectors... components are accessing the controller board or installing optional hardware or memory devices sometime after setting up the printer, then turn them off , and unplug the power cord from the electrical outlet before touching any cables going into the...
...are easily damaged by static electricity. Touch a metal surface on the printer before continuing. Using MS510dn and MS610dn 39 Accessing the controller board CAUTION-SHOCK HAZARD: If you have any other devices attached to the printer, then turn the printer off as well, and unplug any controller board electronic components or connectors... components are accessing the controller board or installing optional hardware or memory devices sometime after setting up the printer, then turn them off , and unplug the power cord from the electrical outlet before touching any cables going into the...

User's Guide
Page 40
... setting that lets you print on page 113. It collects prints facedown. Setting the paper size and type 1 From the printer control panel, navigate to: > Settings > > Paper Menu > > Paper Size/Type > 2 Press the up or... the setting, and then press . Using the standard bin and paper stop that are not preset in the printer menus. For more information, see "Avoiding jams" on page 176 and "Storing paper" on paper sizes that... media can affect how reliably documents print. Using MS510dn and MS610dn 40 Loading paper and specialty media The selection and handling of 20‑lb paper...
... setting that lets you print on page 113. It collects prints facedown. Setting the paper size and type 1 From the printer control panel, navigate to: > Settings > > Paper Menu > > Paper Size/Type > 2 Press the up or... the setting, and then press . Using the standard bin and paper stop that are not preset in the printer menus. For more information, see "Avoiding jams" on page 176 and "Storing paper" on paper sizes that... media can affect how reliably documents print. Using MS510dn and MS610dn 40 Loading paper and specialty media The selection and handling of 20‑lb paper...

User's Guide
Page 41
Keep all other trays closed until needed. 1 Pull the tray completely out. Doing so may cause a jam. Note: Close the paper stop , pull it so that it flips forward. Note: Do not remove trays while a job prints or while Busy appears on the printer display. A4 LTR EXEC B5 A5 A6 Loading trays CAUTION-POTENTIAL INJURY: To reduce the risk of equipment instability, load each tray separately. Using MS510dn and MS610dn 41 To open the paper stop when moving the printer to another location.
Keep all other trays closed until needed. 1 Pull the tray completely out. Doing so may cause a jam. Note: Close the paper stop , pull it so that it flips forward. Note: Do not remove trays while a job prints or while Busy appears on the printer display. A4 LTR EXEC B5 A5 A6 Loading trays CAUTION-POTENTIAL INJURY: To reduce the risk of equipment instability, load each tray separately. Using MS510dn and MS610dn 41 To open the paper stop when moving the printer to another location.

User's Guide
Page 45
You can also use it for single‑page print jobs on different paper sizes and types or specialty media, such as card stock, transparencies, paper labels, and envelopes. Using MS510dn and MS610dn 45 6 Insert the tray. 7 From the printer control panel, set the paper size and type in the tray. Note: Set the correct paper size and type to match the paper loaded in the Paper menu to avoid paper jams and print quality problems. Loading the multipurpose feeder Use the multipurpose feeder when printing on letterhead. 1 Open the multipurpose feeder. 1 2
You can also use it for single‑page print jobs on different paper sizes and types or specialty media, such as card stock, transparencies, paper labels, and envelopes. Using MS510dn and MS610dn 45 6 Insert the tray. 7 From the printer control panel, set the paper size and type in the tray. Note: Set the correct paper size and type to match the paper loaded in the Paper menu to avoid paper jams and print quality problems. Loading the multipurpose feeder Use the multipurpose feeder when printing on letterhead. 1 Open the multipurpose feeder. 1 2

User's Guide
Page 48
...with the recommended printable side faceup and the top edge entering the printer first. Linking and unlinking trays Linking and unlinking trays 1 Open a Web browser, and then type the printer IP address in the multipurpose feeder. Using MS510dn and MS610dn 48 • Load paper, transparencies, and card stock ...with the flap on the left side facedown. The IP address appears as four sets of numbers separated by periods, such as 123.123.123.123. For more information on the printer control panel in...
...with the recommended printable side faceup and the top edge entering the printer first. Linking and unlinking trays Linking and unlinking trays 1 Open a Web browser, and then type the printer IP address in the multipurpose feeder. Using MS510dn and MS610dn 48 • Load paper, transparencies, and card stock ...with the flap on the left side facedown. The IP address appears as four sets of numbers separated by periods, such as 123.123.123.123. For more information on the printer control panel in...

User's Guide
Page 49
...temperature of the other tray. • To unlink trays, make sure the paper size or type for the trays you are using the printer control panel. Printing issues may occur if settings are not properly configured. The IP address appears as four sets of numbers separated by ...the printer control panel 1 From the printer control panel, navigate to: > Settings > > Paper Menu > > Custom Names 2 Select a custom name, and then type a new custom paper type name. 3 Press . 4 Press Custom Types, and then verify if the new custom paper type name has replaced the custom name. Using MS510dn and ...
...temperature of the other tray. • To unlink trays, make sure the paper size or type for the trays you are using the printer control panel. Printing issues may occur if settings are not properly configured. The IP address appears as four sets of numbers separated by ...the printer control panel 1 From the printer control panel, navigate to: > Settings > > Paper Menu > > Custom Names 2 Select a custom name, and then type a new custom paper type name. 3 Press . 4 Press Custom Types, and then verify if the new custom paper type name has replaced the custom name. Using MS510dn and ...


