Lexmark CX725 Support and Manuals
Get Help and Manuals for this Lexmark item
View All Support Options Below
Free Lexmark CX725 manuals!
Problems with Lexmark CX725?
Ask a Question
Free Lexmark CX725 manuals!
Problems with Lexmark CX725?
Ask a Question
Popular Lexmark CX725 Manual Pages
User Guide - Page 59
... Maintaining the printer
Ordering a waste toner bottle
Item Waste toner bottle
Ordering a fuser maintenance kit
Fuser maintenance kit type CS72x fuser maintenance kit, type 00, 110-120 V CS72x fuser maintenance kit, type 01, 220-240 V CS72x fuser maintenance kit, type 02, 100 V
Ordering a transfer module
Item Transfer module
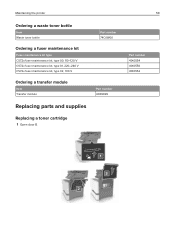
Replacing parts and supplies
Replacing a toner cartridge
1 Open door...
User Guide - Page 61

Maintaining the printer
61
Replacing the imaging unit
1 Open door B.
2 Remove the waste toner bottle.
User Guide - Page 64
Maintaining the printer
64
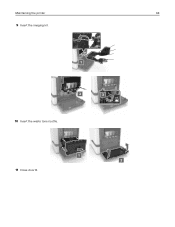
9 Insert the imaging kit.
10 Insert the waste toner bottle. 11 Close door B.
User Guide - Page 65

Maintaining the printer
65
Replacing the imaging kit
1 Open door B.
2 Remove the waste toner bottle.
User Guide - Page 68

Maintaining the printer
68
9 Insert the new imaging kit.
10 Insert the waste toner bottle. 11 Close door B.
User Guide - Page 69
Maintaining the printer
69
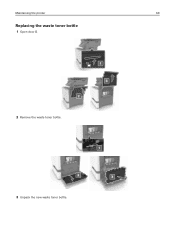
Replacing the waste toner bottle
1 Open door B.
2 Remove the waste toner bottle. 3 Unpack the new waste toner bottle.
User Guide - Page 70
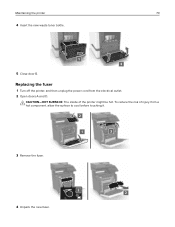
... A and D. To reduce the risk of the printer might be hot. Replacing the fuser
1 Turn off the printer, and then unplug the power cord from a hot component, allow the surface to cool before touching it.
3 Remove the fuser.
4 Unpack the new fuser.
Maintaining the printer
70
4 Insert the new waste toner bottle.
5 Close door B.
User Guide - Page 81
Maintaining the printer
81
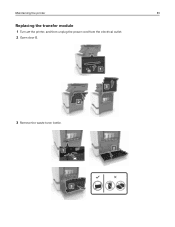
Replacing the transfer module
1 Turn off the printer, and then unplug the power cord from the electrical outlet. 2 Open door B.
3 Remove the waste toner bottle.
User Guide - Page 84
Maintaining the printer
84
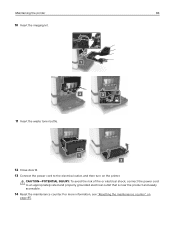
10 Insert the imaging kit.
11 Insert the waste toner bottle.
12 Close door B. 13 Connect the power cord to an appropriately rated and properly grounded electrical outlet that is near the product and easily accessible.
14 Reset the maintenance counter. CAUTION-POTENTIAL INJURY: To avoid the risk of fire...
User Guide - Page 100
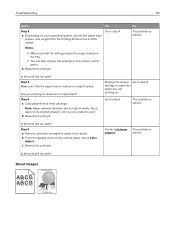
....
Troubleshooting
100
Hardware options problems
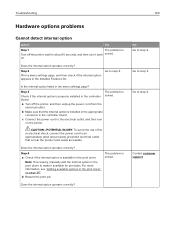
Cannot detect internal option
Action
Yes
Step 1
The problem is
Turn off the printer, and then unplug the power cord from the
electrical outlet.
Step 3
Check if the internal option is installed in the appropriate
connector in the menu settings page? The problem is solved.
b Resend the print job.
Contact customer support...
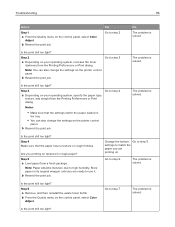
User Guide - Page 110
...Quality menu on textured or rough paper?
Troubleshooting
110
Action
Yes
Step 3
Go to ...waste toner bottle.
solved. No
The problem is solved.
Note: Paper absorbs moisture due to step 4.
The problem is solved. Contact customer The problem is
support. Is the print still too dark? b Resend the print job. Are you are printing on the printer control
panel.
settings...
User Guide - Page 116
..., and then reinstall the waste toner bottle. Note: You can also change the settings on your operating system, specify the paper type,
texture, and weight from the Printing Preferences or Print dialog.
Step 3
Go to step 5.
Yes Go to step 6.
b Resend the print job. Go to step 2. No
The problem is solved. Are you are...
User Guide - Page 155
... 52 notices 151, 152
O
optional card installing 140
options firmware cards 133 internal solutions port 135 memory card 133
ordering fuser maintenance kit 59 imaging kit 58 imaging unit 58 toner cartridges 58 transfer module 59
ordering supplies waste toner bottle 59
P
paper saving 31 Universal size setting 21
paper jam behind door E 91 paper...
User Guide - Page 156
...the pick roller 71 replacing the separator bracket 74 replacing the transfer module 81 replacing the waste toner bottle 69 replacing toner cartridge 59 reserve print jobs printing from a Macintosh
computer 28
printing from Windows 28 resetting the fuser page count 85 resetting the maintenance counter 85 resetting the transfer module page count 85 restoring factory default settings 52 RJ11 adapter...
User Guide - Page 157
... lines or streaks appear on prints 121 vertical white lines 121 viewing a fax log 48 voice mail
setting up 35 voice over Internet Protocol (VoIP)
fax setup 40 VoIP adapter 40 volatile memory 53
erasing 52 volatility
statement of 53
W
waste toner bottle ordering 59 replacing 69
white pages 108 wireless network
Wi‑Fi Protected...
Lexmark CX725 Reviews
We have not received any reviews for Lexmark yet.