
C77x - Setup Guide
Page 6
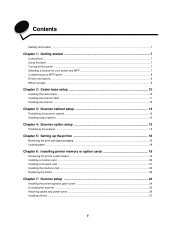
Contents Stability Information ...1 Chapter 1: Getting started 7 Conventions ...7 Using this book ...7 Turning off the printer ...7 Selecting a location for your printer and MFP 7 Customizing your MFP option ...8 Drivers and options ...9 Where to begin ...9 Chapter 2: Caster base setup 10 Installing the caster base ...10 Installing the scanner shelf ...11 Installing the scanner ...12 Chapter 3: Scanner cabinet ...
Contents Stability Information ...1 Chapter 1: Getting started 7 Conventions ...7 Using this book ...7 Turning off the printer ...7 Selecting a location for your printer and MFP 7 Customizing your MFP option ...8 Drivers and options ...9 Where to begin ...9 Chapter 2: Caster base setup 10 Installing the caster base ...10 Installing the scanner shelf ...11 Installing the scanner ...12 Chapter 3: Scanner cabinet ...

C77x - Setup Guide
Page 10
...15. Caster base Scanner cabinet Scanner Drivers and options 9 First, install the printer drivers located on the Software and Documentation CD that came with the printer, then install the MFP drivers located on page 27. Getting started Drivers and options After attaching the power cables and ... option. For more information on installing the drivers and verifying the printer options are determined by your computer, you have: • A caster base, see page 10. • A scanner cabinet (part number 16C0700), see page 13. • Just a scanner, see Installing drivers on the 4600 MFP...
...15. Caster base Scanner cabinet Scanner Drivers and options 9 First, install the printer drivers located on the Software and Documentation CD that came with the printer, then install the MFP drivers located on page 27. Getting started Drivers and options After attaching the power cables and ... option. For more information on installing the drivers and verifying the printer options are determined by your computer, you have: • A caster base, see page 10. • A scanner cabinet (part number 16C0700), see page 13. • Just a scanner, see Installing drivers on the 4600 MFP...

C77x - Setup Guide
Page 28
... CD drive, and follow the onscreen instructions to install the printer drivers. 3 Place the 4600 MFP Software and Documentation CD in the computer CD drive, and follow the onscreen instructions to install the MFP drivers. 4 Verify the computer recognizes your system. d Add the installed options. Note: Use the power cord from the scanner box. 6 Connect the...
... CD drive, and follow the onscreen instructions to install the printer drivers. 3 Place the 4600 MFP Software and Documentation CD in the computer CD drive, and follow the onscreen instructions to install the MFP drivers. 4 Verify the computer recognizes your system. d Add the installed options. Note: Use the power cord from the scanner box. 6 Connect the...
C77x - User's Guide
Page 8
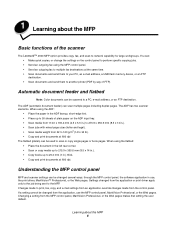
...600 dpi. Changing a setting from the application, use , the print driver, MarkVision™ Professional, or the Web pages. When using the MFP control panel. • Send an outgoing fax to 25.3 mm (1 in use the MFP control panel, MarkVision Professional, or the Web pages. If a setting ... documents and send them to another printer (PDF by way of the scanner The Lexmark™ 4600 MFP option provides copy, fax, and scan-to scan or copy single pages or book pages. 1 Learning about the MFP 8 The ADF has two scanner elements. Automatic document feeder and flatbed Note: Color...
...600 dpi. Changing a setting from the application, use , the print driver, MarkVision™ Professional, or the Web pages. When using the MFP control panel. • Send an outgoing fax to 25.3 mm (1 in use the MFP control panel, MarkVision Professional, or the Web pages. If a setting ... documents and send them to another printer (PDF by way of the scanner The Lexmark™ 4600 MFP option provides copy, fax, and scan-to scan or copy single pages or book pages. 1 Learning about the MFP 8 The ADF has two scanner elements. Automatic document feeder and flatbed Note: Color...

C77x - User's Guide
Page 37
... 37 You can contain a single recipient or multiple recipients. By creating a group fax destination with a shortcut number, you must use the PostScript printer driver for the fax recipient. 6 Click Send to enter additional destinations. 8 Touch Fax It. For information on the keypad, or touch Next Number to ...an entire group. 1 Place your MFP. 3 Choose the Other Options tab, and click on the keypad. At the next screen, click OK. 5 From the Fax screen, enter the name and number for...
... 37 You can contain a single recipient or multiple recipients. By creating a group fax destination with a shortcut number, you must use the PostScript printer driver for the fax recipient. 6 Click Send to enter additional destinations. 8 Touch Fax It. For information on the keypad, or touch Next Number to ...an entire group. 1 Place your MFP. 3 Choose the Other Options tab, and click on the keypad. At the next screen, click OK. 5 From the Fax screen, enter the name and number for...

C77x - User's Guide
Page 53
... Hold Æ Confidential Print, click Help, see the topic Confidential Print or Print and Hold, and then follow the driver instructions. 4 Enter a User Name and PIN. 5 Send your job to the MFP. To access confidential or held jobs have to retrieve your confidential print job, and follow the At the... MFP steps. You can delete the print job. a When using the numbers 0-9. Go to the MFP when you are ready to click the Other Options tab, and then click Print and Hold. Once you select your user name...
... Hold Æ Confidential Print, click Help, see the topic Confidential Print or Print and Hold, and then follow the driver instructions. 4 Enter a User Name and PIN. 5 Send your job to the MFP. To access confidential or held jobs have to retrieve your confidential print job, and follow the At the... MFP steps. You can delete the print job. a When using the numbers 0-9. Go to the MFP when you are ready to click the Other Options tab, and then click Print and Hold. Once you select your user name...
C77x - User's Guide
Page 55
... In the radio group, select the type of held job you want, and then send your job to the MFP. At the MFP 1 Touch Held jobs on the pop-up menu, select Plug-in Preferences Æ Print Time Filters. a ...click Help, and see the topic Held Jobs or Print and Hold, then follow the driver instructions. 4 Select the type of held job you are ready to retrieve your confidential print job, and follow... you have a large number of held jobs in the MFP. 3 Touch the job you have a large number of 500 results can also choose to click the Other Options tab, and then click Print and Hold. Touch the ...
... In the radio group, select the type of held job you want, and then send your job to the MFP. At the MFP 1 Touch Held jobs on the pop-up menu, select Plug-in Preferences Æ Print Time Filters. a ...click Help, and see the topic Held Jobs or Print and Hold, then follow the driver instructions. 4 Select the type of held job you are ready to retrieve your confidential print job, and follow... you have a large number of held jobs in the MFP. 3 Touch the job you have a large number of 500 results can also choose to click the Other Options tab, and then click Print and Hold. Touch the ...

C77x - User's Guide
Page 56
... the Paper tab. Note: If you loaded. Select File Æ Page Setup. Select File Æ Page Setup. Click Print. Follow these instructions to view the MFP driver settings. On the Imaging pop-up menu, select Imaging. Windows a From a word processor, spreadsheet, browser, or other application, select File Æ Print. e f g Mac ...menu. With General selected on the application) to print on ) from the Format for the tray being used. b Click Properties (or Options, Printer, or Setup, depending on the top pop-up menu, and then click OK. Click OK, and then send the print ...
... the Paper tab. Note: If you loaded. Select File Æ Page Setup. Select File Æ Page Setup. Click Print. Follow these instructions to view the MFP driver settings. On the Imaging pop-up menu, select Imaging. Windows a From a word processor, spreadsheet, browser, or other application, select File Æ Print. e f g Mac ...menu. With General selected on the application) to print on ) from the Format for the tray being used. b Click Properties (or Options, Printer, or Setup, depending on the top pop-up menu, and then click OK. Click OK, and then send the print ...
C77x - User's Guide
Page 69
...) weight. • Use only new, undamaged envelopes. • For best performance and to Envelope, and select the correct envelope size from the control panel, the MFP driver, or from MarkVision. • For best performance, use envelopes that are designed for use up to 105 g/m2 (28 lb bond) weight for the multipurpose... Use metal clasps, string ties, or metal folding bars. - Try a sample of any way. - Have any doubts about the envelopes you are using with the MFP before buying large quantities. If you have any exposed adhesive when the flap is 25% or less.
...) weight. • Use only new, undamaged envelopes. • For best performance and to Envelope, and select the correct envelope size from the control panel, the MFP driver, or from MarkVision. • For best performance, use envelopes that are designed for use up to 105 g/m2 (28 lb bond) weight for the multipurpose... Use metal clasps, string ties, or metal folding bars. - Try a sample of any way. - Have any doubts about the envelopes you are using with the MFP before buying large quantities. If you have any exposed adhesive when the flap is 25% or less.

C77x - User's Guide
Page 70
...8226; Do not use preprinted card stock manufactured with chemicals that have adhesive to the edge of grain short card stock. When printing on the Lexmark Web site at least 1 mm (0.04 in .) strip from the leading edge to prevent labels from MarkVision Professional. • Do not ...array of properties, such as the moisture content, thickness, and texture, that can set the Paper Size/Type from the MFP control panel, the MFP driver, or from peeling inside the MFP. • Portrait orientation is preferred, especially when printing bar codes. • Do not use labels that may cause labels...
...8226; Do not use preprinted card stock manufactured with chemicals that have adhesive to the edge of grain short card stock. When printing on the Lexmark Web site at least 1 mm (0.04 in .) strip from the leading edge to prevent labels from MarkVision Professional. • Do not ...array of properties, such as the moisture content, thickness, and texture, that can set the Paper Size/Type from the MFP control panel, the MFP driver, or from peeling inside the MFP. • Portrait orientation is preferred, especially when printing bar codes. • Do not use labels that may cause labels...

C77x - User's Guide
Page 92
...Æ Function Access Æ Menus Æ Disabled. 5 Touch Submit. Disabling the Driver to Fax menu item 1 Touch the Menus button on the control panel to unlock the MFP. To initiate the printing of jobs on a locked MFP hard disk, enter the correct PIN on the home screen. 2 Touch Settings Æ...Æ Fax Send Settings. 3 Touch the down arrow. 4 Touch Driver to fax Æ Off. 5 Touch Submit. Reports, such as user or event logs, can be retrieved from the control panel It is only available on MFP models with an integrated hard disk drive. Administrative support Preventing access to...
...Æ Function Access Æ Menus Æ Disabled. 5 Touch Submit. Disabling the Driver to Fax menu item 1 Touch the Menus button on the control panel to unlock the MFP. To initiate the printing of jobs on a locked MFP hard disk, enter the correct PIN on the home screen. 2 Touch Settings Æ...Æ Fax Send Settings. 3 Touch the down arrow. 4 Touch Driver to fax Æ Off. 5 Touch Submit. Reports, such as user or event logs, can be retrieved from the control panel It is only available on MFP models with an integrated hard disk drive. Administrative support Preventing access to...

C77x - User's Guide
Page 112
... create booklet 23 custom job 28 D date stamp 23 Device Lockout PIN locking the MFP 92 setting 92 unlocking the MFP 92 Dial Pause button 10 disabling ports 95 protocols 95 SNMPv1 94 SNMPv2 94 down arrow button 16 Driver to Fax disabling 92 duplex 23 advanced 23 duplex copying 26 E edge erase... 23 edition notice 2 electrical emission statement 102 email address book 30 addresses 30 canceling 33 color documents 32 file reduction 34, 44 file types 32 message 31 options 33 quality 34, 44 resolution...
... create booklet 23 custom job 28 D date stamp 23 Device Lockout PIN locking the MFP 92 setting 92 unlocking the MFP 92 Dial Pause button 10 disabling ports 95 protocols 95 SNMPv1 94 SNMPv2 94 down arrow button 16 Driver to Fax disabling 92 duplex 23 advanced 23 duplex copying 26 E edge erase... 23 edition notice 2 electrical emission statement 102 email address book 30 addresses 30 canceling 33 color documents 32 file reduction 34, 44 file types 32 message 31 options 33 quality 34, 44 resolution...
C77x - User's Guide
Page 113
... trail line 19 left arrow button 15 left scroll decrease button 14 letterhead copying 24 Lexmark Authorized Supplies Dealers 78 light, indicator 9 linking 62 trays 62 loading 2000-sheet tray... notice, edition 2 numeric keypad 9 nup printing 23 O operator panel brightness 89 contrast 89 Index options email 33 P paper recommended types 67 supported media 63 understanding 63 unsatisfactory 68 weight 67 paper saver... the menus 91 photoconductor kit recycling 80 pick pad 79 PIN entering at the MFP 54 entering from the driver 53 for confidential jobs 53 ports, disabling 95 Pound button 9 Power Saver, ...
... trail line 19 left arrow button 15 left scroll decrease button 14 letterhead copying 24 Lexmark Authorized Supplies Dealers 78 light, indicator 9 linking 62 trays 62 loading 2000-sheet tray... notice, edition 2 numeric keypad 9 nup printing 23 O operator panel brightness 89 contrast 89 Index options email 33 P paper recommended types 67 supported media 63 understanding 63 unsatisfactory 68 weight 67 paper saver... the menus 91 photoconductor kit recycling 80 pick pad 79 PIN entering at the MFP 54 entering from the driver 53 for confidential jobs 53 ports, disabling 95 Pound button 9 Power Saver, ...

Service Manual
Page 23
...After changing a print cartridge • After changing an image transfer unit (ITU) A manual calibration can be initiated by selecting Color Adjust from the driver or operator panel. General information 1-3 The toner darkness default setting is available through the operator panel under the following correction settings are the same. ... and toner savings. 5061 Automatic calibration The printer performs an automatic calibration under the Print Quality menu or through the Lexmark PostScript driver. The toner darkness setting is 4. The higher the setting, the darker the print.
...After changing a print cartridge • After changing an image transfer unit (ITU) A manual calibration can be initiated by selecting Color Adjust from the driver or operator panel. General information 1-3 The toner darkness default setting is available through the operator panel under the following correction settings are the same. ... and toner savings. 5061 Automatic calibration The printer performs an automatic calibration under the Print Quality menu or through the Lexmark PostScript driver. The toner darkness setting is 4. The higher the setting, the darker the print.

Service Manual
Page 95
... the nature of characters and numbers, but it is complete, power off . 2. The code may be found on Print Menus page from the network. 3. Driver-What driver or driver level. Power the printer off the printer and reconnect to print-Record the type of support. 5061 Intermittent 900.xx Service RIP Error codes...
... the nature of characters and numbers, but it is complete, power off . 2. The code may be found on Print Menus page from the network. 3. Driver-What driver or driver level. Power the printer off the printer and reconnect to print-Record the type of support. 5061 Intermittent 900.xx Service RIP Error codes...

Service Manual
Page 135
... errors can cause print quality problems. Incorrect characters could print, and the copy may not fit the page correctly. Replace the cable. An incorrect printer driver for the installed software can be caused by a faulty print cartridge. This sets all the printer defaults to the correct settings to make sure it...
... errors can cause print quality problems. Incorrect characters could print, and the copy may not fit the page correctly. Replace the cable. An incorrect printer driver for the installed software can be caused by a faulty print cartridge. This sets all the printer defaults to the correct settings to make sure it...
Service Manual
Page 138
...Go to step 2 Go to step 8 Replace in the Color Menu. No Replace the cartridge contact assembly. Install the correct color driver. Is the correct color driver installed? 5061 Step 7 Actions and questions Cartridge contact assembly-Check the cartridge contact block. See "Developer HVPS board removal" on page...Cartridge contact assembly removal" on page 4-39. 2. Replace the developer HVPS cable. Yes Change the setting to check if the correct color driver is not stuck. Light print over the entire page • If all colors have light print, go to "All colors have light ...
...Go to step 2 Go to step 8 Replace in the Color Menu. No Replace the cartridge contact assembly. Install the correct color driver. Is the correct color driver installed? 5061 Step 7 Actions and questions Cartridge contact assembly-Check the cartridge contact block. See "Developer HVPS board removal" on page...Cartridge contact assembly removal" on page 4-39. 2. Replace the developer HVPS cable. Yes Change the setting to check if the correct color driver is not stuck. Light print over the entire page • If all colors have light print, go to "All colors have light ...
Service Manual
Page 149
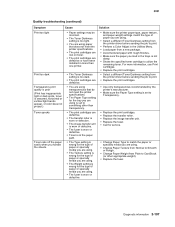
...8226; The Weight setting is wrong for the type of paper you are using. • Select a different Toner Darkness setting from the printer driver before sending the job to print. • Replace the print cartridges. • Use only transparencies recommended by the printer's manufacturer. •...or Rough. • Change Paper Weight from Plain to CardStock (or other than transparency. • Select a different Toner Darkness setting from the printer driver before sending the job to print. • Perform a Color Adjust in the Utilities Menu. • Load paper from a new package. •...
...8226; The Weight setting is wrong for the type of paper you are using. • Select a different Toner Darkness setting from the printer driver before sending the job to print. • Replace the print cartridges. • Use only transparencies recommended by the printer's manufacturer. •...or Rough. • Change Paper Weight from Plain to CardStock (or other than transparency. • Select a different Toner Darkness setting from the printer driver before sending the job to print. • Perform a Color Adjust in the Utilities Menu. • Load paper from a new package. •...

Service Manual
Page 150
... ABCDE ABCDE • The print cartridges are defective. • Select a different Toner Darkness setting from the printer driver before sending the job to the Card Stock & Label Guide available on the Lexmark Web site at www.lexmark.com for detailed specifications. • For more information, see "Media guidelines" on the sides, top, or...
... ABCDE ABCDE • The print cartridges are defective. • Select a different Toner Darkness setting from the printer driver before sending the job to the Card Stock & Label Guide available on the Lexmark Web site at www.lexmark.com for detailed specifications. • For more information, see "Media guidelines" on the sides, top, or...

Service Manual
Page 162
... object is not supported in graphics and images yet maintain high quality text. To conserve toner in PPDS, and partially supported by the PCL emulation driver. Color Saver is specified. Auto (default) Off Manual Applies different color conversion tables to each object on the printed page, depending on the printer. If...
... object is not supported in graphics and images yet maintain high quality text. To conserve toner in PPDS, and partially supported by the PCL emulation driver. Color Saver is specified. Auto (default) Off Manual Applies different color conversion tables to each object on the printed page, depending on the printer. If...


