User's Guide
Page 12
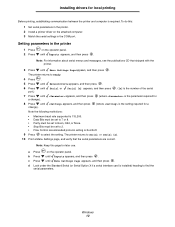
... d Look under the Standard Serial (or Serial Option X if a serial interface card is required. Installing drivers for local printing Before printing, establishing communication between the printer and computer is installed) heading to Serial or Serial [x]. 10 Print a Menu Settings page, and verify that shipped with the printer. 3 Press until Reports appears, and then press .
... d Look under the Standard Serial (or Serial Option X if a serial interface card is required. Installing drivers for local printing Before printing, establishing communication between the printer and computer is installed) heading to Serial or Serial [x]. 10 Print a Menu Settings page, and verify that shipped with the printer. 3 Press until Reports appears, and then press .
User's Guide
Page 13
... for the printer settings under the Serial Standard (or Serial Option X) heading on the computer that is connected to the printer driver. b Select the printer just added. When a test page prints successfully, printer setup is installed, the serial parameters must be installed on...It should follow the installation directions in the printer. Look for use. 10 Click Finish to verify printer installation. Installing drivers for local printing Installing a printer driver A printer driver must be set the serial parameters to a USB-attached printer, create a desktop printer icon (...
... for the printer settings under the Serial Standard (or Serial Option X) heading on the computer that is connected to the printer driver. b Select the printer just added. When a test page prints successfully, printer setup is installed, the serial parameters must be installed on...It should follow the installation directions in the printer. Look for use. 10 Click Finish to verify printer installation. Installing drivers for local printing Installing a printer driver A printer driver must be set the serial parameters to a USB-attached printer, create a desktop printer icon (...
User's Guide
Page 16
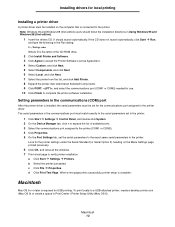
...the network is not using DHCP, an IP address is automatically assigned after connecting the network cable to the printer. 1 Look for network printing Printing a network setup page If the printer is entered, press . Submitting Selection appears briefly. 6 Press until TCP/IP appears, and then ..., Network 1 appears. 4 Press until Gateway appears, and then press . 3 Installing drivers for the address under the "TCP/IP" heading on the network setup page printed in Printing a network setup page. 2 Go to Verifying the IP settings, and begin with step 2. Once it is on. 2 Press on...
...the network is not using DHCP, an IP address is automatically assigned after connecting the network cable to the printer. 1 Look for network printing Printing a network setup page If the printer is entered, press . Submitting Selection appears briefly. 6 Press until TCP/IP appears, and then ..., Network 1 appears. 4 Press until Gateway appears, and then press . 3 Installing drivers for the address under the "TCP/IP" heading on the network setup page printed in Printing a network setup page. 2 Go to Verifying the IP settings, and begin with step 2. Once it is on. 2 Press on...
User's Guide
Page 17
Look under the "TCP/IP" heading, and make sure the IP address, netmask, and gateway are available on the Lexmark Web site at www.lexmark.com. See Printing a network setup page on a network computer, type ping followed by the new printer IP address (for direct printing or shared printing. Updated system and custom drivers are correct. Verifying...
Look under the "TCP/IP" heading, and make sure the IP address, netmask, and gateway are available on the Lexmark Web site at www.lexmark.com. See Printing a network setup page on a network computer, type ping followed by the new printer IP address (for direct printing or shared printing. Updated system and custom drivers are correct. Verifying...
User's Guide
Page 18
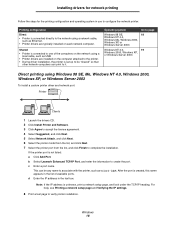
...the port is created, this name appears in the text box. Shared • Printer is connected to one of available ports. b Select Lexmark Enhanced TCP/IP Port, and enter the information to verify printer installation. Operating system Go to page Windows 98 SE, 18 Windows NT 4.0, Windows Me...computer. Windows 18 If the printer port is unknown, print a network setup page, and look under the TCP/IP heading. For help, see Printing a network setup page and Verifying the IP settings. 8 Print a test page to create the port. This can print to it. d Enter the IP address in the ...
...the port is created, this name appears in the text box. Shared • Printer is connected to one of available ports. b Select Lexmark Enhanced TCP/IP Port, and enter the information to verify printer installation. Operating system Go to page Windows 98 SE, 18 Windows NT 4.0, Windows Me...computer. Windows 18 If the printer port is unknown, print a network setup page, and look under the TCP/IP heading. For help, see Printing a network setup page and Verifying the IP settings. 8 Print a test page to create the port. This can print to it. d Enter the IP address in the ...
User's Guide
Page 21
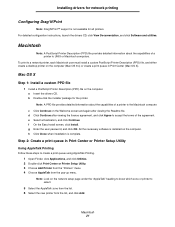
... Easy Install screen, click Install. h Click Close when installation is not available for all printers. Step 2: Create a print queue in Print Center (Mac OS X). Note: Look on the network setup page under the "AppleTalk" heading to know which zone or printer to a network printer, each Macintosh user must install a custom PostScript Printer Description...
... Easy Install screen, click Install. h Click Close when installation is not available for all printers. Step 2: Create a print queue in Print Center (Mac OS X). Note: Look on the network setup page under the "AppleTalk" heading to know which zone or printer to a network printer, each Macintosh user must install a custom PostScript Printer Description...
User's Guide
Page 22
... the Easy Install screen, click Install. Macintosh 22 b Choose Print from the "Copies & Pages" pop-up menu. All the necessary files are installed on the Network Setup page under the "AppleTalk" heading to find the default name of a printer to select. • If the PPD file displayed in the ...correct for the printer, delete the printer from the printer list in the Printer Address box. 6 Choose Lexmark from the "Printer Model" pop-up menu. 5 Enter the IP address or the printer DNS name in Print Center or Printer Setup Utility, and repeat Step 1: Install a custom PPD file. Using IP...
... the Easy Install screen, click Install. Macintosh 22 b Choose Print from the "Copies & Pages" pop-up menu. All the necessary files are installed on the Network Setup page under the "AppleTalk" heading to find the default name of a printer to select. • If the PPD file displayed in the ...correct for the printer, delete the printer from the printer list in the Printer Address box. 6 Choose Lexmark from the "Printer Model" pop-up menu. 5 Enter the IP address or the printer DNS name in Print Center or Printer Setup Utility, and repeat Step 1: Install a custom PPD file. Using IP...
User's Guide
Page 23
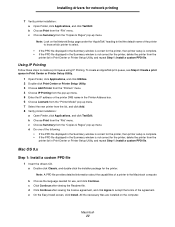
..., look on the Network Setup page under the "AppleTalk" heading to find the default name of supported UNIX and Linux platforms. Note: The Sun Solaris and Linux packages are available for Zone. 3 Select the new printer from the Lexmark Web site. Step 2: Create a desktop printer 1 In ...default zone from the list. b Choose Printing Æ Change Setup. - If the PPD file displayed in each supported UNIX and Linux platform. Visit the Lexmark Web site at www.lexmark.com. The driver package needed is also on the Lexmark Web site at www.lexmark.com for a complete list of the printer...
..., look on the Network Setup page under the "AppleTalk" heading to find the default name of supported UNIX and Linux platforms. Note: The Sun Solaris and Linux packages are available for Zone. 3 Select the new printer from the Lexmark Web site. Step 2: Create a desktop printer 1 In ...default zone from the list. b Choose Printing Æ Change Setup. - If the PPD file displayed in each supported UNIX and Linux platform. Visit the Lexmark Web site at www.lexmark.com. The driver package needed is also on the Lexmark Web site at www.lexmark.com for a complete list of the printer...


