User's Guide
Page 6
......110 Maintaining the printer 111 Maintaining print cartridges...111 Installing print cartridges...111 Removing a used print cartridge ...112 Refilling print cartridges...113 Using genuine Lexmark print cartridges...113 Aligning print cartridges ...114 Cleaning the print cartridge nozzles...114 Checking ink levels...115 Wiping the print cartridge nozzles and contacts ...116 Preserving the print cartridges ...117 Cleaning the scanner glass...117 Cleaning...
......110 Maintaining the printer 111 Maintaining print cartridges...111 Installing print cartridges...111 Removing a used print cartridge ...112 Refilling print cartridges...113 Using genuine Lexmark print cartridges...113 Aligning print cartridges ...114 Cleaning the print cartridge nozzles...114 Checking ink levels...115 Wiping the print cartridge nozzles and contacts ...116 Preserving the print cartridges ...117 Cleaning the scanner glass...117 Cleaning...
User's Guide
Page 27
Menus List Setup menu Photo menu Maintenance Note: The Photo menu is enabled only when you insert a memory • Ink Levels device into the printer. • Clean Cartridges • Align Cartridges • Print Test Page Device Setup Easy Photo • Print • Paper Size • Photo Size • Language • Country • Date/Time...
Menus List Setup menu Photo menu Maintenance Note: The Photo menu is enabled only when you insert a memory • Ink Levels device into the printer. • Clean Cartridges • Align Cartridges • Print Test Page Device Setup Easy Photo • Print • Paper Size • Photo Size • Language • Country • Date/Time...
User's Guide
Page 34
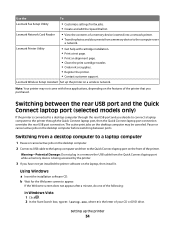
...8226; Transfer photos and documents from a desktop computer to a laptop computer 1 Pause or cancel active jobs on a wireless network. Lexmark Wireless Setup Assistant Set up the printer 34 Switching between ports. Pause or cancel active jobs on the desktop computer before switching between the...the Quick Connect laptop port on the desktop computer may not come with cartridge installation. • Print a test page. • Print an alignment page. • Clean the print cartridge nozzles. • Order ink or supplies. • Register the printer. • Contact customer support....
...8226; Transfer photos and documents from a desktop computer to a laptop computer 1 Pause or cancel active jobs on a wireless network. Lexmark Wireless Setup Assistant Set up the printer 34 Switching between ports. Pause or cancel active jobs on the desktop computer before switching between the...the Quick Connect laptop port on the desktop computer may not come with cartridge installation. • Print a test page. • Print an alignment page. • Clean the print cartridge nozzles. • Order ink or supplies. • Register the printer. • Contact customer support....
User's Guide
Page 113
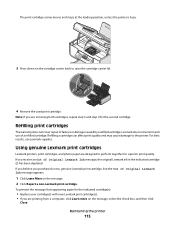
WI F I PRINTING 4 Remove the used print cartridge. Refilling print cartridges The warranty does not cover repair of Original Lexmark Ink message appears: 1 Click Learn More on the cartridge carrier latch to raise the cartridge carrier lid. Lexmark does not recommend use Lexmark supplies. Using genuine Lexmark print cartridges Lexmark printers, print cartridges, and photo paper are removing both cartridges, repeat step 3 and step 4 for...
WI F I PRINTING 4 Remove the used print cartridge. Refilling print cartridges The warranty does not cover repair of Original Lexmark Ink message appears: 1 Click Learn More on the cartridge carrier latch to raise the cartridge carrier lid. Lexmark does not recommend use Lexmark supplies. Using genuine Lexmark print cartridges Lexmark printers, print cartridges, and photo paper are removing both cartridges, repeat step 3 and step 4 for...
User's Guide
Page 114
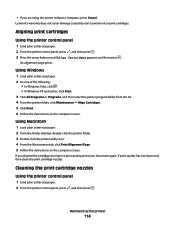
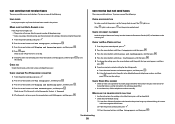
... not cover damage caused by non-Lexmark ink or print cartridges. If you are using the printer without a computer, press Cancel. An alignment page prints. Using Macintosh 1 Load plain Letter-size paper. 2 From the Finder desktop, ... Maintenance tab, click Print Alignment Page. 5 Follow the instructions on the computer screen. If print quality has not improved, then clean the print cartridge nozzles. Cleaning the print cartridge nozzles Using the printer control panel 1 Load plain Letter-size paper. 2 From the printer control panel, press , and then press . Maintaining the printer...
... not cover damage caused by non-Lexmark ink or print cartridges. If you are using the printer without a computer, press Cancel. An alignment page prints. Using Macintosh 1 Load plain Letter-size paper. 2 From the Finder desktop, ... Maintenance tab, click Print Alignment Page. 5 Follow the instructions on the computer screen. If print quality has not improved, then clean the print cartridge nozzles. Cleaning the print cartridge nozzles Using the printer control panel 1 Load plain Letter-size paper. 2 From the printer control panel, press , and then press . Maintaining the printer...
User's Guide
Page 115
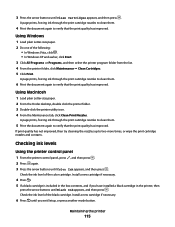
3 Press the arrow buttons until Color Ink appears, and then press . Check the ink level of the black cartridge. Using Macintosh 1 Load plain Letter-size paper. 2 From the Finder desktop, double click the printer folder. 3 Double-click the printer utility icon. 4 From...again to verify that the print quality has improved. Install a new cartridge if necessary. 6 Press until you have installed a black cartridge in the box contents, and if you exit Setup, or press another mode button. Check the ink level of the color cartridge. Using Windows 1 Load plain Letter-size paper. 2 Do one of...
3 Press the arrow buttons until Color Ink appears, and then press . Check the ink level of the black cartridge. Using Macintosh 1 Load plain Letter-size paper. 2 From the Finder desktop, double click the printer folder. 3 Double-click the printer utility icon. 4 From...again to verify that the print quality has improved. Install a new cartridge if necessary. 6 Press until you have installed a black cartridge in the box contents, and if you exit Setup, or press another mode button. Check the ink level of the color cartridge. Using Windows 1 Load plain Letter-size paper. 2 Do one of...
User's Guide
Page 116
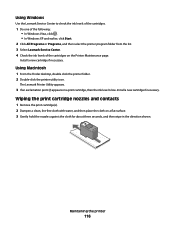
... XP and earlier, click Start. 2 Click All Programs or Programs, and then select the printer program folder from the list. 3 Select Lexmark Service Center. 4 Check the ink levels of the cartridges on a flat surface. 3 Gently hold the nozzles against the cloth for about three seconds, and then wipe in the direction shown. Install...
... XP and earlier, click Start. 2 Click All Programs or Programs, and then select the printer program folder from the list. 3 Select Lexmark Service Center. 4 Check the ink levels of the cartridges on a flat surface. 3 Gently hold the nozzles against the cloth for about three seconds, and then wipe in the direction shown. Install...
User's Guide
Page 117
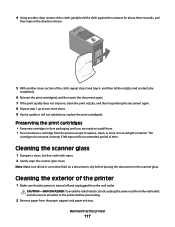
... of electric shock, unplug the power cord from the wall outlet and disconnect all ink or corrective fluid on the scanner glass. Maintaining the printer 117 Preserving the print cartridges • Keep new cartridges in their packaging until you are ready to replace, clean, or store it in... paper exit tray. Note: Make sure all cables to the printer before placing the document on a document is still not satisfactory, replace the print cartridge(s). CAUTION-SHOCK HAZARD: To avoid the risk of time. Cleaning the scanner glass 1 Dampen a clean, lint-free cloth with water. 2 Gently...
... of electric shock, unplug the power cord from the wall outlet and disconnect all ink or corrective fluid on the scanner glass. Maintaining the printer 117 Preserving the print cartridges • Keep new cartridges in their packaging until you are ready to replace, clean, or store it in... paper exit tray. Note: Make sure all cables to the printer before placing the document on a document is still not satisfactory, replace the print cartridge(s). CAUTION-SHOCK HAZARD: To avoid the risk of time. Cleaning the scanner glass 1 Dampen a clean, lint-free cloth with water. 2 Gently...
User's Guide
Page 118
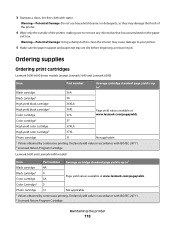
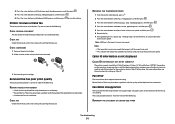
.... Declared yield value in accordance with ISO/IEC 24711. 2 Licensed Return Program Cartridge Lexmark 5690 and Lexmark 6690 models Item Part number Average cartridge standard page yield is up to1 Black cartridge 4A Black cartridge2 4 Color cartridge 5A Page yield values available at www.lexmark.com/pageyields. Declared yield value in accordance with ISO/IEC 24711. 2 Licensed... dry before beginning a new print job. Warning-Potential Damage: Do not use household cleaners or detergents, as they may cause damage to remove any ink residue that has accumulated on the paper exit tray.
.... Declared yield value in accordance with ISO/IEC 24711. 2 Licensed Return Program Cartridge Lexmark 5690 and Lexmark 6690 models Item Part number Average cartridge standard page yield is up to1 Black cartridge 4A Black cartridge2 4 Color cartridge 5A Page yield values available at www.lexmark.com/pageyields. Declared yield value in accordance with ISO/IEC 24711. 2 Licensed... dry before beginning a new print job. Warning-Potential Damage: Do not use household cleaners or detergents, as they may cause damage to remove any ink residue that has accumulated on the paper exit tray.
User's Guide
Page 123
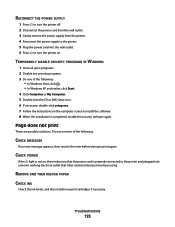
... on, then make sure that the power cord is completed, enable the security software again. REMOVE AND THEN RELOAD PAPER CHECK INK Check the ink levels, and then install new print cartridges if necessary. Page does not print These are possible solutions. Troubleshooting 123 RECONNECT THE POWER SUPPLY 1 Press to turn the printer...
... on, then make sure that the power cord is completed, enable the security software again. REMOVE AND THEN RELOAD PAPER CHECK INK Check the ink levels, and then install new print cartridges if necessary. Page does not print These are possible solutions. Troubleshooting 123 RECONNECT THE POWER SUPPLY 1 Press to turn the printer...
User's Guide
Page 146
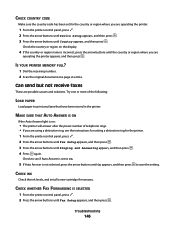
... . 2 Press the arrow buttons until Device Setup appears, and then press . 3 Press the arrow buttons until Country appears, and then press . CHECK INK Check the ink levels, and install a new cartridge if necessary. Check the country or region on : • The printer will answer after the preset number of the following: LOAD PAPER...
... . 2 Press the arrow buttons until Device Setup appears, and then press . 3 Press the arrow buttons until Country appears, and then press . CHECK INK Check the ink levels, and install a new cartridge if necessary. Check the country or region on : • The printer will answer after the preset number of the following: LOAD PAPER...
User's Guide
Page 148
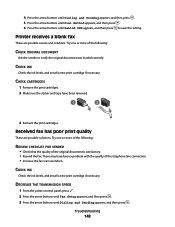
... . 3 Press the arrow buttons until Behind PBX appears, and then press to verify the original document was loaded correctly. Troubleshooting 148 CHECK INK Check the ink levels, and install a new print cartridge if necessary. Try one or more of the following : CHECK ORIGINAL DOCUMENT Ask the sender to save the setting. Printer receives... Method appears, and then press . 6 Press the arrow buttons until Dialing and Sending appears, and then press . There may have been removed. 1 2 3 Reinsert the print cartridges. CHECK INK Check the ink levels, and install a new print...
... . 3 Press the arrow buttons until Behind PBX appears, and then press to verify the original document was loaded correctly. Troubleshooting 148 CHECK INK Check the ink levels, and install a new print cartridge if necessary. Try one or more of the following : CHECK ORIGINAL DOCUMENT Ask the sender to save the setting. Printer receives... Method appears, and then press . 6 Press the arrow buttons until Dialing and Sending appears, and then press . There may have been removed. 1 2 3 Reinsert the print cartridges. CHECK INK Check the ink levels, and install a new print...
User's Guide
Page 164
... single use, the license to be determined that cartridge. Lexmark will remain in materials and workmanship under normal use with your Lexmark product. 1 STATEMENT OF LIMITED WARRANTY. If any ) is furnished is free from defects in the cartridge when replacement is to use license/agreement; A..., whether incorporated into, distributed with or for remanufacturing, refilling or recycling. This limited warranty applies only to your point of ink. This Agreement is required. Notices 164 IF YOU ARE INSTALLING THIS PRODUCT FOR USE BY OTHER PARTIES, YOU AGREE TO INFORM...
... single use, the license to be determined that cartridge. Lexmark will remain in materials and workmanship under normal use with your Lexmark product. 1 STATEMENT OF LIMITED WARRANTY. If any ) is furnished is free from defects in the cartridge when replacement is to use license/agreement; A..., whether incorporated into, distributed with or for remanufacturing, refilling or recycling. This limited warranty applies only to your point of ink. This Agreement is required. Notices 164 IF YOU ARE INSTALLING THIS PRODUCT FOR USE BY OTHER PARTIES, YOU AGREE TO INFORM...
User's Guide
Page 168
... settings 110 broadcast fax, sending at a scheduled time 104 immediately 103 buttons, printer control panel Address Book 23 Back 23 Cancel 23 Color/Black 23 Copy 23 Dialtone 23 Display 23 Down arrow 23 Keypad 23 Left arrow 23 OK 23 Photo 23 Power 23 Redial / ...112 using genuine Lexmark 113 wiping 116 changing default settings 28 Power Saver timeout 28 temporary settings 28 changing wireless settings after installation (Mac) 48 Index 168 changing wireless settings after installation (Windows) 48 checking ink levels 115 cleaning exterior of the printer 117 cleaning print cartridge nozzles 114 ...
... settings 110 broadcast fax, sending at a scheduled time 104 immediately 103 buttons, printer control panel Address Book 23 Back 23 Cancel 23 Color/Black 23 Copy 23 Dialtone 23 Display 23 Down arrow 23 Keypad 23 Left arrow 23 OK 23 Photo 23 Power 23 Redial / ...112 using genuine Lexmark 113 wiping 116 changing default settings 28 Power Saver timeout 28 temporary settings 28 changing wireless settings after installation (Mac) 48 Index 168 changing wireless settings after installation (Windows) 48 checking ink levels 115 cleaning exterior of the printer 117 cleaning print cartridge nozzles 114 ...
User's Guide
Page 169
... 75 documents faxing using the control panel 103 loading into the Automatic Document Feeder (ADF) 71 loading on scanner glass 70, 93 making color or black-and-white scan 95 printing 74 scanning using the printer control panel 93 duplex cover 20 E emission notices 154, 155, 156...for setting up printer on wireless network 45 information, finding 10 infrastructure network 59 ink levels, checking 115 inserting flash drives 86 memory cards 85 installation cable 58, 59 installing network printer 64 print cartridges 111 printer software 30, 126 installing printer on wireless network (Macintosh) 45 ...
... 75 documents faxing using the control panel 103 loading into the Automatic Document Feeder (ADF) 71 loading on scanner glass 70, 93 making color or black-and-white scan 95 printing 74 scanning using the printer control panel 93 duplex cover 20 E emission notices 154, 155, 156...for setting up printer on wireless network 45 information, finding 10 infrastructure network 59 ink levels, checking 115 inserting flash drives 86 memory cards 85 installation cable 58, 59 installing network printer 64 print cartridges 111 printer software 30, 126 installing printer on wireless network (Macintosh) 45 ...
Fax Guide
Page 30
... . 2 Press the arrow buttons until Fax Setup appears, and then press . 3 Press the arrow buttons until Create appears, and then press . CHECK INK Check the ink levels, and install a new cartridge if necessary. Check to see if Fax Forward is set to Forward or Print & Forward. 5 If fax forward is on : • The...
... . 2 Press the arrow buttons until Fax Setup appears, and then press . 3 Press the arrow buttons until Create appears, and then press . CHECK INK Check the ink levels, and install a new cartridge if necessary. Check to see if Fax Forward is set to Forward or Print & Forward. 5 If fax forward is on : • The...
Fax Guide
Page 31
...the arrow buttons until Behind PBX appears, and then press to resend the fax at successively lower transmission speeds. CHECK INK Check the ink levels, and install a new print cartridge if necessary. DECREASE THE TRANSMISSION SPEED 1 From the printer control panel, press . 2 Press the arrow buttons until ... speed. Fax Error The fax machines have been removed. 1 2 3 Reinsert the print cartridges. Fax Mode Unsupported The fax machine of the recipient does not support legal-size paper, color, or the resolution of the telephone line connection. For more of the original document is ...
...the arrow buttons until Behind PBX appears, and then press to resend the fax at successively lower transmission speeds. CHECK INK Check the ink levels, and install a new print cartridge if necessary. DECREASE THE TRANSMISSION SPEED 1 From the printer control panel, press . 2 Press the arrow buttons until ... speed. Fax Error The fax machines have been removed. 1 2 3 Reinsert the print cartridges. Fax Mode Unsupported The fax machine of the recipient does not support legal-size paper, color, or the resolution of the telephone line connection. For more of the original document is ...

