
Setup Guide (2.8 MB)
Page 2
... following paragraph does not apply to any time. Lexmark may be obvious. Any functionally equivalent product, program, or service that the printer emulates the functions corresponding to compatibility are provided with...; Copyright 1999 Lexmark International, Inc. Safety information • If your product is NOT marked with other replacement parts. • Your product uses a laser. In the ... strict global safety standards with diamond design, MarkNet, MarkVision, and Optra are the property of specific Lexmark components. If the form has been removed, comments may use of...
... following paragraph does not apply to any time. Lexmark may be obvious. Any functionally equivalent product, program, or service that the printer emulates the functions corresponding to compatibility are provided with...; Copyright 1999 Lexmark International, Inc. Safety information • If your product is NOT marked with other replacement parts. • Your product uses a laser. In the ... strict global safety standards with diamond design, MarkNet, MarkVision, and Optra are the property of specific Lexmark components. If the form has been removed, comments may use of...

Setup Guide (2.8 MB)
Page 3
Table of contents Preface vii About your printer vii About this book ix Other sources of information xi Step 1: Select a location for your printer 1 Allowing enough space 1 Considering environmental issues 3 Moving the printer 4 Step 2: Unpack the printer 6 Step 3: Set up the optional 2500-sheet drawer 8 Attaching the stabilizing feet 10 Moving the 2500-sheet drawer 13 Step 4: Set up the 500-sheet drawers 15 Step 5: Set up the printer 18 Connecting the printer to one 500-sheet drawer 19 Connecting the printer to two 500-sheet drawers 22 Table of contents iii
Table of contents Preface vii About your printer vii About this book ix Other sources of information xi Step 1: Select a location for your printer 1 Allowing enough space 1 Considering environmental issues 3 Moving the printer 4 Step 2: Unpack the printer 6 Step 3: Set up the optional 2500-sheet drawer 8 Attaching the stabilizing feet 10 Moving the 2500-sheet drawer 13 Step 4: Set up the 500-sheet drawers 15 Step 5: Set up the printer 18 Connecting the printer to one 500-sheet drawer 19 Connecting the printer to two 500-sheet drawers 22 Table of contents iii

Setup Guide (2.8 MB)
Page 4
... operator panel overlay 31 Installing the toner cartridge 32 Installing the photoconductor cartridge 35 Step 6: Install memory and option cards 45 Accessing the printer system board 46 Installing memory cards 48 Installing option cards 52 Installing a hard disk 55 Reinstalling the system board access cover 59 Step ... Attaching the set pin and magnetic bracket 76 Attaching the guide rail 77 Positioning the transport unit 81 Aligning the mailbox and the printer 85 Attaching the output bins 95 Plugging in the mailbox 97 Step 9: Set up the optional finisher 100 Attaching the set pin ...
... operator panel overlay 31 Installing the toner cartridge 32 Installing the photoconductor cartridge 35 Step 6: Install memory and option cards 45 Accessing the printer system board 46 Installing memory cards 48 Installing option cards 52 Installing a hard disk 55 Reinstalling the system board access cover 59 Step ... Attaching the set pin and magnetic bracket 76 Attaching the guide rail 77 Positioning the transport unit 81 Aligning the mailbox and the printer 85 Attaching the output bins 95 Plugging in the mailbox 97 Step 9: Set up the optional finisher 100 Attaching the set pin ...
Setup Guide (2.8 MB)
Page 7
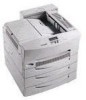
... Side door (Door C) Jam access door (Door D) Jam access door (Door E) Three printer models are included in this manual. Instructions for installing these options are available: • The Optra W810 printer, delivering 600 dots per inch (dpi) resolution at the left, unless it's necessary to 35... map Operator panel On/off button Tray 1 Tray 2 Tray 3 About your printer may look different. Depending on the following page illustrates the Optra W810 and all the available paper handling options. The W810 printer comes with 16MB of standard memory. • The W810n, a network model,...
... Side door (Door C) Jam access door (Door D) Jam access door (Door E) Three printer models are included in this manual. Instructions for installing these options are available: • The Optra W810 printer, delivering 600 dots per inch (dpi) resolution at the left, unless it's necessary to 35... map Operator panel On/off button Tray 1 Tray 2 Tray 3 About your printer may look different. Depending on the following page illustrates the Optra W810 and all the available paper handling options. The W810 printer comes with 16MB of standard memory. • The W810n, a network model,...

Setup Guide (2.8 MB)
Page 8
... finisher or the mailbox option may be attached to the base printer. 10-bin mailbox option Provides up to the base printer. Either this drawer or the 2500-sheet optional drawer may be attached to the printer's output capabilities. Support shelf Aligns the transport unit with one 250.... Either this drawer or the 500-sheet optional drawer may be attached to ten output bins for organizing printed documents. Optra W810 printer Comes standard with the printer and the mailbox or finisher. Either the mailbox or the finisher option may be attached to the mailbox or finisher. ...
... finisher or the mailbox option may be attached to the base printer. 10-bin mailbox option Provides up to the base printer. Either this drawer or the 2500-sheet optional drawer may be attached to the printer's output capabilities. Support shelf Aligns the transport unit with one 250.... Either this drawer or the 500-sheet optional drawer may be attached to ten output bins for organizing printed documents. Optra W810 printer Comes standard with the printer and the mailbox or finisher. Either the mailbox or the finisher option may be attached to the mailbox or finisher. ...

Setup Guide (2.8 MB)
Page 9
... type: Press Go after changing a menu setting. • Messages and menu items that appear on the printer operator panel display are printed in a boldface type: If Replace Toner appears on your new Optra W810, Optra W810n, or Optra W810dn printer. Conventions It may help you to recognize the conventions we've used in this book This...
... type: Press Go after changing a menu setting. • Messages and menu items that appear on the printer operator panel display are printed in a boldface type: If Replace Toner appears on your new Optra W810, Optra W810n, or Optra W810dn printer. Conventions It may help you to recognize the conventions we've used in this book This...

Setup Guide (2.8 MB)
Page 10
thing that might damage your printer hardware or software. Go to do next? A caution identifies some - What do I do next. A warning identifies some - Warning! thing that tell you what to page ... Task 1 Read about other sources of information. 2 Select a location for easy reference. • Arrows in the left column for the printer. 3 Unpack the printer. CAUTION! xi 1 6 x Preface Note: A note provides information you harm. • Notes, warnings, and cautions appear in the left column identify text or tables that might cause you may find useful.
thing that might damage your printer hardware or software. Go to do next? A caution identifies some - What do I do next. A warning identifies some - Warning! thing that tell you what to page ... Task 1 Read about other sources of information. 2 Select a location for easy reference. • Arrows in the left column for the printer. 3 Unpack the printer. CAUTION! xi 1 6 x Preface Note: A note provides information you harm. • Notes, warnings, and cautions appear in the left column identify text or tables that might cause you may find useful.

Setup Guide (2.8 MB)
Page 11
... takes you to the Technical Reference, which includes details about printer languages and commands, interface specifications, and memory management. • Special Media takes you to information about Lexmark printers. You can store the User's Reference in the convenient printer pocket that shipped with your printer. When you have completed setup and find you to documents...
... takes you to the Technical Reference, which includes details about printer languages and commands, interface specifications, and memory management. • Special Media takes you to information about Lexmark printers. You can store the User's Reference in the convenient printer pocket that shipped with your printer. When you have completed setup and find you to documents...

Setup Guide (2.8 MB)
Page 12
... information about configuring MarkNet internal print servers. Go to Step 1: "Select a location for updated printer drivers and utilities, and documentation including the Complete Printer Reference: http://www.lexmark.com Complete Printer Reference The Complete Printer Reference on page 1 to change printer defaults, selecting appropriate paper and other media, and managing memory. • MarkNet Print Servers takes...
... information about configuring MarkNet internal print servers. Go to Step 1: "Select a location for updated printer drivers and utilities, and documentation including the Complete Printer Reference: http://www.lexmark.com Complete Printer Reference The Complete Printer Reference on page 1 to change printer defaults, selecting appropriate paper and other media, and managing memory. • MarkNet Print Servers takes...
Setup Guide (2.8 MB)
Page 13
...; The type of environment necessary for optimum printer performance Allowing enough space When choosing a place to set up your Optra W810, be sure to ensuring that the printer provides you with the quality of space your printer and any optional output bins. Select a location for your new Lexmark Optra™ W810 is vital to allow enough space for...
...; The type of environment necessary for optimum printer performance Allowing enough space When choosing a place to set up your Optra W810, be sure to ensuring that the printer provides you with the quality of space your printer and any optional output bins. Select a location for your new Lexmark Optra™ W810 is vital to allow enough space for...

Setup Guide (2.8 MB)
Page 14
..., and duplex options 1200 mm (47.25") When selecting a location for an Optra W810 configured with a mailbox, 2500-sheet drawer, and duplex options, make sure you install a 500-sheet drawer option and supporting furniture rather than a 2500-sheet drawer, your printer will require the same amount of space as shown in the figure... figure. 900 mm (35.5") 1840 mm (72.5") 400 mm (15.75") 300 mm (11.5") 600 mm (23.5") 1530 mm (60.25") 2 Select a location for your Optra W810, make sure you have at left. For a base printer 850 mm (33.5") When selecting a location for your...
..., and duplex options 1200 mm (47.25") When selecting a location for an Optra W810 configured with a mailbox, 2500-sheet drawer, and duplex options, make sure you install a 500-sheet drawer option and supporting furniture rather than a 2500-sheet drawer, your printer will require the same amount of space as shown in the figure... figure. 900 mm (35.5") 1840 mm (72.5") 400 mm (15.75") 300 mm (11.5") 600 mm (23.5") 1530 mm (60.25") 2 Select a location for your Optra W810, make sure you have at left. For a base printer 850 mm (33.5") When selecting a location for your...

Setup Guide (2.8 MB)
Page 15
... direct sunlight Select a location for an Optra W810 configured with a 2500-sheet finisher, 2500-sheet drawer, and duplex options, make sure the location you will be subjected to strong vibration Note: Adequate ventilation is espe- cially important if you select is: • A firm, level surface where the printer won't be printing a high volume...
... direct sunlight Select a location for an Optra W810 configured with a 2500-sheet finisher, 2500-sheet drawer, and duplex options, make sure the location you will be subjected to strong vibration Note: Adequate ventilation is espe- cially important if you select is: • A firm, level surface where the printer won't be printing a high volume...

Setup Guide (2.8 MB)
Page 16
... each of the four corners of the drawer. 4 Select a location for your printer If you need to a new location. Moving the printer Front view At some point in the future you may decide to move the printer to move the 2500-sheet drawer sometime after setup, you can roll the drawer... a short distance. Rear view • If you need to use the handles located at left, when you lift the printer. • Remove the photoconductor cartridge before moving the printer. Protect the cartridge from light by covering it with all the standard drawers), two people are required to plug the...
... each of the four corners of the drawer. 4 Select a location for your printer If you need to a new location. Moving the printer Front view At some point in the future you may decide to move the printer to move the 2500-sheet drawer sometime after setup, you can roll the drawer... a short distance. Rear view • If you need to use the handles located at left, when you lift the printer. • Remove the photoconductor cartridge before moving the printer. Protect the cartridge from light by covering it with all the standard drawers), two people are required to plug the...

Setup Guide (2.8 MB)
Page 17
Continue with Step 2: "Unpack the printer" on page 6. Select a location for your printer 5
Continue with Step 2: "Unpack the printer" on page 6. Select a location for your printer 5

Setup Guide (2.8 MB)
Page 18
..., refer to the registration card for the designated Lexmark support phone number for your country. 6 Unpack the printer Now you're ready to unpack the printer and prepare to perform many of the procedures outlined in box) Printer Printer pocket You've chosen an appropriate location for your Optra W810. Setup Guide - Operator panel overlay (non-English...
..., refer to the registration card for the designated Lexmark support phone number for your country. 6 Unpack the printer Now you're ready to unpack the printer and prepare to perform many of the procedures outlined in box) Printer Printer pocket You've chosen an appropriate location for your Optra W810. Setup Guide - Operator panel overlay (non-English...

Setup Guide (2.8 MB)
Page 19
Task 1 Set up the optional 2500-sheet drawer. 2 Set up the 500-sheet drawer (standard configuration). lowing table that identifies something you need to page ... 8 15 Unpack the printer 7 Then go to do next? Go to repack the printer. 2 Choose the first task in case you have left to the page listed. What do I do . Save the carton and packing materials in the fol-
Task 1 Set up the optional 2500-sheet drawer. 2 Set up the 500-sheet drawer (standard configuration). lowing table that identifies something you need to page ... 8 15 Unpack the printer 7 Then go to do next? Go to repack the printer. 2 Choose the first task in case you have left to the page listed. What do I do . Save the carton and packing materials in the fol-

Setup Guide (2.8 MB)
Page 20
... the optional 2500-sheet drawer Stabilizing kit: -- 4 stabilizing feet -- 2 stabilizing foot covers -- Stabilizing feet Locking clips and screws Stabilizing kit screws Foot covers Drawer The Optra W810 printer supports an optional drawer that can hold 2500 sheets of paper commonly used in case you need to repack the drawer. 2 Make sure you are... installing an optional 2500-sheet drawer sometime after setting up the 2500-sheet drawer: 1 Remove the drawer from its packing materials. To set up the printer, turn the printer off and unplug the power cord before continuing.
... the optional 2500-sheet drawer Stabilizing kit: -- 4 stabilizing feet -- 2 stabilizing foot covers -- Stabilizing feet Locking clips and screws Stabilizing kit screws Foot covers Drawer The Optra W810 printer supports an optional drawer that can hold 2500 sheets of paper commonly used in case you need to repack the drawer. 2 Make sure you are... installing an optional 2500-sheet drawer sometime after setting up the 2500-sheet drawer: 1 Remove the drawer from its packing materials. To set up the printer, turn the printer off and unplug the power cord before continuing.

Setup Guide (2.8 MB)
Page 22
ing foot. 10 Set up the optional 2500-sheet drawer Attaching the stabilizing feet Complete the following instructions to install the kit that stabilizes the 2500-sheet drawer. 1 Roll the drawer to the location you have chosen for the printer. 2 Pull the tray open. 3 Place a stabilizing foot on the floor and align it with the front of the drawer, as shown. 4 Use a short screw to attach the stabilizing foot to the drawer. 5 Press a cover onto the stabiliz-
ing foot. 10 Set up the optional 2500-sheet drawer Attaching the stabilizing feet Complete the following instructions to install the kit that stabilizes the 2500-sheet drawer. 1 Roll the drawer to the location you have chosen for the printer. 2 Pull the tray open. 3 Place a stabilizing foot on the floor and align it with the front of the drawer, as shown. 4 Use a short screw to attach the stabilizing foot to the drawer. 5 Press a cover onto the stabiliz-

Setup Guide (2.8 MB)
Page 27
...Optra W810 printer ships with a second 500-sheet drawer that supplements the 250-sheet multipurpose tray and the 500-sheet tray that are the same for all 500-sheet drawers. 1 Remove the drawer from its packing materials. The setup instructions in case you need to the Complete Printer Reference on the Lexmark...plain paper. Refer to repack the drawer. 2 Make sure you are installing an optional 500-sheet drawer sometime after setting up the printer, turn the printer off and unplug the power cord before continuing. You may have the follow- Paper size label Set up the 500-sheet drawers ...
...Optra W810 printer ships with a second 500-sheet drawer that supplements the 250-sheet multipurpose tray and the 500-sheet tray that are the same for all 500-sheet drawers. 1 Remove the drawer from its packing materials. The setup instructions in case you need to the Complete Printer Reference on the Lexmark...plain paper. Refer to repack the drawer. 2 Make sure you are installing an optional 500-sheet drawer sometime after setting up the printer, turn the printer off and unplug the power cord before continuing. You may have the follow- Paper size label Set up the 500-sheet drawers ...

Setup Guide (2.8 MB)
Page 28
... 4. Otherwise, skip to Step 5: "Set up the 500-sheet drawers If any items are missing or damaged, refer to the registration card for the designated Lexmark support phone number for your country. 3 Place the drawer in the location you 've purchased an optional fourth drawer, place the 500-sheet drawer on... on the top of the optional drawer. If you're attaching the 500-sheet drawer to an optional 2500-sheet drawer 16 Set up the printer" on page 18. 4 If you 've chosen for your...
... 4. Otherwise, skip to Step 5: "Set up the 500-sheet drawers If any items are missing or damaged, refer to the registration card for the designated Lexmark support phone number for your country. 3 Place the drawer in the location you 've purchased an optional fourth drawer, place the 500-sheet drawer on... on the top of the optional drawer. If you're attaching the 500-sheet drawer to an optional 2500-sheet drawer 16 Set up the printer" on page 18. 4 If you 've chosen for your...

