Windows XP Professional x64 Edition Recovery and Conversion Kit - English
Page 5
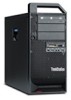
... Sequence [Primary] menu, do the following to select Startup from the startup sequence and press the Plus (+) key repeatedly until it to use RAID (Redundant Array of DVD device is already listed as the first boot device. When the save and exit the Setup Utility. v If your ... left and right arrow keys to select the DVD device that internal DVD drives are listed as an excluded device, select it is configured before starting the product recovery or conversion process. To configure RAID, do one time to save and exit message displays, select Yes and then press Enter.
... Sequence [Primary] menu, do the following to select Startup from the startup sequence and press the Plus (+) key repeatedly until it to use RAID (Redundant Array of DVD device is already listed as the first boot device. When the save and exit the Setup Utility. v If your ... left and right arrow keys to select the DVD device that internal DVD drives are listed as an excluded device, select it is configured before starting the product recovery or conversion process. To configure RAID, do one time to save and exit message displays, select Yes and then press Enter.

Windows XP Professional x64 Edition Recovery and Conversion Kit - English
Page 6
...then press Ctrl+I accept these terms and conditions and click Next. b. Select I (for S20 with SATA drives) or Ctrl+M (for D20 or S20 with SAS drives). The recovery process begins. When the recovery or conversion procedure is complete, save the changes and exit the ...wait approximately five seconds, turn on the screen to create a RAID volume and then follow the prompts. b. When prompted to restore the default setup values. Step 9. If you can restore the original startup sequence. After the configuration is complete, the Windows Setup wizard starts. Select a language...
...then press Ctrl+I accept these terms and conditions and click Next. b. Select I (for S20 with SATA drives) or Ctrl+M (for D20 or S20 with SAS drives). The recovery process begins. When the recovery or conversion procedure is complete, save the changes and exit the ...wait approximately five seconds, turn on the screen to create a RAID volume and then follow the prompts. b. When prompted to restore the default setup values. Step 9. If you can restore the original startup sequence. After the configuration is complete, the Windows Setup wizard starts. Select a language...
Hardware Maintenance Manual
Page 5
... diagnostics from the disc . . . . . 36 Running diagnostics from the Setup Utility program . . . . . 44 Chapter 7. General information . . . . 29 Lenovo Welcome Center 29 Lenovo Solution Center 29 SimpleTap 29 Additional information resources 29 Specifications 29 Chapter 4. Installing hard disk drives and configuring RAID (types: 4155, 4158, 4218 49 Installing SATA or SAS hard disk drives and...
... diagnostics from the disc . . . . . 36 Running diagnostics from the Setup Utility program . . . . . 44 Chapter 7. General information . . . . 29 Lenovo Welcome Center 29 Lenovo Solution Center 29 SimpleTap 29 Additional information resources 29 Specifications 29 Chapter 4. Installing hard disk drives and configuring RAID (types: 4155, 4158, 4218 49 Installing SATA or SAS hard disk drives and...
Hardware Maintenance Manual
Page 53
... exit. © Copyright Lenovo 2008, 2012 45 Note: The information about the required number of SATA hard disk drives for the supported level of RAID and SATA RAID configuration. Two hard disk drives minimum - Installing hard disk drives and configuring RAID (types 4105, 4157, 4217) This chapter contains information about configuring RAID in the ThinkStation Hardware Installation and Replacement...
... exit. © Copyright Lenovo 2008, 2012 45 Note: The information about the required number of SATA hard disk drives for the supported level of RAID and SATA RAID configuration. Two hard disk drives minimum - Installing hard disk drives and configuring RAID (types 4105, 4157, 4217) This chapter contains information about configuring RAID in the ThinkStation Hardware Installation and Replacement...

Hardware Maintenance Manual
Page 54
..., and then press Enter to delete additional RAID volumes. • See "Creating RAID volumes" on page 46 for the supported level of RAID below: 46 ThinkStation Hardware Maintenance Manual Deleting a RAID volume will reset the hard disk drives to delete additional RAID volumes. - a. Installing SAS hard disk ...page 46 for the supported level of RAID and SAS RAID configuration. Use the arrow keys and the space key to mark individual physical hard disk drives to create additional RAID volumes, or select Exit and press Enter. 10. See "Creating RAID volumes" on page 46 to be ...
..., and then press Enter to delete additional RAID volumes. • See "Creating RAID volumes" on page 46 for the supported level of RAID below: 46 ThinkStation Hardware Maintenance Manual Deleting a RAID volume will reset the hard disk drives to delete additional RAID volumes. - a. Installing SAS hard disk ...page 46 for the supported level of RAID and SAS RAID configuration. Use the arrow keys and the space key to mark individual physical hard disk drives to create additional RAID volumes, or select Exit and press Enter. 10. See "Creating RAID volumes" on page 46 to be ...

Hardware Maintenance Manual
Page 55
... section describes how to enter the Marvell BIOS Setup to complete the array creation and RAID configuration. Turn on your computer and press Ctrl+M when prompted to "Replacing an adapter card" in the ThinkStation Hardware Installation and Replacement Guide. Stripe error correction information - For installing or replacing a Marvell SAS adapter card, refer to...
... section describes how to enter the Marvell BIOS Setup to complete the array creation and RAID configuration. Turn on your computer and press Ctrl+M when prompted to "Replacing an adapter card" in the ThinkStation Hardware Installation and Replacement Guide. Stripe error correction information - For installing or replacing a Marvell SAS adapter card, refer to...
Hardware Maintenance Manual
Page 56
... and press Ctrl+M when prompted to enter the Marvell BIOS Setup. 2. Configuring the Marvell BIOS Setup to delete an optional hot spare hard disk drive To configure the Marvell BIOS Setup to complete the deletion. 48 ThinkStation Hardware Maintenance Manual From the RAID Config menu, select Delete array. 4. Press Y when prompted to delete an...
... and press Ctrl+M when prompted to enter the Marvell BIOS Setup. 2. Configuring the Marvell BIOS Setup to delete an optional hot spare hard disk drive To configure the Marvell BIOS Setup to complete the deletion. 48 ThinkStation Hardware Maintenance Manual From the RAID Config menu, select Delete array. 4. Press Y when prompted to delete an...
Hardware Maintenance Manual
Page 57
...drives minimum - Installing hard disk drives and configuring RAID (types: 4155, 4158, 4218) This chapter contains information about configuring RAID in the ThinkStation Hardware Installation and Replacement Guide. However, be...RAID below: • RAID Level 0 - Note: The information about installing hard disk drives and configuring Redundant Array of RAID 0 and RAID 1 - Striped disk array - Mirrored disk array - Entering the Marvell BIOS Setup to configure SATA or SAS RAID This section describes how to enter the Marvell BIOS Setup to configure SATA/SAS RAID. © Copyright Lenovo...
...drives minimum - Installing hard disk drives and configuring RAID (types: 4155, 4158, 4218) This chapter contains information about configuring RAID in the ThinkStation Hardware Installation and Replacement Guide. However, be...RAID below: • RAID Level 0 - Note: The information about installing hard disk drives and configuring Redundant Array of RAID 0 and RAID 1 - Striped disk array - Mirrored disk array - Entering the Marvell BIOS Setup to configure SATA or SAS RAID This section describes how to enter the Marvell BIOS Setup to configure SATA/SAS RAID. © Copyright Lenovo...

Hardware Maintenance Manual
Page 58
...hot spare hard disk drive: 1. When prompted, press Y to select RAID Config and press Enter. On the Marvell BIOS Setup screen, use the arrow keys to complete the array creation and RAID configuration. Configuring the Marvell BIOS Setup to set an optional hot spare hard disk ...drive To configure the Marvell BIOS Setup to set an optional hot spare hard disk drive: 1. This utility assumes that you want to enter the Marvell BIOS Setup. 50 ThinkStation Hardware Maintenance...
...hot spare hard disk drive: 1. When prompted, press Y to select RAID Config and press Enter. On the Marvell BIOS Setup screen, use the arrow keys to complete the array creation and RAID configuration. Configuring the Marvell BIOS Setup to set an optional hot spare hard disk ...drive To configure the Marvell BIOS Setup to set an optional hot spare hard disk drive: 1. This utility assumes that you want to enter the Marvell BIOS Setup. 50 ThinkStation Hardware Maintenance...

Hardware Maintenance Manual
Page 59
The RAID Config menu opens. 3. Press Y when prompted to select RAID Config and press Enter. From the RAID Config menu, select Delete array. 4. 2. Installing hard disk drives and configuring RAID (types: 4155, 4158, 4218) 51 On the Marvell BIOS Setup screen, use the arrow keys to complete the deletion. Chapter 8. Use the arrow keys and the Enter key to select the array you want to select Next and press Enter. 6. Use the arrow keys to delete from the list. 5.
The RAID Config menu opens. 3. Press Y when prompted to select RAID Config and press Enter. From the RAID Config menu, select Delete array. 4. 2. Installing hard disk drives and configuring RAID (types: 4155, 4158, 4218) 51 On the Marvell BIOS Setup screen, use the arrow keys to complete the deletion. Chapter 8. Use the arrow keys and the Enter key to select the array you want to select Next and press Enter. 6. Use the arrow keys to delete from the list. 5.

(English) User guide
Page 3
...configuring RAID 21 Installing SATA or SAS hard disk drives and configuring RAID 21 Installing SATA or SAS hard disk drives . . . 21 Entering the Marvell BIOS Setup to configure SATA or SAS RAID 21 Configuring the Marvell BIOS Setup to enable SATA or SAS RAID 0, 1, 5, or 10 functionality . 22 Configuring...from a POST/BIOS update failure . . 26 Chapter 8. Arranging your Windows operating system 15 Software provided by Lenovo 15 Lenovo Solution Center 15 SimpleTap 16 Lenovo ThinkVantage Toolbox 16 PC-Doctor for DOS 32 Cleaning an optical mouse 32 Chapter 9. Software overview. . . ...
...configuring RAID 21 Installing SATA or SAS hard disk drives and configuring RAID 21 Installing SATA or SAS hard disk drives . . . 21 Entering the Marvell BIOS Setup to configure SATA or SAS RAID 21 Configuring the Marvell BIOS Setup to enable SATA or SAS RAID 0, 1, 5, or 10 functionality . 22 Configuring...from a POST/BIOS update failure . . 26 Chapter 8. Arranging your Windows operating system 15 Software provided by Lenovo 15 Lenovo Solution Center 15 SimpleTap 16 Lenovo ThinkVantage Toolbox 16 PC-Doctor for DOS 32 Cleaning an optical mouse 32 Chapter 9. Software overview. . . ...
(English) User guide
Page 27
...high performance - Entering the Marvell BIOS Setup to configure SATA or SAS RAID This section describes how to enter the Marvell BIOS Setup to the installation procedure in "Replacing a hard disk drive" in the ThinkStation Hardware Installation and Replacement Guide. Fault tolerance To... install a new SATA or SAS hard disk drive, refer to configure a SATA or SAS RAID. 1. Press Ctrl+M when prompted to enter the Marvell BIOS Setup to configure SATA/SAS RAID. © Copyright Lenovo 2009, 2012 21...
...high performance - Entering the Marvell BIOS Setup to configure SATA or SAS RAID This section describes how to enter the Marvell BIOS Setup to the installation procedure in "Replacing a hard disk drive" in the ThinkStation Hardware Installation and Replacement Guide. Fault tolerance To... install a new SATA or SAS hard disk drive, refer to configure a SATA or SAS RAID. 1. Press Ctrl+M when prompted to enter the Marvell BIOS Setup to configure SATA/SAS RAID. © Copyright Lenovo 2009, 2012 21...
(English) User guide
Page 28
...use the Marvell BIOS Setup configuration utility as the SATA/SAS configuration utility. Select your computer and press Ctrl+M when prompted to enter the Marvell BIOS Setup. 22 ThinkStation User Guide From the Stripe size menu, you want to delete. 5. From the RAID Config menu, select Spare ...Management. 4. From the RAID Config menu, select Spare Management. 4. Type a proper array name in the array. 5. Configuring the Marvell BIOS Setup to ...
...use the Marvell BIOS Setup configuration utility as the SATA/SAS configuration utility. Select your computer and press Ctrl+M when prompted to enter the Marvell BIOS Setup. 22 ThinkStation User Guide From the Stripe size menu, you want to delete. 5. From the RAID Config menu, select Spare ...Management. 4. From the RAID Config menu, select Spare Management. 4. Type a proper array name in the array. 5. Configuring the Marvell BIOS Setup to ...

(English) User guide
Page 29
Press Y when prompted to select Next and press Enter. 6. From the RAID Config menu, select Delete array. 4. Use the arrow keys to complete the deletion. The RAID Config menu opens. 3. Installing hard disk drives and configuring RAID 23 2. On the Marvell BIOS Setup screen, use the arrow keys to delete from the list. 5. Chapter 6. Use the arrow keys and the Enter key to select the array you want to select RAID Config and press Enter.
Press Y when prompted to select Next and press Enter. 6. From the RAID Config menu, select Delete array. 4. Use the arrow keys to complete the deletion. The RAID Config menu opens. 3. Installing hard disk drives and configuring RAID 23 2. On the Marvell BIOS Setup screen, use the arrow keys to delete from the list. 5. Chapter 6. Use the arrow keys and the Enter key to select the array you want to select RAID Config and press Enter.

(Arabic) User guide
Page 29
... SAS Marvell SAS SAS RAID Marvell SAS ThinkStation SAS Marvell SAS Ctrl+M Marvell BIOS Setup SAS RAID Marvell BIOS Setup SAS RAID 0 1 5 SAS RAID 0 1 5 Marvell BIOS Setup configuration utility SAS Ctrl+M Marvell BIOS Setup Marvell BIOS Setup RAID Config Enter RAID Config RAID Config Enter Enter RAID Enter RAID SAS RAID RAID 0 RAID 1 RAID 5 Enter...
... SAS Marvell SAS SAS RAID Marvell SAS ThinkStation SAS Marvell SAS Ctrl+M Marvell BIOS Setup SAS RAID Marvell BIOS Setup SAS RAID 0 1 5 SAS RAID 0 1 5 Marvell BIOS Setup configuration utility SAS Ctrl+M Marvell BIOS Setup Marvell BIOS Setup RAID Config Enter RAID Config RAID Config Enter Enter RAID Enter RAID SAS RAID RAID 0 RAID 1 RAID 5 Enter...
(Japanese) User guide
Page 30
... Setup RAID Config Enter RAID Config 3. 『RAID Config Spare Management 24 ThinkStation Marvell BIOS Setup RAID Config Enter RAID Config 3. 『RAID Config Spare Management 4 5 Next Enter 6 Y Marvell BIOS Setup の構成 Marvell BIOS Setup 1 Ctrl+M Marvell BIOS Setup 2. SATA/SAS RAID 0、1、5 10 Marvell BIOS Setup の構成 SATA/SAS RAID SATA/SAS Configuration Utility...
... Setup RAID Config Enter RAID Config 3. 『RAID Config Spare Management 24 ThinkStation Marvell BIOS Setup RAID Config Enter RAID Config 3. 『RAID Config Spare Management 4 5 Next Enter 6 Y Marvell BIOS Setup の構成 Marvell BIOS Setup 1 Ctrl+M Marvell BIOS Setup 2. SATA/SAS RAID 0、1、5 10 Marvell BIOS Setup の構成 SATA/SAS RAID SATA/SAS Configuration Utility...


