(English) Access Connections Profile Deployment guide
Page 39
... following package: Access Connections version 3.82 with the Lenovo ThinkPad /L3000 system BIOS. The default directory where modules are extracted is used to complete an integrated package installation for your system: http://www.lenovo.com/pc/support/site.wss/document.do ? Using a lower layer system BIOS interface, Access Connections controls wireless devices and system dependent...
... following package: Access Connections version 3.82 with the Lenovo ThinkPad /L3000 system BIOS. The default directory where modules are extracted is used to complete an integrated package installation for your system: http://www.lenovo.com/pc/support/site.wss/document.do ? Using a lower layer system BIOS interface, Access Connections controls wireless devices and system dependent...

(English) Access Connections Profile Deployment guide
Page 40
v IBMPM is the folder that contains the Power Management driver files. v WLLANATH is the folder that contains the ThinkPad Wireless LAN Adapter Software (11a/b, 11b/g, and 11a/b/g) setup. v LSID is the driver that contains the Intel Pro/Wireless...Hotkey Utilities package v Wireless LAN drivers such as WLANCX2, WLLANATH, or WLLANINT. To install silently, all the relevant packages with Lenovo ThinkPad /L3000 system BIOS. v OSD is ready for customization to prepare for Access Connections to complete the installation type: \setup.exe /S /H /R:0 d. Using a lower layer...
v IBMPM is the folder that contains the Power Management driver files. v WLLANATH is the folder that contains the ThinkPad Wireless LAN Adapter Software (11a/b, 11b/g, and 11a/b/g) setup. v LSID is the driver that contains the Intel Pro/Wireless...Hotkey Utilities package v Wireless LAN drivers such as WLANCX2, WLLANATH, or WLLANINT. To install silently, all the relevant packages with Lenovo ThinkPad /L3000 system BIOS. v OSD is ready for customization to prepare for Access Connections to complete the installation type: \setup.exe /S /H /R:0 d. Using a lower layer...
(Japanese) Power Manager Deployment Guide
Page 9
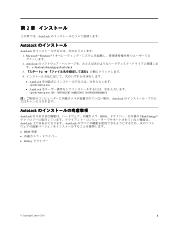
Windows XP、Windows Vista Windows 7 © Copyright Lenovo 2008, 2011 3 Power Manager C:¥Drivers¥Vista¥PWRMGRV 3 Windows XP cmd Windows Vista または Windows 7 cmd 4 Power ... Web http://msdn.microsoft.com/en-us/netframework/default.aspx 注:Windows 2000 Power Manager Power Manager 1.48 Power Manager BIOS ThinkVantage TVT Power Manager Power Manager • BIOS 更新 • ThinkPad Hotkey Access Connections™ Power Manager Power Manager 1. Windows XP、Windows Vista Windows 7 2.
Windows XP、Windows Vista Windows 7 © Copyright Lenovo 2008, 2011 3 Power Manager C:¥Drivers¥Vista¥PWRMGRV 3 Windows XP cmd Windows Vista または Windows 7 cmd 4 Power ... Web http://msdn.microsoft.com/en-us/netframework/default.aspx 注:Windows 2000 Power Manager Power Manager 1.48 Power Manager BIOS ThinkVantage TVT Power Manager Power Manager • BIOS 更新 • ThinkPad Hotkey Access Connections™ Power Manager Power Manager 1. Windows XP、Windows Vista Windows 7 2.
(Simplified Chinese) Power Manager Deployment Guide
Page 9
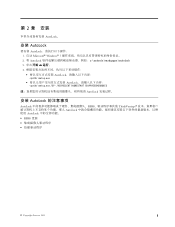
...msdn.microsoft.com/en-us/netframework/default.aspx Windows 2000 Power Manager Power Manager V1.48。 Power Manager BIOS ThinkVantage 技术(TVT Power Manager Power Manager BIOS 更新 • ThinkPad Power Management Driver Access Connections™ 安装 Power Manager Power Manager 1. 启动 Windows ... 2. 双击 Power Manager 3 4 3 5 ThinkVantage Power Manager 6 注:Power Manager Windows XP Windows Vista 和 Windows 7 Power Manager Power Manager © Copyright Lenovo 2008, 2011 3
...msdn.microsoft.com/en-us/netframework/default.aspx Windows 2000 Power Manager Power Manager V1.48。 Power Manager BIOS ThinkVantage 技术(TVT Power Manager Power Manager BIOS 更新 • ThinkPad Power Management Driver Access Connections™ 安装 Power Manager Power Manager 1. 启动 Windows ... 2. 双击 Power Manager 3 4 3 5 ThinkVantage Power Manager 6 注:Power Manager Windows XP Windows Vista 和 Windows 7 Power Manager Power Manager © Copyright Lenovo 2008, 2011 3
(English) Power Manager Deployment Guide
Page 9
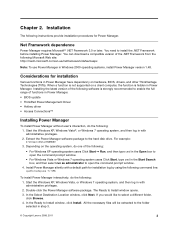
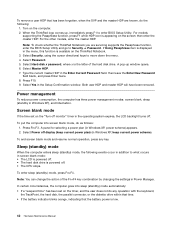
... : 1. Start the Windows XP, Windows Vista®, or Windows 7 operating system, and then log in Power Manager. • BIOS update • ThinkPad Power Management Driver • Hotkey driver • Access Connections™ Installing Power Manager To install Power Manager without user's interaction, do...to Install window opens. 3. Double-click the Power Manager software package. When a function is hidden in step 3. © Copyright Lenovo 2008, 2011 3 Considerations for Power Manager. If you would like to Install window, click Install. In the Select Destination Location ...
... : 1. Start the Windows XP, Windows Vista®, or Windows 7 operating system, and then log in Power Manager. • BIOS update • ThinkPad Power Management Driver • Hotkey driver • Access Connections™ Installing Power Manager To install Power Manager without user's interaction, do...to Install window opens. 3. Double-click the Power Manager software package. When a function is hidden in step 3. © Copyright Lenovo 2008, 2011 3 Considerations for Power Manager. If you would like to Install window, click Install. In the Select Destination Location ...
(Simplified Chinese) Lenovo AutoLock Deployment Guide
Page 10
第 2 章 安装 AutoLock。 安装 AutoLock 要安装 AutoLock 1. 启动 Microsoft® Windows® 7 2. 将 AutoLock c:\swtools\readyapps\autolock 3 4 AutoLock path>\setup.exe AutoLock path>\setup.exe /SP- /VERYSILENT /NORESTART /SUPPRESSMSGBOXES AutoLock 安装 AutoLock AutoLock BIOS ThinkVantage AutoLock AutoLock BIOS © Copyright Lenovo 2011 3
第 2 章 安装 AutoLock。 安装 AutoLock 要安装 AutoLock 1. 启动 Microsoft® Windows® 7 2. 将 AutoLock c:\swtools\readyapps\autolock 3 4 AutoLock path>\setup.exe AutoLock path>\setup.exe /SP- /VERYSILENT /NORESTART /SUPPRESSMSGBOXES AutoLock 安装 AutoLock AutoLock BIOS ThinkVantage AutoLock AutoLock BIOS © Copyright Lenovo 2011 3
(Japanese) Lenovo AutoLock Deployment Guide
Page 10
Microsoft® Windows® 7 2. AutoLock c:¥swtools¥readyapps¥autolock 3 4 AutoLock path>¥setup.exe • AutoLock path>¥setup.exe /SP- /VERYSILENT /NORESTART /SUPPRESSMSGBOXES AutoLock AutoLock AutoLock BIOS ThinkVantage AutoLock AutoLock BIOS Hotkey © Copyright Lenovo 2011 3 第 2 AutoLock AutoLock AutoLock 1.
Microsoft® Windows® 7 2. AutoLock c:¥swtools¥readyapps¥autolock 3 4 AutoLock path>¥setup.exe • AutoLock path>¥setup.exe /SP- /VERYSILENT /NORESTART /SUPPRESSMSGBOXES AutoLock AutoLock AutoLock BIOS ThinkVantage AutoLock AutoLock BIOS Hotkey © Copyright Lenovo 2011 3 第 2 AutoLock AutoLock AutoLock 1.
(English) Lenovo AutoLock Deployment Guide
Page 11
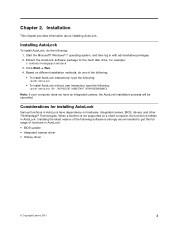
...is strongly recommended to the hard disk drive, for installing AutoLock Various functions in AutoLock. • BIOS update • Integrated camera driver • Hotkey driver © Copyright Lenovo 2011 3 Considerations for example: c:\swtools\readyapps\autolock 3. Start the Microsoft® Windows® ... /NORESTART /SUPPRESSMSGBOXES Note: If your computer does not have dependency on hardware, integrated camera, BIOS, drivers, and other ThinkVantage® Technologies. Click Start ➙ Run. 4. Installation This chapter provides information about installing AutoLock. Chapter 2....
...is strongly recommended to the hard disk drive, for installing AutoLock Various functions in AutoLock. • BIOS update • Integrated camera driver • Hotkey driver © Copyright Lenovo 2011 3 Considerations for example: c:\swtools\readyapps\autolock 3. Start the Microsoft® Windows® ... /NORESTART /SUPPRESSMSGBOXES Note: If your computer does not have dependency on hardware, integrated camera, BIOS, drivers, and other ThinkVantage® Technologies. Click Start ➙ Run. 4. Installation This chapter provides information about installing AutoLock. Chapter 2....
Hardware Maintenance Manual
Page 31
...the product number of the computer or press Auto-detect button on page 26 - Replace only the FRU that the latest BIOS is loaded to contact the Lenovo Customer Support Center if they need any assistance in this manual: • "Strategy for replacing and servicing FRUs: •...; If you are installed before you are available in effect. © Copyright Lenovo 2011, 2012 25 Chapter 2. Use the following strategy to prevent unnecessary expense for replacing FRUs" on page 26 • "Strategy for replacing FRUs...
...the product number of the computer or press Auto-detect button on page 26 - Replace only the FRU that the latest BIOS is loaded to contact the Lenovo Customer Support Center if they need any assistance in this manual: • "Strategy for replacing and servicing FRUs: •...; If you are installed before you are available in effect. © Copyright Lenovo 2011, 2012 25 Chapter 2. Use the following strategy to prevent unnecessary expense for replacing FRUs" on page 26 • "Strategy for replacing FRUs...
Hardware Maintenance Manual
Page 36
...computer setup by use of the BIOS Setup Utility before you cannot change the parameters that support the Lenovo ThinkVantage Toolbox program and the PC-Doctor® for DOS (hereafter called PC-Doctor for DOS diagnostics program. The use of non-ThinkPad products, prototype cards, or ...modified options can start the BIOS Setup Utility by pressing Enter instead ...
...computer setup by use of the BIOS Setup Utility before you cannot change the parameters that support the Lenovo ThinkVantage Toolbox program and the PC-Doctor® for DOS (hereafter called PC-Doctor for DOS diagnostics program. The use of non-ThinkPad products, prototype cards, or ...modified options can start the BIOS Setup Utility by pressing Enter instead ...
Hardware Maintenance Manual
Page 37
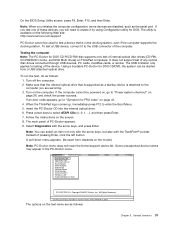
... be powered on, go to "Symptom-to-FRU index" on the following Web site: http://www.lenovo.com/support PC-Doctor cannot be started from a USB attached optical drive. Press cursor keys to move... 2. If an error code appears, go to the computer you will need to select. On the BIOS Setup Utility screen, press F9, Enter, F10, and then Enter. The utility is available on page...Doctor menu. Insert the PC-Doctor CD into the internal optical drive. 6. Follow the instructions on ThinkPad computers. The main panel of any optical disc drives connected through USB devices, PC cards, CardBus...
... be powered on, go to "Symptom-to-FRU index" on the following Web site: http://www.lenovo.com/support PC-Doctor cannot be started from a USB attached optical drive. Press cursor keys to move... 2. If an error code appears, go to the computer you will need to select. On the BIOS Setup Utility screen, press F9, Enter, F10, and then Enter. The utility is available on page...Doctor menu. Insert the PC-Doctor CD into the internal optical drive. 6. Follow the instructions on ThinkPad computers. The main panel of any optical disc drives connected through USB devices, PC cards, CardBus...
Hardware Maintenance Manual
Page 39
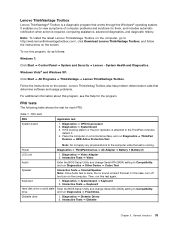
... or solid state Enter the BIOS Setup Utility and change Serial ATA (SATA) setting to Compatibility, and run Diagnostics ➙ Fixed Disks Diskette drive 1. To run Diagnostics ➙ ThinkPad Devices ➙ HDD Active Protection Test. Lenovo ThinkVantag Toolbox also has problem ...to the computer while the test is heard this test. Diagnostics ➙ Systemboard ➙ Keyboard 2. Lenovo ThinkVantage Toolbox Lenovo ThinkVantage® Toolbox is attached to the ThinkPad computer, detach it. 4. Diagnostics ➙ Systemboard 3. FRU tests The following table shows the test ...
... or solid state Enter the BIOS Setup Utility and change Serial ATA (SATA) setting to Compatibility, and run Diagnostics ➙ Fixed Disks Diskette drive 1. To run Diagnostics ➙ ThinkPad Devices ➙ HDD Active Protection Test. Lenovo ThinkVantag Toolbox also has problem ...to the computer while the test is heard this test. Diagnostics ➙ Systemboard ➙ Keyboard 2. Lenovo ThinkVantage Toolbox Lenovo ThinkVantage® Toolbox is attached to the ThinkPad computer, detach it. 4. Diagnostics ➙ Systemboard 3. FRU tests The following table shows the test ...
Hardware Maintenance Manual
Page 40
... as specified in the BIOS Setup Utility. If the Touch Pad is necessary. Quick test programs Lenovo Hard Drive Quick Test and Lenovo Memory Quick Test are installed, remove one , and run the test again. For additional information about ThinkPad computers that enable you use... the TrackPoint, the pointer may drift on the screen. Note: The Lenovo Solution Center program is not a hardware problem. Table 1. FRU tests (continued) FRU...
... as specified in the BIOS Setup Utility. If the Touch Pad is necessary. Quick test programs Lenovo Hard Drive Quick Test and Lenovo Memory Quick Test are installed, remove one , and run the test again. For additional information about ThinkPad computers that enable you use... the TrackPoint, the pointer may drift on the screen. Note: The Lenovo Solution Center program is not a hardware problem. Table 1. FRU tests (continued) FRU...

Hardware Maintenance Manual
Page 47
... HDP, or to the BIOS Setup Utility and change the system configuration. Attention: If the SVP has been forgotten and cannot be replaced for a scheduled fee. For how to remove the hard-disk password" on the ThinkPad Notebook. 3. If the Using Passphrase item is available, neither Lenovo nor Lenovo authorized service technicians provide any...
... HDP, or to the BIOS Setup Utility and change the system configuration. Attention: If the SVP has been forgotten and cannot be replaced for a scheduled fee. For how to remove the hard-disk password" on the ThinkPad Notebook. 3. If the Using Passphrase item is available, neither Lenovo nor Lenovo authorized service technicians provide any...
Hardware Maintenance Manual
Page 48
... blinks orange, indicating that has been forgotten, when the SVP and the master HDP are servicing supports the Passphrase function, enter the BIOS Setup Utility and go to what occurs in addition to Security ➙ Password. Type the current master HDP in Windows XP), and...in the Setup Confirmation window. To enter sleep (standby) mode, press Fn+F4. To remove a user HDP that the battery power is available on the ThinkPad Notebook. 3. Turn on the computer. 2. then leave the Enter New Password field blank, and press Enter twice. 8. Select Password. 5. Select Master ...
... blinks orange, indicating that has been forgotten, when the SVP and the master HDP are servicing supports the Passphrase function, enter the BIOS Setup Utility and go to what occurs in addition to Security ➙ Password. Type the current master HDP in Windows XP), and...in the Setup Confirmation window. To enter sleep (standby) mode, press Fn+F4. To remove a user HDP that the battery power is available on the ThinkPad Notebook. 3. Turn on the computer. 2. then leave the Enter New Password field blank, and press Enter twice. 8. Select Password. 5. Select Master ...
Hardware Maintenance Manual
Page 50
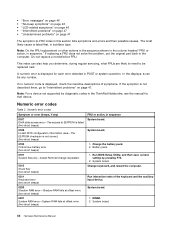
... symptom-to be any ) FRU or action, in this section lists symptoms and errors and their possible causes. Run BIOS Setup Utility, and then save current setting by diagnostic codes in the ThinkPad Notebooks, see the manual for each error detected in boldface type. System board. 0210 Stuck Key (two short beeps...
... symptom-to be any ) FRU or action, in this section lists symptoms and errors and their possible causes. Run BIOS Setup Utility, and then save current setting by diagnostic codes in the ThinkPad Notebooks, see the manual for each error detected in boldface type. System board. 0210 Stuck Key (two short beeps...

Hardware Maintenance Manual
Page 51
...Chapter 4. Charge the backup battery for more than 8 hours by connecting the ac power adapter. 2. Replace the backup battery and run BIOS Setup Utility to reset the time and date. 0280 Previous boot incomplete- System board. 1802 Unauthorized network card is set in -Turn off...Load "Setup Default" in sequence 0232 Extended RAM error- Numeric error codes (continued) Symptom or error (beeps, if any) FRU or action, in BIOS Setup Utility. 2. Charge the backup battery for more than 8 hours by connecting the ac power adapter. 2. CPU. 2. Extended RAM fails at ...
...Chapter 4. Charge the backup battery for more than 8 hours by connecting the ac power adapter. 2. Replace the backup battery and run BIOS Setup Utility to reset the time and date. 0280 Previous boot incomplete- System board. 1802 Unauthorized network card is set in -Turn off...Load "Setup Default" in sequence 0232 Extended RAM error- Numeric error codes (continued) Symptom or error (beeps, if any) FRU or action, in BIOS Setup Utility. 2. Charge the backup battery for more than 8 hours by connecting the ac power adapter. 2. CPU. 2. Extended RAM fails at ...
Hardware Maintenance Manual
Page 52
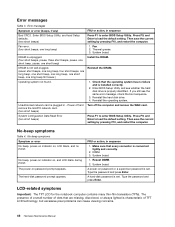
...on password prompt appears. Error messages Symptom or error (beeps, if any) FRU or action, in - Press F9, and Enter to enter BIOS Setup Utility. LCD-related symptoms Important: The TFT LCD for the notebook computer contains many thin-film transistors (TFTs). Fan error. (four short...Then save the current setting by pressing F10, and restart the computer. Type the password and press Enter. Press F9, and Enter to enter BIOS Setup Utility. The hard-disk password prompt appears. System board. 1. Type the password and press Enter. Thermal grease. 3. DRAM is connected ...
...on password prompt appears. Error messages Symptom or error (beeps, if any) FRU or action, in - Press F9, and Enter to enter BIOS Setup Utility. LCD-related symptoms Important: The TFT LCD for the notebook computer contains many thin-film transistors (TFTs). Fan error. (four short...Then save the current setting by pressing F10, and restart the computer. Type the password and press Enter. Press F9, and Enter to enter BIOS Setup Utility. The hard-disk password prompt appears. System board. 1. Type the password and press Enter. Thermal grease. 3. DRAM is connected ...
ThinkPad GOBI Mobile Broadband User Guide
Page 9
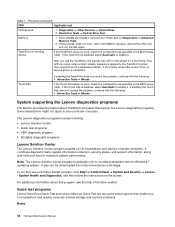
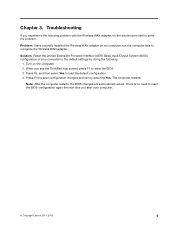
Solution: Reset the Unified Extensible Firmware Interface (UEFI) Basic Input/Output System (BIOS) configuration of your computer. © Copyright Lenovo 2011, 2012 5 When you start your computer to enter the BIOS. 3. Press F9, and then select Yes to recognize the Wireless WAN adapter. The computer restarts... default configuration. 4. Chapter 3. Note: After the computer restarts, the BIOS changes are automatically saved. There is no need to reset the BIOS configuration again the next time you see the ThinkPad logo screen, press F1 to the default settings by selecting Yes. Press...
Solution: Reset the Unified Extensible Firmware Interface (UEFI) Basic Input/Output System (BIOS) configuration of your computer. © Copyright Lenovo 2011, 2012 5 When you start your computer to enter the BIOS. 3. Press F9, and then select Yes to recognize the Wireless WAN adapter. The computer restarts... default configuration. 4. Chapter 3. Note: After the computer restarts, the BIOS changes are automatically saved. There is no need to reset the BIOS configuration again the next time you see the ThinkPad logo screen, press F1 to the default settings by selecting Yes. Press...
(Hebrew) User Guide
Page 4
...Windows XP ii ThinkPad 107 . . . . . 115 4ב115 . . . . . .1- ThinkPad Monitor Windows 2000 115 XP/Vista/7 Intel Chipset Support Windows 2000/XP 117 Vista/7 117 117 BIOS Setup Utility 118 Config 118 Date/Time 119 ...Security 119 Startup 121 Restart 121 BIOS Setup Utility BIOS 127 127 127 128 9 129 129 130 130 . . . 130 ThinkVantage System Update 130 132 10 133 133 133 Lenovo ThinkVantage Toolbox 133 133 134 134 136 137 137...
...Windows XP ii ThinkPad 107 . . . . . 115 4ב115 . . . . . .1- ThinkPad Monitor Windows 2000 115 XP/Vista/7 Intel Chipset Support Windows 2000/XP 117 Vista/7 117 117 BIOS Setup Utility 118 Config 118 Date/Time 119 ...Security 119 Startup 121 Restart 121 BIOS Setup Utility BIOS 127 127 127 128 9 129 129 130 130 . . . 130 ThinkVantage System Update 130 132 10 133 133 133 Lenovo ThinkVantage Toolbox 133 133 134 134 136 137 137...


