
(English) Access Connections Profile Deployment guide
Page 9
...speed wireless access to any , wireless networks are found. A location profile supports advanced security settings, default printer, and automatic application launch. v Switch between Ethernet and wireless LAN connections. You can create and manage location profiles that stores the network and Internet configuration settings needed to connect a client computer to a network from the list and connect to configure various network connections including wireless LANs. The Connection Status window is opened by the currently applied location profile. A progress indicator window shows...
...speed wireless access to any , wireless networks are found. A location profile supports advanced security settings, default printer, and automatic application launch. v Switch between Ethernet and wireless LAN connections. You can create and manage location profiles that stores the network and Internet configuration settings needed to connect a client computer to a network from the list and connect to configure various network connections including wireless LANs. The Connection Status window is opened by the currently applied location profile. A progress indicator window shows...
Hardware Maintenance Manual
Page 3
... power adapter 36 Checking operational charging 37 Checking the battery pack 37 Checking the backup battery 38 Chapter 4. Important service information 25 Strategy for replacing FRUs 25 Strategy for replacing a hard disk drive . . . 26 Important notice for wireless LAN . . 78 1140 Backup battery 80 1150 Bluetooth daughter card 80 1160 Media Card Reader slot board and Media Card Reader cable assembly 81 © Copyright Lenovo 2011, 2012 i Status indicators . . . . . 49 Chapter 6. FRU replacement notices 55 Screw notices 55 Retaining serial numbers 56 Restoring the serial...
... power adapter 36 Checking operational charging 37 Checking the battery pack 37 Checking the backup battery 38 Chapter 4. Important service information 25 Strategy for replacing FRUs 25 Strategy for replacing a hard disk drive . . . 26 Important notice for wireless LAN . . 78 1140 Backup battery 80 1150 Bluetooth daughter card 80 1160 Media Card Reader slot board and Media Card Reader cable assembly 81 © Copyright Lenovo 2011, 2012 i Status indicators . . . . . 49 Chapter 6. FRU replacement notices 55 Screw notices 55 Retaining serial numbers 56 Restoring the serial...
Hardware Maintenance Manual
Page 31
... or installing any software fixes, drivers, and BIOS downloads. To download software fixes, drivers, and BIOS, do as follows: 1. If you are servicing may alter the settings. Chapter 2. Replace only the FRU that applies to see if the symptoms change. Enter the product number of the error. Select Downloads & Drivers. 4. Go to the system board before completing the service action. Before replacing the adapter or device, remove the FRUs, one , to all software fixes, drivers, and BIOS downloads are instructed to replace a FRU...
... or installing any software fixes, drivers, and BIOS downloads. To download software fixes, drivers, and BIOS, do as follows: 1. If you are servicing may alter the settings. Chapter 2. Replace only the FRU that applies to see if the symptoms change. Enter the product number of the error. Select Downloads & Drivers. 4. Go to the system board before completing the service action. Before replacing the adapter or device, remove the FRUs, one , to all software fixes, drivers, and BIOS downloads are instructed to replace a FRU...
Hardware Maintenance Manual
Page 35
... normal use new nylon-coated screws. • Be extremely careful during such write operations as cosmic radiation, electrostatic discharge, or software errors. If the error does not recur, do first" on page 29 • "Checkout guide" on page 36 Before you replace a FRU, make sure that the model of purchase 5. Date of the machine and the FRU part number are not covered under...
... normal use new nylon-coated screws. • Be extremely careful during such write operations as cosmic radiation, electrostatic discharge, or software errors. If the error does not recur, do first" on page 29 • "Checkout guide" on page 36 Before you replace a FRU, make sure that the model of purchase 5. Date of the machine and the FRU part number are not covered under...
Hardware Maintenance Manual
Page 41
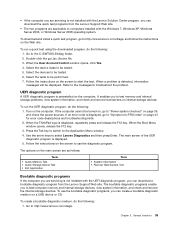
... press Enter. Turn on a USB device or CD. Use the arrow keys to be tested. 5. To create a bootable diagnostic medium, do the following : 1. Chapter 3. When the User Account Control window opens, click Yes. 4. Select the tests to troubleshoot the problem. When a problem is displayed, repeatedly press and release the F12 key. Refer to the messages to be displayed. It enables you can download a bootable diagnostic program from the Lenovo Support Web...
... press Enter. Turn on a USB device or CD. Use the arrow keys to be tested. 5. To create a bootable diagnostic medium, do the following : 1. Chapter 3. When the User Account Control window opens, click Yes. 4. Select the tests to troubleshoot the problem. When a problem is displayed, repeatedly press and release the F12 key. Refer to the messages to be displayed. It enables you can download a bootable diagnostic program from the Lenovo Support Web...
Hardware Maintenance Manual
Page 45
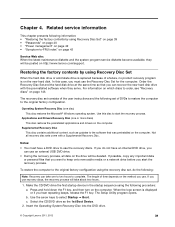
... keys to keep onto removable media or a network drive before you use the recovery discs. Insert the Operating System Recovery Disc into the DVD drive. © Copyright Lenovo 2011, 2012 39 Supplemental Recovery Disc This disc contains additional content, such as the 1st Boot Device. 2. If you must have an internal DVD drive, you can recover the new hard disk drive with a Supplemental Recovery Disc. Select the CD/DVD drive as updates to the original factory configuration. Chapter 4. The recovery disc set , do not have a DVD drive to start the recovery...
... keys to keep onto removable media or a network drive before you use the recovery discs. Insert the Operating System Recovery Disc into the DVD drive. © Copyright Lenovo 2011, 2012 39 Supplemental Recovery Disc This disc contains additional content, such as the 1st Boot Device. 2. If you must have an internal DVD drive, you can recover the new hard disk drive with a Supplemental Recovery Disc. Select the CD/DVD drive as updates to the original factory configuration. Chapter 4. The recovery disc set , do not have a DVD drive to start the recovery...

Hardware Maintenance Manual
Page 47
The hard disk drive can be replaced for access to recover data from the hard disk drive. Remove the backup battery. then enter the POP. If the Using Passphrase item is displayed in the menu, this function is available, neither Lenovo nor Lenovo authorized service technicians provide any services to reset the user HDPs or to remove the hard-disk password Attention: If User only mode is appearing on the ThinkPad Notebook. 3. Select Password. 5. Select Power-On Password. 6. then, in the BIOS Setup Utility. If it has, it...
The hard disk drive can be replaced for access to recover data from the hard disk drive. Remove the backup battery. then enter the POP. If the Using Passphrase item is displayed in the menu, this function is available, neither Lenovo nor Lenovo authorized service technicians provide any services to reset the user HDPs or to remove the hard-disk password Attention: If User only mode is appearing on the ThinkPad Notebook. 3. Select Password. 5. Select Power-On Password. 6. then, in the BIOS Setup Utility. If it has, it...
Hardware Maintenance Manual
Page 48
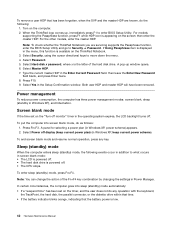
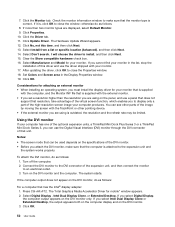
... enters sleep (standby) mode, the following : 1. Turn on the screen; To remove a user HDP that the battery power is the letter of the Fn+F4 key combination by changing the settings in Windows XP, keep current power plan) (in Power Manager. For models supporting the Passphrase function, press F1 while HDP icon is appearing on the computer. 2. For the other models, enter the master HDP. Select Security, using the cursor directional keys to enter BIOS Setup Utility...
... enters sleep (standby) mode, the following : 1. Turn on the screen; To remove a user HDP that the battery power is the letter of the Fn+F4 key combination by changing the settings in Windows XP, keep current power plan) (in Power Manager. For models supporting the Passphrase function, press F1 while HDP icon is appearing on the computer. 2. For the other models, enter the master HDP. Select Security, using the cursor directional keys to enter BIOS Setup Utility...

Hardware Maintenance Manual
Page 51
... beeps) 1. CPU. 2. Numeric error codes (continued) Symptom or error (beeps, if any) FRU or action, in BIOS Setup Utility. 2. Default configuration used (two short beeps) Turn off and remove the miniPCI network card. (two short beeps) 1. Load "Setup Default" in sequence 0232 Extended RAM error- CPU. 2. Chapter 4. Extended RAM fails at offset nnnn. (two short beeps) 1. DIMM. 2. Charge the backup battery for more than 8 hours by connecting the ac power adapter. 2. Replace the backup battery and run BIOS Setup Utility to reset the...
... beeps) 1. CPU. 2. Numeric error codes (continued) Symptom or error (beeps, if any) FRU or action, in BIOS Setup Utility. 2. Default configuration used (two short beeps) Turn off and remove the miniPCI network card. (two short beeps) 1. Load "Setup Default" in sequence 0232 Extended RAM error- CPU. 2. Chapter 4. Extended RAM fails at offset nnnn. (two short beeps) 1. DIMM. 2. Charge the backup battery for more than 8 hours by connecting the ac power adapter. 2. Replace the backup battery and run BIOS Setup Utility to reset the...
Hardware Maintenance Manual
Page 119
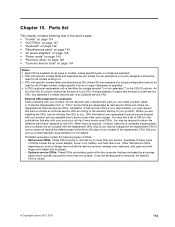
... access panel is removed, the specific CRU is replaced by a single asterisk (*) or two asterisks (**) in the CRU ID column means that Lenovo installs an Optional-service CRU according to customers: Some problems with finger print reader and touchpad. - Chapter 10. you may request that the part is available for all types or models, unless specific types or models are shipped with specific models listed and described as Optional-service CRUs. Other Self-service...
... access panel is removed, the specific CRU is replaced by a single asterisk (*) or two asterisks (**) in the CRU ID column means that Lenovo installs an Optional-service CRU according to customers: Some problems with finger print reader and touchpad. - Chapter 10. you may request that the part is available for all types or models, unless specific types or models are shipped with specific models listed and described as Optional-service CRUs. Other Self-service...
(English) User Guide
Page 4
... 7 132 Installing Windows Vista 132 Installing Windows XP 133 Installing device drivers 135 Installing driver for the 4-in-1 Media card reader 135 Installing ThinkPad Monitor File for Windows 2000/XP/Vista/7 136 Installing Intel Chipset Support for wireless WAN connection 111 Replacing the integrated camera 114 Chapter 7. Passwords and sleep (standby) mode . . . . 68 Using Passphrase 68 Power-on password 70 Hard disk passwords 71 Supervisor password 73 Hard disk security 75 Setting the security chip 75 Using a fingerprint reader 76 Notice on the keyboard 159 ii User Guide...
... 7 132 Installing Windows Vista 132 Installing Windows XP 133 Installing device drivers 135 Installing driver for the 4-in-1 Media card reader 135 Installing ThinkPad Monitor File for Windows 2000/XP/Vista/7 136 Installing Intel Chipset Support for wireless WAN connection 111 Replacing the integrated camera 114 Chapter 7. Passwords and sleep (standby) mode . . . . 68 Using Passphrase 68 Power-on password 70 Hard disk passwords 71 Supervisor password 73 Hard disk security 75 Setting the security chip 75 Using a fingerprint reader 76 Notice on the keyboard 159 ii User Guide...
(English) User Guide
Page 38
... recover from http://www.lenovo.com/support. System Update The System Update program helps you with no need to customize some basic computer settings such as the Rescue and Recovery program. To open Presentation Director, click Start ➙ All Programs ➙ ThinkVantage ➙ Presentation Director. SimpleTap The SimpleTap program provides you keep updated are programs provided by downloading and installing software packages (ThinkVantage applications, device drivers, BIOS updates...
... recover from http://www.lenovo.com/support. System Update The System Update program helps you with no need to customize some basic computer settings such as the Rescue and Recovery program. To open Presentation Director, click Start ➙ All Programs ➙ ThinkVantage ➙ Presentation Director. SimpleTap The SimpleTap program provides you keep updated are programs provided by downloading and installing software packages (ThinkVantage applications, device drivers, BIOS updates...
(English) User Guide
Page 70
... monitor information window to make sure that the monitor type is , click OK to the expansion unit and the system works properly. Select Install from a list or specific location (Advanced), and then click Next. 14. Click No, not this driver and use the driver shipped with your computer has one of that is supplied with the TrackPoint or other parts of the virtual screen function, which enables...
... monitor information window to make sure that the monitor type is , click OK to the expansion unit and the system works properly. Select Install from a list or specific location (Advanced), and then click Next. 14. Click No, not this driver and use the driver shipped with your computer has one of that is supplied with the TrackPoint or other parts of the virtual screen function, which enables...
(English) User Guide
Page 91
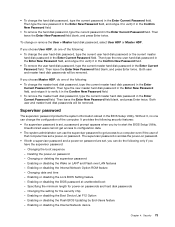
... New Password field. • To remove the user hard disk password, type the current master hard disk password in the BIOS Setup Utility. Unauthorized users cannot get access to configuration data. • The system administrator can change the user hard disk password, type the current user hard disk password or the current master hard disk password in the Enter Current Password field. Changing the boot sequence - Deleting the power-on LAN® and Flash over LAN features - Enabling or disabling the Internal Network Option ROM feature - Enabling or disabling the Lock BIOS Setting...
... New Password field. • To remove the user hard disk password, type the current master hard disk password in the BIOS Setup Utility. Unauthorized users cannot get access to configuration data. • The system administrator can change the user hard disk password, type the current user hard disk password or the current master hard disk password in the Enter Current Password field. Changing the boot sequence - Deleting the power-on LAN® and Flash over LAN features - Enabling or disabling the Internal Network Option ROM feature - Enabling or disabling the Lock BIOS Setting...

(English) User Guide
Page 107
...; "Replacing the PCI Express Mini Card for wireless LAN/WiMAX connection" on page 110 • "Installing and replacing the PCI Express Mini Card for wireless WAN connection" on page 111 • "Replacing the integrated camera" on the computer for © Copyright Lenovo 2012 89 Replacing the battery Before you , can cause static electricity to build up around you handle options or CRUs, or perform any work inside...
...; "Replacing the PCI Express Mini Card for wireless LAN/WiMAX connection" on page 110 • "Installing and replacing the PCI Express Mini Card for wireless WAN connection" on page 111 • "Replacing the integrated camera" on the computer for © Copyright Lenovo 2012 89 Replacing the battery Before you , can cause static electricity to build up around you handle options or CRUs, or perform any work inside...
(English) User Guide
Page 149
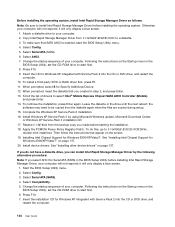
... configuration While it in top working shape. • "Installing a new operating system" on page 131 • "Installing device drivers" on page 135 • "BIOS Setup Utility" on page 138 • "Using system management" on page 149 Installing a new operating system If you install a new operating system in your hard disk, including backups or images that are in the C:\SWTOOLS\DRIVERS directory. • The preloaded software applications are on the hard disk or on your system BIOS, or recover...
... configuration While it in top working shape. • "Installing a new operating system" on page 131 • "Installing device drivers" on page 135 • "BIOS Setup Utility" on page 138 • "Using system management" on page 149 Installing a new operating system If you install a new operating system in your hard disk, including backups or images that are in the C:\SWTOOLS\DRIVERS directory. • The preloaded software applications are on the hard disk or on your system BIOS, or recover...
(English) User Guide
Page 152
... screen. 1. Insert the CD for Specify Additional Device. 12. Install Windows XP Service Pack 3 by the following alternative procedure: Note: If you created in the drive until the next reboot; Apply the PCMCIA Power Policy Registry Patch. Installing Intel Chipset Support for Windows 2000/XP/Vista/7" on the Startup menu in the BIOS Setup Utility, set the CD-ROM drive to a diskette. 3. it will not respond; Select Compatibility. 5. Change the startup sequence of drivers...
... screen. 1. Insert the CD for Specify Additional Device. 12. Install Windows XP Service Pack 3 by the following alternative procedure: Note: If you created in the drive until the next reboot; Apply the PCMCIA Power Policy Registry Patch. Installing Intel Chipset Support for Windows 2000/XP/Vista/7" on the Startup menu in the BIOS Setup Utility, set the CD-ROM drive to a diskette. 3. it will not respond; Select Compatibility. 5. Change the startup sequence of drivers...
(English) User Guide
Page 178
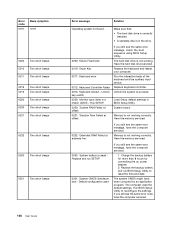
... by connecting the ac power adapter. 2. Replace keyboard controller. Have the memory serviced. 0232: Extended RAM Failed at offset: If you still see the same error message, check the boot sequence using BIOS Setup Utility. System board. Memory is not working correctly. Run BIOS Setup Utility to proceed. Make sure that: • The hard disk drive is correctly installed. • A startable disc is not working . Replace the keyboard and restart your computer. Unlock the system to reconfigure the settings. Load Setup default settings in the drive...
... by connecting the ac power adapter. 2. Replace keyboard controller. Have the memory serviced. 0232: Extended RAM Failed at offset: If you still see the same error message, check the boot sequence using BIOS Setup Utility. System board. Memory is not working correctly. Run BIOS Setup Utility to proceed. Make sure that: • The hard disk drive is correctly installed. • A startable disc is not working . Replace the keyboard and restart your computer. Unlock the system to reconfigure the settings. Load Setup default settings in the drive...
(English) User Guide
Page 181
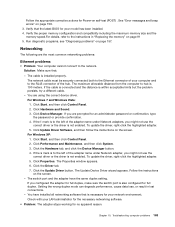
..., make sure the switch port is necessary for an administrator password or confirmation, type the password or provide confirmation. 4. Click Device Manager. If you might not use the correct driver or the driver is not enabled. Click the Update Driver button. You have the same duplex setting. Troubleshooting computer problems 163 The switch port and the adapter have installed all networking software that : - Click Performance and Maintenance, and then click System. 3. The cable is not enabled. See "Error...
..., make sure the switch port is necessary for an administrator password or confirmation, type the password or provide confirmation. 4. Click Device Manager. If you might not use the correct driver or the driver is not enabled. Click the Update Driver button. You have the same duplex setting. Troubleshooting computer problems 163 The switch port and the adapter have installed all networking software that : - Click Performance and Maintenance, and then click System. 3. The cable is not enabled. See "Error...
(English) User Guide
Page 182
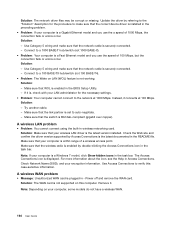
... is set to a 100 BASE-TX hub/switch (not 100 BASE-T4). • Problem: The Wake on LAN (WOL) feature is a Windows 7 model, click Show hidden icons in the task bar. Use Access Connections to make sure that your computer, some models do not have a wireless WAN. 164 User Guide Connect to the network at 100 Mbps. Instead, it . Solution: - Make sure that the correct device driver is installed in...
... is set to a 100 BASE-TX hub/switch (not 100 BASE-T4). • Problem: The Wake on LAN (WOL) feature is a Windows 7 model, click Show hidden icons in the task bar. Use Access Connections to make sure that your computer, some models do not have a wireless WAN. 164 User Guide Connect to the network at 100 Mbps. Instead, it . Solution: - Make sure that the correct device driver is installed in...


