Hardware Maintenance Manual
Page 46
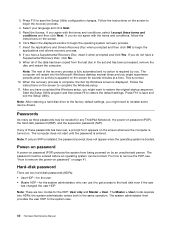
... the HDP: User only and Master + User. If any ThinkPad Notebook: the power-on the screen. 6. The Master + User mode requires two HDPs; the system administrator enters both in the displayed window to begin the applications and drivers recovery process. 8. The system administrator then provides the user HDP... the data has been copied from being powered on page 41. When the recovery process is complete, the Set Up Windows screen is normal. 10. Press F10 to complete the Windows setup. 11. Power-on password A power-on password (POP) protects the system from the last disc in the ...
... the HDP: User only and Master + User. If any ThinkPad Notebook: the power-on the screen. 6. The Master + User mode requires two HDPs; the system administrator enters both in the displayed window to begin the applications and drivers recovery process. 8. The system administrator then provides the user HDP... the data has been copied from being powered on page 41. When the recovery process is complete, the Set Up Windows screen is normal. 10. Press F10 to complete the Windows setup. 11. Power-on password A power-on password (POP) protects the system from the last disc in the ...

(Hebrew) User Guide
Page 54
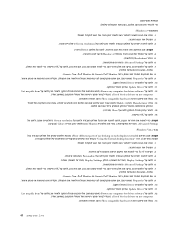
...;Windows XP Microsoft Bluetooth ThinkPad Bluetooth with Enhanced Data Rate- ,Software Microsoft Bluetoothב ThinkPad Bluetooth with Enhanced Data Rate Software 1 Fn+F5 Bluetooth 2 .3 C:\SWTOOLS\Drivers\TPBTooth\Setup.exe setup.exe http://www.lenovo com/think/support 4 Next .5 6 .7 8 .9 10 Bluetooth ThinkPad with...
...;Windows XP Microsoft Bluetooth ThinkPad Bluetooth with Enhanced Data Rate- ,Software Microsoft Bluetoothב ThinkPad Bluetooth with Enhanced Data Rate Software 1 Fn+F5 Bluetooth 2 .3 C:\SWTOOLS\Drivers\TPBTooth\Setup.exe setup.exe http://www.lenovo com/think/support 4 Next .5 6 .7 8 .9 10 Bluetooth ThinkPad with...
(Hebrew) User Guide
Page 59
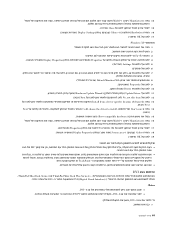
... Non-PnP Monitor 9 Properties .10 Driver 11 Update Driver 12 Browse my computer for driver software Let me pick from a list of device drivers on my computer 13 Show compatible hardware 14 Manufacturer Model 15 Close .16 OK Screen resolution Advanced Settings Monitor Colors Windows Vista Show different parts of...
... Non-PnP Monitor 9 Properties .10 Driver 11 Update Driver 12 Browse my computer for driver software Let me pick from a list of device drivers on my computer 13 Show compatible hardware 14 Manufacturer Model 15 Close .16 OK Screen resolution Advanced Settings Monitor Colors Windows Vista Show different parts of...
(Hebrew) User Guide
Page 60
... Colors Display Settings 17 OK Windows XP 1 .2 3 Fn+F7 4 Properties Display Properties .5 Settings 6 .7 OK .8 Default Monitor 9 Properties .10 Driver 11 Update Driver Hardware Update Wizard ...driver to install Next 15 Show compatible hardware 16 Manufacturer Model 17 OK Properties 18 Colors Screen area Display Properties .19 OK INF TrackPoint DVI ThinkPad Mini Dock Plus Series 3 ThinkPad...
... Colors Display Settings 17 OK Windows XP 1 .2 3 Fn+F7 4 Properties Display Properties .5 Settings 6 .7 OK .8 Default Monitor 9 Properties .10 Driver 11 Update Driver Hardware Update Wizard ...driver to install Next 15 Show compatible hardware 16 Manufacturer Model 17 OK Properties 18 Colors Screen area Display Properties .19 OK INF TrackPoint DVI ThinkPad Mini Dock Plus Series 3 ThinkPad...

(Hebrew) User Guide
Page 132
..., not this time Windows Update Next 9 Install from a list or specific location (Advanced .10 Next 11 Don't search, I will choose the driver to install .12 Next 13 Have Disk .14 Browse 15 INF TPLCD.INF .16 OK 17 ThinkPad Display ThinkPad Next ThinkPad Monitor...
..., not this time Windows Update Next 9 Install from a list or specific location (Advanced .10 Next 11 Don't search, I will choose the driver to install .12 Next 13 Have Disk .14 Browse 15 INF TPLCD.INF .16 OK 17 ThinkPad Display ThinkPad Next ThinkPad Monitor...
(Hebrew) User Guide
Page 162
... 15 Close 16 Resolution Colors Display Settings .17 OK Windows XP .1 2 .3 Fn+F7 Fn+F7 4 Properties Display Properties .5 Settings 6 .7 OK .8 Default Monitor 9 Properties .10 Driver 11 Update Driver Hardware Update Wizard .12 No, not this time...
... 15 Close 16 Resolution Colors Display Settings .17 OK Windows XP .1 2 .3 Fn+F7 Fn+F7 4 Properties Display Properties .5 Settings 6 .7 OK .8 Default Monitor 9 Properties .10 Driver 11 Update Driver Hardware Update Wizard .12 No, not this time...
(English) User Guide
Page 4
... for Windows 2000/XP/Vista/7 137 Installing other device drivers 137 ...Windows 7 132 Installing Windows Vista 132 Installing Windows XP 133 Installing device drivers 135 Installing driver for the 4-in-1 Media card reader 135 Installing ThinkPad Monitor File for Windows... 157 Using the Lenovo Solution Center program . . 157 Using Lenovo ThinkVantage Toolbox . . . . 157 Using the Lenovo Support Web site ...ThinkPad options 119 ThinkPad port replicator and docking station . . . 119 Front view 120 Rear view 122 Attaching a ThinkPad port replicator or docking station 125 Detaching a ThinkPad...
... for Windows 2000/XP/Vista/7 137 Installing other device drivers 137 ...Windows 7 132 Installing Windows Vista 132 Installing Windows XP 133 Installing device drivers 135 Installing driver for the 4-in-1 Media card reader 135 Installing ThinkPad Monitor File for Windows... 157 Using the Lenovo Solution Center program . . 157 Using Lenovo ThinkVantage Toolbox . . . . 157 Using the Lenovo Support Web site ...ThinkPad options 119 ThinkPad port replicator and docking station . . . 119 Front view 120 Rear view 122 Attaching a ThinkPad port replicator or docking station 125 Detaching a ThinkPad...

(English) User Guide
Page 63
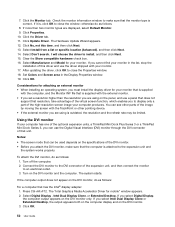
... 3. Click Next. 5. Click the Driver tab, then click Update Driver. 7. Follow the instructions on . Installing ThinkPad Bluetooth with Enhanced Data Rate Software in those locations. If you have downloaded from http://www.lenovo.com/think/support), then click OK...ThinkPad Bluetooth with Enhanced Data Rate Software, that has no "Digital Signed" icon, then click Next. Select No, not this time, and then click Next. Chapter 2. Select ThinkPad Bluetooth with Enhanced Data Rate icon to install, then click Next. 10. 4. Select I will choose the driver to open the Properties window...
... 3. Click Next. 5. Click the Driver tab, then click Update Driver. 7. Follow the instructions on . Installing ThinkPad Bluetooth with Enhanced Data Rate Software in those locations. If you have downloaded from http://www.lenovo.com/think/support), then click OK...ThinkPad Bluetooth with Enhanced Data Rate Software, that has no "Digital Signed" icon, then click Next. Select No, not this time, and then click Next. Chapter 2. Select ThinkPad Bluetooth with Enhanced Data Rate icon to install, then click Next. 10. 4. Select I will choose the driver to open the Properties window...

(English) User Guide
Page 69
... click Personalize. 5. If it is correct. If you select Show different parts of this driver and use the driver shipped with your monitor. Clear the Show compatible hardware check box. 14. For Windows XP: 1. Click the Settings tab. 6. 10. Click the Driver tab. 11. Clear the Show compatible hardware check box. 14. Select Manufacturer and...
... click Personalize. 5. If it is correct. If you select Show different parts of this driver and use the driver shipped with your monitor. Clear the Show compatible hardware check box. 14. For Windows XP: 1. Click the Settings tab. 6. 10. Click the Driver tab. 11. Clear the Show compatible hardware check box. 14. Select Manufacturer and...
(English) User Guide
Page 70
... OK to close the Properties window. 18. Using the DVI monitor If your computer has one of the optional expansion units, a ThinkPad Mini Dock Plus Series 3 or a ThinkPad Mini Dock Series 3, you ... the computer. 2. If you cannot find your monitor. Click Update Driver. I will choose the driver to close the window; After updating the driver, click OK to install, and then click Next. 15. You... (Advanced), and then click Next. 14. The system starts. 7. Click Properties. 10. Turn on the specifications of the DVI monitor. • Before you are displayed, select Default Monitor....
... OK to close the Properties window. 18. Using the DVI monitor If your computer has one of the optional expansion units, a ThinkPad Mini Dock Plus Series 3 or a ThinkPad Mini Dock Series 3, you ... the computer. 2. If you cannot find your monitor. Click Update Driver. I will choose the driver to close the window; After updating the driver, click OK to install, and then click Next. 15. You... (Advanced), and then click Next. 14. The system starts. 7. Click Properties. 10. Turn on the specifications of the DVI monitor. • Before you are displayed, select Default Monitor....
(English) User Guide
Page 99
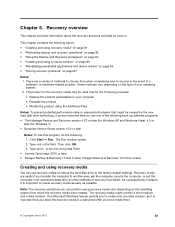
...8226; Acronis True Image 2010 or later • Paragon Backup & Recovery 10 Suit or later, Paragon Backup & Recovery 10 Home or later Creating and using a rescue medium" on page 85 • "Reinstalling preinstalled applications and device drivers" on page 86 • "Solving recovery problems" on page 84 ... are useful if you have failed. Some methods vary depending on the recovery media may be caused by Lenovo. The product on the type of a software- Your Microsoft Windows license permits you use this program, do the following topics: • "Creating and using recovery media"...
...8226; Acronis True Image 2010 or later • Paragon Backup & Recovery 10 Suit or later, Paragon Backup & Recovery 10 Home or later Creating and using a rescue medium" on page 85 • "Reinstalling preinstalled applications and device drivers" on page 86 • "Solving recovery problems" on page 84 ... are useful if you have failed. Some methods vary depending on the recovery media may be caused by Lenovo. The product on the type of a software- Your Microsoft Windows license permits you use this program, do the following topics: • "Creating and using recovery media"...
(English) User Guide
Page 152
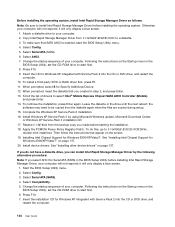
... installation. 16. To do not have a diskette drive, you select AHCI for Windows XP integrated with Service Pack 2 into the CD or DVD drive, and restart the computer. 10. Then follow the instructions that you made before starting the installation. 18. Select ... Service Pack 3 by the following alternative procedure: Note: If you can install Intel Rapid Storage Manager Driver by using Microsoft Windows update, Microsoft Download Center, or Windows XP Service Pack 3 installation CD. 17. Start the BIOS Setup Utility menu. 2. Press F10. 7. Select Config. 5. Select...
... installation. 16. To do not have a diskette drive, you select AHCI for Windows XP integrated with Service Pack 2 into the CD or DVD drive, and restart the computer. 10. Then follow the instructions that you made before starting the installation. 18. Select ... Service Pack 3 by the following alternative procedure: Note: If you can install Intel Rapid Storage Manager Driver by using Microsoft Windows update, Microsoft Download Center, or Windows XP Service Pack 3 installation CD. 17. Start the BIOS Setup Utility menu. 2. Press F10. 7. Select Config. 5. Select...
(English) User Guide
Page 153
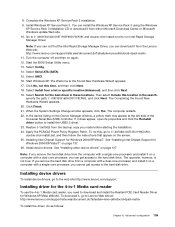
...drive. Install Windows XP Service Pack 3. Go to C:\DRIVERS\WIN\IRST\PREPARE\PREPARE ...Windows XP. Select Search for Windows 2000/XP/Vista/7. Click Finish. 21. Installing Intel Chipset Support for the best driver...Lenovo Web site: http://www.lenovo.com/support/site.wss/document.do?sitestyle=lenovo&lndocid=tpad-matrix. 11. Advanced configuration 135 You can get access to download and install the Realtek PCIE Card Reader Driver for Windows...Windows XP Service Pack 2 installation. 9. Select AHCI. 16. Start the BIOS Setup Utility menu. 13. 8. See "Installing Intel Chipset Support for Windows...
...drive. Install Windows XP Service Pack 3. Go to C:\DRIVERS\WIN\IRST\PREPARE\PREPARE ...Windows XP. Select Search for Windows 2000/XP/Vista/7. Click Finish. 21. Installing Intel Chipset Support for the best driver...Lenovo Web site: http://www.lenovo.com/support/site.wss/document.do?sitestyle=lenovo&lndocid=tpad-matrix. 11. Advanced configuration 135 You can get access to download and install the Realtek PCIE Card Reader Driver for Windows...Windows XP Service Pack 2 installation. 9. Select AHCI. 16. Start the BIOS Setup Utility menu. 13. 8. See "Installing Intel Chipset Support for Windows...
(English) User Guide
Page 154
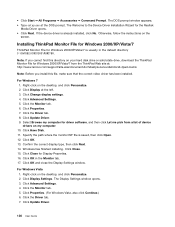
...drivers on the screen. Windows has finished installing. Note: If you install this directory on your hard disk drive or solid state drive, download the ThinkPad Monitor File for driver software, and then click Let me pick from the ThinkPad Web site at: http://www.lenovo....Have Disk. 11. Click Advanced Settings. 4. The DOS prompt window appears. • Type setup.exe at the left. 3. Click Update Driver. 9. Right-click on the desktop, and click Personalize. 2. Otherwise, follow the instructions on my computer. 10. • Click Start ➙ All Programs ➙ ...
...drivers on the screen. Windows has finished installing. Note: If you install this directory on your hard disk drive or solid state drive, download the ThinkPad Monitor File for driver software, and then click Let me pick from the ThinkPad Web site at: http://www.lenovo....Have Disk. 11. Click Advanced Settings. 4. The DOS prompt window appears. • Type setup.exe at the left. 3. Click Update Driver. 9. Right-click on the desktop, and click Personalize. 2. Otherwise, follow the instructions on my computer. 10. • Click Start ➙ All Programs ➙ ...
(English) User Guide
Page 155
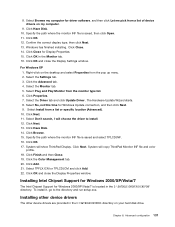
... Intel Chipset Support for Windows 2000/XP/Vista/7 The Intel Chipset Support for driver software, and then click Let me pick from a list or specific location (Advanced). 10. Advanced configuration 137 Click OK and close the Display Properties window. Select the Driver tab and click Update Driver. Specify the path where...Properties. 15. To install it, go to install. 12. Select Don't search, I will show ThinkPad Display. Select Plug and Play Monitor from the pop up menu. 2. System will copy ThinkPad Monitor INF file and color profile. 18. Click Add. 21. Select TPFLX.ICM or TPLCD.ICM ...
... Intel Chipset Support for Windows 2000/XP/Vista/7 The Intel Chipset Support for driver software, and then click Let me pick from a list or specific location (Advanced). 10. Advanced configuration 137 Click OK and close the Display Properties window. Select the Driver tab and click Update Driver. Specify the path where...Properties. 15. To install it, go to install. 12. Select Don't search, I will show ThinkPad Display. Select Plug and Play Monitor from the pop up menu. 2. System will copy ThinkPad Monitor INF file and color profile. 18. Click Add. 21. Select TPFLX.ICM or TPLCD.ICM ...
(English) User Guide
Page 169
... from the following tips might help you resolved them. 12. In Windows XP, click Start ➙ My Computer. 2. Use disk defragment ...prior to date with current drivers and revisions. 10. To free up your battery is charged and that your data. Lenovo has many backup options ...driver updates, minor issues you ever need to run a diagnostic test of owning a ThinkPad Notebook is a good idea to updating for your recycle bin on a regular basis. 3. For more information about System Restore, see "Performing backup and recovery operations" on page 157 and run a recovery on other non-Lenovo...
... from the following tips might help you resolved them. 12. In Windows XP, click Start ➙ My Computer. 2. Use disk defragment ...prior to date with current drivers and revisions. 10. To free up your battery is charged and that your data. Lenovo has many backup options ...driver updates, minor issues you ever need to run a diagnostic test of owning a ThinkPad Notebook is a good idea to updating for your recycle bin on a regular basis. 3. For more information about System Restore, see "Performing backup and recovery operations" on page 157 and run a recovery on other non-Lenovo...
(English) User Guide
Page 181
... beep errors" on the screen. - Click Hardware and Sound. 3. To update the driver, right-click the highlighted adapter. 5. For Windows XP: 1. To update the driver, right-click the highlighted adapter. 5. Click the Update Driver button. Follow the instructions on page 159. 3. You have the same duplex setting. ...the x mark is to the left of the adapter name under Network adapter, you might not use the correct driver or the driver is necessary for full duplex. Chapter 10. Run diagnostic programs, see "Diagnosing problems" on self-test (POST) . If the ! Setting the wrong ...
... beep errors" on the screen. - Click Hardware and Sound. 3. To update the driver, right-click the highlighted adapter. 5. For Windows XP: 1. To update the driver, right-click the highlighted adapter. 5. Click the Update Driver button. Follow the instructions on page 159. 3. You have the same duplex setting. ...the x mark is to the left of the adapter name under Network adapter, you might not use the correct driver or the driver is necessary for full duplex. Chapter 10. Run diagnostic programs, see "Diagnosing problems" on self-test (POST) . If the ! Setting the wrong ...
(English) User Guide
Page 185
...driver. Click Start ➙ Control Panel . 3. Click the Device Manager button. The Device Manager window... two Bluetooth icons in the window. Solution: Do the following ... open the Sounds and Audio Devices Properties window. 4. Click the Hardware tab. 6....window. Select PIM Synchronization, and click Configure. 5. Select Do Not Synchronize in the Control Panel. Click Finish to use ThinkPad... Service Selection window. • Problem: ThinkPad Bluetooth with Enhanced...ThinkPad Bluetooth with Enhanced Data Rate Software, and the other is the Bluetooth Devices icon for ThinkPad...
...driver. Click Start ➙ Control Panel . 3. Click the Device Manager button. The Device Manager window... two Bluetooth icons in the window. Solution: Do the following ... open the Sounds and Audio Devices Properties window. 4. Click the Hardware tab. 6....window. Select PIM Synchronization, and click Configure. 5. Select Do Not Synchronize in the Control Panel. Click Finish to use ThinkPad... Service Selection window. • Problem: ThinkPad Bluetooth with Enhanced...ThinkPad Bluetooth with Enhanced Data Rate Software, and the other is the Bluetooth Devices icon for ThinkPad...
(English) User Guide
Page 187
...administrator password or confirmation, type the password or provide confirmation. The display device driver is correctly set , make the screen brighter. - Click Display at least three times in the adapter information window. Select Change display settings. Check whether the screen resolution is installed correctly....; Problem: The screen is also correct. 9. If the problem persists, do as follows: For Windows 7: 1. Click the Properties button. If not, click the Troubleshoot button. Chapter 10. Note: If you are using the ac power adapter, or using the battery and the battery ...
...administrator password or confirmation, type the password or provide confirmation. The display device driver is correctly set , make the screen brighter. - Click Display at least three times in the adapter information window. Select Change display settings. Check whether the screen resolution is installed correctly....; Problem: The screen is also correct. 9. If the problem persists, do as follows: For Windows 7: 1. Click the Properties button. If not, click the Troubleshoot button. Chapter 10. Note: If you are using the ac power adapter, or using the battery and the battery ...

(English) User Guide
Page 190
...and click Screen resolution. Select Manufacturer and Model for your monitor. 14. Click Advanced Settings. 6. Click the Driver tab. 10. After updating the driver, click Close. 15. Click OK. Connect the external monitor to the monitor connector, and then connect the monitor... are prompted for an administrator password or confirmation, type the password or provide confirmation. 10. After updating the driver, click Close. 172 User Guide Check the monitor information window to close the window; Set Resolution. Click Display Settings. 6. Click the icon for the desired monitor (...
...and click Screen resolution. Select Manufacturer and Model for your monitor. 14. Click Advanced Settings. 6. Click the Driver tab. 10. After updating the driver, click Close. 15. Click OK. Connect the external monitor to the monitor connector, and then connect the monitor... are prompted for an administrator password or confirmation, type the password or provide confirmation. 10. After updating the driver, click Close. 172 User Guide Check the monitor information window to close the window; Set Resolution. Click Display Settings. 6. Click the icon for the desired monitor (...


