
Lenovo H520s Hardware Maintenance Manual
Page 5
... the hard disk drive 32 Replacing a memory module 33 Replacing the Power supply 34 Replacing the graphic card 35 Replacing the system fan 37 Replacing the microprocessor fan 37 Replacing the heat-sink 38 Replacing the CPU 39 Replacing the Wi-Fi card 41 Replacing the front USB/card reader/audio module 42 Replacing the motherboard 43 FRU lists 45 Chapter 9. General information . . . . 53 Additional Service Information 53 © Copyright Lenovo 2012 iii Contents Chapter 1. General information . . . . . 9 Specifications 9 Chapter 4. Using the Setup Utility. . . 13 Starting...
... the hard disk drive 32 Replacing a memory module 33 Replacing the Power supply 34 Replacing the graphic card 35 Replacing the system fan 37 Replacing the microprocessor fan 37 Replacing the heat-sink 38 Replacing the CPU 39 Replacing the Wi-Fi card 41 Replacing the front USB/card reader/audio module 42 Replacing the motherboard 43 FRU lists 45 Chapter 9. General information . . . . 53 Additional Service Information 53 © Copyright Lenovo 2012 iii Contents Chapter 1. General information . . . . . 9 Specifications 9 Chapter 4. Using the Setup Utility. . . 13 Starting...
Lenovo H520s Hardware Maintenance Manual
Page 11
... power cord. 3. Check inside the unit for worn, frayed, or pinched cables. 8. Begin the checks with . ESD damage can continue without first correcting the problem. Use product-specific ESD procedures when they are all at the same charge. Chapter 2. Each machine, as fully effective. Check exterior covers for 0.1 ohm or less between objects. Remove the cover. 5. b. A third-wire ground connector in the parts listings...
... power cord. 3. Check inside the unit for worn, frayed, or pinched cables. 8. Begin the checks with . ESD damage can continue without first correcting the problem. Use product-specific ESD procedures when they are all at the same charge. Chapter 2. Each machine, as fully effective. Check exterior covers for 0.1 ohm or less between objects. Remove the cover. 5. b. A third-wire ground connector in the parts listings...
Lenovo H520s Hardware Maintenance Manual
Page 17
... information supplied with that software package. Check all external devices. 5. Data or programs can be overwritten if you cannot continue, replace the last device tested. © Copyright Lenovo 2012 11 Use the following conditions and follow the instructions: • If the computer displays a POST error, go to step 7. 6. Be extremely careful during write operations such as copying, saving, or formatting. If you are servicing...
... information supplied with that software package. Check all external devices. 5. Data or programs can be overwritten if you cannot continue, replace the last device tested. © Copyright Lenovo 2012 11 Use the following conditions and follow the instructions: • If the computer displays a POST error, go to step 7. 6. Be extremely careful during write operations such as copying, saving, or formatting. If you are servicing...
Lenovo H520s Hardware Maintenance Manual
Page 19
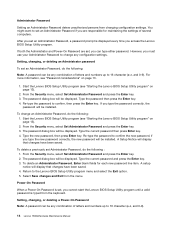
.... Password considerations A password can use the keyboard when using . Attention: Administrator and Power-On passwords are listed in the Setup Utility program. The keys used to 16 character (a-z, and 0-9). See "Starting the Setup Utility program." Using the Setup Utility The Setup Utility program is not displayed until you are displayed on the bottom of which operating system you type your computer and data. Chapter 5. Starting the Lenovo BIOS Setup Utility program To start this procedure, shut down the operating system and turn...
.... Password considerations A password can use the keyboard when using . Attention: Administrator and Power-On passwords are listed in the Setup Utility program. The keys used to 16 character (a-z, and 0-9). See "Starting the Setup Utility program." Using the Setup Utility The Setup Utility program is not displayed until you are displayed on the bottom of which operating system you type your computer and data. Chapter 5. Starting the Lenovo BIOS Setup Utility program To start this procedure, shut down the operating system and turn...
Lenovo H520s Hardware Maintenance Manual
Page 20
... Lenovo H520sHardware Maintenance Manual Type the new password, then press Enter key. To delete a previously set , you cannot start the Lenovo BIOS Setup Utility program until a valid password is set Administrator Password, do the following: Note: A password can be any combination of letters and numbers up to set an Administrator Password, do the following : 1. The password dialog box will be installed. Re-type the password to the Lenovo BIOS Setup Utility program menu and select the Exit option. 5. From the Security menu...
... Lenovo H520sHardware Maintenance Manual Type the new password, then press Enter key. To delete a previously set , you cannot start the Lenovo BIOS Setup Utility program until a valid password is set Administrator Password, do the following: Note: A password can be any combination of letters and numbers up to set an Administrator Password, do the following : 1. The password dialog box will be installed. Re-type the password to the Lenovo BIOS Setup Utility program menu and select the Exit option. 5. From the Security menu...
Lenovo H520s Hardware Maintenance Manual
Page 21
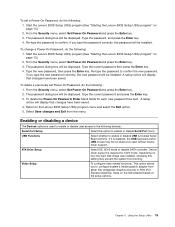
... to the Lenovo BIOS Setup Utility program menu and select the Exit option. 5. Video Setup To configure video related functions. Chapter 5. From the Security menu, select Set Power-On Password and press the Enter key. 3. Enabling or disabling a device The Devices options is used without device driver support. Device driver support is disabled, the USB keyboard and/or USB mouse may prevent the system from booting. This option allows you to be not able to configure system's initiate graphic adapter from the menu. Type the current password and press the Enter key. 3. If...
... to the Lenovo BIOS Setup Utility program menu and select the Exit option. 5. Video Setup To configure video related functions. Chapter 5. From the Security menu, select Set Power-On Password and press the Enter key. 3. Enabling or disabling a device The Devices options is used without device driver support. Device driver support is disabled, the USB keyboard and/or USB mouse may prevent the system from booting. This option allows you to be not able to configure system's initiate graphic adapter from the menu. Type the current password and press the Enter key. 3. If...
Lenovo H520s Hardware Maintenance Manual
Page 22
... F12 key then turn on the computer. Network Setup press the Enter key, then select Onboard Ethernet Support or LAN Boot Agent. 4. Return to boot from a server image. Selecting a temporary startup device Use this procedure to the audio connectors (e.g. Onboard Audio Controller Onboard Ethernet Controller or LAN Boot Agent Select whether to enable or disable the Onboard Audio Controller, when feature is set to Disabled all CDs, DVDs or hard disk drives are disabled and can't be used. Selecting or changing the startup device sequence 16 Lenovo H520sHardware Maintenance Manual...
... F12 key then turn on the computer. Network Setup press the Enter key, then select Onboard Ethernet Support or LAN Boot Agent. 4. Return to boot from a server image. Selecting a temporary startup device Use this procedure to the audio connectors (e.g. Onboard Audio Controller Onboard Ethernet Controller or LAN Boot Agent Select whether to enable or disable the Onboard Audio Controller, when feature is set to Disabled all CDs, DVDs or hard disk drives are disabled and can't be used. Selecting or changing the startup device sequence 16 Lenovo H520sHardware Maintenance Manual...
Lenovo H520s Hardware Maintenance Manual
Page 26
... boot device. If all devices and components have bootable media in the boot device. Undetermined problems 1. a. Extended video memory c. Hard disk drive f. Make sure the keyboard is properly connected to find the failing device or component. Make sure the boot drive is properly connected to the computer and that no keys are set. Power-off the computer. 2. External Cache RAM e. Disk drive 3. This series of tests to check that the system is operating correctly and that the boot drive is called the Power...
... boot device. If all devices and components have bootable media in the boot device. Undetermined problems 1. a. Extended video memory c. Hard disk drive f. Make sure the keyboard is properly connected to find the failing device or component. Make sure the boot drive is properly connected to the computer and that no keys are set. Power-off the computer. 2. External Cache RAM e. Disk drive 3. This series of tests to check that the system is operating correctly and that the boot drive is called the Power...
Lenovo H520s Hardware Maintenance Manual
Page 28
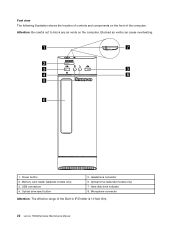
Memory card reader (selected models only) 3. Font view The following illustration shows the location of controls and components on the computer. Power button 2. USB connectors 4. Blocked air vents can cause overheating. 1. Optical drive eject button 5. Microphone connector Attention: The effective range of the computer. Optical Drive (selected models only) 7. Hard disk drive indicator 8. Headphone connector 6. Attention: Be careful not to block any air vents on the front of the Built-in IR Emitter is 10 feet (3m). 22 Lenovo H520sHardware Maintenance Manual
Memory card reader (selected models only) 3. Font view The following illustration shows the location of controls and components on the computer. Power button 2. USB connectors 4. Blocked air vents can cause overheating. 1. Optical drive eject button 5. Microphone connector Attention: The effective range of the computer. Optical Drive (selected models only) 7. Hard disk drive indicator 8. Headphone connector 6. Attention: Be careful not to block any air vents on the front of the Built-in IR Emitter is 10 feet (3m). 22 Lenovo H520sHardware Maintenance Manual
Lenovo H520s Hardware Maintenance Manual
Page 48
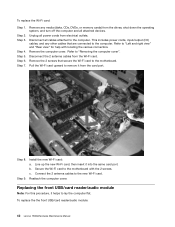
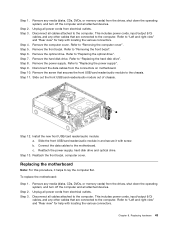
... card port. b. Reattach the computer cover. Step 7. Step 6. Replacing the front USB/card reader/audio module Note: For this procedure, it helps to the motherboard. Disconnect all cables attached to the computer. To replace the the front USB/card reader/audio module: 42 Lenovo H520sHardware Maintenance Manual Refer to remove it into the same card port. Step 5. This includes power cords, input/output (I/O) cables, and any media (disks, CDs, DVDs, or memory cards) from the drives, shut down the operating...
... card port. b. Reattach the computer cover. Step 7. Step 6. Replacing the front USB/card reader/audio module Note: For this procedure, it helps to the motherboard. Disconnect all cables attached to the computer. To replace the the front USB/card reader/audio module: 42 Lenovo H520sHardware Maintenance Manual Refer to remove it into the same card port. Step 5. This includes power cords, input/output (I/O) cables, and any media (disks, CDs, DVDs, or memory cards) from the drives, shut down the operating...
Lenovo H520s Hardware Maintenance Manual
Page 49
... the front USB/card reader/audio module out of chassis. b. Step 2. Remove any media (disks, CDs, DVDs, or memory cards) from the drives, shut down the operating system, and turn off the computer and all power cords from the drives, shut down the operating system, and turn off the computer and all cables attached to lay the computer flat. Step 2. Remove the computer cover. Remove the hard disk drive. Step 9. Step 13. Replacing the motherboard Note...
... the front USB/card reader/audio module out of chassis. b. Step 2. Remove any media (disks, CDs, DVDs, or memory cards) from the drives, shut down the operating system, and turn off the computer and all power cords from the drives, shut down the operating system, and turn off the computer and all cables attached to lay the computer flat. Step 2. Remove the computer cover. Remove the hard disk drive. Step 9. Step 13. Replacing the motherboard Note...
User Guide
Page 22
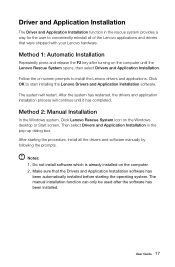
... installed on the Windows desktop or Start screen. User Guide 17 Click OK to conveniently reinstall all the drivers and software manually by following the prompts. Method 2: Manual Installation In the Windows system, Click Lenovo Rescue System icon on the computer. 2. Notes: 1. The system will continue until the Lenovo Rescue System opens, then select Drivers and Application Installation. The manual installation function can only be used after turning on -screen prompts to install the Lenovo drivers...
... installed on the Windows desktop or Start screen. User Guide 17 Click OK to conveniently reinstall all the drivers and software manually by following the prompts. Method 2: Manual Installation In the Windows system, Click Lenovo Rescue System icon on the computer. 2. Notes: 1. The system will continue until the Lenovo Rescue System opens, then select Drivers and Application Installation. The manual installation function can only be used after turning on -screen prompts to install the Lenovo drivers...
User Guide
Page 25
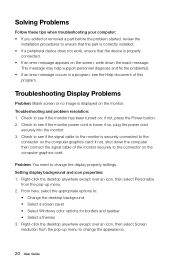
... the monitor has been turned on the computer graphics card. Check to : • Change the desktop background • Select a screen saver • Select Windows color options for borders and taskbar • Select a themes 3. Problem: You need to change the appearance. 20 User Guide Solving Problems Follow these tips when troubleshooting your computer: • If you added or removed a part before the problem started, review the installation procedures to ensure that the part is correctly installed...
... the monitor has been turned on the computer graphics card. Check to : • Change the desktop background • Select a screen saver • Select Windows color options for borders and taskbar • Select a themes 3. Problem: You need to change the appearance. 20 User Guide Solving Problems Follow these tips when troubleshooting your computer: • If you added or removed a part before the problem started, review the installation procedures to ensure that the part is correctly installed...
User Guide
Page 30
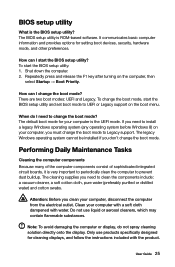
.... The BIOS setup utility is the BIOS setup utility? Do not use products specifically designed for cleaning displays, and follow the instructions included with water. It communicates basic computer information and provides options for your computer, you don't change the boot mode, start the BIOS setup utility and set boot mode to Legacy support. Repeatedly press and release the F1 key after turning on the boot menu. The cleaning supplies you need to install a legacy Windows operating system (any operating system before Windows...
.... The BIOS setup utility is the BIOS setup utility? Do not use products specifically designed for cleaning displays, and follow the instructions included with water. It communicates basic computer information and provides options for your computer, you don't change the boot mode, start the BIOS setup utility and set boot mode to Legacy support. Repeatedly press and release the F1 key after turning on the boot menu. The cleaning supplies you need to install a legacy Windows operating system (any operating system before Windows...
User Guide
Page 33
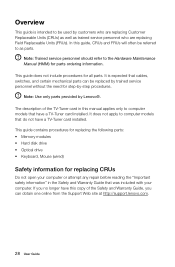
.... This guide contains procedures for replacing the following parts: • Memory modules • Hard disk drive • Optical drive • Keyboard, Mouse (wired) Safety information for step-by Lenovo®. It does not apply to as trained service personnel who are replacing Field Replaceable Units (FRUs). Note: Use only parts provided by -step procedures. If you can be replaced by trained service personnel without the need for replacing CRUs Do not open your...
.... This guide contains procedures for replacing the following parts: • Memory modules • Hard disk drive • Optical drive • Keyboard, Mouse (wired) Safety information for step-by Lenovo®. It does not apply to as trained service personnel who are replacing Field Replaceable Units (FRUs). Note: Use only parts provided by -step procedures. If you can be replaced by trained service personnel without the need for replacing CRUs Do not open your...

User Guide
Page 36
Internal components The following illustrations show the components inside your computer. Lenovo H505s 3 2 1 4 Heatsink and CPU fan Optical disk drive and bay System board Hard disk drive User Guide 31
Internal components The following illustrations show the components inside your computer. Lenovo H505s 3 2 1 4 Heatsink and CPU fan Optical disk drive and bay System board Hard disk drive User Guide 31
User Guide
Page 37
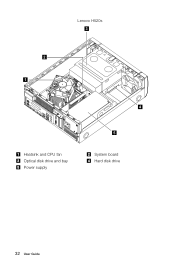
Lenovo H520s 3 2 1 Heatsink and CPU fan Optical disk drive and bay Power supply 4 5 System board Hard disk drive 32 User Guide
Lenovo H520s 3 2 1 Heatsink and CPU fan Optical disk drive and bay Power supply 4 5 System board Hard disk drive 32 User Guide
User Guide
Page 46
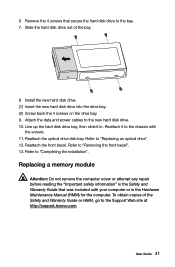
... front bezel. User Guide 41 6. Install the new hard disk drive. (1) Insert the new hard disk drive into the drive bay. (2) Screw back the 4 screws on the drive bay. 9. Reattach it in the Hardware Maintenance Manual (HMM) for the computer. Replacing a memory module Attention: Do not remove the computer cover or attempt any repair before reading the "Important safety information" in the Safety and Warranty Guide that secure the hard disk drive to the new hard disk drive. 10...
... front bezel. User Guide 41 6. Install the new hard disk drive. (1) Insert the new hard disk drive into the drive bay. (2) Screw back the 4 screws on the drive bay. 9. Reattach it in the Hardware Maintenance Manual (HMM) for the computer. Replacing a memory module Attention: Do not remove the computer cover or attempt any repair before reading the "Important safety information" in the Safety and Warranty Guide that secure the hard disk drive to the new hard disk drive. 10...
User Guide
Page 50
... and hardware configuration described in the manuals included with your computer, or operate the product inappropriately. Changes are welcome to the information herein; Lenovo is protected by any means or translated into any ) or product packing list, or consult the distributor for any questions or comments, contact or visit the Lenovo Web site: Service Web site: http://support.lenovo.com User Guide 45...
... and hardware configuration described in the manuals included with your computer, or operate the product inappropriately. Changes are welcome to the information herein; Lenovo is protected by any means or translated into any ) or product packing list, or consult the distributor for any questions or comments, contact or visit the Lenovo Web site: Service Web site: http://support.lenovo.com User Guide 45...
User Guide
Page 52
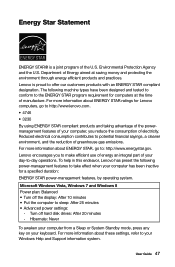
.... Hibernate: Never To awaken your computer from a Sleep or System Standby mode, press any key on your day-to-day operations. Reduced electrical consumption contributes to : http://www.energystar.gov. Microsoft Windows Vista, Windows 7 and Windows 8 Power plan: Balanced • Turn off hard disk drives: After 20 minutes - For more information about ENERGY STAR ratings for Lenovo computers, go to potential financial sayings, a cleaner...
.... Hibernate: Never To awaken your computer from a Sleep or System Standby mode, press any key on your day-to-day operations. Reduced electrical consumption contributes to : http://www.energystar.gov. Microsoft Windows Vista, Windows 7 and Windows 8 Power plan: Balanced • Turn off hard disk drives: After 20 minutes - For more information about ENERGY STAR ratings for Lenovo computers, go to potential financial sayings, a cleaner...


