Brochure
Page 1
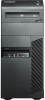
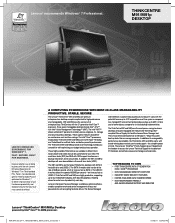
... peace of keys and passwords for self-encrypting hard disk drives. TOP REASONS TO OWN • First ThinkCentre with award-winning base warranty service and support - Faster, more durable and greener Think-branded PCs are premium enterprise-class desktop computers optimized for Windows® ...as compared to deliver improved ease of use. BUILT FOR BUSINESS. A COMPUTING POWERHOUSE WITH BEST-IN-CLASS MANAGEABILITY PRODUCTIVE. SECURE The Lenovo® ThinkCentre® M91 and M91p are optimized for high performance and manageability. The ThinkCentre M91 and M91p provide smart technology ...
... peace of keys and passwords for self-encrypting hard disk drives. TOP REASONS TO OWN • First ThinkCentre with award-winning base warranty service and support - Faster, more durable and greener Think-branded PCs are premium enterprise-class desktop computers optimized for Windows® ...as compared to deliver improved ease of use. BUILT FOR BUSINESS. A COMPUTING POWERHOUSE WITH BEST-IN-CLASS MANAGEABILITY PRODUCTIVE. SECURE The Lenovo® ThinkCentre® M91 and M91p are optimized for high performance and manageability. The ThinkCentre M91 and M91p provide smart technology ...

Brochure
Page 3
...; Office Starter 2010 • Norton® Internet® Security Service Offerings ThinkPlus® Support • All Lenovo® ThinkCentre® customers receive Lenovo's award-winning base warranty service and support. Lenovo's ThinkPlus Priority Support gives IT department faster access to Lenovo technical support for PC hardware and software issues, along with IT management tools to...
...; Office Starter 2010 • Norton® Internet® Security Service Offerings ThinkPlus® Support • All Lenovo® ThinkCentre® customers receive Lenovo's award-winning base warranty service and support. Lenovo's ThinkPlus Priority Support gives IT department faster access to Lenovo technical support for PC hardware and software issues, along with IT management tools to...

Brochure
Page 5
..., ThinkVantage and ThinkVision are registered trademarks of applicable warranties, write to boost system performance • 1GB PC3-10600: 57Y4389 • 2GB PC3-10600: 57Y4390 www.lenovo.com/support/desktopmemorycompatibility Security Accessories Lenovo Fingerprint USB Keyboard (73P4730) • Replace Windows...; Boost graphics performance • Attach two DVI digital or VGA analog monitors www.lenovo.com/support/graphiccards PC3-10600 DDR3-1333 UDIMM Memory • Lowest cost method to : Warranty Information, 500 Park Offices Drive, RTP, NC, 27709, Attn: Dept. Availability...
..., ThinkVantage and ThinkVision are registered trademarks of applicable warranties, write to boost system performance • 1GB PC3-10600: 57Y4389 • 2GB PC3-10600: 57Y4390 www.lenovo.com/support/desktopmemorycompatibility Security Accessories Lenovo Fingerprint USB Keyboard (73P4730) • Replace Windows...; Boost graphics performance • Attach two DVI digital or VGA analog monitors www.lenovo.com/support/graphiccards PC3-10600 DDR3-1333 UDIMM Memory • Lowest cost method to : Warranty Information, 500 Park Offices Drive, RTP, NC, 27709, Attn: Dept. Availability...

User Manual
Page 4
...supports, be sure to use , reproduction, or disclosure is subject to restrictions set forth in Contract No. GS-35F-05925. LENOVO products, data, computer software, and services have been developed exclusively at private expense and are delivered pursuant a General Services Administration ..."GSA" contract, use , reproduction and disclosure. First Edition (March 2011) © Copyright Lenovo 2011. LIMITED AND RESTRICTED RIGHTS NOTICE: If products, data, computer software, or services are sold to governmental entities as commercial items...
...supports, be sure to use , reproduction, or disclosure is subject to restrictions set forth in Contract No. GS-35F-05925. LENOVO products, data, computer software, and services have been developed exclusively at private expense and are delivered pursuant a General Services Administration ..."GSA" contract, use , reproduction and disclosure. First Edition (March 2011) © Copyright Lenovo 2011. LIMITED AND RESTRICTED RIGHTS NOTICE: If products, data, computer software, or services are sold to governmental entities as commercial items...

User Manual
Page 6
...information, help, and service 109 Information resources 109 Lenovo ThinkVantage Tools 109 ThinkVantage Productivity Center . . . . . 109 Lenovo Welcome 109 Help and Support 109 Safety and Warranty 110 Lenovo Web site (http://www.lenovo.com) . . 110 Lenovo Support Web site 110 Help and service 110 ... . . . . 102 Printer problems 105 Serial port problems 105 Software problems 105 USB problems 106 Diagnostic programs 107 Lenovo ThinkVantage Toolbox 107 PC-Doctor for service 111 Using other services 111 Purchasing additional services 112 iv ThinkCentre User Guide Preventing ...
...information, help, and service 109 Information resources 109 Lenovo ThinkVantage Tools 109 ThinkVantage Productivity Center . . . . . 109 Lenovo Welcome 109 Help and Support 109 Safety and Warranty 110 Lenovo Web site (http://www.lenovo.com) . . 110 Lenovo Support Web site 110 Help and service 110 ... . . . . 102 Printer problems 105 Serial port problems 105 Software problems 105 USB problems 106 Diagnostic programs 107 Lenovo ThinkVantage Toolbox 107 PC-Doctor for service 111 Using other services 111 Purchasing additional services 112 iv ThinkCentre User Guide Preventing ...

User Manual
Page 9
..., turn off and that you received with this product. CAUTION: Before replacing any power source. The Lenovo Support Web site also provides the ThinkCentre Safety and Warranty Guide and this ThinkCentre User Guide in your computer after the power cord has been disconnected, the following... options or replace CRUs. Reading and understanding this safety information reduces the risk of the ThinkCentre Safety and Warranty Guide, you unpack an option © Copyright Lenovo 2011 vii For more information on CRUs, refer to the ThinkCentre User Guide for customers to repair your ...
..., turn off and that you received with this product. CAUTION: Before replacing any power source. The Lenovo Support Web site also provides the ThinkCentre Safety and Warranty Guide and this ThinkCentre User Guide in your computer after the power cord has been disconnected, the following... options or replace CRUs. Reading and understanding this safety information reduces the risk of the ThinkCentre Safety and Warranty Guide, you unpack an option © Copyright Lenovo 2011 vii For more information on CRUs, refer to the ThinkCentre User Guide for customers to repair your ...

User Manual
Page 45
... the static-protective packaging, and install it . • Do not place the part on the computer for the option. © Copyright Lenovo 2011 31 When you handle parts and other computer components, take these precautions to build up around you. • Always handle parts and...options, you make the connection and install any repair before reading and understanding the "Important safety information" in the ThinkCentre Safety and Warranty Guide that the part came with the option. Installing or replacing hardware This section provides instructions on how to help you must install ...
... the static-protective packaging, and install it . • Do not place the part on the computer for the option. © Copyright Lenovo 2011 31 When you handle parts and other computer components, take these precautions to build up around you. • Always handle parts and...options, you make the connection and install any repair before reading and understanding the "Important safety information" in the ThinkCentre Safety and Warranty Guide that the part came with the option. Installing or replacing hardware This section provides instructions on how to help you must install ...

User Manual
Page 46
... any locking device that are connected to let the computer cool before reading and understanding the "Important safety information" in the ThinkCentre Safety and Warranty Guide that secure the computer cover. 6. Figure 9. To obtain a copy of the computer to remove the cover. CAUTION: Turn off all... computer cover. Disconnect the power cords, Input/Output cables, and any screws that came with your computer" on how to : http://www.lenovo.com/support This section provides instructions on page 9. 4. Remove any other cables that secures the computer cover, such as a padlock or an...
... any locking device that are connected to let the computer cool before reading and understanding the "Important safety information" in the ThinkCentre Safety and Warranty Guide that secure the computer cover. 6. Figure 9. To obtain a copy of the computer to remove the cover. CAUTION: Turn off all... computer cover. Disconnect the power cords, Input/Output cables, and any screws that came with your computer" on how to : http://www.lenovo.com/support This section provides instructions on page 9. 4. Remove any other cables that secures the computer cover, such as a padlock or an...

User Manual
Page 47
... the front bezel outward. Figure 10. Removing the front bezel 4. Installing or replacing hardware 33 See "Removing the computer cover" on how to : http://www.lenovo.com/support This section provides instructions on page 32. 3. Turn off the computer and disconnect all power cords from electrical outlets. 2. Remove the computer cover... the front bezel, align the three plastic tabs on the right side of the front bezel with the corresponding holes in the ThinkCentre Safety and Warranty Guide that came with another piece of the ThinkCentre Safety and...
... the front bezel outward. Figure 10. Removing the front bezel 4. Installing or replacing hardware 33 See "Removing the computer cover" on how to : http://www.lenovo.com/support This section provides instructions on page 32. 3. Turn off the computer and disconnect all power cords from electrical outlets. 2. Remove the computer cover... the front bezel, align the three plastic tabs on the right side of the front bezel with the corresponding holes in the ThinkCentre Safety and Warranty Guide that came with another piece of the ThinkCentre Safety and...

User Manual
Page 48
... computer cover" on how to open your computer or attempt any repair before reading and understanding the "Important safety information" in the ThinkCentre Safety and Warranty Guide that is currently installed and gently pull it out of the following : 1. Opening the PCI card latch 4. Depending on whether you are installing or... 11. To obtain a copy of the computer, press the release button 1 to install or replace a PCI card. At the rear of the ThinkCentre Safety and Warranty Guide, go to: http://www.lenovo.com/support This section provides instructions on page 32. 3.
... computer cover" on how to open your computer or attempt any repair before reading and understanding the "Important safety information" in the ThinkCentre Safety and Warranty Guide that is currently installed and gently pull it out of the following : 1. Opening the PCI card latch 4. Depending on whether you are installing or... 11. To obtain a copy of the computer, press the release button 1 to install or replace a PCI card. At the rear of the ThinkCentre Safety and Warranty Guide, go to: http://www.lenovo.com/support This section provides instructions on page 32. 3.

User Manual
Page 50
...the "Important safety information" in the sequence of DIMM 2, DIMM 4, DIMM 1, and DIMM 3. To obtain a copy of the ThinkCentre Safety and Warranty Guide, go to "Completing the parts replacement" on how to a maximum of 16 GB system memory. Your computer has four slots for easier ...3. To install or replace a memory module, do next: • To work with your computer or attempt any combination up to : http://www.lenovo.com/support This section provides instructions on page 64. Installing or replacing a memory module Attention: Do not open your computer. Remove the computer cover...
...the "Important safety information" in the sequence of DIMM 2, DIMM 4, DIMM 1, and DIMM 3. To obtain a copy of the ThinkCentre Safety and Warranty Guide, go to "Completing the parts replacement" on how to a maximum of 16 GB system memory. Your computer has four slots for easier ...3. To install or replace a memory module, do next: • To work with your computer or attempt any combination up to : http://www.lenovo.com/support This section provides instructions on page 64. Installing or replacing a memory module Attention: Do not open your computer. Remove the computer cover...

User Manual
Page 52
... to use. Installing or replacing the optical drive Attention: Do not open your computer. To obtain a copy of the ThinkCentre Safety and Warranty Guide, go to do next: • To work with your computer or attempt any repair before reading and understanding the "Important safety information... User Guide See "Removing the computer cover" on how to : http://www.lenovo.com/support This section provides instructions on page 32. 3. If there is a metal static shield installed in the ThinkCentre Safety and Warranty Guide that the notch 1 on the memory module aligns correctly with the slot ...
... to use. Installing or replacing the optical drive Attention: Do not open your computer. To obtain a copy of the ThinkCentre Safety and Warranty Guide, go to do next: • To work with your computer or attempt any repair before reading and understanding the "Important safety information... User Guide See "Removing the computer cover" on how to : http://www.lenovo.com/support This section provides instructions on page 32. 3. If there is a metal static shield installed in the ThinkCentre Safety and Warranty Guide that the notch 1 on the memory module aligns correctly with the slot ...

User Manual
Page 55
... the computer cover. Note: The card reader is only available in the ThinkCentre Safety and Warranty Guide that are connected to the left and slide it out of the ThinkCentre Safety and Warranty Guide, go to: http://www.lenovo.com/support This section provides instructions on page 33. 4. Installing or replacing hardware 41...
... the computer cover. Note: The card reader is only available in the ThinkCentre Safety and Warranty Guide that are connected to the left and slide it out of the ThinkCentre Safety and Warranty Guide, go to: http://www.lenovo.com/support This section provides instructions on page 33. 4. Installing or replacing hardware 41...

User Manual
Page 57
...replacing hardware 43 To remove the card read cover, pivot the two retaining clips 1 that came with another piece of the ThinkCentre Safety and Warranty Guide, go to "Completing the parts replacement" on page 33. Remove the computer cover. Remove all attached devices and the computer. To ...obtain a copy of hardware, go to the appropriate section. • To complete the installation or replacement, go to : http://www.lenovo.com/support To replace the card reader, do next: • To work with your computer or attempt any repair before reading and understanding the ...
...replacing hardware 43 To remove the card read cover, pivot the two retaining clips 1 that came with another piece of the ThinkCentre Safety and Warranty Guide, go to "Completing the parts replacement" on page 33. Remove the computer cover. Remove all attached devices and the computer. To ...obtain a copy of hardware, go to the appropriate section. • To complete the installation or replacement, go to : http://www.lenovo.com/support To replace the card reader, do next: • To work with your computer or attempt any repair before reading and understanding the ...

User Manual
Page 59
... for built-in the ThinkCentre Safety and Warranty Guide that came with another piece of hardware, go to the appropriate section. • To complete the installation or replacement, go to: http://www.lenovo.com/support Your computer has a special type of memory that maintains the ...date, time, and settings for information about replacing and disposing of the ThinkCentre Safety and Warranty Guide, go to do the following: Chapter 5. Installing ...
... for built-in the ThinkCentre Safety and Warranty Guide that came with another piece of hardware, go to the appropriate section. • To complete the installation or replacement, go to: http://www.lenovo.com/support Your computer has a special type of memory that maintains the ...date, time, and settings for information about replacing and disposing of the ThinkCentre Safety and Warranty Guide, go to do the following: Chapter 5. Installing ...

User Manual
Page 60
... all power cords from electrical outlets. 2. Although there are no moving parts in the ThinkCentre Safety and Warranty Guide that came with another piece of the ThinkCentre Safety and Warranty Guide, go to: http://www.lenovo.com/support This section provides instructions on for your computer. Remove the computer cover. Installing a new battery...
... all power cords from electrical outlets. 2. Although there are no moving parts in the ThinkCentre Safety and Warranty Guide that came with another piece of the ThinkCentre Safety and Warranty Guide, go to: http://www.lenovo.com/support This section provides instructions on for your computer. Remove the computer cover. Installing a new battery...

User Manual
Page 62
...at the rear of hardware, go to the appropriate section. • To complete the installation or replacement, go to: http://www.lenovo.com/support This section provides instructions on how to the system board and each of the chassis. 7. Secure the power supply assembly ...cables with your computer or attempt any repair before reading and understanding the "Important safety information" in the ThinkCentre Safety and Warranty Guide that the new power supply assembly is the correct replacement. 8. Slide the power supply assembly to secure the power supply assembly. ...
...at the rear of hardware, go to the appropriate section. • To complete the installation or replacement, go to: http://www.lenovo.com/support This section provides instructions on how to the system board and each of the chassis. 7. Secure the power supply assembly ...cables with your computer or attempt any repair before reading and understanding the "Important safety information" in the ThinkCentre Safety and Warranty Guide that the new power supply assembly is the correct replacement. 8. Slide the power supply assembly to secure the power supply assembly. ...

User Manual
Page 64
...computer cover. To obtain a copy of hardware, go to the appropriate section. • To complete the installation or replacement, go to: http://www.lenovo.com/support This section provides instructions on page 64. See "Locating parts on the system board" on page 32. 3. Do not over-tighten the screws... wait three to five minutes to let the computer cool before reading and understanding the "Important safety information" in the ThinkCentre Safety and Warranty Guide that the heat sink and fan assembly cable is toward the microprocessor fan connector on the bottom of it does not get in ...
...computer cover. To obtain a copy of hardware, go to the appropriate section. • To complete the installation or replacement, go to: http://www.lenovo.com/support This section provides instructions on page 64. See "Locating parts on the system board" on page 32. 3. Do not over-tighten the screws... wait three to five minutes to let the computer cool before reading and understanding the "Important safety information" in the ThinkCentre Safety and Warranty Guide that the heat sink and fan assembly cable is toward the microprocessor fan connector on the bottom of it does not get in ...

User Manual
Page 67
...and understanding the "Important safety information" in the ThinkCentre Safety and Warranty Guide that came with another piece of hardware, go to the appropriate section. • To complete the replacement, go to: http://www.lenovo.com/support This section provides instructions on how to replace the ...primary hard disk drive. To obtain a copy of the ThinkCentre Safety and Warranty Guide, go to "Completing the parts replacement" on page 64. Remove...
...and understanding the "Important safety information" in the ThinkCentre Safety and Warranty Guide that came with another piece of hardware, go to the appropriate section. • To complete the replacement, go to: http://www.lenovo.com/support This section provides instructions on how to replace the ...primary hard disk drive. To obtain a copy of the ThinkCentre Safety and Warranty Guide, go to "Completing the parts replacement" on page 64. Remove...

User Manual
Page 69
...your computer might come with your computer or attempt any repair before reading and understanding the "Important safety information" in the ThinkCentre Safety and Warranty Guide that came with a secondary hard disk drive bay for installing or replacing a secondary hard disk drive. Removing the secondary hard disk ... 6. To obtain a copy of hardware, go to the appropriate section. • To complete the installation or replacement, go to: http://www.lenovo.com/support Note: Depending on page 64. Pull on how to replace the secondary hard disk drive. What to do the following: 1. This ...
...your computer might come with your computer or attempt any repair before reading and understanding the "Important safety information" in the ThinkCentre Safety and Warranty Guide that came with a secondary hard disk drive bay for installing or replacing a secondary hard disk drive. Removing the secondary hard disk ... 6. To obtain a copy of hardware, go to the appropriate section. • To complete the installation or replacement, go to: http://www.lenovo.com/support Note: Depending on page 64. Pull on how to replace the secondary hard disk drive. What to do the following: 1. This ...

