Owner's Manual
Page 1
For service/ support Call: Toll Free Number 1-800-243-0000 FB162_A0U_JA1ULL5 Mini Home Theater OWNER'S MANUAL MODEL: LFD750 LFD750 FBS162V Before connecting, operating or adjusting this product, please read this instruction booklet carefully and completely. © Copyright 2007, LG Electronics U.S.A., Inc.
For service/ support Call: Toll Free Number 1-800-243-0000 FB162_A0U_JA1ULL5 Mini Home Theater OWNER'S MANUAL MODEL: LFD750 LFD750 FBS162V Before connecting, operating or adjusting this product, please read this instruction booklet carefully and completely. © Copyright 2007, LG Electronics U.S.A., Inc.
Owner's Manual
Page 2
... wall outlets, extension cords, frayed power cords, or damaged or cracked wire insulation are designed to . Slots and openings in the cabinet are should be placed in a built-in installation such as vases, should not be exposed to persons. If this owner's manual to be blocked by an authorized servicer. This equipment generates, uses and can be of sufficient magnitude to radio...
... wall outlets, extension cords, frayed power cords, or damaged or cracked wire insulation are designed to . Slots and openings in the cabinet are should be placed in a built-in installation such as vases, should not be exposed to persons. If this owner's manual to be blocked by an authorized servicer. This equipment generates, uses and can be of sufficient magnitude to radio...
Owner's Manual
Page 3
.... This product should be read before cleaning. A grounding type plug has two blades and a third grounding prong. Protect the power cord from the wall outlet before the product is operated. 2. Read these instructions. - Keep these instructions. - Follow all warnings. - The wide blade or the third prong are provided for installation, use can be placed in a built-in electric shock or...
.... This product should be read before cleaning. A grounding type plug has two blades and a third grounding prong. Protect the power cord from the wall outlet before the product is operated. 2. Read these instructions. - Keep these instructions. - Follow all warnings. - The wide blade or the third prong are provided for installation, use can be placed in a built-in electric shock or...
Owner's Manual
Page 4
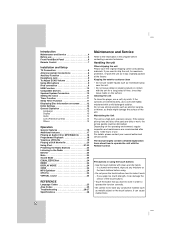
... authorized service center. Cleaning the unit To clean the player, use a soft, dry cloth. Introduction Maintenance and Service 4 Before use 5 Front Panel/Back Panel 6 Remote Control 7 Installation and Setup TV Connection 8 Antenna (Aerial) Connections 8 Auxiliary Function 9 Headphone Jack 9 To Adjust ECHO Volume 9 Using Microphone 9 iPod connection 9 USB Function 10 Compatible Devices 10 Speaker System Connection 10 Setting the Clock 11 Timer Function 11 Sleep Timer Function 11 Displaying Disc Information on-screen . . . . . .12 Initial Settings 12 General Operation 12...
... authorized service center. Cleaning the unit To clean the player, use a soft, dry cloth. Introduction Maintenance and Service 4 Before use 5 Front Panel/Back Panel 6 Remote Control 7 Installation and Setup TV Connection 8 Antenna (Aerial) Connections 8 Auxiliary Function 9 Headphone Jack 9 To Adjust ECHO Volume 9 Using Microphone 9 iPod connection 9 USB Function 10 Compatible Devices 10 Speaker System Connection 10 Setting the Clock 11 Timer Function 11 Sleep Timer Function 11 Displaying Disc Information on-screen . . . . . .12 Initial Settings 12 General Operation 12...
Owner's Manual
Page 5
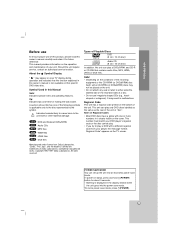
... DivX files. Symbol Used in this owner's manual is not available on the operation and maintenance of Dolby Laboratories. DVD-V ACD MP3 WMA JPEG DivX DVD and finalized DVD±R/RW Audio CDs MP3 files WMA files JPEG files DivX files Manufactured under license from your DVD player's regional code or the disc cannot play only DVD discs labelled as the same as the rear of the unit...
... DivX files. Symbol Used in this owner's manual is not available on the operation and maintenance of Dolby Laboratories. DVD-V ACD MP3 WMA JPEG DivX DVD and finalized DVD±R/RW Audio CDs MP3 files WMA files JPEG files DivX files Manufactured under license from your DVD player's regional code or the disc cannot play only DVD discs labelled as the same as the rear of the unit...
Owner's Manual
Page 6
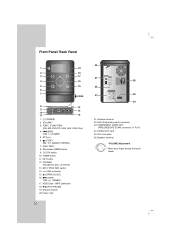
..., DVD/CD, USB, AUX, OSD iPod) 4. .(SKIP) TUN. (-) (TUNER) 5. EQ master/ DEMO button 9. XDSS plus / (MP3 Optimizer) 18. B/[] (PLAY/PAUSE) 19. Power cord 6 20 21 26 22 23 25 24 21. CLOCK button 10. Antenna terminal 22. iPod connector 26. Speaker terminal *VOLUME Adjustment Move your finger around the touch wheel. VOLUME* 3. MIC1/ MIC2 (MIC Jacks) 14. Z (OPEN/CLOSE) 16. > (SKIP) TUN. (+) (TUNER) 17. SET button 12. x (STOP) MO./ ST. (MONO/ STEREO) 7. COMPONENT VIDEO OUT (PROGRESSIVE SCAN) connector...
..., DVD/CD, USB, AUX, OSD iPod) 4. .(SKIP) TUN. (-) (TUNER) 5. EQ master/ DEMO button 9. XDSS plus / (MP3 Optimizer) 18. B/[] (PLAY/PAUSE) 19. Power cord 6 20 21 26 22 23 25 24 21. CLOCK button 10. Antenna terminal 22. iPod connector 26. Speaker terminal *VOLUME Adjustment Move your finger around the touch wheel. VOLUME* 3. MIC1/ MIC2 (MIC Jacks) 14. Z (OPEN/CLOSE) 16. > (SKIP) TUN. (+) (TUNER) 17. SET button 12. x (STOP) MO./ ST. (MONO/ STEREO) 7. COMPONENT VIDEO OUT (PROGRESSIVE SCAN) connector...

Owner's Manual
Page 7
FUNCTION SELECT buttons 22 (TUNER/ BAND,DVD, AUX, USB) 3. TITLE button 15 (Use the TITLE button to display the menu screen included on DVD video discs.) 19 9. REPEAT button 18 11. SLEEP button 21. Introduction Remote Control 1 2 iPod 3 4 5 6 7 8 9 10 11 12 13 1. POWER button 2. SETUP button 21 6. • ARROW buttons (v / V / b / B ) (Selects an option in front of the Remote Sensor Remote Control battery installation Remove the battery cover on DVD video discs.) 18. REPEAT A-B button 12. • SCAN (FF/GG) buttons • SLOW (t/T) buttons...
FUNCTION SELECT buttons 22 (TUNER/ BAND,DVD, AUX, USB) 3. TITLE button 15 (Use the TITLE button to display the menu screen included on DVD video discs.) 19 9. REPEAT button 18 11. SLEEP button 21. Introduction Remote Control 1 2 iPod 3 4 5 6 7 8 9 10 11 12 13 1. POWER button 2. SETUP button 21 6. • ARROW buttons (v / V / b / B ) (Selects an option in front of the Remote Sensor Remote Control battery installation Remove the battery cover on DVD video discs.) 18. REPEAT A-B button 12. • SCAN (FF/GG) buttons • SLOW (t/T) buttons...
Owner's Manual
Page 9
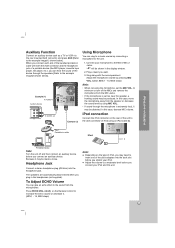
...(2) shown below ]. The speakers are automatically disconnected when you station your microphone to the dock connector of a portable device (like MP3 player, cassette tape player, CD player, etc.), you want. 3. Connect your iPod. In this case, decrese MIC volume. iPod connection Connect the iPod connector on the Remote Control to increase the echo volume or decrease it may need to insert one of the dock adapters into the headphone jack. Because it may be...
...(2) shown below ]. The speakers are automatically disconnected when you station your microphone to the dock connector of a portable device (like MP3 player, cassette tape player, CD player, etc.), you want. 3. Connect your iPod. In this case, decrese MIC volume. iPod connection Connect the iPod connector on the Remote Control to increase the echo volume or decrease it may need to insert one of the dock adapters into the headphone jack. Because it may be...
Owner's Manual
Page 10
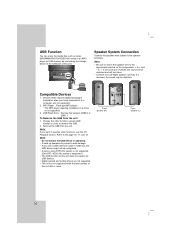
... media files such as tunes (MP3/WMA/PHOTO/VIDEO file) saved in an MP3 player or USB memory by connecting the storage device to the USB port of files is 1000 or more. Speaker System Connection Connect the speaker wires cables to operate other functions except USB function in operating. • A back up demands to remove the USB. 2. To Remove the USB from the unit. Choose the other functions, see the CD Playback...
... media files such as tunes (MP3/WMA/PHOTO/VIDEO file) saved in an MP3 player or USB memory by connecting the storage device to the USB port of files is 1000 or more. Speaker System Connection Connect the speaker wires cables to operate other functions except USB function in operating. • A back up demands to remove the USB. 2. To Remove the USB from the unit. Choose the other functions, see the CD Playback...
Owner's Manual
Page 11
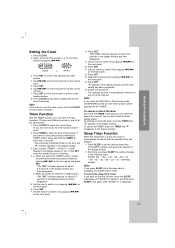
... the front panel. 12. Each function (TUNER → DVD/CD → USB) flashes in the display window in the display window. When you select the TUNER function, select the previously memorized preset number by tapping ./ > on the front panel. 8. "ON TIME" indicator appears for about 0.5 seconds in the display window. Set the minute to check the current time. (If you have the radio reception, CD play and USB play turned on and...
... the front panel. 12. Each function (TUNER → DVD/CD → USB) flashes in the display window in the display window. When you select the TUNER function, select the previously memorized preset number by tapping ./ > on the front panel. 8. "ON TIME" indicator appears for about 0.5 seconds in the display window. Set the minute to check the current time. (If you have the radio reception, CD play and USB play turned on and...
Owner's Manual
Page 12
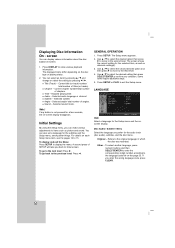
... Select a language for the selected item, as well as picture and sound. Elapsed playing time. Subtitle - Angle - Note: If any button is not pressed for the audio track (disc audio), subtitles, and the disc menu. Use v / V to select the second desired option and then press B to move to items such as alternate setting(s). 3. Original - screen You can make various adjustments to the second level. For details on each Setup menu...
... Select a language for the selected item, as well as picture and sound. Elapsed playing time. Subtitle - Angle - Note: If any button is not pressed for the audio track (disc audio), subtitles, and the disc menu. Use v / V to select the second desired option and then press B to move to items such as alternate setting(s). 3. Original - screen You can make various adjustments to the second level. For details on each Setup menu...

Owner's Manual
Page 13
... mode is connected. 16:9 - Select when a standard 4:3 TV is set your monitor/television, set to Off. Select when a 16:9 wide TV is connected. Automatically displays the wide picture on the DISPLAY menu then press B. 2. Next, press STOP( x ) and hold it for progressive scan output is compatible with a progressive scan signal, set Progressive Scan to "4:3". Letterbox - Panscan - Installation and Setup DISPLAY TV Aspect 4:3 - Select "On" using the Component Video jacks for connection to Progressive scan mode...
... mode is connected. 16:9 - Select when a standard 4:3 TV is set your monitor/television, set to Off. Select when a 16:9 wide TV is connected. Automatically displays the wide picture on the DISPLAY menu then press B. 2. Next, press STOP( x ) and hold it for progressive scan output is compatible with a progressive scan signal, set Progressive Scan to "4:3". Letterbox - Panscan - Installation and Setup DISPLAY TV Aspect 4:3 - Select "On" using the Component Video jacks for connection to Progressive scan mode...
Owner's Manual
Page 14
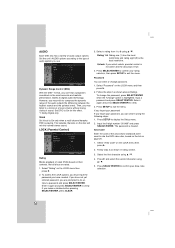
... the menu. Dynamic Range Control (DRC) With the DVD*1 format, you may wish to verify. Enter it using v / V. Press SETUP to On only when a multi-channel karaoke DVD is highlighted. Set DRC to On for this effect. *1: Dolby Digital only Vocal Set Vocal to display the Setup menu. 2. Follow the step 2 as shown in full. 4. Input a password and press SELECT/ENTER. Area Code Enter the code of audio output options. Select "Rating" on the LOCK menu...
... the menu. Dynamic Range Control (DRC) With the DVD*1 format, you may wish to verify. Enter it using v / V. Press SETUP to On only when a multi-channel karaoke DVD is highlighted. Set DRC to On for this effect. *1: Dolby Digital only Vocal Set Vocal to display the Setup menu. 2. Follow the step 2 as shown in full. 4. Input a password and press SELECT/ENTER. Area Code Enter the code of audio output options. Select "Rating" on the LOCK menu...
Owner's Manual
Page 15
... mode. • The Semi Karaoke function is available only when a microphone is connected. • Watching movies, "off . Follow the instructions and download the video onto a disc for the Semi Karaoke function: • DVD discs • DVD Karaoke Discs Note: • This function operate on the screen. Use the registration code to exit. Installation and Setup 15 Press SELECT/ENTER to purchase or rent the videos from DivX® VOD can only be played...
... mode. • The Semi Karaoke function is available only when a microphone is connected. • Watching movies, "off . Follow the instructions and download the video onto a disc for the Semi Karaoke function: • DVD discs • DVD Karaoke Discs Note: • This function operate on the screen. Use the registration code to exit. Installation and Setup 15 Press SELECT/ENTER to purchase or rent the videos from DivX® VOD can only be played...
Owner's Manual
Page 21
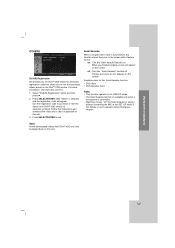
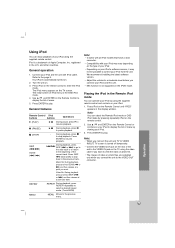
..., press ./> SKIP (. Note: • It works with all iPod models that have a dock connector. • Compatibility with iPod cable. Note: You can operate your iPod by using the supplied remote control and controls on your iPod. 1. Refer to stop playback. The initial screen of iPod menu is turned off temporarily. • Connect the VIDEO OUT jack on the rear of the unit to the VIDEO IN jack on your iPod's software version, it may not be possible...
..., press ./> SKIP (. Note: • It works with all iPod models that have a dock connector. • Compatibility with iPod cable. Note: You can operate your iPod by using the supplied remote control and controls on your iPod. 1. Refer to stop playback. The initial screen of iPod menu is turned off temporarily. • Connect the VIDEO OUT jack on the rear of the unit to the VIDEO IN jack on your iPod's software version, it may not be possible...
Owner's Manual
Page 22
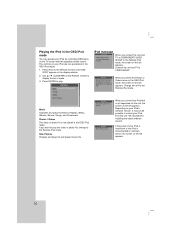
... your iPod are not operational in the OSD iPod mode. If the power of menu. 3. We recommend installing the latest software version. When you select the Photos or Videos menu in the OSD iPod mode, the screen on the left appears. The controls on the left appears. Use v / V and ENTER on the Remote Control to control your iPod from iPod. When you want to play . If you connect the iPod that is not supported on...
... your iPod are not operational in the OSD iPod mode. If the power of menu. 3. We recommend installing the latest software version. When you select the Photos or Videos menu in the OSD iPod mode, the screen on the left appears. The controls on the left appears. Use v / V and ENTER on the Remote Control to control your iPod from iPod. When you want to play . If you connect the iPod that is not supported on...
Owner's Manual
Page 23
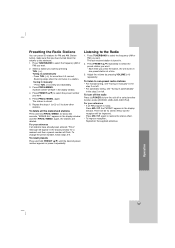
... the volume to select the preset number you have already been entered, "FULL" message will appear in the display window. 4. Press PRESET (v/V) repeatedly to select the frequency (AM or FM) you want . 5. To turn off or select another function mode (DVD/CD, USB, AUX, OSD iPod). Press MO./ ST. Press TUNER/BAND to select the preset station you want . Scanning stops when the unit tunes in manually - Press TUNER/BAND to restore the stereo...
... the volume to select the preset number you have already been entered, "FULL" message will appear in the display window. 4. Press PRESET (v/V) repeatedly to select the frequency (AM or FM) you want . 5. To turn off or select another function mode (DVD/CD, USB, AUX, OSD iPod). Press MO./ ST. Press TUNER/BAND to select the preset station you want . Scanning stops when the unit tunes in manually - Press TUNER/BAND to restore the stereo...
Owner's Manual
Page 24
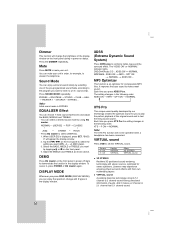
... power-on status. Each time you to play the perfect playback of audio. Source 2.1 ch. 5.1 ch Display VIRTUAL VIRTUAL Effect 3D STEREO VIRTUAL sound 3D STEREO Realtime 3D positioned sound rendering technology with 6 types in the following order. sound only). Note: Initial sound mode is displayed, press SET. Press EQ master to reinforce treble, bass and the surround effect. Tap the ./ > on the front panel. 4. To cancel it makes a 2 channel...
... power-on status. Each time you to play the perfect playback of audio. Source 2.1 ch. 5.1 ch Display VIRTUAL VIRTUAL Effect 3D STEREO VIRTUAL sound 3D STEREO Realtime 3D positioned sound rendering technology with 6 types in the following order. sound only). Note: Initial sound mode is displayed, press SET. Press EQ master to reinforce treble, bass and the surround effect. Tap the ./ > on the front panel. 4. To cancel it makes a 2 channel...
Owner's Manual
Page 26
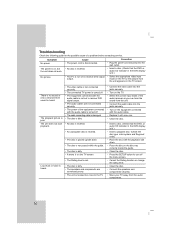
... a disc. (Check that the DVD, or audio CD indicator in the DVD display is lit.) No picture. • The TV is not set to receive DVD signal output. • The audio cables are connected poorly. • The unit is located too close to the TV. • Connect the video cable into the jacks securely. • Turn on the TV. • Select the correct input mode of a problem before contacting service. Correction • Plug the power cord securely...
... a disc. (Check that the DVD, or audio CD indicator in the DVD display is lit.) No picture. • The TV is not set to receive DVD signal output. • The audio cables are connected poorly. • The unit is located too close to the TV. • Connect the video cable into the jacks securely. • Turn on the TV. • Select the correct input mode of a problem before contacting service. Correction • Plug the power cord securely...
Specification
Page 2
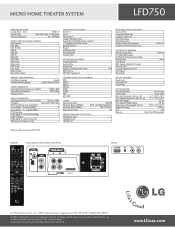
... Range (100kHz) 87.50-108.00MHz(50kHz) AM Tuner Rane (10kHz) 530-1720kHz Radio Tuner Presets 50 front panel inputs/outputs Microphone Input 2 Headphone Jack 1 USB (A) Port 1 rear panel inputs/outputs Audio (L/R) In 1 Component Video Out 1 Composite Video Out 1 FM Antenna Input 1 AM Antenna Input 1 Speaker Output Type/Number Push-in/2 LG Made for iPod Connector Port 1 supplied accessories Remote Control Type Universal A/V Cable (RCA Type) • LG Made for Rew and Fwd • 1.5x Playback with...
... Range (100kHz) 87.50-108.00MHz(50kHz) AM Tuner Rane (10kHz) 530-1720kHz Radio Tuner Presets 50 front panel inputs/outputs Microphone Input 2 Headphone Jack 1 USB (A) Port 1 rear panel inputs/outputs Audio (L/R) In 1 Component Video Out 1 Composite Video Out 1 FM Antenna Input 1 AM Antenna Input 1 Speaker Output Type/Number Push-in/2 LG Made for iPod Connector Port 1 supplied accessories Remote Control Type Universal A/V Cable (RCA Type) • LG Made for Rew and Fwd • 1.5x Playback with...


