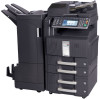
Kyocera Command Center Operation Guide Rev 6.3
Page 57
...Serial Number • %etheraddr = MAC Address • %equipid = Equipment ID E-mail Interval Sets the time or interval for sending, from 1 to immediately send a report. Advanced > Management > Maintenance Notification > Sending Log History This feature defines the Job Log Notification information reports. The string will be separated... semicolon ";". COMMAND CENTER 3-50 Recipient Address The E-mail address of every day. • Hourly: Sends at the specified time of the recipient. Run once now You can include model name, serial number, and MAC address in the month, such ...
...Serial Number • %etheraddr = MAC Address • %equipid = Equipment ID E-mail Interval Sets the time or interval for sending, from 1 to immediately send a report. Advanced > Management > Maintenance Notification > Sending Log History This feature defines the Job Log Notification information reports. The string will be separated... semicolon ";". COMMAND CENTER 3-50 Recipient Address The E-mail address of every day. • Hourly: Sends at the specified time of the recipient. Run once now You can include model name, serial number, and MAC address in the month, such ...
PRESCRIBE Commands Technical Reference Manual - Rev. 4.7
Page 94
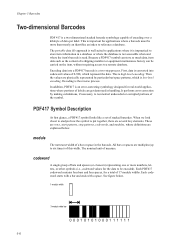
Because a PDF417 symbol can store so much data, item data such as the content of a shipping manifest or equipment maintenance history can get destroyed in handling. In addition, PDF417 is an error-correcting symbology designed for a total of labels can be encoded... 0 1 0 1 0 1 0 0 0 1 1 1 1 1 1 5-10 module The narrowest width of bars and spaces (or elements) representing one or more than merely an identifier, an index to six times) of 0-928, which is a two-step process. Decoding is high-level encoding. The portable data file approach is well suited to store item information in...
Because a PDF417 symbol can store so much data, item data such as the content of a shipping manifest or equipment maintenance history can get destroyed in handling. In addition, PDF417 is an error-correcting symbology designed for a total of labels can be encoded... 0 1 0 1 0 1 0 0 0 1 1 1 1 1 1 5-10 module The narrowest width of bars and spaces (or elements) representing one or more than merely an identifier, an index to six times) of 0-928, which is a two-step process. Decoding is high-level encoding. The portable data file approach is well suited to store item information in...
250ci/300ci/400ci/500ci/552ci Operation Guide Rev-1
Page 20
Warranty (the United States) 250ci/300ci/400ci/500ci/552ci COLOR MULTIFUNCTIONAL PRODUCT LIMITED WARRANTY Kyocera Mita America, Inc. If the Kyocera Dealer is authorized to extend the time period or expand this warranty on behalf of one (1) year, or 300,000 copies/prints from date...(b) have had the serial number modified, altered, or removed. Kyocera shall have a 90 day Limited Warranty. Neither the seller, nor any defective parts. This warranty covers Maintenance Kits and the components of Maintenance Kits included with the initial installation of the MFP, against any ...
Warranty (the United States) 250ci/300ci/400ci/500ci/552ci COLOR MULTIFUNCTIONAL PRODUCT LIMITED WARRANTY Kyocera Mita America, Inc. If the Kyocera Dealer is authorized to extend the time period or expand this warranty on behalf of one (1) year, or 300,000 copies/prints from date...(b) have had the serial number modified, altered, or removed. Kyocera shall have a 90 day Limited Warranty. Neither the seller, nor any defective parts. This warranty covers Maintenance Kits and the components of Maintenance Kits included with the initial installation of the MFP, against any ...
250ci/300ci/400ci/500ci/552ci Operation Guide Rev-1
Page 294
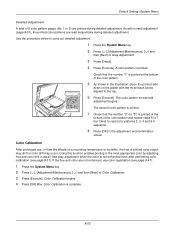
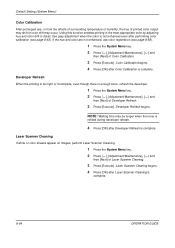
... Calibration begins. 4 Press [OK] after performing color calibration (see page 8-47). 1 Press the System Menu key. 2 Press [ ], [Adjustment/Maintenance], [ ] and then [Next] of Color Calibration. 3 Press [Execute]. A color pattern is printed at the bottom of the color pattern and repeat ...steps 5 to 7 four times to carry out detailed adjustment. 1 Press the System Menu key. 2 Press [ ], [Adjustment/Maintenance], [ ] and then [Next] of Gray Adjustment. 3 Press [Detail]. 4 Press [Execute]. Check that the ...
... Calibration begins. 4 Press [OK] after performing color calibration (see page 8-47). 1 Press the System Menu key. 2 Press [ ], [Adjustment/Maintenance], [ ] and then [Next] of Color Calibration. 3 Press [Execute]. A color pattern is printed at the bottom of the color pattern and repeat ...steps 5 to 7 four times to carry out detailed adjustment. 1 Press the System Menu key. 2 Press [ ], [Adjustment/Maintenance], [ ] and then [Next] of Gray Adjustment. 3 Press [Detail]. 4 Press [Execute]. Check that the ...
250ci/300ci/400ci/500ci/552ci Operation Guide Rev-1
Page 295
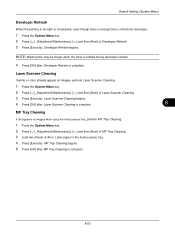
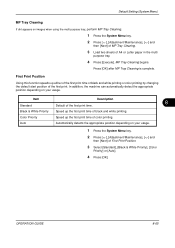
NOTE: Waiting time may be longer when the toner is refilled during developer refresh. 4 Press [OK] after MP Tray Cleaning is complete. 8 MP Tray Cleaning If dirt appears on images, perform Laser Scanner Cleaning. 1 Press the System Menu key. 2 Press [ ], [Adjustment/Maintenance], [ ] and then [Next] of... begins. 5 Press [OK] after Developer Refresh is enough toner, refresh the developer. 1 Press the System Menu key. 2 Press [ ], [Adjustment/Maintenance], [ ] and then [Next] of A4 or Letter paper in the multi purpose tray. 4 Press [Execute]. Laser Scanner Cleaning If white or color...
NOTE: Waiting time may be longer when the toner is refilled during developer refresh. 4 Press [OK] after MP Tray Cleaning is complete. 8 MP Tray Cleaning If dirt appears on images, perform Laser Scanner Cleaning. 1 Press the System Menu key. 2 Press [ ], [Adjustment/Maintenance], [ ] and then [Next] of... begins. 5 Press [OK] after Developer Refresh is enough toner, refresh the developer. 1 Press the System Menu key. 2 Press [ ], [Adjustment/Maintenance], [ ] and then [Next] of A4 or Letter paper in the multi purpose tray. 4 Press [Execute]. Laser Scanner Cleaning If white or color...
250ci/300ci/400ci/500ci/552ci Operation Guide Rev-1
Page 296
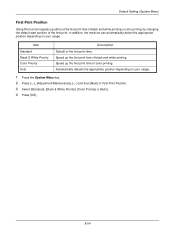
... appropriate position depending on your usage. 1 Press the System Menu key. 2 Press [ ], [Adjustment/Maintenance], [ ] and then [Next] of color printing. Default Setting (System Menu) First Print Position Using this function speeds up either of the first print time of black and white printing or color printing by changing the default start position...
... appropriate position depending on your usage. 1 Press the System Menu key. 2 Press [ ], [Adjustment/Maintenance], [ ] and then [Next] of color printing. Default Setting (System Menu) First Print Position Using this function speeds up either of the first print time of black and white printing or color printing by changing the default start position...
250ci/300ci/400ci/500ci/552ci Operation Guide Rev-1
Page 334
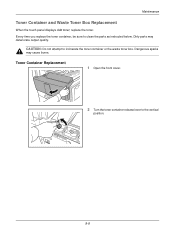
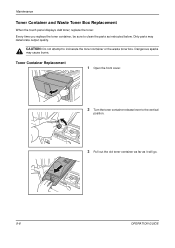
Dangerous sparks may deteriorate output quality. Every time you replace the toner container, be sure to the vertical position. 9-8 Maintenance Toner Container and Waste Toner Box Replacement When the touch panel displays Add toner, replace the toner. Toner Container Replacement 1 Open the front cover. 2 Turn the toner container release lever to clean the parts as instructed below. Dirty parts may cause burns. CAUTION: Do not attempt to incinerate the toner container or the waste toner box.
Dangerous sparks may deteriorate output quality. Every time you replace the toner container, be sure to the vertical position. 9-8 Maintenance Toner Container and Waste Toner Box Replacement When the touch panel displays Add toner, replace the toner. Toner Container Replacement 1 Open the front cover. 2 Turn the toner container release lever to clean the parts as instructed below. Dirty parts may cause burns. CAUTION: Do not attempt to incinerate the toner container or the waste toner box.
250ci/300ci/400ci/500ci/552ci Operation Guide Rev-1
Page 335
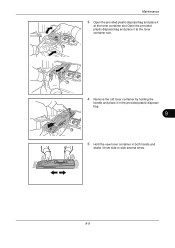
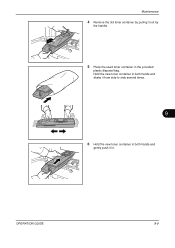
Maintenance 3 Open the provided plastic disposal bag and place it at the toner container slot.Open the provided plastic disposal bag and place it at the toner container slot. 4 Remove the old toner container by holding the handle and place it in the provided plastic disposal bag. 9 5 Hold the new toner container in both hands and shake it from side to side several times. 9-9
Maintenance 3 Open the provided plastic disposal bag and place it at the toner container slot.Open the provided plastic disposal bag and place it at the toner container slot. 4 Remove the old toner container by holding the handle and place it in the provided plastic disposal bag. 9 5 Hold the new toner container in both hands and shake it from side to side several times. 9-9
500ci/400ci/300ci/250ci Operation Guide Rev-1
Page 21
...400ci / 500ci COLOR MULTIFUNCTIONAL PRODUCT LIMITED WARRANTY Kyocera Mita America, Inc. In the event the color MFP or an accessory is not able to provide service, write to extend the time period or expand this warranty, the Customer must immediately notify the Authorized Kyocera Dealer from date of Kyocera. This warranty covers Maintenance... Kits and the components of Maintenance Kits included with the initial...
...400ci / 500ci COLOR MULTIFUNCTIONAL PRODUCT LIMITED WARRANTY Kyocera Mita America, Inc. In the event the color MFP or an accessory is not able to provide service, write to extend the time period or expand this warranty, the Customer must immediately notify the Authorized Kyocera Dealer from date of Kyocera. This warranty covers Maintenance... Kits and the components of Maintenance Kits included with the initial...
500ci/400ci/300ci/250ci Operation Guide Rev-1
Page 326
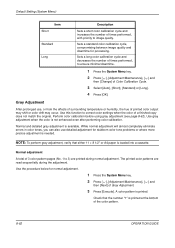
...not match the original. Use this function to correct color settings when the color of times performed, with priority to ensure minimal downtime. 1 Press the System Menu key. 2 Press [ ], [Adjustment/Maintenance], [ ] and then [Change] of Gray Adjustment. 3 Press [Execute]. Sets ...a standard color calibration cycle, compromising between image quality and downtime for normal adjustment. 1 Press the System Menu key. 2 Press [ ], [Adjustment/Maintenance], [ ] and then [Next] of Color Calibration Cycle. 3 Select [Auto], [Short], [Standard] or [Long]. 4 Press [OK]. Normal and detailed...
...not match the original. Use this function to correct color settings when the color of times performed, with priority to ensure minimal downtime. 1 Press the System Menu key. 2 Press [ ], [Adjustment/Maintenance], [ ] and then [Change] of Gray Adjustment. 3 Press [Execute]. Sets ...a standard color calibration cycle, compromising between image quality and downtime for normal adjustment. 1 Press the System Menu key. 2 Press [ ], [Adjustment/Maintenance], [ ] and then [Next] of Color Calibration Cycle. 3 Select [Auto], [Short], [Standard] or [Long]. 4 Press [OK]. Normal and detailed...
500ci/400ci/300ci/250ci Operation Guide Rev-1
Page 327
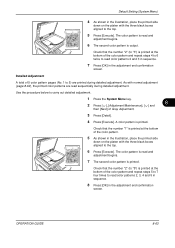
... Press [Execute]. OPERATION GUIDE 8-63 Use the procedure below to carry out detailed adjustment. 1 Press the System Menu key. 8 2 Press [ ], [Adjustment/Maintenance], [ ] and then [Next] of the color pattern. 5 As shown in the adjustment end confirmation screen. The color pattern is read and adjustment begins. 7...patterns are printed during detailed adjustment. Detailed Adjustment A total of the color pattern and repeat steps 5 to 7 four times to the top. 6 Press [Execute]. Check that the number "2" (to "3") is printed. Check that the number "2" (to "5") is printed...
... Press [Execute]. OPERATION GUIDE 8-63 Use the procedure below to carry out detailed adjustment. 1 Press the System Menu key. 8 2 Press [ ], [Adjustment/Maintenance], [ ] and then [Next] of the color pattern. 5 As shown in the adjustment end confirmation screen. The color pattern is read and adjustment begins. 7...patterns are printed during detailed adjustment. Detailed Adjustment A total of the color pattern and repeat steps 5 to 7 four times to the top. 6 Press [Execute]. Check that the number "2" (to "3") is printed. Check that the number "2" (to "5") is printed...
500ci/400ci/300ci/250ci Operation Guide Rev-1
Page 328
...enhanced, use , or from the effects of surrounding temperature or humidity, the hue of Developer Refresh. 3 Press [Execute]. NOTE: Waiting time may occur. Color Calibration begins. 4 Press [OK] after Laser Scanner Cleaning is complete. Developer Refresh begins. Laser Scanner Cleaning begins. ...developer refresh. 4 Press [OK] after performing color calibration (see page 8-58). 1 Press the System Menu key. 2 Press [ ], [Adjustment/Maintenance], [ ] and then [Next] of Laser Scanner Cleaning. 3 Press [Execute]. Using this function enables printing in the most appropriate color by ...
...enhanced, use , or from the effects of surrounding temperature or humidity, the hue of Developer Refresh. 3 Press [Execute]. NOTE: Waiting time may occur. Color Calibration begins. 4 Press [OK] after Laser Scanner Cleaning is complete. Developer Refresh begins. Laser Scanner Cleaning begins. ...developer refresh. 4 Press [OK] after performing color calibration (see page 8-58). 1 Press the System Menu key. 2 Press [ ], [Adjustment/Maintenance], [ ] and then [Next] of Laser Scanner Cleaning. 3 Press [Execute]. Using this function enables printing in the most appropriate color by ...
500ci/400ci/300ci/250ci Operation Guide Rev-1
Page 329
... or color printing by changing the default start position of the first print time. Auto Automatically detects the appropriate position depending on your usage. 1 Press the System Menu key. 2 Press [ ], [Adjustment/Maintenance], [ ] and then [Next] of black and white printing. Press ...[OK] after MP Tray Cleaning is complete. OPERATION GUIDE 8-65 First Print Position Using this function speeds up the first print time of First Print Position. 3 Select [Standard], [Black...
... or color printing by changing the default start position of the first print time. Auto Automatically detects the appropriate position depending on your usage. 1 Press the System Menu key. 2 Press [ ], [Adjustment/Maintenance], [ ] and then [Next] of black and white printing. Press ...[OK] after MP Tray Cleaning is complete. OPERATION GUIDE 8-65 First Print Position Using this function speeds up the first print time of First Print Position. 3 Select [Standard], [Black...
500ci/400ci/300ci/250ci Operation Guide Rev-1
Page 378
Every time you replace the toner container, be sure to clean the parts as it will go. 9-8 OPERATION GUIDE Dirty parts may cause burns. Dangerous sparks may deteriorate output quality. CAUTION: Do not attempt to the vertical position. 3 Pull out the old toner container as far as instructed below. Toner Container Replacement 1 Open the front cover. 2 Turn the toner container release lever to incinerate the toner container or the waste toner box. Maintenance Toner Container and Waste Toner Box Replacement When the touch panel displays Add toner, replace the toner.
Every time you replace the toner container, be sure to clean the parts as it will go. 9-8 OPERATION GUIDE Dirty parts may cause burns. Dangerous sparks may deteriorate output quality. CAUTION: Do not attempt to the vertical position. 3 Pull out the old toner container as far as instructed below. Toner Container Replacement 1 Open the front cover. 2 Turn the toner container release lever to incinerate the toner container or the waste toner box. Maintenance Toner Container and Waste Toner Box Replacement When the touch panel displays Add toner, replace the toner.
500ci/400ci/300ci/250ci Operation Guide Rev-1
Page 379
Hold the new toner container in both hands and shake it from side to side several times. 9 6 Hold the new toner container in both hands and gently push it out by pulling it in the provided plastic disposal bag. OPERATION GUIDE 9-9 Maintenance 4 Remove the old toner container by the handle. 5 Place the used toner container in .
Hold the new toner container in both hands and shake it from side to side several times. 9 6 Hold the new toner container in both hands and gently push it out by pulling it in the provided plastic disposal bag. OPERATION GUIDE 9-9 Maintenance 4 Remove the old toner container by the handle. 5 Place the used toner container in .


