
User Manual
Page 5
... the strap 1 Loading the KLIC-7004 battery 1 Charging the battery 2 Turning on the camera 3 Setting the language and date/time 4 Storing pictures on an SD or ... the 3X optical zoom 7 Using the self-timer 8 Using the flash 9 Using different modes 10 Using camera Help 13 Understanding the picture-taking icons 13 3 Working with pictures/videos 14 Reviewing pictures/videos 14 Deleting ...videos 15 Using the menu button in review 16 Cropping pictures 17 Adding sound tags 17 Using Kodak Perfect Touch technology 18 Editing videos 19 Running a slide show 22 Viewing pictures/videos in ...
... the strap 1 Loading the KLIC-7004 battery 1 Charging the battery 2 Turning on the camera 3 Setting the language and date/time 4 Storing pictures on an SD or ... the 3X optical zoom 7 Using the self-timer 8 Using the flash 9 Using different modes 10 Using camera Help 13 Understanding the picture-taking icons 13 3 Working with pictures/videos 14 Reviewing pictures/videos 14 Deleting ...videos 15 Using the menu button in review 16 Cropping pictures 17 Adding sound tags 17 Using Kodak Perfect Touch technology 18 Editing videos 19 Running a slide show 22 Viewing pictures/videos in ...

User Manual
Page 8
... Charging li ghts do not turn on during USB chargi ng, ensure: ■The USB cable is connected to a powered USB port ■The computer is turned on, and not in sleep mode For more on USB charging, visit www.kodak.com/go /support Setting up your camera Charging the battery Charge using... a USB com puter Charge using a Kodak 5V AC adapter (may be sold separately) USB cable (included...
... Charging li ghts do not turn on during USB chargi ng, ensure: ■The USB cable is connected to a powered USB port ■The computer is turned on, and not in sleep mode For more on USB charging, visit www.kodak.com/go /support Setting up your camera Charging the battery Charge using... a USB com puter Charge using a Kodak 5V AC adapter (may be sold separately) USB cable (included...

User Manual
Page 9
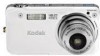
www.kodak.com/go/support 3 Kodak EasyShare HDTV dock; Turning on the camera Press the On/Off button to turn the camera on the camera in Auto mode. Fo r d ock compatibility, see the do ck us er's guide. Setting up your camera Charging the battery using other accessories K odak Easy Share camera or pr inter dock; NOTE: You can also press the Auto/SCN, Video, or Favorites button to turn on in that mode. Kodak EasyShare photo fram e dock 2 (Ma y be sold separately.) For details, see page 50.
www.kodak.com/go/support 3 Kodak EasyShare HDTV dock; Turning on the camera Press the On/Off button to turn the camera on the camera in Auto mode. Fo r d ock compatibility, see the do ck us er's guide. Setting up your camera Charging the battery using other accessories K odak Easy Share camera or pr inter dock; NOTE: You can also press the Auto/SCN, Video, or Favorites button to turn on in that mode. Kodak EasyShare photo fram e dock 2 (Ma y be sold separately.) For details, see page 50.

User Manual
Page 10
.../videos (www.kodak.com/go /support To change date & time, see page 36. Inserting or removing a card while it may damage the pictures, the card, or the camera. 1 Turn off the camera. 2 Insert or remove the optional card. 3 Turn on an SD or MMC card Your camera has internal memory.... for previous/next field. optional 4 www.kodak.com/go /v1253accessories). Date/Time: 1 At the prompt, press OK...
.../videos (www.kodak.com/go /support To change date & time, see page 36. Inserting or removing a card while it may damage the pictures, the card, or the camera. 1 Turn off the camera. 2 Insert or remove the optional card. 3 Turn on an SD or MMC card Your camera has internal memory.... for previous/next field. optional 4 www.kodak.com/go /v1253accessories). Date/Time: 1 At the prompt, press OK...

User Manual
Page 11
www.kodak.com/go/support 5 Reviewing the picture just taken After you take a picture/video, the LCD displays a quickview for approximately 5 seconds. (To exit the quickview sooner, .... 2 Taking pictures/videos Taking a picture 1 Press the On/Off or Auto/SCN button to turn green, press the Shutter button completely down. When the framing marks turn on the camera. 2 Compose the picture. 3 Press the Shutter button halfway to turn on/off status icons, histogram, and framing grid. Fr am ing marks NOTE: You...
www.kodak.com/go/support 5 Reviewing the picture just taken After you take a picture/video, the LCD displays a quickview for approximately 5 seconds. (To exit the quickview sooner, .... 2 Taking pictures/videos Taking a picture 1 Press the On/Off or Auto/SCN button to turn green, press the Shutter button completely down. When the framing marks turn on the camera. 2 Compose the picture. 3 Press the Shutter button halfway to turn on/off status icons, histogram, and framing grid. Fr am ing marks NOTE: You...

User Manual
Page 12
...halfway. To review and work with videos, see page 14. 6 www.kodak.com/go/support Taking pictures/videos Using the framing marks to take the picture. When the framing marks turn green, focus is accomplished. 2 If the camera is not focusing on faces. Framing marks do not appear in SCN modes... designed for pictures of people), the camera attempts to focus on the desired subject (or if the framing...
...halfway. To review and work with videos, see page 14. 6 www.kodak.com/go/support Taking pictures/videos Using the framing marks to take the picture. When the framing marks turn green, focus is accomplished. 2 If the camera is not focusing on faces. Framing marks do not appear in SCN modes... designed for pictures of people), the camera attempts to focus on the desired subject (or if the framing...

User Manual
Page 15
... setti ng, even after you can reduce red eye by using a preflash or by using automatic red eye reduction. To ma ke the camera: Red Eye ■ Preflash, turn the Red Eye Prefla sh on. (The first flash shrinks the eye pupil to reduce the chance of the lighting conditions. To make... show n in sha dow or is "backlit" (when light is in the LCD status area. www.kodak.com/go/support 9 Taking pictures/videos Using the flash Press the flash button repeatedly to its default settings (such as Auto flash), turn off Maintain Settings (see page 33). In Red Eye fla sh, you...
... setti ng, even after you can reduce red eye by using a preflash or by using automatic red eye reduction. To ma ke the camera: Red Eye ■ Preflash, turn the Red Eye Prefla sh on. (The first flash shrinks the eye pupil to reduce the chance of the lighting conditions. To make... show n in sha dow or is "backlit" (when light is in the LCD status area. www.kodak.com/go/support 9 Taking pictures/videos Using the flash Press the flash button repeatedly to its default settings (such as Auto flash), turn off Maintain Settings (see page 33). In Red Eye fla sh, you...

User Manual
Page 17
...Fir ework s Fireworks. Taking pictures/videos Using Scene (SCN) modes Choose a Scene mode-for great pictures in motion. If the mode description turns off before you finish reading it Full-frame portraits of people in b righ t ligh t. Panorama Left -Right See page 38. Panorama Right-...light instead of flowers or other small su bjects in night scenes or low-light conditions. Digital Im age Reducing blur caused by camera shake or subject motion. Text Documents. www.kodak.com/go/support 11 St abil iza tion Sport Subjects that are in practically any situation! ...
...Fir ework s Fireworks. Taking pictures/videos Using Scene (SCN) modes Choose a Scene mode-for great pictures in motion. If the mode description turns off before you finish reading it Full-frame portraits of people in b righ t ligh t. Panorama Left -Right See page 38. Panorama Right-...light instead of flowers or other small su bjects in night scenes or low-light conditions. Digital Im age Reducing blur caused by camera shake or subject motion. Text Documents. www.kodak.com/go/support 11 St abil iza tion Sport Subjects that are in practically any situation! ...

User Manual
Page 19
T Turn on Help Scroll up/dow n OK Turn off Help Understanding the picture-taking icons Self timer L ong time exposure Camera mode Album name White Balance Macro/Landscape Zoom: digital te le ph oto wide H ist ogra m Date stamp Pictures/ time remaining Image storage location Picture size IS O Flash AF zone AF mode Exposure metering Battery level Exposure compensation www.kodak.com/go/support 13 Highlight a menu choice, then press the Zoom telephoto (T) button. Taking pictures/videos Using camera Help To better understand each menu option, use camera Help.
T Turn on Help Scroll up/dow n OK Turn off Help Understanding the picture-taking icons Self timer L ong time exposure Camera mode Album name White Balance Macro/Landscape Zoom: digital te le ph oto wide H ist ogra m Date stamp Pictures/ time remaining Image storage location Picture size IS O Flash AF zone AF mode Exposure metering Battery level Exposure compensation www.kodak.com/go/support 13 Highlight a menu choice, then press the Zoom telephoto (T) button. Taking pictures/videos Using camera Help To better understand each menu option, use camera Help.

User Manual
Page 28
...on Loop, the slide show repeats until you press the OK button or until you have a Kodak EasyShare HDTV dock,see page 25. 1 Press the Review button. 2 Press the Menu button, ... then press the OK button. The interval setting remains until the battery is exhausted. 22 www.kodak.com/go/support Each picture/video is continuously repeated. 1 On the Slide Show menu, press to... Begin Show, then press the OK button. Running a continuous slide show loop When you have an EasyShare photo frame dock 2, see its Getting Started Guide. You can set the display interval from 3-60 seconds...
...on Loop, the slide show repeats until you press the OK button or until you have a Kodak EasyShare HDTV dock,see page 25. 1 Press the Review button. 2 Press the Menu button, ... then press the OK button. The interval setting remains until the battery is exhausted. 22 www.kodak.com/go/support Each picture/video is continuously repeated. 1 On the Slide Show menu, press to... Begin Show, then press the OK button. Running a continuous slide show loop When you have an EasyShare photo frame dock 2, see its Getting Started Guide. You can set the display interval from 3-60 seconds...

User Manual
Page 32
button to turn on/off status icons, ■ Press the Review button to highlight a date, album, or image storage, then press the T button. Viewing picture/video information 1 Press .../Display histogram, and picture/video info. Highlight All, Date, Album, or Image Storage, then press the OK button. ■ Press to exit Review. 26 www.kodak.com/go/support Working with pictures/videos Viewing pictures/videos in different ways Viewing as thumbnails (multi-up) 1 Press the Review button. 2 Press W to change...
button to turn on/off status icons, ■ Press the Review button to highlight a date, album, or image storage, then press the T button. Viewing picture/video information 1 Press .../Display histogram, and picture/video info. Highlight All, Date, Album, or Image Storage, then press the OK button. ■ Press to exit Review. 26 www.kodak.com/go/support Working with pictures/videos Viewing pictures/videos in different ways Viewing as thumbnails (multi-up) 1 Press the Review button. 2 Press W to change...

User Manual
Page 35
... not determined. Working with pictures/videos Understanding the blur warning icons If the feature is turned on a computer monitor before printing.) Re d-Picture is not sharp enough for an acceptable 4 x 6-inch (10 x 15 cm) print. www.kodak.com/go/support 29 White-Print sharpness is sharp enough for an acceptable 4 x 6-inch (10...
... not determined. Working with pictures/videos Understanding the blur warning icons If the feature is turned on a computer monitor before printing.) Re d-Picture is not sharp enough for an acceptable 4 x 6-inch (10 x 15 cm) print. www.kodak.com/go/support 29 White-Print sharpness is sharp enough for an acceptable 4 x 6-inch (10...

User Manual
Page 36
4 Doing more with your camera Using the menu button to change settings You can change settings to highlight a setting, then press the OK button. 4 Highlight an option, then press the ... picture-taking settings ■ Capture plus for other picture-taking settings ■ Video for video-taking settings ■ Setup for other camera settings 3 Press to get the best results from your camera. Using the capture tab Press Menu, , , and OK to access settings Opti ons Se lf-t ime r See page 8. Choose a self...
4 Doing more with your camera Using the menu button to change settings You can change settings to highlight a setting, then press the OK button. 4 Highlight an option, then press the ... picture-taking settings ■ Capture plus for other picture-taking settings ■ Video for video-taking settings ■ Setup for other camera settings 3 Press to get the best results from your camera. Using the capture tab Press Menu, , , and OK to access settings Opti ons Se lf-t ime r See page 8. Choose a self...

User Manual
Page 38
.... Ideal for indoo r p ictu res under tungs ten or halogen lig htin g without flas h. Doing more with your camera Press Menu, , , and OK to focus o n faces. Choose a date option, or turn off the fea ture. (Default is off.) Using the capture plus tab Press Menu, , , and OK to focus. ...TTL-AF (through-the-lens auto focus) when the Shutter button is no need to press the Shutter button halfwa y down . Off 32 www.kodak.com/go/support is always focusing, there is pressed halfway down to access settings Opti ons White Balance Choos e you r ligh ting con dition ....
.... Ideal for indoo r p ictu res under tungs ten or halogen lig htin g without flas h. Doing more with your camera Press Menu, , , and OK to focus o n faces. Choose a date option, or turn off the fea ture. (Default is off.) Using the capture plus tab Press Menu, , , and OK to focus. ...TTL-AF (through-the-lens auto focus) when the Shutter button is no need to press the Shutter button halfwa y down . Off 32 www.kodak.com/go/support is always focusing, there is pressed halfway down to access settings Opti ons White Balance Choos e you r ligh ting con dition ....

User Manual
Page 40
...to focus. Choose a self-timer setting. medium quality and file size. 640 x 480- is always focusing, there is ISO Speed turned off. Doing more with your camera Press Menu, , , and OK to access settings Opti ons Maintain Settings Fl as h Choose which settings are White Balance saved, ...even after the camera is no need to press the Shutter button halfway down . 34 www.kodak.com/go/support uses compression to access settings Opti ons Se lf-t ime r See page 8. medium...
...to focus. Choose a self-timer setting. medium quality and file size. 640 x 480- is always focusing, there is ISO Speed turned off. Doing more with your camera Press Menu, , , and OK to access settings Opti ons Maintain Settings Fl as h Choose which settings are White Balance saved, ...even after the camera is no need to press the Shutter button halfway down . 34 www.kodak.com/go/support uses compression to access settings Opti ons Se lf-t ime r See page 8. medium...

User Manual
Page 42
...und effect set to access settings Opti ons Orientation Sensor Orient pictures/videos so tha t they are d isplayed with your language. 36 www.kodak.com/go/support Individual- Sound Volume Off High Medium (default) Low Date & Time Set date and time. Photo Fram e Choose E asyShare... Video Out NTSC (default)-used in North America and Choose the regiona l setting that lets you Japan; Digital Zoom Turn digital zoom on or off. choose a sound for slide show) Language Choose your camera Press Menu, Setup, then to highlight to all fu nct ions . Int erval (b etween s lid ...
...und effect set to access settings Opti ons Orientation Sensor Orient pictures/videos so tha t they are d isplayed with your language. 36 www.kodak.com/go/support Individual- Sound Volume Off High Medium (default) Low Date & Time Set date and time. Photo Fram e Choose E asyShare... Video Out NTSC (default)-used in North America and Choose the regiona l setting that lets you Japan; Digital Zoom Turn digital zoom on or off. choose a sound for slide show) Language Choose your camera Press Menu, Setup, then to highlight to all fu nct ions . Int erval (b etween s lid ...

User Manual
Page 45
...lighter. ■ Press to decrease exposure compensation. ■ Press to increase exposure compensation. To turn on the histogram in Capture mode or in the middle of light before or after you want ... compose a picture The framing grid divides the LCD into thirds-vertically and horizontally. To turn on the LCD; If the peak is shown on the framing grid in Auto/SCN ... the histogram. Optimal exposure i s achieved when the peak is dark. Doing more with your camera Using exposure compensation to adjust picture brightness Before you take a pi cture. The flash may affect...
...lighter. ■ Press to decrease exposure compensation. ■ Press to increase exposure compensation. To turn on the histogram in Capture mode or in the middle of light before or after you want ... compose a picture The framing grid divides the LCD into thirds-vertically and horizontally. To turn on the LCD; If the peak is shown on the framing grid in Auto/SCN ... the histogram. Optimal exposure i s achieved when the peak is dark. Doing more with your camera Using exposure compensation to adjust picture brightness Before you take a pi cture. The flash may affect...

User Manual
Page 49
...then click OK. 5 Close the Sync and Transfer Manager window. Printing and emailing favorites 1 Press the Favorites button. Camera fa vorites wil no longer synchronize with EasyShare software. To turn on the sync fe ature, select Yes, synchronize with my softw are displayed at a 3:2 aspect ratio with a black... Optional settings In Favorites mode, press the Menu button to 4 x 6 in Fa vorites mode. www.kodak.com/go/support 43 Doing more with your camera Preventing camera favorites from your camera, press the Dele te button while in . (10 x 15 cm). NOTE: Favorites that were takenon ...
...then click OK. 5 Close the Sync and Transfer Manager window. Printing and emailing favorites 1 Press the Favorites button. Camera fa vorites wil no longer synchronize with EasyShare software. To turn on the sync fe ature, select Yes, synchronize with my softw are displayed at a 3:2 aspect ratio with a black... Optional settings In Favorites mode, press the Menu button to 4 x 6 in Fa vorites mode. www.kodak.com/go/support 43 Doing more with your camera Preventing camera favorites from your camera, press the Dele te button while in . (10 x 15 cm). NOTE: Favorites that were takenon ...

User Manual
Page 53
Using the photo frame dock 2 If you do not have a Kodak EasyShare photo frame dock 2, use a Kodak USB cable, model U-8 and the USB / A/V adapter. www.kodak.com/go /v1253accessories.) Transfer pictures/videos. Connect, then turn on camera. Transferring and printing pictures Transferring pictures/videos Using the USB cable If you have an EasyShare dock, use it to transfer pictures. (To purchase accessories, visit www.kodak.com/go /support 47
Using the photo frame dock 2 If you do not have a Kodak EasyShare photo frame dock 2, use a Kodak USB cable, model U-8 and the USB / A/V adapter. www.kodak.com/go /v1253accessories.) Transfer pictures/videos. Connect, then turn on camera. Transferring and printing pictures Transferring pictures/videos Using the USB cable If you have an EasyShare dock, use it to transfer pictures. (To purchase accessories, visit www.kodak.com/go /support 47

User Manual
Page 55
..., pictures are found, a message is displayed. Turn on a card, or in Favorites. Disconnecting the camera from a PictBridge enabled printer 1 Turn off the camera and printer. 2 Disconnect the USB cable from a PictBridge enabled printer 1 Turn on the printer. See your printer user guide... on the camera. www.kodak.com/go /v1253accessories to highlight a printing option, then press the OK button. Transferring and printing pictures Connecting the camera to a PictBridge enabled printer 1 Turn off the camera and printer. 2 Connect the appropriate USB cable from the camera to choose...
..., pictures are found, a message is displayed. Turn on a card, or in Favorites. Disconnecting the camera from a PictBridge enabled printer 1 Turn off the camera and printer. 2 Disconnect the USB cable from a PictBridge enabled printer 1 Turn on the printer. See your printer user guide... on the camera. www.kodak.com/go /v1253accessories to highlight a printing option, then press the OK button. Transferring and printing pictures Connecting the camera to a PictBridge enabled printer 1 Turn off the camera and printer. 2 Connect the appropriate USB cable from the camera to choose...


