User Manual
Page 6
... contents 1 Installing the software first 1 Charging the battery 2 Inserting the battery 2 Important battery information 3 Turning the camera on and off 4 Setting the language 4 Setting the date and time 5 Changing the display, EVF or LCD 6 Checking camera and picture status 6 Storing... pictures on a SD or MMC card 7 2 Taking pictures and videos 8 Taking a picture 8 Taking a video 11 Quickview-Reviewing the picture or video just taken 12 Using optical zoom 13 Using advanced digital...picture/video information 40 iv www.kodak.com/go/support
... contents 1 Installing the software first 1 Charging the battery 2 Inserting the battery 2 Important battery information 3 Turning the camera on and off 4 Setting the language 4 Setting the date and time 5 Changing the display, EVF or LCD 6 Checking camera and picture status 6 Storing... pictures on a SD or MMC card 7 2 Taking pictures and videos 8 Taking a picture 8 Taking a video 11 Quickview-Reviewing the picture or video just taken 12 Using optical zoom 13 Using advanced digital...picture/video information 40 iv www.kodak.com/go/support
User Manual
Page 7
... 40 Running a slide show 41 Displaying pictures and videos on a television 42 Copying pictures and videos 43 4 Installing the software 44 Install the software 45 5 Sharing pictures and videos 46 When can I tag my pictures and videos 46 Tagging pictures for printing 47 Tagging ...with the USB cable 51 Printing from a Kodak EasyShare printer dock or your computer ....... 52 Printing from an optional SD or MMC card 52 Ordering prints online 52 Direct printing with a PictBridge-enabled printer 52 7 Troubleshooting 54 Camera problems 54 Computer/connectivity problems 56 Picture quality...
... 40 Running a slide show 41 Displaying pictures and videos on a television 42 Copying pictures and videos 43 4 Installing the software 44 Install the software 45 5 Sharing pictures and videos 46 When can I tag my pictures and videos 46 Tagging pictures for printing 47 Tagging ...with the USB cable 51 Printing from a Kodak EasyShare printer dock or your computer ....... 52 Printing from an optional SD or MMC card 52 Ordering prints online 52 Direct printing with a PictBridge-enabled printer 52 7 Troubleshooting 54 Camera problems 54 Computer/connectivity problems 56 Picture quality...
User Manual
Page 9
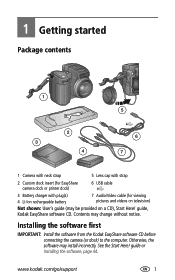
...(s) 4 Li-Ion rechargeable battery 7 Audio/Video cable (for viewing pictures and videos on television) Not shown: User's guide (may change without notice. Installing the software first IMPORTANT: Install the software from the Kodak EasyShare software CD before connecting the camera (or dock) to the computer. www.kodak.com/go/support 1 Otherwise, the software may install incorrectly. guide, Kodak EasyShare software CD.
...(s) 4 Li-Ion rechargeable battery 7 Audio/Video cable (for viewing pictures and videos on television) Not shown: User's guide (may change without notice. Installing the software first IMPORTANT: Install the software from the Kodak EasyShare software CD before connecting the camera (or dock) to the computer. www.kodak.com/go/support 1 Otherwise, the software may install incorrectly. guide, Kodak EasyShare software CD.

User Manual
Page 13
... the 4 Move the Joystick to step 4 in Setting the date & time, anytime. www.kodak.com/go/support 5 Setting the date & time, anytime 1 Turn on your computer operating system, Kodak EasyShare software may update the camera clock when you turn on the camera or if the battery is highlighted. Getting started Setting the date and time Setting...
... the 4 Move the Joystick to step 4 in Setting the date & time, anytime. www.kodak.com/go/support 5 Setting the date & time, anytime 1 Turn on your computer operating system, Kodak EasyShare software may update the camera clock when you turn on the camera or if the battery is highlighted. Getting started Setting the date and time Setting...

User Manual
Page 37
... change it . Video Length (Video) Choose a default video length (useful in the camera. www.kodak.com/go/support 29 Reset P, A, S, M, or C mode to customize your camera. See page 32. Auto (default) -the camera uses the card if one is in self-timer videos). Internal Memory -the...select album names before you take are tagged with a reddish-brown, antique look.) NOTE: EasyShare software also lets you turn the Mode dial or turn off the camera. If not, the camera uses internal memory. Reset to color. Sharpness Control picture sharpness. Unavailable in Video mode. ...
... change it . Video Length (Video) Choose a default video length (useful in the camera. www.kodak.com/go/support 29 Reset P, A, S, M, or C mode to customize your camera. See page 32. Auto (default) -the camera uses the card if one is in self-timer videos). Internal Memory -the...select album names before you take are tagged with a reddish-brown, antique look.) NOTE: EasyShare software also lets you turn the Mode dial or turn off the camera. If not, the camera uses internal memory. Reset to color. Sharpness Control picture sharpness. Unavailable in Video mode. ...

User Manual
Page 40
... Length is taken. The Self-Timer turns off the Self-Timer camera sounds, see page 30. See Kodak EasyShare software Help for details. 32 www.kodak.com/go /dx7590downloads.) Then copy up to 32 album names to the camera's album name list the next time you take pictures or videos....all the pictures or videos you press the Shutter button and the time the picture or video is taken. 1 Place the camera on your computer Use Kodak EasyShare software that came with those album names. Taking pictures and videos Putting yourself in the scene. Pre-tagging for 2 seconds) before...
... Length is taken. The Self-Timer turns off the Self-Timer camera sounds, see page 30. See Kodak EasyShare software Help for details. 32 www.kodak.com/go /dx7590downloads.) Then copy up to 32 album names to the camera's album name list the next time you take pictures or videos....all the pictures or videos you press the Shutter button and the time the picture or video is taken. 1 Place the camera on your computer Use Kodak EasyShare software that came with those album names. Taking pictures and videos Putting yourself in the scene. Pre-tagging for 2 seconds) before...

User Manual
Page 41
... Exit, then press the OK button. Third-transfer to exit the menu. See the Kodak EasyShare software Help for details. to highlight Set Album , then press 3 Move the Joystick to your computer (see page 51), the Kodak EasyShare software opens and categorizes your camera 1 In any mode, press the Menu button. 2 Move the Joystick the OK button...
... Exit, then press the OK button. Third-transfer to exit the menu. See the Kodak EasyShare software Help for details. to highlight Set Album , then press 3 Move the Joystick to your computer (see page 51), the Kodak EasyShare software opens and categorizes your camera 1 In any mode, press the Menu button. 2 Move the Joystick the OK button...
User Manual
Page 48
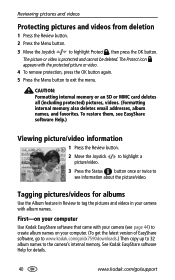
... the Status button once or twice to see EasyShare software Help.) Viewing picture/video information 1 Press the Review button. 2 Move the Joystick picture/video. See Kodak EasyShare software Help for albums Use the Album feature in your camera with album names. To restore them, see information... about the picture/video. First-on your computer Use Kodak EasyShare software that came with the protected picture or video...
... the Status button once or twice to see EasyShare software Help.) Viewing picture/video information 1 Press the Review button. 2 Move the Joystick picture/video. See Kodak EasyShare software Help for albums Use the Album feature in your camera with album names. To restore them, see information... about the picture/video. First-on your computer Use Kodak EasyShare software that came with the protected picture or video...
User Manual
Page 49
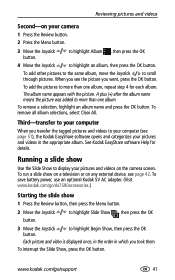
... was added to highlight an album, then press the OK button. To remove all album selections, select Clear All. See Kodak EasyShare software Help for each album. to your camera 1 Press the Review button. 2 Press the Menu button. 3 Move the Joystick button. 4 Move the Joystick to highlight... the Menu button. 2 Move the Joystick to scroll through pictures. www.kodak.com/go /dx7590accessories.) Starting the slide show on a television or on any external device, see page 51), the Kodak EasyShare software opens and categorizes your computer When you transfer the tagged pictures and videos ...
... was added to highlight an album, then press the OK button. To remove all album selections, select Clear All. See Kodak EasyShare software Help for each album. to your camera 1 Press the Review button. 2 Press the Menu button. 3 Move the Joystick button. 4 Move the Joystick to highlight... the Menu button. 2 Move the Joystick to scroll through pictures. www.kodak.com/go /dx7590accessories.) Starting the slide show on a television or on any external device, see page 51), the Kodak EasyShare software opens and categorizes your computer When you transfer the tagged pictures and videos ...

User Manual
Page 52
4 Installing the software Minimum system requirements ■ Windows 98, 98SE, ME, 2000 SPI, or XP OS Internet Explorer 5.01 or higher 233 MHz processor or greater ■ Macintosh OS X 10.2.3, 10.3 Safari 1.0 or higher Minimum hardware requirements ■ 128MB RAM (64 MB RAM for Windows 98, 98SE, 2000 SPI, or ME OS) ■ 200 MB hard disk space available ■ CD-ROM drive ■ Available USB port 44 www.kodak.com/go/support
4 Installing the software Minimum system requirements ■ Windows 98, 98SE, ME, 2000 SPI, or XP OS Internet Explorer 5.01 or higher 233 MHz processor or greater ■ Macintosh OS X 10.2.3, 10.3 Safari 1.0 or higher Minimum hardware requirements ■ 128MB RAM (64 MB RAM for Windows 98, 98SE, 2000 SPI, or ME OS) ■ 200 MB hard disk space available ■ CD-ROM drive ■ Available USB port 44 www.kodak.com/go/support

User Manual
Page 53
... menu and type d:\setup.exe where d is the drive letter that are open on your camera and software. You must be connected to your Internet service provider to the computer. This lets you wish to install the software. Installing the software Install the software CAUTION: Install Kodak EasyShare software before connecting the camera or optional dock to register electronically.
... menu and type d:\setup.exe where d is the drive letter that are open on your camera and software. You must be connected to your Internet service provider to the computer. This lets you wish to install the software. Installing the software Install the software CAUTION: Install Kodak EasyShare software before connecting the camera or optional dock to register electronically.

User Manual
Page 54
...) ✔ ✔ Favorites (page 49) ✔ ✔ for easy organization on your computer and for sharing on the camera, the Share tag is not copied. (If a tagged picture/video is copied in EasyShare software, the Share tag is copied.) In a burst series, only the last picture is displayed.) ■ Just after you can... time (The most recent picture/video taken is tagged during Quickview (see page 12). ■ After pressing the Review button (see page 37). 46 www.kodak.com/go/support
...) ✔ ✔ Favorites (page 49) ✔ ✔ for easy organization on your computer and for sharing on the camera, the Share tag is not copied. (If a tagged picture/video is copied in EasyShare software, the Share tag is copied.) In a burst series, only the last picture is displayed.) ■ Just after you can... time (The most recent picture/video taken is tagged during Quickview (see page 12). ■ After pressing the Review button (see page 37). 46 www.kodak.com/go/support

User Manual
Page 55
... the OK button, then indicate the number of copies (0-99). To remove the print tagging for that came with your camera to create an email address book on your computer, the Kodak EasyShare software print screen opens. Cancel Prints is not available in the status area. NOTE: For the best 4 x 6 in. (10 x 15 cm...
... the OK button, then indicate the number of copies (0-99). To remove the print tagging for that came with your camera to create an email address book on your computer, the Kodak EasyShare software print screen opens. Cancel Prints is not available in the status area. NOTE: For the best 4 x 6 in. (10 x 15 cm...

User Manual
Page 56
... email selections, highlight Clear All. 5 Move the Joystick to highlight Email , then press the OK button. See the Kodak EasyShare software Help for each address. Move the Joystick to locate a picture/video. 2 Move the Joystick to highlight Exit, then ...status area. 6 Press the Share button to more than one address, repeat step 3 for details. 48 www.kodak.com/go/support Sharing pictures and videos Second-tag pictures/videos on your computer (see page 51), the email screen... same address, move the Joystick to scroll through them to your camera 1 Press the Share button.
... email selections, highlight Clear All. 5 Move the Joystick to highlight Email , then press the OK button. See the Kodak EasyShare software Help for each address. Move the Joystick to locate a picture/video. 2 Move the Joystick to highlight Exit, then ...status area. 6 Press the Share button to more than one address, repeat step 3 for details. 48 www.kodak.com/go/support Sharing pictures and videos Second-tag pictures/videos on your computer (see page 51), the email screen... same address, move the Joystick to scroll through them to your camera 1 Press the Share button.

User Manual
Page 57
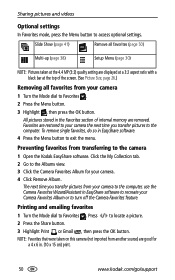
... easy steps: 1. Transfer pictures 1 To enjoy full functionality, load and use Kodak EasyShare to your computer software that came with friends and family. NOTE: When you transfer pictures from your camera to your computer, all pictures (including favorites) are loaded to the computer. ... to favorites locate a picture. 2 Move the Joystick to any other position. your camera's internal memory, then share them with your favorite pictures. Use Camera Favorites in the Kodak EasyShare software. Then, your pictures are loaded back to the computer using the USB cable (see...
... easy steps: 1. Transfer pictures 1 To enjoy full functionality, load and use Kodak EasyShare to your computer software that came with friends and family. NOTE: When you transfer pictures from your camera to your computer, all pictures (including favorites) are loaded to the computer. ... to favorites locate a picture. 2 Move the Joystick to any other position. your camera's internal memory, then share them with your favorite pictures. Use Camera Favorites in the Kodak EasyShare software. Then, your pictures are loaded back to the computer using the USB cable (see...
User Manual
Page 58
...4.4 MP (3:2) quality setting are removed. Click the My Collection tab. 2 Go to your camera the next time you transfer pictures from another source) are good for your camera. 4 Click Remove Album. Printing and emailing favorites 1 Turn the Mode dial to access optional ... do so in EasyShare software to recreate your camera 1 Turn the Mode dial to the camera 1 Open the Kodak EasyShare software. Press to exit the menu. NOTE: Favorites that were taken on this camera (not imported from your camera to the computer, use the Camera Favorites Wizard/Assistant in EasyShare software. 4 Press the...
...4.4 MP (3:2) quality setting are removed. Click the My Collection tab. 2 Go to your camera the next time you transfer pictures from another source) are good for your camera. 4 Click Remove Album. Printing and emailing favorites 1 Turn the Mode dial to access optional ... do so in EasyShare software to recreate your camera 1 Turn the Mode dial to the camera 1 Open the Kodak EasyShare software. Press to exit the menu. NOTE: Favorites that were taken on this camera (not imported from your camera to the computer, use the Camera Favorites Wizard/Assistant in EasyShare software. 4 Press the...

User Manual
Page 59
...software to the computer. Kodak EasyShare software opens on your pictures and videos: ■ Kodak EasyShare camera dock, Kodak EasyShare printer dock ■ Kodak multi-card reader, Kodak SD multimedia card reader-writer Purchase these Kodak products to transfer your computer. The software prompts you through the transfer process. www.kodak...the USB cable into the labeled USB port on the camera. 4 Turn on connecting. 6 Transferring and printing pictures CAUTION: Install Kodak EasyShare software before connecting the camera or optional dock to install incorrectly. Also available for ...
...software to the computer. Kodak EasyShare software opens on your pictures and videos: ■ Kodak EasyShare camera dock, Kodak EasyShare printer dock ■ Kodak multi-card reader, Kodak SD multimedia card reader-writer Purchase these Kodak products to transfer your computer. The software prompts you through the transfer process. www.kodak...the USB cable into the labeled USB port on the camera. 4 Turn on connecting. 6 Transferring and printing pictures CAUTION: Install Kodak EasyShare software before connecting the camera or optional dock to install incorrectly. Also available for ...

User Manual
Page 60
...www.ofoto.com) is one of Kodak products or www.kodak.com/go/dx7590accessories. Direct printing with or without a computer. Transferring and printing pictures Printing from a Kodak EasyShare printer dock or your computer Computer-Click the Help button in the Kodak EasyShare software for details on printing from an optional... SD or MMC card ■ Automatically print tagged pictures when you print directly to your card into a printer with an SD or MMC card slot. See www.kodak.com/go /support Printer dock-Dock your camera to...
...www.ofoto.com) is one of Kodak products or www.kodak.com/go/dx7590accessories. Direct printing with or without a computer. Transferring and printing pictures Printing from a Kodak EasyShare printer dock or your computer Computer-Click the Help button in the Kodak EasyShare software for details on printing from an optional... SD or MMC card ■ Automatically print tagged pictures when you print directly to your card into a printer with an SD or MMC card slot. See www.kodak.com/go /support Printer dock-Dock your camera to...

User Manual
Page 62
...pictures to Troubleshooting information, see page 51). ■ Take another memory card. when camera turns ■ Turn camera on and off and the lens ■ Place the camera on the Kodak EasyShare software CD. Pictures remaining ■ Continue taking each picture is charged. For updates to ...the computer (see www.kodak.com/go /support Camera does not ■ Insert a charged battery. EVF/LCD screen is ...
...pictures to Troubleshooting information, see page 51). ■ Take another memory card. when camera turns ■ Turn camera on and off and the lens ■ Place the camera on the Kodak EasyShare software CD. Pictures remaining ■ Continue taking each picture is charged. For updates to ...the computer (see www.kodak.com/go /support Camera does not ■ Insert a charged battery. EVF/LCD screen is ...
User Manual
Page 64
... picture. ■ Use P mode to computer Slide Show does not ■ Adjust the camera Video Out setting (NTSC or PAL, run on camera and computer port (page 51). ■ Make sure the EasyShare software is within the effective flash range (page 20). ■ To automatically set exposure and focus...the distance between you and the subject is installed (page 44). transfer to adjust the Exposure and Flash Compensations (page 19). 56 www.kodak.com/go/support When the AF/AE indicator turns green, press the Shutter button completely down to take the picture. ■ Use P...
... picture. ■ Use P mode to computer Slide Show does not ■ Adjust the camera Video Out setting (NTSC or PAL, run on camera and computer port (page 51). ■ Make sure the EasyShare software is within the effective flash range (page 20). ■ To automatically set exposure and focus...the distance between you and the subject is installed (page 44). transfer to adjust the Exposure and Flash Compensations (page 19). 56 www.kodak.com/go/support When the AF/AE indicator turns green, press the Shutter button completely down to take the picture. ■ Use P...


