
User Manual
Page 4
Product features Side View 4 3 2 5 6 78 9 10 11 12 1 13 16 15 14 1 Dock connector 2 Tripod socket 3 LCD screen 4 Viewfinder 5 Ready light 6 Review button 7 Menu button 8 LCD On/Off/Status butt button 9 Delete button 10 Zoom (Wide Angle/Telephoto) 11 4-way controller 12 OK button 13 Slot for optional SD or MMC card 14 USB, A/V Out 15 Share button 16 Battery compartment ii www.kodak.com/go/support
Product features Side View 4 3 2 5 6 78 9 10 11 12 1 13 16 15 14 1 Dock connector 2 Tripod socket 3 LCD screen 4 Viewfinder 5 Ready light 6 Review button 7 Menu button 8 LCD On/Off/Status butt button 9 Delete button 10 Zoom (Wide Angle/Telephoto) 11 4-way controller 12 OK button 13 Slot for optional SD or MMC card 14 USB, A/V Out 15 Share button 16 Battery compartment ii www.kodak.com/go/support
User Manual
Page 5
... the wrist strap 1 Loading the batteries 1 Turning on the camera 2 Setting the date/time, first time 2 Setting the language and date/time, other times 3 Storing pictures on an SD or MMC card 3 2 Taking pictures and ... 15 Minimum system requirements 15 Installing the software 16 Transferring pictures with the USB cable 17 Printing pictures 18 Dock compatibility for your camera 21 4 Doing more with your camera 22 Using the self-timer 22 Using burst 23 Running a slide show 24 Copying pictures and videos 26 Changing the flash settings...
... the wrist strap 1 Loading the batteries 1 Turning on the camera 2 Setting the date/time, first time 2 Setting the language and date/time, other times 3 Storing pictures on an SD or MMC card 3 2 Taking pictures and ... 15 Minimum system requirements 15 Installing the software 16 Transferring pictures with the USB cable 17 Printing pictures 18 Dock compatibility for your camera 21 4 Doing more with your camera 22 Using the self-timer 22 Using burst 23 Running a slide show 24 Copying pictures and videos 26 Changing the flash settings...

User Manual
Page 6
... light status 48 Direct printing (PictBridge) problems 49 6 Getting help 50 Helpful links 50 Telephone customer support 51 7 Appendix 52 Camera specifications 52 Storage capacities 55 Power-saving features 56 Important safety instructions 56 Battery information 58 Upgrading your software and firmware 59 Additional care and ...
... light status 48 Direct printing (PictBridge) problems 49 6 Getting help 50 Helpful links 50 Telephone customer support 51 7 Appendix 52 Camera specifications 52 Storage capacities 55 Power-saving features 56 Important safety instructions 56 Battery information 58 Upgrading your software and firmware 59 Additional care and ...

User Manual
Page 7
1 Setting up your camera Attaching the wrist strap Loading the batteries 1 Open the battery door. 2 Load the battery, then close the battery door. CRV3 lithium (non-rechargeable) Ni-MH 2-AA lithium, Ni-MH, (rechargeable) or oxy-alkaline AA ZR6 For information on replacing batteries and extending battery life, see page 58. www.kodak.com/go/support 1
1 Setting up your camera Attaching the wrist strap Loading the batteries 1 Open the battery door. 2 Load the battery, then close the battery door. CRV3 lithium (non-rechargeable) Ni-MH 2-AA lithium, Ni-MH, (rechargeable) or oxy-alkaline AA ZR6 For information on replacing batteries and extending battery life, see page 58. www.kodak.com/go/support 1

User Manual
Page 8
Setting up your camera Turning on the camera Setting the date/time, first time 1 At the prompt, press OK. 2 to accept. 2 www.kodak.com/go/support for previous/next field. OK to change.
Setting up your camera Turning on the camera Setting the date/time, first time 1 At the prompt, press OK. 2 to accept. 2 www.kodak.com/go/support for previous/next field. OK to change.

User Manual
Page 9
...CAUTION: A card can purchase an SD or MMC card to change. Purchase SD or MMC cards at a dealer of internal memory. Setting up your camera Setting the language and date/time, other times 1 Press Menu. 2 to highlight Setup Menu then press OK. 3 to accept. OK to highlight ... OK. Storing pictures on an SD or MMC card Your camera has 16 MB of Kodak products or www.kodak.com/go /support 3 NOTE: We recommend Kodak SD and MMC cards. forcing it in this camera before taking pictures (see page 35). www.kodak.com/go /c340accessories. See page 55 for previous/next field...
...CAUTION: A card can purchase an SD or MMC card to change. Purchase SD or MMC cards at a dealer of internal memory. Setting up your camera Setting the language and date/time, other times 1 Press Menu. 2 to highlight Setup Menu then press OK. 3 to accept. OK to highlight ... OK. Storing pictures on an SD or MMC card Your camera has 16 MB of Kodak products or www.kodak.com/go /support 3 NOTE: We recommend Kodak SD and MMC cards. forcing it in this camera before taking pictures (see page 35). www.kodak.com/go /c340accessories. See page 55 for previous/next field...

User Manual
Page 10
Ready light 2 Frame your subject in the Viewfinder or LCD screen. To stop recording, press and release the Shutter button again. 4 www.kodak.com/go/support Taking a video 1 Turn on camera. 2 Taking pictures and videos Taking a picture 1 Turn on camera. 2 Frame your subject in the Viewfinder or LCD screen. 3 Press Shutter button halfway to focus and set exposure. 4 When the Ready light turns green, press the button completely down. 3 Press the Shutter button completely down and release.
Ready light 2 Frame your subject in the Viewfinder or LCD screen. To stop recording, press and release the Shutter button again. 4 www.kodak.com/go/support Taking a video 1 Turn on camera. 2 Taking pictures and videos Taking a picture 1 Turn on camera. 2 Frame your subject in the Viewfinder or LCD screen. 3 Press Shutter button halfway to focus and set exposure. 4 When the Ready light turns green, press the button completely down. 3 Press the Shutter button completely down and release.

User Manual
Page 11
...is saved. OK to play/pause a video ( to turn off the screen entirely. Checking camera and picture status Press the LCD On/Off/Status button to turn off the icons of the active camera or picture settings. Status button Press once to see page 9. While the picture or video ...and are displayed: Delete If you take a picture or video, the LCD screen displays a Quickview for print. www.kodak.com/go/support 5
...is saved. OK to play/pause a video ( to turn off the screen entirely. Checking camera and picture status Press the LCD On/Off/Status button to turn off the icons of the active camera or picture settings. Status button Press once to see page 9. While the picture or video ...and are displayed: Delete If you take a picture or video, the LCD screen displays a Quickview for print. www.kodak.com/go/support 5

User Manual
Page 12
... focus Center wide focus Side focus Center and side focus Left and right focus 2 If the camera is not focusing on foreground subjects, even if the subjects are fixed at Center Wide. 6 www.kodak.com/go/support When you use Focus Zone (page 32) and set Center Zone, the framing marks are not...
... focus Center wide focus Side focus Center and side focus Left and right focus 2 If the camera is not focusing on foreground subjects, even if the subjects are fixed at Center Wide. 6 www.kodak.com/go/support When you use Focus Zone (page 32) and set Center Zone, the framing marks are not...

User Manual
Page 13
Capture modes Self Timer/Burst Date stamp Album name Flash Mode Taking pictures and videos Picture size Pictures/time remaining Storage location Zoom: digital, telephoto, wide Focus zone White balance ISO Low battery Camera mode Exposure compensation Capture modes-shutter pressed halfway Framing marks www.kodak.com/go/support 7
Capture modes Self Timer/Burst Date stamp Album name Flash Mode Taking pictures and videos Picture size Pictures/time remaining Storage location Zoom: digital, telephoto, wide Focus zone White balance ISO Low battery Camera mode Exposure compensation Capture modes-shutter pressed halfway Framing marks www.kodak.com/go/support 7

User Manual
Page 14
... exposure and focus, then press completely down to take the picture. (When taking videos, press and release the Shutter button.) Using digital zoom Use digital zoom in Close-up to 3X closer to your subject. Taking pictures and videos Using optical zoom Use optical zoom to get an ... 1 Use the Viewfinder or LCD screen to the optical zoom limit (3X). Zoom indicator Digital zoom range Optical zoom range 2 Press Telephoto (T) to zoom in . (10 x 15 cm) print. 8 www.kodak.com/go/support The blue slider on the zoom indicator pauses and turns red when the picture quality reaches ...
... exposure and focus, then press completely down to take the picture. (When taking videos, press and release the Shutter button.) Using digital zoom Use digital zoom in Close-up to 3X closer to your subject. Taking pictures and videos Using optical zoom Use optical zoom to get an ... 1 Use the Viewfinder or LCD screen to the optical zoom limit (3X). Zoom indicator Digital zoom range Optical zoom range 2 Press Telephoto (T) to zoom in . (10 x 15 cm) print. 8 www.kodak.com/go/support The blue slider on the zoom indicator pauses and turns red when the picture quality reaches ...

User Manual
Page 15
... button repeatedly to beginning (during playback) Next picture/video (during playback) 2 (previous/next) To save battery power, use the optional Kodak EasyShare camera or printer dock, or Kodak 3-volt AC adapter. (See www.kodak.com/go /support 9 Flash-to-subject distance Zoom position Wide angle Telephoto Flash distance 2-12 ft (0.6-3.6 m) @ ISO 140 2-7 ft (0.6-2.1 m) @ ISO 140 Reviewing...
... button repeatedly to beginning (during playback) Next picture/video (during playback) 2 (previous/next) To save battery power, use the optional Kodak EasyShare camera or printer dock, or Kodak 3-volt AC adapter. (See www.kodak.com/go /support 9 Flash-to-subject distance Zoom position Wide angle Telephoto Flash distance 2-12 ft (0.6-3.6 m) @ ISO 140 2-7 ft (0.6-2.1 m) @ ISO 140 Reviewing...

User Manual
Page 16
Taking pictures and videos What the review icons mean Print tag/number of prints Favorite tag Email tag Scroll arrows Video length Favorite tag Email tag Press OK to Play or Pause Protected Picture number Image storage location Review mode Protected Video number Image storage location Review mode 10 www.kodak.com/go/support
Taking pictures and videos What the review icons mean Print tag/number of prints Favorite tag Email tag Scroll arrows Video length Favorite tag Email tag Press OK to Play or Pause Protected Picture number Image storage location Review mode Protected Video number Image storage location Review mode 10 www.kodak.com/go/support

User Manual
Page 18
...Press the Menu button. 4 Choose Crop. A crop box and instructional message appear over the picture. 5 Follow the on other digital cameras. 12 www.kodak.com/go/support Taking pictures and videos Cropping a picture You can select and save the cropped picture or No to cancel cropping. NOTE: The ...original picture is kept. Pictures under 2.1 MP cannot be supported for images captured on -screen instructions. 6 Press to move, or ...
...Press the Menu button. 4 Choose Crop. A crop box and instructional message appear over the picture. 5 Follow the on other digital cameras. 12 www.kodak.com/go/support Taking pictures and videos Cropping a picture You can select and save the cropped picture or No to cancel cropping. NOTE: The ...original picture is kept. Pictures under 2.1 MP cannot be supported for images captured on -screen instructions. 6 Press to move, or ...

User Manual
Page 19
..., and favorites. Note: To cancel Protect, press OK again. 2 for previous/next. 3 Press Menu. 4 Press to exit the menu. To restore them, see EasyShare software Help.) www.kodak.com/go/support 13 The Protect icon with the protected picture or video. Taking pictures and videos Protecting pictures and videos from deletion 1 Press Review.
..., and favorites. Note: To cancel Protect, press OK again. 2 for previous/next. 3 Press Menu. 4 Press to exit the menu. To restore them, see EasyShare software Help.) www.kodak.com/go/support 13 The Protect icon with the protected picture or video. Taking pictures and videos Protecting pictures and videos from deletion 1 Press Review.

User Manual
Page 20
NOTE: To delete protected pictures and videos, remove protection before deleting. 14 www.kodak.com/go/support Taking pictures and videos Deleting pictures and videos 1 Press Review. (To exit, press Review again.) 2 for previous/next. 3 Press Delete. 4 Follow the screen prompts. EXIT-exits the Delete screen. ALL-deletes all pictures and videos from your current storage location. PICTURE or VIDEO-deletes the displayed picture or video.
NOTE: To delete protected pictures and videos, remove protection before deleting. 14 www.kodak.com/go/support Taking pictures and videos Deleting pictures and videos 1 Press Review. (To exit, press Review again.) 2 for previous/next. 3 Press Delete. 4 Follow the screen prompts. EXIT-exits the Delete screen. ALL-deletes all pictures and videos from your current storage location. PICTURE or VIDEO-deletes the displayed picture or video.
User Manual
Page 21
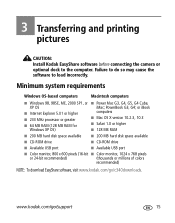
www.kodak.com/go /c340downloads. Failure to do so may cause the software to the computer. PowerBook G3, G4; or iBook I Internet Explorer 5.01 or higher computers I ... I Windows 98, 98SE, ME, 2000 SP1, or I Color monitor, 1024 x 768 pixels or 24-bit recommended) (thousands or millions of colors recommended) NOTE: To download EasyShare software, visit www.kodak.com/go /support 15 3 Transferring and printing pictures CAUTION: Install Kodak EasyShare software before connecting the camera or optional dock to load incorrectly.
www.kodak.com/go /c340downloads. Failure to do so may cause the software to the computer. PowerBook G3, G4; or iBook I Internet Explorer 5.01 or higher computers I ... I Windows 98, 98SE, ME, 2000 SP1, or I Color monitor, 1024 x 768 pixels or 24-bit recommended) (thousands or millions of colors recommended) NOTE: To download EasyShare software, visit www.kodak.com/go /support 15 3 Transferring and printing pictures CAUTION: Install Kodak EasyShare software before connecting the camera or optional dock to load incorrectly.

User Manual
Page 22
...software. See the anti-virus software manual for details. For information on the software applications included on the Kodak EasyShare software CD, click the Help button in the Kodak EasyShare software. 16 www.kodak.com/go /register. 5 If prompted, restart the computer. If you turned off anti-virus software, turn...OS X-double-click the CD icon on the desktop, then click the Install icon. 4 Follow the on your camera and software. To register later, see www.kodak.com/go /support Failure to do so may cause the software to install. This lets you wish to load incorrectly. 1 Close ...
...software. See the anti-virus software manual for details. For information on the software applications included on the Kodak EasyShare software CD, click the Help button in the Kodak EasyShare software. 16 www.kodak.com/go /register. 5 If prompted, restart the computer. If you turned off anti-virus software, turn...OS X-double-click the CD icon on the desktop, then click the Install icon. 4 Follow the on your camera and software. To register later, see www.kodak.com/go /support Failure to do so may cause the software to install. This lets you wish to load incorrectly. 1 Close ...

User Manual
Page 23
... port on the camera. 4 Turn on the camera. NOTE: Visit www.kodak.com/go /support 17 Transferring and printing pictures Transferring pictures with the USB cable 1 Turn off the camera. 2 Plug the labeled end of the USB cable into the labeled USB port on your computer. I Kodak EasyShare camera dock, Kodak EasyShare printer dock (see page 21) I Kodak multi-card reader...
... port on the camera. 4 Turn on the camera. NOTE: Visit www.kodak.com/go /support 17 Transferring and printing pictures Transferring pictures with the USB cable 1 Turn off the camera. 2 Plug the labeled end of the USB cable into the labeled USB port on your computer. I Kodak EasyShare camera dock, Kodak EasyShare printer dock (see page 21) I Kodak multi-card reader...

User Manual
Page 24
.... Purchase this and other accessories at a dealer of Kodak products or www.kodak.com/go /support Transferring and printing pictures Printing pictures Printing with a Kodak EasyShare printer dock Dock your camera to the Kodak EasyShare printer dock and print directly-with a PictBridge enabled printer Your camera features PictBridge technology, so you have a Kodak 3-volt AC adapter (optional accessory), plug it...
.... Purchase this and other accessories at a dealer of Kodak products or www.kodak.com/go /support Transferring and printing pictures Printing pictures Printing with a Kodak EasyShare printer dock Dock your camera to the Kodak EasyShare printer dock and print directly-with a PictBridge enabled printer Your camera features PictBridge technology, so you have a Kodak 3-volt AC adapter (optional accessory), plug it...


