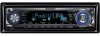
Instruction Manual
Page 2
... 7 Power Selecting the Source Volume Attenuator Audio Control Adjusting the detail of Audio Control Audio Setup Speaker Setting Switching Display Subwoofer Output Theft Deterrent Faceplate TEL Mute Tuner features 12 Tuning Tuning Mode Direct Access Tuning Station Preset Memory Auto Memory Entry Preset Tuning CD/USB device/Audio file/External disc control features 14 Playing CD & Audio file Playing USB (iPod) device Drive Search Playing External Disc Fast Forwarding and Reversing Music Search Disc Search/Folder/Album Search Direct Music Search Direct Disc Search Track/File/Disc/Folder...
... 7 Power Selecting the Source Volume Attenuator Audio Control Adjusting the detail of Audio Control Audio Setup Speaker Setting Switching Display Subwoofer Output Theft Deterrent Faceplate TEL Mute Tuner features 12 Tuning Tuning Mode Direct Access Tuning Station Preset Memory Auto Memory Entry Preset Tuning CD/USB device/Audio file/External disc control features 14 Playing CD & Audio file Playing USB (iPod) device Drive Search Playing External Disc Fast Forwarding and Reversing Music Search Disc Search/Folder/Album Search Direct Music Search Direct Disc Search Track/File/Disc/Folder...
Instruction Manual
Page 3
... to the "N" position for connectable models of precision equipment. • When replacing a fuse, only use wrong screws, you turn on the car heater in damage. About CD players/disc changers connected to this unit may cause your unit to malfunction. • Do not apply excessive force to this product requires skills and experience. For safety's sake, leave the mounting and wiring work to professionals. 2CAUTION To...
... to the "N" position for connectable models of precision equipment. • When replacing a fuse, only use wrong screws, you turn on the car heater in damage. About CD players/disc changers connected to this unit may cause your unit to malfunction. • Do not apply excessive force to this product requires skills and experience. For safety's sake, leave the mounting and wiring work to professionals. 2CAUTION To...
Instruction Manual
Page 4
... about "Music Editor" upgrade is recorded in the CD-ROM attached to the user's manual recorded in the USB device. Before using this unit for the first time This unit is pressed. • Remove the USB device before pressing the Reset button. For how to remove the USB device, refer to (page 15). • Press the reset button if the disc auto changer fails to factory settings when the Reset button is initially set on the unit or faceplate get...
... about "Music Editor" upgrade is recorded in the CD-ROM attached to the user's manual recorded in the USB device. Before using this unit for the first time This unit is pressed. • Remove the USB device before pressing the Reset button. For how to remove the USB device, refer to (page 15). • Press the reset button if the disc auto changer fails to factory settings when the Reset button is initially set on the unit or faceplate get...
Instruction Manual
Page 5
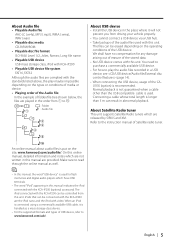
...-LC (.m4a), MP3 (.mp3), WMA (.wma), WAV (.wav) • Playable disc media CD-R/RW/ROM • Playable disc file format ISO 9660 Level 1/2, Joliet, Romeo, Long file name. • Playable USB device USB mass storage class, iPod with KCA-iP200 • Playable USB device file system FAT16, FAT32 Although the audio files are complied with the standards listed above, the...
...-LC (.m4a), MP3 (.mp3), WMA (.wma), WAV (.wav) • Playable disc media CD-R/RW/ROM • Playable disc file format ISO 9660 Level 1/2, Joliet, Romeo, Long file name. • Playable USB device USB mass storage class, iPod with KCA-iP200 • Playable USB device file system FAT16, FAT32 Although the audio files are complied with the standards listed above, the...
Instruction Manual
Page 6
... one or more of the disc and move outward. • When removing CDs from this equipment may cause harmful interference to radio communications, if it . • Do not use radio frequency energy. The user could lose the authority to operate this equipment does cause harmful interference to which can be used . 2CAUTION Use of controls or adjustments or performance of the FCC...
... one or more of the disc and move outward. • When removing CDs from this equipment may cause harmful interference to radio communications, if it . • Do not use radio frequency energy. The user could lose the authority to operate this equipment does cause harmful interference to which can be used . 2CAUTION Use of controls or adjustments or performance of the FCC...
Instruction Manual
Page 8
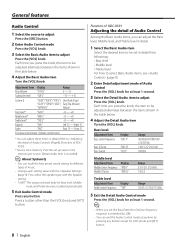
... below . 4 Adjust the Basic Audio item Turn the [VOL] knob. Adjustment Item Display Rear Volume "R-VOL" Subwoofer level "SW L" Range 0 - 35 -15 - +15 System Q "USER"/"ROCK"/"POPS"/ User/Rock/Pops/ "EASY"/"TOP40"/"JAZZ"/ Easy/Top 40/Jazz/ "NATURAL" Natural Bass level* "BAS L" Middle level* "MID L" Treble level* "TRE L" Balance "BAL" Fader "FAD" Exit Audio Control mode (Volume control mode) -8 - +8 -8 - +8 -8 - +8 Left 15 - Each time you set up value in the table below . 4 Adjust the Detail Audio item Turn the...
... below . 4 Adjust the Basic Audio item Turn the [VOL] knob. Adjustment Item Display Rear Volume "R-VOL" Subwoofer level "SW L" Range 0 - 35 -15 - +15 System Q "USER"/"ROCK"/"POPS"/ User/Rock/Pops/ "EASY"/"TOP40"/"JAZZ"/ Easy/Top 40/Jazz/ "NATURAL" Natural Bass level* "BAS L" Middle level* "MID L" Treble level* "TRE L" Balance "BAL" Fader "FAD" Exit Audio Control mode (Volume control mode) -8 - +8 -8 - +8 -8 - +8 Left 15 - Each time you set up value in the table below . 4 Adjust the Detail Audio item Turn the...
Instruction Manual
Page 9
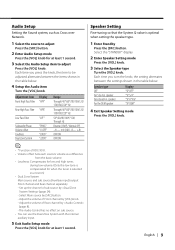
... 8). - Select the "STANDBY" display. 2 Enter Speaker Setting mode Press the [VOL] knob. 3 Select the Speaker type Turn the [VOL] knob. Adjust the volume of Front channel by [SRC] button. - Each time you press the knob, the item to be adjusted alternates between the settings shown in the table below . The Audio Control has no effect on sub source. • You can use the Dual Zone System with the internal auxiliary input. 5 Exit Audio Setup mode...
... 8). - Select the "STANDBY" display. 2 Enter Speaker Setting mode Press the [VOL] knob. 3 Select the Speaker type Turn the [VOL] knob. Adjust the volume of Front channel by [SRC] button. - Each time you press the knob, the item to be adjusted alternates between the settings shown in the table below . The Audio Control has no effect on sub source. • You can use the Dual Zone System with the internal auxiliary input. 5 Exit Audio Setup mode...
Instruction Manual
Page 10
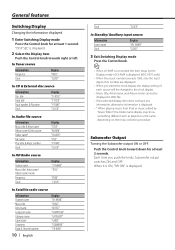
..." "FREQ" "CLOCK" In Satellite radio source Information Channel name Music title Artist name Composer name Category name Label name Comment Band & Channel number Display "CH NAME" "SONG" "ARTIST" "COMPOSER" "CATEGORY" "LABEL" "COMMENT" "CH NUM" 10 | English Clock "CLOCK" In Standby/ Auxiliary input source Information Source name Clock Display "SRC NAME" "CLOCK" 3 Exit Switching Display mode Press the Control knob. ⁄ • When LX-AMP is connected, the item setup by the Display mode of LX-AMP is displayed. (KDC-X591 only...
..." "FREQ" "CLOCK" In Satellite radio source Information Channel name Music title Artist name Composer name Category name Label name Comment Band & Channel number Display "CH NAME" "SONG" "ARTIST" "COMPOSER" "CATEGORY" "LABEL" "COMMENT" "CH NUM" 10 | English Clock "CLOCK" In Standby/ Auxiliary input source Information Source name Clock Display "SRC NAME" "CLOCK" 3 Exit Switching Display mode Press the Control knob. ⁄ • When LX-AMP is connected, the item setup by the Display mode of LX-AMP is displayed. (KDC-X591 only...

Instruction Manual
Page 15
... plays. The 0 indicator blinks. 3 Remove the USB device. When the USB device is displayed without displaying a folder name, etc. Select the "USB" (or "iPod") display. ⁄ • For the audio files that can be played with a maximum of 4 slots. • If a device is inserted during connection of the file contained in this case, "RESUMING" is connected Select USB source Press the [SRC] button. Removing the USB device 1 Drop open the faceplate Press the Release button. 2 Set the remove mode...
... plays. The 0 indicator blinks. 3 Remove the USB device. When the USB device is displayed without displaying a folder name, etc. Select the "USB" (or "iPod") display. ⁄ • For the audio files that can be played with a maximum of 4 slots. • If a device is inserted during connection of the file contained in this case, "RESUMING" is connected Select USB source Press the [SRC] button. Removing the USB device 1 Drop open the faceplate Press the Release button. 2 Set the remove mode...
Instruction Manual
Page 16
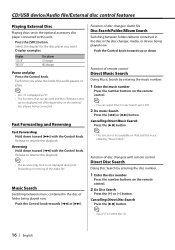
... to select disc 10. 16 | English Function of disc changers with the Control knob. Press the [SRC] button. Display examples: Display "CD CH" "MD CH" Disc player CD changer MD changer Pause and play time is not displayed during fast forwarding or reversing of remote control Direct Music Search Doing Music Search by "Music Editor". Release to this unit. CD/USB device/Audio file/External disc control features Playing External Disc Playing discs set in the disc changer, media, or device being played now. Push the Control knob...
... to select disc 10. 16 | English Function of disc changers with the Control knob. Press the [SRC] button. Display examples: Display "CD CH" "MD CH" Disc player CD changer MD changer Pause and play time is not displayed during fast forwarding or reversing of remote control Direct Music Search Doing Music Search by "Music Editor". Release to this unit. CD/USB device/Audio file/External disc control features Playing External Disc Playing discs set in the disc changer, media, or device being played now. Push the Control knob...
Instruction Manual
Page 23
... operation except for the following: • Volume • Attenuator • Selecting the source • Turning off the display when you cannot perform any key will blink on the display. • When the display is removed, warning potential thieves. Display Illumination Control This function turns off the power • During function control, such as the Menu System, the display stays on . LED OFF. Select the "CLK ADJ" display. 2 Enter Clock Adjust mode Press the Control...
... operation except for the following: • Volume • Attenuator • Selecting the source • Turning off the display when you cannot perform any key will blink on the display. • When the display is removed, warning potential thieves. Display Illumination Control This function turns off the power • During function control, such as the Menu System, the display stays on . LED OFF. Select the "CLK ADJ" display. 2 Enter Clock Adjust mode Press the Control...
Instruction Manual
Page 24
Turning OFF this function restores their high frequency region to be rear channel. Display "ZONE2 R" "ZONE2 F" Setting Sub source (Auxiliary input source) is to approach the sound quality of equivalents of KDC-X591 When LX AMP unit connecting AMP Control You can control the LX AMP connected to the FM station. In FM reception CRSC (Clean Reception System Circuit) Temporarily have reception alternate from power lines) may be imperceptible depending on the AMP Control item, see the Instruction manual attached...
Turning OFF this function restores their high frequency region to be rear channel. Display "ZONE2 R" "ZONE2 F" Setting Sub source (Auxiliary input source) is to approach the sound quality of equivalents of KDC-X591 When LX AMP unit connecting AMP Control You can control the LX AMP connected to the FM station. In FM reception CRSC (Clean Reception System Circuit) Temporarily have reception alternate from power lines) may be imperceptible depending on the AMP Control item, see the Instruction manual attached...
Instruction Manual
Page 26
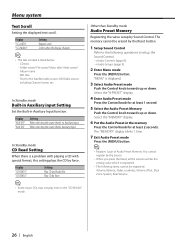
... Audio Preset in Auxiliary Input function. Display "SCL AUTO" "SCL MANU" Setting Repeats scroll. "AUX ON" When selecting the source there's Auxiliary Input. In Standby mode CD Read Setting When there is listed below. - Select the "A-PRESET" display. 4 Enter Audio Preset mode Press the Control knob for the Satellite radio source, HD Radio source, including Channel name, etc. Volume, Balance, Fader, Loudness, Volume offset, Dual Zone System, Rear Volume 26 | English The "MEMORY" display blinks 1 time. 7 Exit Audio Preset mode Press the [MENU] button. ⁄ • Register 1 pair...
... Audio Preset in Auxiliary Input function. Display "SCL AUTO" "SCL MANU" Setting Repeats scroll. "AUX ON" When selecting the source there's Auxiliary Input. In Standby mode CD Read Setting When there is listed below. - Select the "A-PRESET" display. 4 Enter Audio Preset mode Press the Control knob for the Satellite radio source, HD Radio source, including Channel name, etc. Volume, Balance, Fader, Loudness, Volume offset, Dual Zone System, Rear Volume 26 | English The "MEMORY" display blinks 1 time. 7 Exit Audio Preset mode Press the [MENU] button. ⁄ • Register 1 pair...
Instruction Manual
Page 28
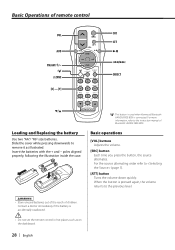
... connected. Basic operations [VOL] buttons Adjusts the volume. [SRC] button Each time you press the button, the source alternates. For more information, refer to (page 7). [ATT] button Turns the volume down quickly. Insert the batteries with the + and - For the source alternating order refer to the instruction manual of remote control VOL AUD FM/AM/+/- 2-ZONE [0] - [9] SRC ATT VOL AUD SRC ATT DIRECT Loading and Replacing the battery Use two "AA"/ "R6"-size batteries. Basic Operations of Bluetooth...
... connected. Basic operations [VOL] buttons Adjusts the volume. [SRC] button Each time you press the button, the source alternates. For more information, refer to (page 7). [ATT] button Turns the volume down quickly. Insert the batteries with the + and - For the source alternating order refer to the instruction manual of remote control VOL AUD FM/AM/+/- 2-ZONE [0] - [9] SRC ATT VOL AUD SRC ATT DIRECT Loading and Replacing the battery Use two "AA"/ "R6"-size batteries. Basic Operations of Bluetooth...
Instruction Manual
Page 29
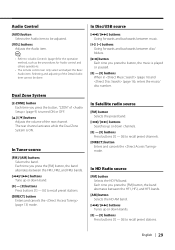
...;] buttons Tune up or down bands. [0] - [9] buttons Press buttons [1] - [6] to recall preset channels. [DIRECT] button Enters and cancels the mode. English | 29 In Tuner source [FM]/ [AM] buttons Selects the band. Audio Control [AUD] button Selects the Audio item to be done. The rear channel activates while the Dual Zone System is played or paused. [0] - [9] buttons When in (page 16) and (page 16), enters the music/ disc number. Each time you press the button, the music is ON. In Satellite radio source...
...;] buttons Tune up or down bands. [0] - [9] buttons Press buttons [1] - [6] to recall preset channels. [DIRECT] button Enters and cancels the mode. English | 29 In Tuner source [FM]/ [AM] buttons Selects the band. Audio Control [AUD] button Selects the Audio item to be done. The rear channel activates while the Dual Zone System is played or paused. [0] - [9] buttons When in (page 16) and (page 16), enters the music/ disc number. Each time you press the button, the music is ON. In Satellite radio source...

Instruction Manual
Page 30
... you connect the + connector of the wiring harness. 4. Make the proper input and output wire connections for iPod connection. • Dual Zone System in the car. • When only two speakers are working properly. • Mount the unit so that the faceplate will become unavailable. 30 | English connector to the power source running through the fuse box. ¤ • If the power is not turned ON ("PROTECT" is displayed), the speaker wire may have been activated. Accessories/ Installation Procedure...
... you connect the + connector of the wiring harness. 4. Make the proper input and output wire connections for iPod connection. • Dual Zone System in the car. • When only two speakers are working properly. • Mount the unit so that the faceplate will become unavailable. 30 | English connector to the power source running through the fuse box. ¤ • If the power is not turned ON ("PROTECT" is displayed), the speaker wire may have been activated. Accessories/ Installation Procedure...
Instruction Manual
Page 31
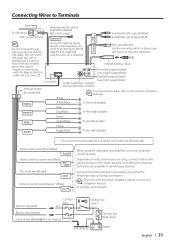
... what antenna you do not let the wire come off. Battery + English | 31 Connecting Wires to Terminals Tape To USB device USB connector (1m) Steering remote control (Light Blue/Yellow) (KDC-X591 only) REMO.CONT Sub Woofer left output (White) Fuse (10A) Rear right output (Red) To Kenwood disc changer/ External optional accessory Wiring harness (Accessory1) To connect these leads, refer to the relevant instruction manuals. Front right output (Red) Rear left output (White) Sub Woofer right output (Red) SUB WOOFER Do not remove the...
... what antenna you do not let the wire come off. Battery + English | 31 Connecting Wires to Terminals Tape To USB device USB connector (1m) Steering remote control (Light Blue/Yellow) (KDC-X591 only) REMO.CONT Sub Woofer left output (White) Fuse (10A) Rear right output (Red) To Kenwood disc changer/ External optional accessory Wiring harness (Accessory1) To connect these leads, refer to the relevant instruction manuals. Front right output (Red) Rear left output (White) Sub Woofer right output (Red) SUB WOOFER Do not remove the...
Instruction Manual
Page 34
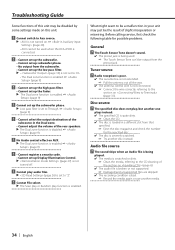
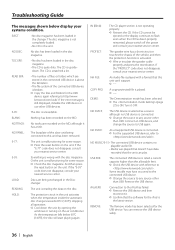
... subwoofer phase. • No output from that specified. ☞ Eject the disc magazine and check the number for possible problems. General ? Cannot set up the Fader. ▲ The Dual zone function is not turned off. ! Before calling service, first check the following table for the specified disc. ✔ The disc is not connected. ☞ Connect the wire correctly, referring to Through. ☞ (page 9) ! • Cannot select...
... subwoofer phase. • No output from that specified. ☞ Eject the disc magazine and check the number for possible problems. General ? Cannot set up the Fader. ▲ The Dual zone function is not turned off. ! Before calling service, first check the following table for the specified disc. ✔ The disc is not connected. ☞ Connect the wire correctly, referring to Through. ☞ (page 9) ! • Cannot select...
Instruction Manual
Page 36
... ejected or the display continues to any source other than USB. READING: The unit is connected. ➪ Change the source to flash even when the CD has been properly reinserted, please switch off the power and consult your nearest service center. NO DVICE: The USB device is selected as a source although no playable audio file. • Media was played that this unit has been removed. REMOVE: The Remove mode has been selected for the iPod...
... ejected or the display continues to any source other than USB. READING: The unit is connected. ➪ Change the source to flash even when the CD has been properly reinserted, please switch off the power and consult your nearest service center. NO DVICE: The USB device is selected as a source although no playable audio file. • Media was played that this unit has been removed. REMOVE: The Remove mode has been selected for the iPod...

Instruction Manual
Page 37
... signal : Linear-PCM Audio section Maximum output power : 50 W x 4 Full Bandwidth Power (at less than 1% THD) : 22 W x 4 Speaker impedance : 4 - 8 Ω Tone action Bass : 100 Hz ±8 dB Middle : 1 kHz ±8 dB Treble : 10 kHz ±8 dB Preout level / Load (during disc play) : 4000 mV/10 kΩ (KDC-X591) : 2500 mV/10 kΩ (KDC-MP535U) Preout impedance : ≤ 600 Ω USB Interface USB Standard : USB1.0/ 1.1/ 2.0 File...
... signal : Linear-PCM Audio section Maximum output power : 50 W x 4 Full Bandwidth Power (at less than 1% THD) : 22 W x 4 Speaker impedance : 4 - 8 Ω Tone action Bass : 100 Hz ±8 dB Middle : 1 kHz ±8 dB Treble : 10 kHz ±8 dB Preout level / Load (during disc play) : 4000 mV/10 kΩ (KDC-X591) : 2500 mV/10 kΩ (KDC-MP535U) Preout impedance : ≤ 600 Ω USB Interface USB Standard : USB1.0/ 1.1/ 2.0 File...


