
Separate volume2
Page 1
...included, the cause cannot be diagnosed, and the repair cannot be sure to while pressing down the lock button located on a PC ... GZ-MC200 MENU Power Switch r 49 GZ-MC100 wr MENU Lock Button Power Switch 49 te 8 Take care to hold e ( ) so that is displayed at least 10 MB...this sheet, store it when necessary. the camera is a number), within the [DCVC] folder. Usage of the instruction manual (printed edition). 8 Reset the camera if it from Hitachi, JVC Microdrive® (CUMD04) CompactFlash cards: By LEXAR, SanDisk and Hagiwara Sys-com SD memory cards: By Panasonic, TOSHIBA and...
...included, the cause cannot be diagnosed, and the repair cannot be sure to while pressing down the lock button located on a PC ... GZ-MC200 MENU Power Switch r 49 GZ-MC100 wr MENU Lock Button Power Switch 49 te 8 Take care to hold e ( ) so that is displayed at least 10 MB...this sheet, store it when necessary. the camera is a number), within the [DCVC] folder. Usage of the instruction manual (printed edition). 8 Reset the camera if it from Hitachi, JVC Microdrive® (CUMD04) CompactFlash cards: By LEXAR, SanDisk and Hagiwara Sys-com SD memory cards: By Panasonic, TOSHIBA and...

Instructions
Page 1
... No. For more information, read the advanced operation manual provided as HTML format in the CD-ROM. See page 32 for future reference. Retain this information for details. Basic Edition DIGITAL MEDIA CAMERA GZ-MC200 GETTING STARTED ENGLISH 6 BASIC OPERATIONS (RECORDING & PLAYBACK...) 19 MENU SETTINGS 26 REFERENCES 32 To deactivate the demonstration, set "DEMO MODE" to "OFF". (੬ pg. 26) INSTRUCTIONS This instruction manual describes the basic operations of the...
... No. For more information, read the advanced operation manual provided as HTML format in the CD-ROM. See page 32 for future reference. Retain this information for details. Basic Edition DIGITAL MEDIA CAMERA GZ-MC200 GETTING STARTED ENGLISH 6 BASIC OPERATIONS (RECORDING & PLAYBACK...) 19 MENU SETTINGS 26 REFERENCES 32 To deactivate the demonstration, set "DEMO MODE" to "OFF". (੬ pg. 26) INSTRUCTIONS This instruction manual describes the basic operations of the...
Instructions
Page 2
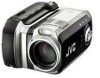
Playlist, playback effects, and other functions are also available for enjoying many different types of playback. (Refer to the advanced operation manual in CD-ROM. ੬ pg. 32) Editing Files on your printer is compatible with PictBridge, still images can be printed easily by ...SOFTWARE INSTALLATION AND USB CONNECTION GUIDE".) Direct Printing If your PC USB 2.0 enables the smooth transfer of video and still images to the advanced operation manual in CD-ROM. ੬ pg. 32) 2 EN Major Features of this Camera Removable hard disk In contrast to conventional digital video cameras that ...
Playlist, playback effects, and other functions are also available for enjoying many different types of playback. (Refer to the advanced operation manual in CD-ROM. ੬ pg. 32) Editing Files on your printer is compatible with PictBridge, still images can be printed easily by ...SOFTWARE INSTALLATION AND USB CONNECTION GUIDE".) Direct Printing If your PC USB 2.0 enables the smooth transfer of video and still images to the advanced operation manual in CD-ROM. ੬ pg. 32) 2 EN Major Features of this Camera Removable hard disk In contrast to conventional digital video cameras that ...

Instructions
Page 5
...recording data is not completely erased. All rights reserved. ● Other product and company names included in Japan. However, this instruction manual are trademarks of Hitachi Global Storage Technologies, Inc. When discarding or giving away the removable hard disk. Be especially careful to avoid sudden...a cold location. (੬ pg. 36) ● The camera and removable hard disk can cause the drive to vibrations or sudden jolts. JVC shall not be read "Recording Medium" on page 38. ● Manufactured under license from the camera. "Dolby" and double-D symbol are ...
...recording data is not completely erased. All rights reserved. ● Other product and company names included in Japan. However, this instruction manual are trademarks of Hitachi Global Storage Technologies, Inc. When discarding or giving away the removable hard disk. Be especially careful to avoid sudden...a cold location. (੬ pg. 36) ● The camera and removable hard disk can cause the drive to vibrations or sudden jolts. JVC shall not be read "Recording Medium" on page 38. ● Manufactured under license from the camera. "Dolby" and double-D symbol are ...

Instructions
Page 6
ATTENTION: ● Be careful not to cover W, a, b, c and d during playback. The explanation "pressing r" in this instruction manual means moving the 49rtwe button in the r direction. 6 EN GETTING STARTED Index The top, buttom, left or right sides of the 49rtwe button can be pressed to cover X during shooting. ● Be careful not to operate like a lever.
ATTENTION: ● Be careful not to cover W, a, b, c and d during playback. The explanation "pressing r" in this instruction manual means moving the 49rtwe button in the r direction. 6 EN GETTING STARTED Index The top, buttom, left or right sides of the 49rtwe button can be pressed to cover X during shooting. ● Be careful not to operate like a lever.

Instructions
Page 7
... (੬ pg. 21) Left Button [w] (੬ pg. 26) Flash Button [ ] (Used to engage backlight compensation or spot exposure control. Refer to the advanced operation manual. ੬ pg. 32) I Play/Pause Button [49] (੬ pg. 21) J Reverse Skip Button [r (2)] (੬ pg. 21) Up Button [r] (੬... Flash d Lens e SD Card Cover [MEMORY CARD] (੬ pg. 16) f Tripod Mounting Socket g Hand Strap Eyelet (੬ pg. 12) h Lens Cap Eyelet (੬ pg. 12) Connectors The connectors are located beneath the covers. O USB (Universal Serial Bus) Connector (Refer to display the file information.
... (੬ pg. 21) Left Button [w] (੬ pg. 26) Flash Button [ ] (Used to engage backlight compensation or spot exposure control. Refer to the advanced operation manual. ੬ pg. 32) I Play/Pause Button [49] (੬ pg. 21) J Reverse Skip Button [r (2)] (੬ pg. 21) Up Button [r] (੬... Flash d Lens e SD Card Cover [MEMORY CARD] (੬ pg. 16) f Tripod Mounting Socket g Hand Strap Eyelet (੬ pg. 12) h Lens Cap Eyelet (੬ pg. 12) Connectors The connectors are located beneath the covers. O USB (Universal Serial Bus) Connector (Refer to display the file information.

Instructions
Page 8
... Control Indicator (੬ pg. 27) H Battery Indicator I Date/Time (੬ pg. 27) J Selected Medium Indicator (੬ pg. 17, 27) K Manual Focus Adjustment Indicator (੬ pg. 31) L Effect Mode Indicator (੬ pg. 31) M Program AE Mode Indicator (੬ pg. 31) N White Balance...pg. 31) o ±: Exposure Adjustment Indicator (੬ pg. 31) : Backlight Compensation Indicator (Appears when backlight compensation is locked. Refer to the advanced operation manual. ੬ pg. 32) A Mode Indicator (੬ pg. 19) B Wide Mode Indicator (੬ pg. 28) C Wind Cut Indicator (੬ pg...
... Control Indicator (੬ pg. 27) H Battery Indicator I Date/Time (੬ pg. 27) J Selected Medium Indicator (੬ pg. 17, 27) K Manual Focus Adjustment Indicator (੬ pg. 31) L Effect Mode Indicator (੬ pg. 31) M Program AE Mode Indicator (੬ pg. 31) N White Balance...pg. 31) o ±: Exposure Adjustment Indicator (੬ pg. 31) : Backlight Compensation Indicator (Appears when backlight compensation is locked. Refer to the advanced operation manual. ੬ pg. 32) A Mode Indicator (੬ pg. 19) B Wide Mode Indicator (੬ pg. 28) C Wind Cut Indicator (੬ pg...

Instructions
Page 9
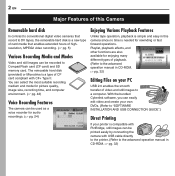
Refer to the advanced operation manual. ੬ pg. 32) F Remaining Number Of Shots (੬ pg. 43) G Continuous Shooting Mode (੬ pg. 22) H Shooting Icon (੬ pg. 22) (Appears during shooting.) I Self-...
Refer to the advanced operation manual. ੬ pg. 32) F Remaining Number Of Shots (੬ pg. 43) G Continuous Shooting Mode (੬ pg. 22) H Shooting Icon (੬ pg. 22) (Appears during shooting.) I Self-...
Instructions
Page 10
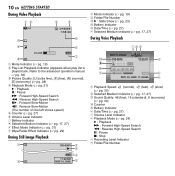
..., 27) During Voice Playback A Mode Indicator (੬ pg. 19) B Play List Playback Indicator (Appears when play list is played back. Refer to the advanced operation manual. ੬ pg. 32) C Picture Quality: [U] (ultra fine), [F] (fine), [N] (normal), [E] (economy) (੬ pg. 28) D Playback Mode (੬ pg. 21) U : Playback 9 : Pause 5 : Forward High-Speed Search 3 : Reverse...
..., 27) During Voice Playback A Mode Indicator (੬ pg. 19) B Play List Playback Indicator (Appears when play list is played back. Refer to the advanced operation manual. ੬ pg. 32) C Picture Quality: [U] (ultra fine), [F] (fine), [N] (normal), [E] (economy) (੬ pg. 28) D Playback Mode (੬ pg. 21) U : Playback 9 : Pause 5 : Forward High-Speed Search 3 : Reverse...

Instructions
Page 19
.... 20, 21) : Still image mode (੬ pg. 22, 23) : Voice mode (੬ pg. 24) 3 Auto/Manual Mode Mode Lamp Press e ( ) to select the recording/playback mode. When manual mode is possible by setting various functions. 1 Power Switch Position Set the power switch for recording ( ) or playback ( ) while...or while pressing down the lock button. Playback Recording Power off the camera, set the power switch to your preference using no special effects or manual adjustments. Auto mode: You can record using the power switch, MODE and e ( ) buttons. To turn on the camera, set the...
.... 20, 21) : Still image mode (੬ pg. 22, 23) : Voice mode (੬ pg. 24) 3 Auto/Manual Mode Mode Lamp Press e ( ) to select the recording/playback mode. When manual mode is possible by setting various functions. 1 Power Switch Position Set the power switch for recording ( ) or playback ( ) while...or while pressing down the lock button. Playback Recording Power off the camera, set the power switch to your preference using no special effects or manual adjustments. Auto mode: You can record using the power switch, MODE and e ( ) buttons. To turn on the camera, set the...

Instructions
Page 20
... when a file size of 4 GB is reached. ● If data cannot be recorded or saved properly, the video files are saved to the advanced operation manual for details. (੬ pg. 32) Deleting Files If you press during recording or playback (video, still image or voice) for 5 minutes when using AC adapter...
... when a file size of 4 GB is reached. ● If data cannot be recorded or saved properly, the video files are saved to the advanced operation manual for details. (੬ pg. 32) Deleting Files If you press during recording or playback (video, still image or voice) for 5 minutes when using AC adapter...

Instructions
Page 23
... 27. 3 Press 3 to be played back, see pages 26 and 29. Press 5 to W so that the index display appears. For details, read the advanced operation manual. (੬ pg. 32) Slide Show Deleting Still Image Files Press , then press rt to select [EXECUTE] and press 49. ● You can zoom in/out...
... 27. 3 Press 3 to be played back, see pages 26 and 29. Press 5 to W so that the index display appears. For details, read the advanced operation manual. (੬ pg. 32) Slide Show Deleting Still Image Files Press , then press rt to select [EXECUTE] and press 49. ● You can zoom in/out...

Instructions
Page 25
...not, go to its VIDEO mode. If using a VCR, go to step 4. 3 Connect the VCR output to the TV input, referring to your VCR's instruction manual. 4 Turn on the camera, the VCR and the TV. 5 Set the VCR to its minimum level to avoid a sudden burst of the battery pack. (੬... sound from the camera without inserting a recording medium, set the camera's power switch to , then set the TV to step 3. Connecting to the VCR's instruction manual.) 3 To stop dubbing, stop recording on the VCR, then stop playback on the camera. Dubbing to a VCR 1 Perform step 1 to 6 above. 2 At the point ...
...not, go to its VIDEO mode. If using a VCR, go to step 4. 3 Connect the VCR output to the TV input, referring to your VCR's instruction manual. 4 Turn on the camera, the VCR and the TV. 5 Set the VCR to its minimum level to avoid a sudden burst of the battery pack. (੬... sound from the camera without inserting a recording medium, set the camera's power switch to , then set the TV to step 3. Connecting to the VCR's instruction manual.) 3 To stop dubbing, stop recording on the VCR, then stop playback on the camera. Dubbing to a VCR 1 Perform step 1 to 6 above. 2 At the point ...

Instructions
Page 26
... select (video), (still image) or (voice). 3 Press MENU. NOTE: Information on the selected mode (video/still image/voice, recording/playback). Refer to the advanced operation manual in the CD-ROM for the full descriptions. (੬ pg. 32) INFO MODE MENU Common Menus for All Modes [ ] = Factory-preset r 49 BASIC SETTING Power...
... select (video), (still image) or (voice). 3 Press MENU. NOTE: Information on the selected mode (video/still image/voice, recording/playback). Refer to the advanced operation manual in the CD-ROM for the full descriptions. (੬ pg. 32) INFO MODE MENU Common Menus for All Modes [ ] = Factory-preset r 49 BASIC SETTING Power...

Instructions
Page 29
... recording start/stop button. CONTINUOUS SHOOTING [OFF] / ON ੬ "Continuous Shooting" (੬ pg. 22) GAIN [80] / 160 Select the ISO sensitivity to the advanced operation manual. [ ] = Factory-preset PLAY LIST PLAY LIST CONTENTS / EDIT / RENAME / DELETE You can create a play list and view your original video clips. WIPE/FADER [OFF] / FADER...
... recording start/stop button. CONTINUOUS SHOOTING [OFF] / ON ੬ "Continuous Shooting" (੬ pg. 22) GAIN [80] / 160 Select the ISO sensitivity to the advanced operation manual. [ ] = Factory-preset PLAY LIST PLAY LIST CONTENTS / EDIT / RENAME / DELETE You can create a play list and view your original video clips. WIPE/FADER [OFF] / FADER...
Instructions
Page 30
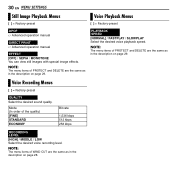
... on page 29. 30 EN MENU SETTINGS Still Image Playback Menus [ ] = Factory-preset Voice Playback Menus [ ] = Factory-preset DPOF ੬ Advanced operation manual DIRECT PRINT ੬ Advanced operation manual EFFECT [OFF] / SEPIA / MONOTONE You can view still images with special image effects. NOTE: The menu items of the quality) [FINE] STANDARD ECONOMY...
... on page 29. 30 EN MENU SETTINGS Still Image Playback Menus [ ] = Factory-preset Voice Playback Menus [ ] = Factory-preset DPOF ੬ Advanced operation manual DIRECT PRINT ੬ Advanced operation manual EFFECT [OFF] / SEPIA / MONOTONE You can view still images with special image effects. NOTE: The menu items of the quality) [FINE] STANDARD ECONOMY...

Instructions
Page 31
... ±6* or ±2 (EV)** Fine exposure adjustment is possible depending on the shooting condition. * For video recording ** For still image recording FOCUS [AUTO] / (manual) If correct focus may not be obtained depending on the switch. 2 Press MODE to the image. SHUTTER [AUTO] / 1/2 / 1/4 / 1/8 / 1/15 / 1/... / SNOW / SPOTLIGHT / TWILIGHT Various programmed effects can select the shutter speed depending on the subject and shooting condition. * Not available for Manual Recording (MSET Menu) MODE Power r 49 Switch w Lock Button t ( SET) e ( ) 1 Set the power switch to the ...
... ±6* or ±2 (EV)** Fine exposure adjustment is possible depending on the shooting condition. * For video recording ** For still image recording FOCUS [AUTO] / (manual) If correct focus may not be obtained depending on the switch. 2 Press MODE to the image. SHUTTER [AUTO] / 1/2 / 1/4 / 1/8 / 1/15 / 1/... / SNOW / SPOTLIGHT / TWILIGHT Various programmed effects can select the shutter speed depending on the subject and shooting condition. * Not available for Manual Recording (MSET Menu) MODE Power r 49 Switch w Lock Button t ( SET) e ( ) 1 Set the power switch to the ...

Instructions
Page 32
...turn off heavy dirt. Put the cloth in the [My Computer] window, then click [Open]. 3 Double-click the [Docs] folder, then double-click the [Manual] folder. 4 Double click "start.html". 5 Select the language by clicking the language button. 6 Now you can see menus on the CD-ROM icon in diluted... mild soap and wring it well to damage the monitor. 32 EN REFERENCES For Advanced Operations Cleaning the Camera Read the advanced operation manual provided as benzine or alcohol. ● Cleaning should be done only after the battery pack has been removed or other power units have ...
...turn off heavy dirt. Put the cloth in the [My Computer] window, then click [Open]. 3 Double-click the [Docs] folder, then double-click the [Manual] folder. 4 Double click "start.html". 5 Select the language by clicking the language button. 6 Now you can see menus on the CD-ROM icon in diluted... mild soap and wring it well to damage the monitor. 32 EN REFERENCES For Advanced Operations Cleaning the Camera Read the advanced operation manual provided as benzine or alcohol. ● Cleaning should be done only after the battery pack has been removed or other power units have ...

Instructions
Page 33
... EN 33 Troubleshooting The camera is choppy. Digital zoom does not work. ● [ZOOM] is no picture on again automatically. HTry manual white balance adjustment. (Refer to OFF and remove the power supply (battery pack or AC adapter) from functioning properly. HConnect the AC Adapter...੬ pg. 32) REFERENCES HTo solve the problem, follow the Instructions below .) HIf the problem still exists, please consult your nearest JVC dealer. 8 To reset the camera A Press and hold MENU and MODE for video playback. Advanced features The focus does not adjust automatically....
... EN 33 Troubleshooting The camera is choppy. Digital zoom does not work. ● [ZOOM] is no picture on again automatically. HTry manual white balance adjustment. (Refer to OFF and remove the power supply (battery pack or AC adapter) from functioning properly. HConnect the AC Adapter...੬ pg. 32) REFERENCES HTo solve the problem, follow the Instructions below .) HIf the problem still exists, please consult your nearest JVC dealer. 8 To reset the camera A Press and hold MENU and MODE for video playback. Advanced features The focus does not adjust automatically....

Instructions
Page 34
...) mode. (੬ pg. 31) The image looks like the shutter speed is too slow. ● When shooting in places subject to the advanced operation manual in the SD card a few more than 99.99 %) The SD card cannot be deleted. ● Files are not recorded on the LCD monitor appear...9679; In places subject to [SPOTLIGHT]. (੬ pg. 31) White balance setting cannot be avoided. (੬ pg. 28) Images on the picture. HConsult your nearest JVC dealer. HClose the cover. (੬ pg. 14) The data process is too slow after the power is switched on the camera does not light during...
...) mode. (੬ pg. 31) The image looks like the shutter speed is too slow. ● When shooting in places subject to the advanced operation manual in the SD card a few more than 99.99 %) The SD card cannot be deleted. ● Files are not recorded on the LCD monitor appear...9679; In places subject to [SPOTLIGHT]. (੬ pg. 31) White balance setting cannot be avoided. (੬ pg. 28) Images on the picture. HConsult your nearest JVC dealer. HClose the cover. (੬ pg. 14) The data process is too slow after the power is switched on the camera does not light during...


