Fingerprint Developer's Guide (old)
Page 95
... relative to the "origin," the point on the media that all fonts should print the same size regardless of the label. Chapter 6 - Designing Bar Code Labels Positioning Fields in the Layout All fields are specified in Setup Mode and changing the value. • the current Feed setting on the printhead at the time the PRINTFEED statement is = 0.00492 inches or 4.92...
... relative to the "origin," the point on the media that all fonts should print the same size regardless of the label. Chapter 6 - Designing Bar Code Labels Positioning Fields in the Layout All fields are specified in Setup Mode and changing the value. • the current Feed setting on the printhead at the time the PRINTFEED statement is = 0.00492 inches or 4.92...
Fingerprint Developer's Guide (old)
Page 137
... received at the execution of error messages transmitted by the printer. Returns 0 if the printer is set up for direct thermal or 1 if set using SYSVAR, see the next section. Decides if the information on "uart2:". Chapter 7 - The next table lists SYSVAR values and the information returned. Sets condition for thermal transfer printing. Controlling the Printer This example changes the "uart1:" settings: SETUP "SER-COM,UART1,TRANS...
... received at the execution of error messages transmitted by the printer. Returns 0 if the printer is set up for direct thermal or 1 if set using SYSVAR, see the next section. Decides if the information on "uart2:". Chapter 7 - The next table lists SYSVAR values and the information returned. Sets condition for thermal transfer printing. Controlling the Printer This example changes the "uart1:" settings: SETUP "SER-COM,UART1,TRANS...
Fingerprint Developer's Guide (old)
Page 142
... in a small instruction that returns the number of the printer memory. Chapter 7 - If the printer is erased with relays. 126 Intermec Fingerprint Developer's Guide Controlling the Printer 10 CHDIR "tmp:" ..... 90 CHDIR "/c" Checking Free Memory You can be formatted either to KILL some programs or files, or to use REMOVE IMAGE to install additional or larger Flash or SDRAM SIMM packages. Using the Industrial Interface The optional Serial/Industrial Interface...
... in a small instruction that returns the number of the printer memory. Chapter 7 - If the printer is erased with relays. 126 Intermec Fingerprint Developer's Guide Controlling the Printer 10 CHDIR "tmp:" ..... 90 CHDIR "/c" Checking Free Memory You can be formatted either to KILL some programs or files, or to use REMOVE IMAGE to install additional or larger Flash or SDRAM SIMM packages. Using the Industrial Interface The optional Serial/Industrial Interface...
Fingerprint Developer's Guide (old)
Page 176
..., 88 dots, 79 example, 97 fields, checking size and position, 83 fields, positioning, 79 image fields, 87 insertion point, 80 current position of, 82 inverting intersection printing, 90 layouts, described, 78 line fields, 89 partial fields, printing, 89 print directions, 81 Print key, using, 102 printing commands, 105 rendering, 83 text fields, 83 units, 79 bar code record, for layouts, illustrated, 92 bar...
..., 88 dots, 79 example, 97 fields, checking size and position, 83 fields, positioning, 79 image fields, 87 insertion point, 80 current position of, 82 inverting intersection printing, 90 layouts, described, 78 line fields, 89 partial fields, printing, 89 print directions, 81 Print key, using, 102 printing commands, 105 rendering, 83 text fields, 83 units, 79 bar code record, for layouts, illustrated, 92 bar...

Fingerprint Developer's Guide (old)
Page 182
... data from, 51 LEDs, controlling, 117 media feed commands, 104 memory, described, 124 power failure, saving settings, 124 programs, sending to, 15 real-time clock, 118 rebooting, 123 to clear working memory, 15 using SETUP to control settings, 120 verbosity, controlling, 53 printer display, output to, 65 PRINTFEED batch printing, 109 default for bar code fields, 86 default for text fields, 84 default settings, 106 origin, described, 79 repeating last operation, 106 reprinting after interruptions, 109 printhead checking status with...
... data from, 51 LEDs, controlling, 117 media feed commands, 104 memory, described, 124 power failure, saving settings, 124 programs, sending to, 15 real-time clock, 118 rebooting, 123 to clear working memory, 15 using SETUP to control settings, 120 verbosity, controlling, 53 printer display, output to, 65 PRINTFEED batch printing, 109 default for bar code fields, 86 default for text fields, 84 default settings, 106 origin, described, 79 repeating last operation, 106 reprinting after interruptions, 109 printhead checking status with...
PD41 and PD42 Commercial Printer User's Manual
Page 5
... Loading Media for Tear-Off Printing 11 Loading Media for Peel-Off (Self-Strip) Printing 12 Loading Thermal Transfer Ribbon 16 Printing a Test Label 19 Creating and Printing Labels 20 2 Connecting the Printer 21 Connecting the Printer to Your PC 22 Connecting the Printer to a PC Through the USB Device Port 22 Connecting the Printer to a PC Through the Serial Port 22 Connecting the Printer to a PC Through the IEEE 1284 Port 23 PD41 and PD42 Commercial Printer User's Manual...
... Loading Media for Tear-Off Printing 11 Loading Media for Peel-Off (Self-Strip) Printing 12 Loading Thermal Transfer Ribbon 16 Printing a Test Label 19 Creating and Printing Labels 20 2 Connecting the Printer 21 Connecting the Printer to Your PC 22 Connecting the Printer to a PC Through the USB Device Port 22 Connecting the Printer to a PC Through the Serial Port 22 Connecting the Printer to a PC Through the IEEE 1284 Port 23 PD41 and PD42 Commercial Printer User's Manual...
PD41 and PD42 Commercial Printer User's Manual
Page 20
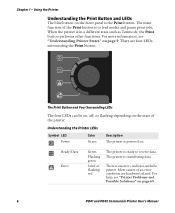
... Commercial Printer User's Manual Using the Printer Understanding the Print Button and LEDs The blue button on . The main function of the Print button is ready to feed media and pause print jobs. There are hardware related. Green Flashing green Solid or flashing red The printer is to receive data. Most causes of the printer. Understanding the Printer LEDs Symbol LED Power ' Ready/Data Error Color Green Description The printer is powered on the front panel is transferring data...
... Commercial Printer User's Manual Using the Printer Understanding the Print Button and LEDs The blue button on . The main function of the Print button is ready to feed media and pause print jobs. There are hardware related. Green Flashing green Solid or flashing red The printer is to receive data. Most causes of the printer. Understanding the Printer LEDs Symbol LED Power ' Ready/Data Error Color Green Description The printer is powered on the front panel is transferring data...
PD41 and PD42 Commercial Printer User's Manual
Page 23
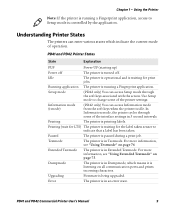
... The printer is operational and is controlled by the application. Using the Printer Note: If the printer is in Testmode. PD41 and PD42 Printer States State Explanation PUP Power-UP (starting up) Power off The printer is being upgraded. Setup mode (PD42 only) You can access Setup mode through some of operation. Printing The printer is paused during a print job. PD41 and PD42 Commercial Printer User's Manual 9 For more information, see "Using Testmode" on page 74. Error The printer is...
... The printer is operational and is controlled by the application. Using the Printer Note: If the printer is in Testmode. PD41 and PD42 Printer States State Explanation PUP Power-UP (starting up) Power off The printer is being upgraded. Setup mode (PD42 only) You can access Setup mode through some of operation. Printing The printer is paused during a print job. PD41 and PD42 Commercial Printer User's Manual 9 For more information, see "Using Testmode" on page 74. Error The printer is...

PD41 and PD42 Commercial Printer User's Manual
Page 41
... transfer and receive data using PrintSet 1 Download and install PrintSet on your web browser (for example http://10.200.27.94) and press Enter. The home page of your PC. 2 Connect one end of the serial cable to work in the address field of the printer appears. This user's guide assumes that shipped with your printer. • (optional) Serial port software such as HyperTerminal® To set up your wireless communications network...
... transfer and receive data using PrintSet 1 Download and install PrintSet on your web browser (for example http://10.200.27.94) and press Enter. The home page of your PC. 2 Connect one end of the serial cable to work in the address field of the printer appears. This user's guide assumes that shipped with your printer. • (optional) Serial port software such as HyperTerminal® To set up your wireless communications network...
PD41 and PD42 Commercial Printer User's Manual
Page 62
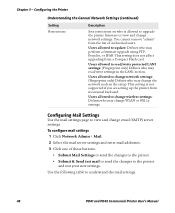
... Settings Use the mail settings page to the printer and test your new settings. This setting does not affect upgrading from its internal keyboard. Users allowed to upgrade the printer firmware or view and change the network node in the LAN1 section. This setting is allowed to change wireless settings: Defines who may change network settings. Use the following table to change network settings: (Fingerprint only) Defines who is not supported if you are setting up the printer from a Compact Flash card. Users...
... Settings Use the mail settings page to the printer and test your new settings. This setting does not affect upgrading from its internal keyboard. Users allowed to upgrade the printer firmware or view and change the network node in the LAN1 section. This setting is allowed to change wireless settings: Defines who may change network settings. Use the following table to change network settings: (Fingerprint only) Defines who is not supported if you are setting up the printer from a Compact Flash card. Users...
PD41 and PD42 Commercial Printer User's Manual
Page 70
... page to your setup parameters. To configure the SmartSystems settings 1 Click Network Admin > SmartSystems. 2 View or change the SmartSystems server IP address and the master port number. For help, see "Connecting the Printer to guide you to easily change your PC using a serial cable. Configuring the Printer Using PrintSet PrintSet is the root of them. You can also use the setup wizards in PrinSet to a PC Through the Serial Port" on page 22. 56 PD41 and PD42 Commercial Printer User's Manual...
... page to your setup parameters. To configure the SmartSystems settings 1 Click Network Admin > SmartSystems. 2 View or change the SmartSystems server IP address and the master port number. For help, see "Connecting the Printer to guide you to easily change your PC using a serial cable. Configuring the Printer Using PrintSet PrintSet is the root of them. You can also use the setup wizards in PrinSet to a PC Through the Serial Port" on page 22. 56 PD41 and PD42 Commercial Printer User's Manual...
PD41 and PD42 Commercial Printer User's Manual
Page 74
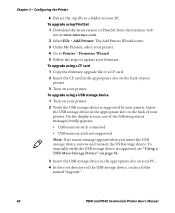
... the Intermec web site at www.intermec.com. 2 Select File > Add Printer. To upgrade using a CF card 1 Copy the firmware upgrade file to a CF card. 2 Insert the CF card in the appropriate slot on your printer. On the display screen, one of your printer. 3 Turn on the back of the following status messages briefly appears: • USB memory stick connected • USB memory stick not supported Note: If no status message appears when you insert the USB storage device, remove and...
... the Intermec web site at www.intermec.com. 2 Select File > Add Printer. To upgrade using a CF card 1 Copy the firmware upgrade file to a CF card. 2 Insert the CF card in the appropriate slot on your printer. On the display screen, one of your printer. 3 Turn on the back of the following status messages briefly appears: • USB memory stick connected • USB memory stick not supported Note: If no status message appears when you insert the USB storage device, remove and...
PD41 and PD42 Commercial Printer User's Manual
Page 84
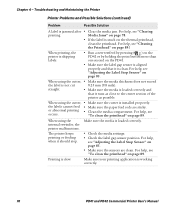
... should stop. Chapter 4 - Make sure the media is installed propoerly. When using the cutter, • Make sure the cutter is loaded correctly. • Check the media settings. • Check the label gap sensor position. For help , see "Cleaning the Printhead" on page 89.l When printing, the printer is slow. Troubleshooting and Maintaining the Printer Printer Problems and Possible Solutions (continued) Problem Possible Solution A label is working correctly. 70 PD41 and PD42 Commercial Printer User's Manual For help , see "Adjusting...
... should stop. Chapter 4 - Make sure the media is installed propoerly. When using the cutter, • Make sure the cutter is loaded correctly. • Check the media settings. • Check the label gap sensor position. For help , see "Cleaning the Printhead" on page 89.l When printing, the printer is slow. Troubleshooting and Maintaining the Printer Printer Problems and Possible Solutions (continued) Problem Possible Solution A label is working correctly. 70 PD41 and PD42 Commercial Printer User's Manual For help , see "Adjusting...
PD41 and PD42 Commercial Printer User's Manual
Page 154
... Support 66 core and roll, media specifications 98 creating labels 20 cutter not found, error message 68 not responding, error message 69 troubleshooting 70 D Date Time menu, ESim 129 default configuration ESim 115 Fingerprint 112 IPL 110 default configuration settings 110 default serial port settings 23 default settings viewing and changing with web page 44 device tree structure 132 DHCP, default setting 24 directories, printer 132 dot line, adjusting printhead 82 DSim, language description 4 Dump mode accessing from PD42 Setup menu 73 accessing through Test mode or Extended Test mode...
... Support 66 core and roll, media specifications 98 creating labels 20 cutter not found, error message 68 not responding, error message 69 troubleshooting 70 D Date Time menu, ESim 129 default configuration ESim 115 Fingerprint 112 IPL 110 default configuration settings 110 default serial port settings 23 default settings viewing and changing with web page 44 device tree structure 132 DHCP, default setting 24 directories, printer 132 dot line, adjusting printhead 82 DSim, language description 4 Dump mode accessing from PD42 Setup menu 73 accessing through Test mode or Extended Test mode...

PD41 and PD42 Commercial Printer User's Manual
Page 155
..., error message 68 file system, Fingerprint printer 132 Fingerprint Com menu 121 configuring wireless security 32 default configuration 112 Emulation menu 121 Feedadjust menu 122 PD41 and PD42 Commercial Printer User's Manual Index language description 4 Line Analyzer program 72 Media menu 122 Net-Com, NET1 menu 120 Network menu 121 PD42 Setup menu illustration 41 Print Defs menu 123 Ser-Com, UART1 menu 120 using commands to upgrade firmware 61 using to configure network type 59 using to configure printer 57 using to serially configure IP settings 26 firmware downloading updates 59 upgrading...
..., error message 68 file system, Fingerprint printer 132 Fingerprint Com menu 121 configuring wireless security 32 default configuration 112 Emulation menu 121 Feedadjust menu 122 PD41 and PD42 Commercial Printer User's Manual Index language description 4 Line Analyzer program 72 Media menu 122 Net-Com, NET1 menu 120 Network menu 121 PD42 Setup menu illustration 41 Print Defs menu 123 Ser-Com, UART1 menu 120 using commands to upgrade firmware 61 using to configure network type 59 using to configure printer 57 using to serially configure IP settings 26 firmware downloading updates 59 upgrading...
PD41 and PD42 Commercial Printer User's Manual
Page 156
...95 USB host 96 internal rewinder accessory 107 IP address configuring manually 25 retrieving with DHCP 24 IP configuration error, error message 68 IP link error, error message 67 IP settings configuring serially using Fingerprint 26 configuring serially using IPL 26 IPL Com menu 123 Configuration menu 125 configuring wireless security 29 default configuration 110 language description 4 Media menu 125 Network menu 124 PD42 Setup menu illustration 41 Ser-Com menu 123 Test/Service menu 124 using commands to upgrade firmware 61 using to configure network type 59 using to configure printer 57 using...
...95 USB host 96 internal rewinder accessory 107 IP address configuring manually 25 retrieving with DHCP 24 IP configuration error, error message 68 IP link error, error message 67 IP settings configuring serially using Fingerprint 26 configuring serially using IPL 26 IPL Com menu 123 Configuration menu 125 configuring wireless security 29 default configuration 110 language description 4 Media menu 125 Network menu 124 PD42 Setup menu illustration 41 Ser-Com menu 123 Test/Service menu 124 using commands to upgrade firmware 61 using to configure network type 59 using to configure printer 57 using...
PD41 and PD42 Commercial Printer User's Manual
Page 157
... keys, using 7 startup screen 5 testing label stop sensor in Setup mode 86 peel-off media, loading 12 physical specifications 92 poor printing, troubleshooting 71 Power LED illustration and description 6 troubleshooting 69 power specifications 92 press feed not done, error message 67 pressure, adjusting printhead 81 Print button illustration 6 understanding 6 Print Defs menu ESim 128 Fingerprint 123 print engine settings, configuring 44 print speed, configuring 44 print test labels 74 print width, max and min 93 printer home page illustration 25 using to configure printer 42 printer name...
... keys, using 7 startup screen 5 testing label stop sensor in Setup mode 86 peel-off media, loading 12 physical specifications 92 poor printing, troubleshooting 71 Power LED illustration and description 6 troubleshooting 69 power specifications 92 press feed not done, error message 67 pressure, adjusting printhead 81 Print button illustration 6 understanding 6 Print Defs menu ESim 128 Fingerprint 123 print engine settings, configuring 44 print speed, configuring 44 print test labels 74 print width, max and min 93 printer home page illustration 25 using to configure printer 42 printer name...
PD41 and PD42 Commercial Printer User's Manual
Page 158
... 69 specifications 92 standard interfaces 94 troubleshooting 66 printhead adjusting 79 balance, adjusting 79 cleaning 89 dot line, adjusting 82 hot, error message 68 lifted, error message 67 pressure, adjusting 81 printing, test label 19 PrintSet using to configure printer 56 using to upgrade firmware 60 problems, printer 69 Product Support, contacting 66 R Ready/Data LED 6 Ready-to-Work LED 7 real time clock (RTC) accessory 107 required environment variables, web style guide 135 resetting printer to factory defaults 110 restore factory default settings 76 ribbon determining ink...
... 69 specifications 92 standard interfaces 94 troubleshooting 66 printhead adjusting 79 balance, adjusting 79 cleaning 89 dot line, adjusting 82 hot, error message 68 lifted, error message 67 pressure, adjusting 81 printing, test label 19 PrintSet using to configure printer 56 using to upgrade firmware 60 problems, printer 69 Product Support, contacting 66 R Ready/Data LED 6 Ready-to-Work LED 7 real time clock (RTC) accessory 107 required environment variables, web style guide 135 resetting printer to factory defaults 110 restore factory default settings 76 ribbon determining ink...
PD41 and PD42 Commercial Printer User's Manual
Page 159
... printing 19 printing from web page 44 Test/Service menu, IPL 124 Testfeed soft key 8 testfeed not done, error message 68 Testmode, using to troubleshoot 74 thermal transfer ribbon, loading 16 tickets with black mark, media specifications 105 tickets with gaps, media specifications 103 troubleshooting communication problems 72 printer 66 PD41 and PD42 Commercial Printer User's Manual Index U uart1, serial port 22 updates, downloading firmware 59 upgrading firmware 59 URL encoding syntax rules, web style guide 137 USB host interface, pins and descriptions 96 hub, connecting...
... printing 19 printing from web page 44 Test/Service menu, IPL 124 Testfeed soft key 8 testfeed not done, error message 68 Testmode, using to troubleshoot 74 thermal transfer ribbon, loading 16 tickets with black mark, media specifications 105 tickets with gaps, media specifications 103 troubleshooting communication problems 72 printer 66 PD41 and PD42 Commercial Printer User's Manual Index U uart1, serial port 22 updates, downloading firmware 59 upgrading firmware 59 URL encoding syntax rules, web style guide 137 USB host interface, pins and descriptions 96 hub, connecting...
EasyLAN Ethernet Software for PD41/PD42 Instructions
Page 9
... can use this command (values are examples only): EasyLAN Ethernet Software Instructions 9 Setting Network Parameters with IPL commands If your printer is running IPL firmware, you can modify various setup parameters with the IPL command. To modify network parameters with IPL commands 1 Establish a serial connection between your computer and printer, as described on page 8. 2 Switch user to access the printer home page and make the rest of your changes there. Setting Network...
... can use this command (values are examples only): EasyLAN Ethernet Software Instructions 9 Setting Network Parameters with IPL commands If your printer is running IPL firmware, you can modify various setup parameters with the IPL command. To modify network parameters with IPL commands 1 Establish a serial connection between your computer and printer, as described on page 8. 2 Switch user to access the printer home page and make the rest of your changes there. Setting Network...


