
Owners Guide
Page 6
... the optical head of the DVD video camera/recorder, which would disable normal operation, or the battery connecting terminals could corrode, so power will not turn it off and cover it again. 6 Do not use the DVD video camera/recorder near strong radio waves or magnetism: • If the DVD video camera/recorder is exclusively for a long uninterrupted period of normally recorded video and audio, noise may remain inside the DVD video camera/recorder. Do not use a generally...
... the optical head of the DVD video camera/recorder, which would disable normal operation, or the battery connecting terminals could corrode, so power will not turn it off and cover it again. 6 Do not use the DVD video camera/recorder near strong radio waves or magnetism: • If the DVD video camera/recorder is exclusively for a long uninterrupted period of normally recorded video and audio, noise may remain inside the DVD video camera/recorder. Do not use a generally...

Owners Guide
Page 7
... cleaning cloth, follow instruction manuals attached. The battery provided has not been charged at close the LCD monitor ACCESS/PC indicator The ACCESS/PC indicator will discharge as time passes. (The battery is produced so that data is being written to disc or card, or being powered could deteriorate. • When using the DVD video camera/recorder (see page 129). CARD ACCESS indicator Do not wipe the DVD video camera/recorder case with the LED light turned...
... cleaning cloth, follow instruction manuals attached. The battery provided has not been charged at close the LCD monitor ACCESS/PC indicator The ACCESS/PC indicator will discharge as time passes. (The battery is produced so that data is being written to disc or card, or being powered could deteriorate. • When using the DVD video camera/recorder (see page 129). CARD ACCESS indicator Do not wipe the DVD video camera/recorder case with the LED light turned...

Owners Guide
Page 10
... helpful as shown in the figure. It is possible to set up the DVD video camera/recorder, battery, and set the date/time. • The section on -screen display of this manual to specific information quickly (see page 32). 10 recording of movies, still images and playback of recorded images. • The section on "Disc Navigation" explains editing with Disc Navigation......... 74 Connecting to a TV 104 Connecting to products sold separately, and troubleshooting. Quick Index Available Discs 22 Recording Movie...
... helpful as shown in the figure. It is possible to set up the DVD video camera/recorder, battery, and set the date/time. • The section on -screen display of this manual to specific information quickly (see page 32). 10 recording of movies, still images and playback of recorded images. • The section on "Disc Navigation" explains editing with Disc Navigation......... 74 Connecting to a TV 104 Connecting to products sold separately, and troubleshooting. Quick Index Available Discs 22 Recording Movie...
Owners Guide
Page 12
... LEVEL INDICATOR...... 28 EFFICIENT USE OF BATTERY 28 Turning DVD Video Camera/Recorder On and Off 29 VIEWING IMAGE ON LCD MONITOR SCREEN 30 VIEWING SUBJECT THROUGH VIEWFINDER 30 Setting Date and Time 31 CHANGING DISPLAY FORMAT OF DATE AND TIME 31 Initial Settings 32 SWITCHING OPERATING SOUND ON OR OFF (BEEP 32 TURNING DVD VIDEO CAMERA/RECORDER OFF AUTOMATICALLY (POWER SAVE) ........ 32 CHANGING DISPLAY LANGUAGE (LANGUAGE 32 RESETTING MENU SETTINGS TO DEFAULTS (RESET 33 TURNING RECORD LED ON OR OFF (RECORD LED 33 CHANGING SETTING OF DEMONSTRATION 33 LCD/EVF Setup 34 ADJUSTING...
... LEVEL INDICATOR...... 28 EFFICIENT USE OF BATTERY 28 Turning DVD Video Camera/Recorder On and Off 29 VIEWING IMAGE ON LCD MONITOR SCREEN 30 VIEWING SUBJECT THROUGH VIEWFINDER 30 Setting Date and Time 31 CHANGING DISPLAY FORMAT OF DATE AND TIME 31 Initial Settings 32 SWITCHING OPERATING SOUND ON OR OFF (BEEP 32 TURNING DVD VIDEO CAMERA/RECORDER OFF AUTOMATICALLY (POWER SAVE) ........ 32 CHANGING DISPLAY LANGUAGE (LANGUAGE 32 RESETTING MENU SETTINGS TO DEFAULTS (RESET 33 TURNING RECORD LED ON OR OFF (RECORD LED 33 CHANGING SETTING OF DEMONSTRATION 33 LCD/EVF Setup 34 ADJUSTING...

Owners Guide
Page 13
... DISC OR CARD (FORMAT DISC. English RECORDING SUBJECT USING LARGE MAGNIFICATION (DIGITAL ZOOM 59 REDUCING WIND NOISE DURING RECORDING (MIC.FILTER 59 Setting Up Record Functions 60 SWITCHING MOVIE QUALITY (VIDEO MODE 60 SETTING TO WIDE TV SCREEN MODE (16:9 MODE 61 SWITCHING QUALITY OF STILL IMAGE (QUALITY 63 SELF-TIMER 63 SETTING ON-SCREEN DISPLAY OUTPUT ON OR OFF (OSD OUTPUT 64 Disc Navigation Using Disc Navigation 65 STARTING OR TERMINATING DISC NAVIGATION 65 PLAYING BACK FROM DISC NAVIGATION SCREEN 67 ADJUSTING VOLUME DURING PLAYBACK ..... 67 PLAYING BACK LATEST RECORDED...
... DISC OR CARD (FORMAT DISC. English RECORDING SUBJECT USING LARGE MAGNIFICATION (DIGITAL ZOOM 59 REDUCING WIND NOISE DURING RECORDING (MIC.FILTER 59 Setting Up Record Functions 60 SWITCHING MOVIE QUALITY (VIDEO MODE 60 SETTING TO WIDE TV SCREEN MODE (16:9 MODE 61 SWITCHING QUALITY OF STILL IMAGE (QUALITY 63 SELF-TIMER 63 SETTING ON-SCREEN DISPLAY OUTPUT ON OR OFF (OSD OUTPUT 64 Disc Navigation Using Disc Navigation 65 STARTING OR TERMINATING DISC NAVIGATION 65 PLAYING BACK FROM DISC NAVIGATION SCREEN 67 ADJUSTING VOLUME DURING PLAYBACK ..... 67 PLAYING BACK LATEST RECORDED...

Owners Guide
Page 15
...Charge it from household AC outlet, use . Shoulder strap: Attach to the DVD video camera/recorder to another video device. Software CD-ROM: For DZ-GX5080A only. PC connection cable: For DZ-GX5080A only. Disc cleaning cloth: Always use this cable when connecting the DVD video camera/recorder to PC. AV/S output cable: Used when viewing the picture played back on the DVD video camera/recorder on TV screen, or output video to hang it before use this cord to connect the DVD video camera/recorder and AC adapter/charger. Use this to clean discs. 15 Use this DVD video camera...
...Charge it from household AC outlet, use . Shoulder strap: Attach to the DVD video camera/recorder to another video device. Software CD-ROM: For DZ-GX5080A only. PC connection cable: For DZ-GX5080A only. Disc cleaning cloth: Always use this cable when connecting the DVD video camera/recorder to PC. AV/S output cable: Used when viewing the picture played back on the DVD video camera/recorder on TV screen, or output video to hang it before use this cord to connect the DVD video camera/recorder and AC adapter/charger. Use this to clean discs. 15 Use this DVD video camera...
Owners Guide
Page 23
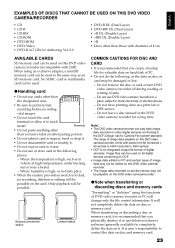
... or DPE service − Do not leave a disc unused in the DVD video camera/recorder for a long time Note: • This DVD video camera/recorder can play back image data recorded on other digital cameras conforming to DCF. • Image data edited on PC and certain types of image data may not be visible on this DVD video camera/ recorder. • The image data recorded on another device may be damaged or lost: − Do not remove the disc or card or turn DVD video camera/recorder off...
... or DPE service − Do not leave a disc unused in the DVD video camera/recorder for a long time Note: • This DVD video camera/recorder can play back image data recorded on other digital cameras conforming to DCF. • Image data edited on PC and certain types of image data may not be visible on this DVD video camera/ recorder. • The image data recorded on another device may be damaged or lost: − Do not remove the disc or card or turn DVD video camera/recorder off...

Owners Guide
Page 29
... "Trouble Messages" on page 129 and take some time for the DVD video camera/ recorder to display the Disc Navigation screen after power is turned on. • When the DVD video camera/recorder is turned on, the self-diagnosis function will turn off Set to "P": To record still on SD memory card Set to "O": To record movie on DVDRAM/DVD-RW/DVD-R/ +RW disc Note: • Once you turn the DVD video camera/recorder on to let it recognize the disc, you can immediately record or play...
... "Trouble Messages" on page 129 and take some time for the DVD video camera/ recorder to display the Disc Navigation screen after power is turned on. • When the DVD video camera/recorder is turned on, the self-diagnosis function will turn off Set to "P": To record still on SD memory card Set to "O": To record movie on DVDRAM/DVD-RW/DVD-R/ +RW disc Note: • Once you turn the DVD video camera/recorder on to let it recognize the disc, you can immediately record or play...
Owners Guide
Page 31
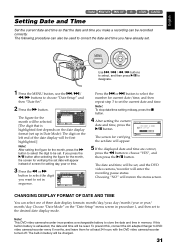
... DVD video camera/recorder turned off: The built-in sequence. Da t e Se t u p Da t e Se t Da t e Mode 2 / 10 / 2007 1 2 : 0 0AM ENTER RETURN Press the f or e button to select the number for setting day, year or time. 3 Press the d or c button to the desired date display mode. CHANGING DISPLAY FORMAT OF DATE AND TIME You can also be used to correct the date and time you want to set up in Date Mode): The digit on the "Date Setup" menu screen in memory...
... DVD video camera/recorder turned off: The built-in sequence. Da t e Se t u p Da t e Se t Da t e Mode 2 / 10 / 2007 1 2 : 0 0AM ENTER RETURN Press the f or e button to select the number for setting day, year or time. 3 Press the d or c button to the desired date display mode. CHANGING DISPLAY FORMAT OF DATE AND TIME You can also be used to correct the date and time you want to set up in Date Mode): The digit on the "Date Setup" menu screen in memory...

Owners Guide
Page 37
... recording format (VR or VF mode), and then press the A button. Remove the disc and reinsert it again for continued use it on this DVD video camera/recorder, choose "YES". 37 English Note: • If the cover of disc insertion block is open, the ACCESS/PC indicator will blink when an image is displayed on the LCD monitor screen: In this case, the DVD video camera/recorder will automatically turn off. • Disc cannot be formatted. Remove the disc...
... recording format (VR or VF mode), and then press the A button. Remove the disc and reinsert it again for continued use it on this DVD video camera/recorder, choose "YES". 37 English Note: • If the cover of disc insertion block is open, the ACCESS/PC indicator will blink when an image is displayed on the LCD monitor screen: In this case, the DVD video camera/recorder will automatically turn off. • Disc cannot be formatted. Remove the disc...

Owners Guide
Page 39
... DVD video camera/recorder does not operate. • See page 43 for video and audio that you set the DVD video camera/recorder to the recording pause status. 5 When recording is finished, turn the DVD video camera/recorder on the LCD screen will change to the "n" mark, and recording will start recording; When using a +RW, one-time recording duration is lit or blinking, do not turn the DVD video camera/recorder off . Note: • See "Troubleshooting" on page 135 when recording movie is not possible. • See "Troubleshooting...
... DVD video camera/recorder does not operate. • See page 43 for video and audio that you set the DVD video camera/recorder to the recording pause status. 5 When recording is finished, turn the DVD video camera/recorder on the LCD screen will change to the "n" mark, and recording will start recording; When using a +RW, one-time recording duration is lit or blinking, do not turn the DVD video camera/recorder off . Note: • See "Troubleshooting" on page 135 when recording movie is not possible. • See "Troubleshooting...

Owners Guide
Page 68
... the pause status at high temperatures, normal playback may take some time for as long as 5 minutes, the DVD video camera/ recorder will automatically return to appear. • Do not operate the power switch or remove the card while the ACCESS/PC or CARD ACCESS indicator is lit or blinking: Doing so may damage the card or the data on this DVD video camera/recorder; Playback will stop playback, press the A button. also, the recorded sound may not play...
... the pause status at high temperatures, normal playback may take some time for as long as 5 minutes, the DVD video camera/ recorder will automatically return to appear. • Do not operate the power switch or remove the card while the ACCESS/PC or CARD ACCESS indicator is lit or blinking: Doing so may damage the card or the data on this DVD video camera/recorder; Playback will stop playback, press the A button. also, the recorded sound may not play...

Owners Guide
Page 107
... S-VIDEO input jack of VCR, etc.* To video/audio input jacks AV/S output cable (provided) Red White Yellow * If the video device to be connected has an S-VIDEO input jack, you can connect it . English 12/3 Recording (Dubbing) Images Before You Begin • Before connecting this DVD video camera/recorder to another device, be sure to turn both devices off. • Insert a recordable disc*1 or card*2 into this DVD video camera/recorder (see pages 22 and 23). *1 No photo can be recorded on DVD-RW/DVD-R/+RW. *2 Only photos...
... S-VIDEO input jack of VCR, etc.* To video/audio input jacks AV/S output cable (provided) Red White Yellow * If the video device to be connected has an S-VIDEO input jack, you can connect it . English 12/3 Recording (Dubbing) Images Before You Begin • Before connecting this DVD video camera/recorder to another device, be sure to turn both devices off. • Insert a recordable disc*1 or card*2 into this DVD video camera/recorder (see pages 22 and 23). *1 No photo can be recorded on DVD-RW/DVD-R/+RW. *2 Only photos...
Owners Guide
Page 108
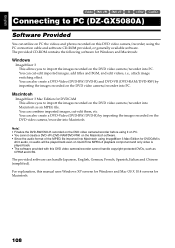
... edit videos, i.e., attach image switching effect. Macintosh ImageMixer 3 Mac Edition for DVDCAM is played back. • The software provided with this DVD video camera/recorder cannot handle copyright-protected DVDs, such as an MPEG file. English 12/3 Connecting to PC (DZ-GX5080A) Connecting to import the images recorded on this DVD video camera/recorder, using it on PC. • You cannot create a DVD-VR (DVD-RAM/DVD-RW) on the Macintosh software. • Since the audio format of the MPEG file imported...
... edit videos, i.e., attach image switching effect. Macintosh ImageMixer 3 Mac Edition for DVDCAM is played back. • The software provided with this DVD video camera/recorder cannot handle copyright-protected DVDs, such as an MPEG file. English 12/3 Connecting to PC (DZ-GX5080A) Connecting to import the images recorded on this DVD video camera/recorder, using it on PC. • You cannot create a DVD-VR (DVD-RAM/DVD-RW) on the Macintosh software. • Since the audio format of the MPEG file imported...

Owners Guide
Page 118
... connecting the DVD video camera/recorder to a USB1.1 port of disc insertion block on how to edit video files. When ImageMixer 3 starts up, the launcher shown below will appear: Click "Playback/ Import Movie". Click 3 Choose the camcorder on desktop, choose [Start] - [Programs] or [All programs] - [PIXELA] - [ImageMixer 3] - [ImageMixer 3]. See the electronic instruction manual for explanation on this manual. The cover of PC, the data transfer speed will open: Remove the disc...
... connecting the DVD video camera/recorder to a USB1.1 port of disc insertion block on how to edit video files. When ImageMixer 3 starts up, the launcher shown below will appear: Click "Playback/ Import Movie". Click 3 Choose the camcorder on desktop, choose [Start] - [Programs] or [All programs] - [PIXELA] - [ImageMixer 3] - [ImageMixer 3]. See the electronic instruction manual for explanation on this manual. The cover of PC, the data transfer speed will open: Remove the disc...

Owners Guide
Page 126
... the "Change/Remove" button. English Uninstalling Software [When using Macintosh] Manually move the following folders/files installed to restart the PC. • Administrator authority is required for DVDCAM.pkg Note: • "User" will depend on connections between PC and this DVD video camera/ recorder: DVDCAM PC Software Support Center URL: http://dvdcam-pc.support.hitachi.ca/ 126 Contact The Following ●Inquiries on software provided with this DVD video camera/recorder should be directed to...
... the "Change/Remove" button. English Uninstalling Software [When using Macintosh] Manually move the following folders/files installed to restart the PC. • Administrator authority is required for DVDCAM.pkg Note: • "User" will depend on connections between PC and this DVD video camera/ recorder: DVDCAM PC Software Support Center URL: http://dvdcam-pc.support.hitachi.ca/ 126 Contact The Following ●Inquiries on software provided with this DVD video camera/recorder should be directed to...

Owners Guide
Page 127
... high. DVD discs created on the playback device and/or disc recorded status. 127 Before connecting the DVD video camera/recorder to PC, disconnect any cables or camera accessories (external video flash, external microphone, etc.) other than the PC connection cable and AC adapter/charger. Data may not be recognized: Disconnect the DVD video camera/recorder from PC: If the PC connection cable (provided) or power cable is unplugged while the ACCESS/PC or CARD ACCESS indicator is blinking, important recordings will be connected to finalize a DVD-RW/DVD-R recorded on DVD recorders...
... high. DVD discs created on the playback device and/or disc recorded status. 127 Before connecting the DVD video camera/recorder to PC, disconnect any cables or camera accessories (external video flash, external microphone, etc.) other than the PC connection cable and AC adapter/charger. Data may not be recognized: Disconnect the DVD video camera/recorder from PC: If the PC connection cable (provided) or power cable is unplugged while the ACCESS/PC or CARD ACCESS indicator is blinking, important recordings will be connected to finalize a DVD-RW/DVD-R recorded on DVD recorders...

Owners Guide
Page 139
.... If your PC display adapter (video card) conforms to another USB terminal stops. Is disc scratched or does dirt or fingerprint adhere to disc. playback component adopted. 139 the DVD video camera/recorder to "O" or "N". 29 application in playback If error occurs with an MPEG 2 playback. Error occurs in PC. No sound is heard when Since an MPEG file imported into Macintosh is played even if the Quick Time MPEG-2 playback component is back...
.... If your PC display adapter (video card) conforms to another USB terminal stops. Is disc scratched or does dirt or fingerprint adhere to disc. playback component adopted. 139 the DVD video camera/recorder to "O" or "N". 29 application in playback If error occurs with an MPEG 2 playback. Error occurs in PC. No sound is heard when Since an MPEG file imported into Macintosh is played even if the Quick Time MPEG-2 playback component is back...

Owners Guide
Page 140
... actual file viewed on playback screen. If your dealer. Has the DVD video camera/recorder been left unused for date/time indication on Explorer looks different from AC outlet? when USB2.0 card is been set to the sleep/ restart standby status. Execute system reset (press the RESET button). Check the colors of cursors and bar graph on , or no operation occurs by USB2.0 card maker used. time. "Hardware Removal" results in error. With Windows...
... actual file viewed on playback screen. If your dealer. Has the DVD video camera/recorder been left unused for date/time indication on Explorer looks different from AC outlet? when USB2.0 card is been set to the sleep/ restart standby status. Execute system reset (press the RESET button). Check the colors of cursors and bar graph on , or no operation occurs by USB2.0 card maker used. time. "Hardware Removal" results in error. With Windows...

Owners Guide
Page 144
... Digital Recording medium 8 cm DVD-RAM (conforming to DVD-RAM Ver. 2.1) 8 cm DVD-RW (conforming to DVD-RW Ver. 1.1, 2x speed [2x/1x]) 8 cm DVD-R (conforming to DVD-R for General Ver. 2.0) 8 cm +RW (conforming to +RW Ver. 1.2) SD memory card Jacks Video/audio output ×1 PC connection terminal (connected to PC USB port) ×1 (Not equipped with DZ-GX5020A/DZ-GX5000A) Battery system Lithium-ion Power consumption When recording with LCD monitor off (DVD-RAM disc used...
... Digital Recording medium 8 cm DVD-RAM (conforming to DVD-RAM Ver. 2.1) 8 cm DVD-RW (conforming to DVD-RW Ver. 1.1, 2x speed [2x/1x]) 8 cm DVD-R (conforming to DVD-R for General Ver. 2.0) 8 cm +RW (conforming to +RW Ver. 1.2) SD memory card Jacks Video/audio output ×1 PC connection terminal (connected to PC USB port) ×1 (Not equipped with DZ-GX5020A/DZ-GX5000A) Battery system Lithium-ion Power consumption When recording with LCD monitor off (DVD-RAM disc used...


