Warranty Guide
Page 2
... warranty HP Digital Projector Cables, Remote Control, and other parts (included with the projector) Same period as applicable, a defective product which duration begins on the date of purchase. 2. This Limited Warranty Statement describes the standard Digital Projector warranty. For software products, HP's limited warranty applies only to a failure to HP. 7. or • Operation outside the product's specifications. 4. Any replacement product may be uninterrupted or error free. 3. Product Warranty period HP Digital Projector...
... warranty HP Digital Projector Cables, Remote Control, and other parts (included with the projector) Same period as applicable, a defective product which duration begins on the date of purchase. 2. This Limited Warranty Statement describes the standard Digital Projector warranty. For software products, HP's limited warranty applies only to a failure to HP. 7. or • Operation outside the product's specifications. 4. Any replacement product may be uninterrupted or error free. 3. Product Warranty period HP Digital Projector...
Support Guide
Page 2
... about your digital projector, including product help and user forum. Support Information Contacting HP Technical Support HP provides expert advice on -screen owner's manual. This service requires access to your digital projector. Email support is available in the following order: Step 1: HP Digital Projector Documentation Use the provided CD to you can obtain a wide variety of customer issues are answered within 1 hour. Many emails are addressed in the owner's manual. Check the printed setup guide included...
... about your digital projector, including product help and user forum. Support Information Contacting HP Technical Support HP provides expert advice on -screen owner's manual. This service requires access to your digital projector. Email support is available in the following order: Step 1: HP Digital Projector Documentation Use the provided CD to you can obtain a wide variety of customer issues are answered within 1 hour. Many emails are addressed in the owner's manual. Check the printed setup guide included...
User Guide
Page 3
... common features 8 Projector at a glance 8 Projector buttons and lights 9 Back panel 10 Remote control 11 Accessories 12 Setting up the projector 13 Positioning the projector 13 Connecting power 15 Connecting a computer 16 Connecting a handheld organizer 17 Connecting a video source 18 Turning the projector on and off 23 Turning the projector on 23 Turning the projector off 24 Moving the projector 24 Making basic adjustments 25 Aiming the projector 25 Adjusting the focus and zoom 25 Using the remote control 26 2 Showing Presentations...
... common features 8 Projector at a glance 8 Projector buttons and lights 9 Back panel 10 Remote control 11 Accessories 12 Setting up the projector 13 Positioning the projector 13 Connecting power 15 Connecting a computer 16 Connecting a handheld organizer 17 Connecting a video source 18 Turning the projector on and off 23 Turning the projector on 23 Turning the projector off 24 Moving the projector 24 Making basic adjustments 25 Aiming the projector 25 Adjusting the focus and zoom 25 Using the remote control 26 2 Showing Presentations...

User Guide
Page 4
...settings 32 Adjusting the sound settings (certain models only 33 Adjusting the projector setup 33 Preventing unauthorized use 33 Using the on-screen menu 34 Changing settings using the on-screen menu 34 Changing the default settings 34 Setup menu 35 Picture menu 36 Source menu 38 Help menu 38 4 Maintaining the Projector Performing routine maintenance 39 Getting the projector status 39 Cleaning the projector lens 39 Replacing the lamp module 40 Replacing the battery in the remote control 42 Upgrading the projector 43 Updating the firmware 43 5 Installing Permanently Installing...
...settings 32 Adjusting the sound settings (certain models only 33 Adjusting the projector setup 33 Preventing unauthorized use 33 Using the on-screen menu 34 Changing settings using the on-screen menu 34 Changing the default settings 34 Setup menu 35 Picture menu 36 Source menu 38 Help menu 38 4 Maintaining the Projector Performing routine maintenance 39 Getting the projector status 39 Cleaning the projector lens 39 Replacing the lamp module 40 Replacing the battery in the remote control 42 Upgrading the projector 43 Updating the firmware 43 5 Installing Permanently Installing...
User Guide
Page 6
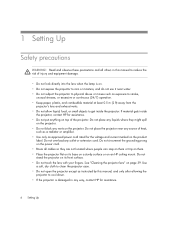
...; Do not look directly into the lens when the lamp is on. • Do not expose the projector to reduce the risk of the projector. If material gets inside the projector. Use a soft, dry cloth to clean the projector case. • Do not open the projector except as instructed by this manual, and only after allowing the projector to cool down. • If...
...; Do not look directly into the lens when the lamp is on. • Do not expose the projector to reduce the risk of the projector. If material gets inside the projector. Use a soft, dry cloth to clean the projector case. • Do not open the projector except as instructed by this manual, and only after allowing the projector to cool down. • If...

User Guide
Page 9
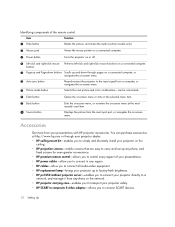
... input port, or navigates the on-screen menu. Identifying common features 9 Projector buttons and lights Identifying the projector buttons and lights Item Function 1 Power button Turns the projector on or off. 2 Page-up and Page-down buttons 3 Lamp warning light 4 Temperature warning light Scrolls up and down through pages on a connected computer, or navigates the on the selected menu item. 8 Picture mode button 9 Auto sync button Selects the next picture and color combination-can be customized. Lit steady: the lamp is faulty. Opens...
... input port, or navigates the on-screen menu. Identifying common features 9 Projector buttons and lights Identifying the projector buttons and lights Item Function 1 Power button Turns the projector on or off. 2 Page-up and Page-down buttons 3 Lamp warning light 4 Temperature warning light Scrolls up and down through pages on a connected computer, or navigates the on the selected menu item. 8 Picture mode button 9 Auto sync button Selects the next picture and color combination-can be customized. Lit steady: the lamp is faulty. Opens...
User Guide
Page 12
... it from anywhere on -screen menu. 7 Picture mode button Selects the next picture and color combination-can purchase accessories at the most recently used item. buttons 5 Page-up and Page-down buttons Scrolls up and down through pages on a connected computer, or navigates the on-screen menu. 6 Auto sync button Resynchronizes the projector to the input signal from the next input port, or navigates the on a connected computer. Displays the picture from a computer, or...
... it from anywhere on -screen menu. 7 Picture mode button Selects the next picture and color combination-can purchase accessories at the most recently used item. buttons 5 Page-up and Page-down buttons Scrolls up and down through pages on a connected computer, or navigates the on-screen menu. 6 Auto sync button Resynchronizes the projector to the input signal from the next input port, or navigates the on a connected computer. Displays the picture from a computer, or...
User Guide
Page 23
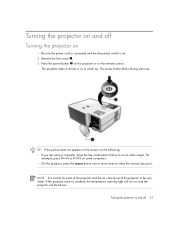
... select the correct input port. The power button blinks during warm-up . NOTE: It is on and the projector will shut down. Turning the projector on the remote control. The projector takes a minute or so to warm up . Remove the lens cover 1. 3. If the projector starts to overheat, the temperature warning light will turn on . 2. Be sure the power cord is connected and the disconnect switch is normal for parts of the projector and the air coming out...
... select the correct input port. The power button blinks during warm-up . NOTE: It is on and the projector will shut down. Turning the projector on the remote control. The projector takes a minute or so to warm up . Remove the lens cover 1. 3. If the projector starts to overheat, the temperature warning light will turn on . 2. Be sure the power cord is connected and the disconnect switch is normal for parts of the projector and the air coming out...
User Guide
Page 28
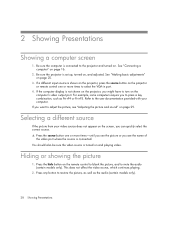
Be sure the computer is shown on the projector, press the source button on . If a different input source is connected to the projector and turned on the projector or remote control one or more times to press a key combination, such as the audio (certain models only). 28 Showing Presentations If you want to adjust the picture, see "Adjusting the picture and sound" on the screen, you might have to restore the...
Be sure the computer is shown on the projector, press the source button on . If a different input source is connected to the projector and turned on the projector or remote control one or more times to press a key combination, such as the audio (certain models only). 28 Showing Presentations If you want to adjust the picture, see "Adjusting the picture and sound" on the screen, you might have to restore the...
User Guide
Page 32
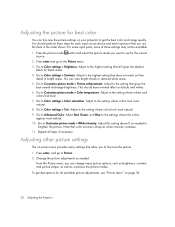
... Adjusting the Projector Go to Advanced Color. Adjust Red, Green, and Blue to Color settings > Tint. Change the picture adjustments as needed . Press the picture mode button and select the picture mode you to fine-tune the picture. 1. Go to the settings where the colors appear most natural. 10. Note that you can view bright clouds or textured white areas. 5. From the Picture menu, you use for the current source. 2. Go to Customize picture mode > Color temperature. Go to Customize picture mode > Picture...
... Adjusting the Projector Go to Advanced Color. Adjust Red, Green, and Blue to Color settings > Tint. Change the picture adjustments as needed . Press the picture mode button and select the picture mode you to fine-tune the picture. 1. Go to the settings where the colors appear most natural. 10. Note that you can view bright clouds or textured white areas. 5. From the Picture menu, you use for the current source. 2. Go to Customize picture mode > Color temperature. Go to Customize picture mode > Picture...
User Guide
Page 35
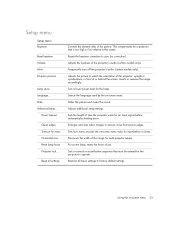
... a new lamp, resets the hours of the projector's audio (certain models only). Power timeout Clean edges Timeout for multi-projector setups. Adjusts the loudness of use. Temporarily turns off the projector's audio (certain models only). Inverts or reverses the image accordingly. Adjusts additional setup settings. Fine-tunes the width of time the projector waits for input before automatically shutting down , in front of the picture. Adjusts the picture to factory default settings. Enlarges and clips video images to zero (no correction). Sets or cancels a secret button...
... a new lamp, resets the hours of the projector's audio (certain models only). Power timeout Clean edges Timeout for multi-projector setups. Adjusts the loudness of use. Temporarily turns off the projector's audio (certain models only). Inverts or reverses the image accordingly. Adjusts additional setup settings. Fine-tunes the width of time the projector waits for input before automatically shutting down , in front of the picture. Adjusts the picture to factory default settings. Enlarges and clips video images to zero (no correction). Sets or cancels a secret button...
User Guide
Page 37
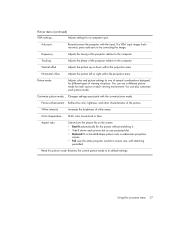
... the image. You can use a different picture mode for a computer input. Picture enhancement Refines the color, lightness, and other characteristics of white areas. Color temperature Shifts color toward red or blue. Aspect ratio Selects how the picture fits on -screen menu 37 You can also customize each viewing environment. Vertical offset Adjusts the picture up or down within the projection area. Changes settings associated with the input. Auto-sync Resynchronizes the projector with the current picture mode. Picture menu (continued) VGA settings...
... the image. You can use a different picture mode for a computer input. Picture enhancement Refines the color, lightness, and other characteristics of white areas. Color temperature Shifts color toward red or blue. Aspect ratio Selects how the picture fits on -screen menu 37 You can also customize each viewing environment. Vertical offset Adjusts the picture up or down within the projection area. Changes settings associated with the input. Auto-sync Resynchronizes the projector with the current picture mode. Picture menu (continued) VGA settings...
User Guide
Page 40
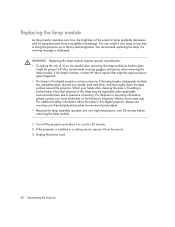
.... If the lamp is broken, contact HP about the lamp in a ceiling mount, remove it to factory-fresh brightness. Turn off the projector and allow it from the mount. 3. You can install a new lamp at a very high temperature, wait 30 minutes before removing the lamp module. 1. We recommend replacing the lamp if a warning message is installed in this digital projector, please see: www.hp.com/hpinfo/globalcitizenship/environment/productdata • Because the lamp assembly operates at any...
.... If the lamp is broken, contact HP about the lamp in a ceiling mount, remove it to factory-fresh brightness. Turn off the projector and allow it from the mount. 3. You can install a new lamp at a very high temperature, wait 30 minutes before removing the lamp module. 1. We recommend replacing the lamp if a warning message is installed in this digital projector, please see: www.hp.com/hpinfo/globalcitizenship/environment/productdata • Because the lamp assembly operates at any...
User Guide
Page 51
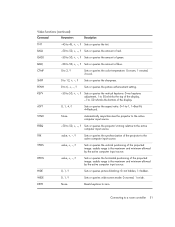
... the active computer input source. Sets or queries the synchronization of green. HPOS value, +, -, ? Sets or queries the color temperature: 0=warm, 1=neutral, 2=cool. Sets or queries the vertical positioning of blue. WIDE 0, 1, ? Video functions (continued) Command Parameters Description TNT -45 to 50, +, -, ? RADJ -50 to 45, +, -, ? GADJ -50 to the active computer input source. Sets or queries the amount of the projected image: usable range is...
... the active computer input source. Sets or queries the synchronization of green. HPOS value, +, -, ? Sets or queries the color temperature: 0=warm, 1=neutral, 2=cool. Sets or queries the vertical positioning of blue. WIDE 0, 1, ? Video functions (continued) Command Parameters Description TNT -45 to 50, +, -, ? RADJ -50 to 45, +, -, ? GADJ -50 to the active computer input source. Sets or queries the amount of the projected image: usable range is...

User Guide
Page 56
...'s external video port is turned on the projector or the remote control one or more times to the computer manual. If the lamp light is on : • Install a new lamp. If the red lamp light is blinking: • Contact HP for assistance. If a new lamp does not fix the problem, contact HP for assistance. If the wrong input source is displayed: • Press the source button on . If the red lamp light is on after you install a new lamp module, remove and reinstall the lamp module.
...'s external video port is turned on the projector or the remote control one or more times to the computer manual. If the lamp light is on : • Install a new lamp. If the red lamp light is blinking: • Contact HP for assistance. If a new lamp does not fix the problem, contact HP for assistance. If the wrong input source is displayed: • Press the source button on . If the red lamp light is on after you install a new lamp module, remove and reinstall the lamp module.
User Guide
Page 58
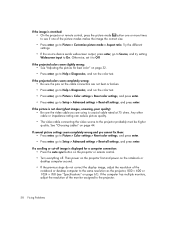
... the projector or remote control, press the picture mode button one or more times to see "Specifications" on page 32. • Press enter, go to Help > Diagnostics, and run the color test. • Press enter, go to Picture > Color settings > Reset color settings, and press enter. • Press enter, go to Setup > Advanced settings > Reset all settings, and press enter. If the projected colors seem slightly wrong: • See "Adjusting the picture for a computer connection...
... the projector or remote control, press the picture mode button one or more times to see "Specifications" on page 32. • Press enter, go to Help > Diagnostics, and run the color test. • Press enter, go to Picture > Color settings > Reset color settings, and press enter. • Press enter, go to Setup > Advanced settings > Reset all settings, and press enter. If the projected colors seem slightly wrong: • See "Adjusting the picture for a computer connection...
User Guide
Page 59
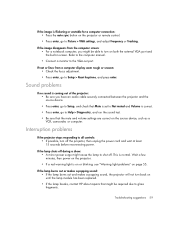
... able to Picture > VGA settings, and adjust Frequency or Tracking. This is on or blinking, see "Warning light problems" on until the lamp module has been replaced. • If the lamp breaks, contact HP about repairs that the mute and volume settings are correct on the projector or remote control. • Press enter, go to Setup > Reset keystone, and press enter. If the lamp burns out or makes a popping sound: • If...
... able to Picture > VGA settings, and adjust Frequency or Tracking. This is on or blinking, see "Warning light problems" on until the lamp module has been replaced. • If the lamp breaks, contact HP about repairs that the mute and volume settings are correct on the projector or remote control. • Press enter, go to Setup > Reset keystone, and press enter. If the lamp burns out or makes a popping sound: • If...

User Guide
Page 62
...-height) Light engine 0.7-in. 12° DDR DMD Audio Monaural speaker, 2-watt peak output (certain models only) Noise level Less than 35 dBA in Normal mode, or 32 dBA in lamp saver mode Vertical tilt 0° to 8° Vertical keystone correction ±15% Remote control USB mouse Mounting options Ceiling and tabletop, front and rear projection Lens cap Detachable with connecting leash Security Kensington lock compatible Unlock...
...-height) Light engine 0.7-in. 12° DDR DMD Audio Monaural speaker, 2-watt peak output (certain models only) Noise level Less than 35 dBA in Normal mode, or 32 dBA in lamp saver mode Vertical tilt 0° to 8° Vertical keystone correction ±15% Remote control USB mouse Mounting options Ceiling and tabletop, front and rear projection Lens cap Detachable with connecting leash Security Kensington lock compatible Unlock...

User Guide
Page 71
warning lights locking projector 33, 45 M menu language 35 listing 34 using 34 mercury safety 64 moving projector 24 O on-screen menu. See lamp; See menu P PC. See picture installing projector 13, 44 L lamp, replacing 40 lens, cleaning 39 lights. See computer picture focus 25 hiding and showing 28 quality of picture 30 slanted picture 31 sound 29 aiming projector 25 analog video mode compatibility 63 audio adjusting 29 ports 10 troubleshooting 59 audio, connecting B buttons location 9 opening menu 34 C cables choosing 44 connections 18 ceiling installation 45 choosing cables 44 ...
warning lights locking projector 33, 45 M menu language 35 listing 34 using 34 mercury safety 64 moving projector 24 O on-screen menu. See lamp; See menu P PC. See picture installing projector 13, 44 L lamp, replacing 40 lens, cleaning 39 lights. See computer picture focus 25 hiding and showing 28 quality of picture 30 slanted picture 31 sound 29 aiming projector 25 analog video mode compatibility 63 audio adjusting 29 ports 10 troubleshooting 59 audio, connecting B buttons location 9 opening menu 34 C cables choosing 44 connections 18 ceiling installation 45 choosing cables 44 ...
User Guide
Page 72
... locking cable 45 security code 33 selecting video source 28 serial port 47 connector 47 setting up 13 shape, adjusting 30 showing picture 28 showing presentations 28 slanted picture, adjusting 31 specifications 61 S-video connecting source 21 port 10 T table installation 13, 44 triggering external accessory 46 troubleshooting audio 59 interruptions 59 picture 56 remote control 60 start-up 56 warning lights 55 turning on and off 23 U unlocking projector 33 updating firmware 43 upgrading projector 43 USB, connecting 16 using remote control 26 V VGA connecting source 16, 17 port 11 video mode...
... locking cable 45 security code 33 selecting video source 28 serial port 47 connector 47 setting up 13 shape, adjusting 30 showing picture 28 showing presentations 28 slanted picture, adjusting 31 specifications 61 S-video connecting source 21 port 10 T table installation 13, 44 triggering external accessory 46 troubleshooting audio 59 interruptions 59 picture 56 remote control 60 start-up 56 warning lights 55 turning on and off 23 U unlocking projector 33 updating firmware 43 upgrading projector 43 USB, connecting 16 using remote control 26 V VGA connecting source 16, 17 port 11 video mode...


