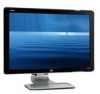
User's Guide w2228h, 2229h w2448h, w2448hc, w2558hc LCD Display
Page 5
... HP LCD Monitors ...1-1 Features ...1-1 2 Safety and Maintenance Guidelines Important Safety Information ...2-1 Safety Precautions ...2-1 Maintenance Guidelines...2-2 Cleaning the Monitor ...2-2 3 Setting Up the Monitor Unpacking the Monitor...3-1 Installing the Monitor ...3-1 Unfolding the monitor ...3-1 Wall-mounting the monitor ...3-2 Preparation ...3-2 Connecting the VGA (Analog) or DVI-D (Digital) Cable 3-3 To connect the VGA cable...3-4 To connect the DVI-D cable...3-4 Connecting the VGA / DVI-I Cable (Select Models Only 3-4 Connecting the HDMI Cable...3-4 Audio and Video Cables...
... HP LCD Monitors ...1-1 Features ...1-1 2 Safety and Maintenance Guidelines Important Safety Information ...2-1 Safety Precautions ...2-1 Maintenance Guidelines...2-2 Cleaning the Monitor ...2-2 3 Setting Up the Monitor Unpacking the Monitor...3-1 Installing the Monitor ...3-1 Unfolding the monitor ...3-1 Wall-mounting the monitor ...3-2 Preparation ...3-2 Connecting the VGA (Analog) or DVI-D (Digital) Cable 3-3 To connect the VGA cable...3-4 To connect the DVI-D cable...3-4 Connecting the VGA / DVI-I Cable (Select Models Only 3-4 Connecting the HDMI Cable...3-4 Audio and Video Cables...
User's Guide w2228h, 2229h w2448h, w2448hc, w2558hc LCD Display
Page 6
...Digital Picture Frame Card Reader (Select Models) Using the Monitor Menu with the Remote Control 5-2 Main Menu ...5-3 Viewing Photos ...5-3 Viewing a Slide Show...5-4 Listening to Music/Audio...5-4 Watching Video Files ...5-5 Changing Settings ...5-5 Changing the language setting ...5-6 Changing the display image size setting 5-6 Changing the slideshow transition 5-7 Changing the slideshow speed ...5-7 Changing the slideshow shuffle ...5-7 Adjusting the LCD settings for DPF 5-8 Restoring factory default...5-8 6 Preparing the Monitor for Shipping Folding the Monitor ...6-1 A Troubleshooting...
...Digital Picture Frame Card Reader (Select Models) Using the Monitor Menu with the Remote Control 5-2 Main Menu ...5-3 Viewing Photos ...5-3 Viewing a Slide Show...5-4 Listening to Music/Audio...5-4 Watching Video Files ...5-5 Changing Settings ...5-5 Changing the language setting ...5-6 Changing the display image size setting 5-6 Changing the slideshow transition 5-7 Changing the slideshow speed ...5-7 Changing the slideshow shuffle ...5-7 Adjusting the LCD settings for DPF 5-8 Restoring factory default...5-8 6 Preparing the Monitor for Shipping Folding the Monitor ...6-1 A Troubleshooting...
User's Guide w2228h, 2229h w2448h, w2448hc, w2558hc LCD Display
Page 9
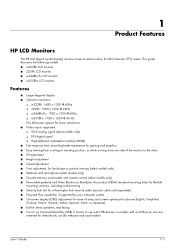
... Serial Bus (USB) 2.0 ports to use with remote control (select models only) ■ Removable pedestal and Video Electronics Standards Association (VESA) standard mounting holes for flexible mounting solutions, including wall-mounting ■ Security lock slot for a Kensington lock security cable (security cable sold separately) ■ Plug and Play capability, if supported by your computer system ■ On-screen display (OSD) adjustments for webcam and card reader). User's Guide 1-1 This guide discusses the following models: ■ w2228h LCD monitor ■ 2229h LCD monitor...
... Serial Bus (USB) 2.0 ports to use with remote control (select models only) ■ Removable pedestal and Video Electronics Standards Association (VESA) standard mounting holes for flexible mounting solutions, including wall-mounting ■ Security lock slot for a Kensington lock security cable (security cable sold separately) ■ Plug and Play capability, if supported by your computer system ■ On-screen display (OSD) adjustments for webcam and card reader). User's Guide 1-1 This guide discusses the following models: ■ w2228h LCD monitor ■ 2229h LCD monitor...
User's Guide w2228h, 2229h w2448h, w2448hc, w2558hc LCD Display
Page 25
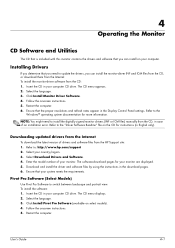
... resolutions and refresh rates appear in your monitor are displayed. 5. Refer to switch between landscape and portrait view. The software-download pages for more information. To install the software: 1. User's Guide 4-1 Installing Drivers If you need to the Windows® operating system documentation for your computer CD drive. To install the monitor-driver software from the HP Support site: 1. Refer to install the digitally signed monitor drivers (INF or ICM files) manually from the CD, in the download pages. 6. Downloading updated drivers...
... resolutions and refresh rates appear in your monitor are displayed. 5. Refer to switch between landscape and portrait view. The software-download pages for more information. To install the software: 1. User's Guide 4-1 Installing Drivers If you need to the Windows® operating system documentation for your computer CD drive. To install the monitor-driver software from the HP Support site: 1. Refer to install the digitally signed monitor drivers (INF or ICM files) manually from the CD, in the download pages. 6. Downloading updated drivers...
User's Guide w2228h, 2229h w2448h, w2448hc, w2558hc LCD Display
Page 26
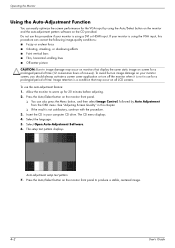
... or turn off the monitor when it is not in use this procedure if your monitor is using the VGA input, this chapter. ❏ If the result is not satisfactory, continue with the procedure. 3. To avoid burn-in image damage on the monitor front panel to warm up for a prolonged period of non-use the auto-adjustment feature: 1. Select Open Auto-Adjustment Software. 6. Image retention is using a DVI or HDMI input. See "Adjusting Screen...
... or turn off the monitor when it is not in use this procedure if your monitor is using the VGA input, this chapter. ❏ If the result is not satisfactory, continue with the procedure. 3. To avoid burn-in image damage on the monitor front panel to warm up for a prolonged period of non-use the auto-adjustment feature: 1. Select Open Auto-Adjustment Software. 6. Image retention is using a DVI or HDMI input. See "Adjusting Screen...
User's Guide w2228h, 2229h w2448h, w2448hc, w2558hc LCD Display
Page 27
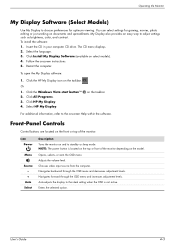
... Windows Vista start button™ 2. on the taskbar. Opens, selects, or exits the OSD menu. Chooses video input source from the computer. You can select settings for optimum viewing. Follow the onscreen instructions. 5. Or 1. For additional information, refer to standby or sleep mode. Adjusts the volume level. Auto-adjusts the display to the ideal setting when the OSD is located on the top or front of the monitor: Icon Power Menu Source - + Auto Select Description Turns the monitor...
... Windows Vista start button™ 2. on the taskbar. Opens, selects, or exits the OSD menu. Chooses video input source from the computer. You can select settings for optimum viewing. Follow the onscreen instructions. 5. Or 1. For additional information, refer to standby or sleep mode. Adjusts the volume level. Auto-adjusts the display to the ideal setting when the OSD is located on the top or front of the monitor: Icon Power Menu Source - + Auto Select Description Turns the monitor...
User's Guide w2228h, 2229h w2448h, w2448hc, w2558hc LCD Display
Page 31
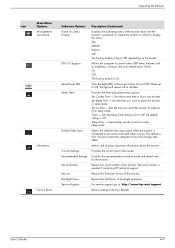
...monitor. Set on . Selects and displays important information about the monitor. When set to control some OSD menu features such as brightness, contrast, and color temperature. The default is connected to place the monitor in sleep mode. Select the location to which to factory defaults. Operating the Monitor Icon Main Menu Options Management (continued) Information Factory Reset Submenu Options Power-On Status Display DDC/CI Support Bezel Power LED Sleep Timer Default Video Input Current Settings Recommended Settings Serial Number Version Backlight Hours Service Support...
...monitor. Set on . Selects and displays important information about the monitor. When set to control some OSD menu features such as brightness, contrast, and color temperature. The default is connected to place the monitor in sleep mode. Select the location to which to factory defaults. Operating the Monitor Icon Main Menu Options Management (continued) Information Factory Reset Submenu Options Power-On Status Display DDC/CI Support Bezel Power LED Sleep Timer Default Video Input Current Settings Recommended Settings Serial Number Version Backlight Hours Service Support...
User's Guide w2228h, 2229h w2448h, w2448hc, w2558hc LCD Display
Page 32
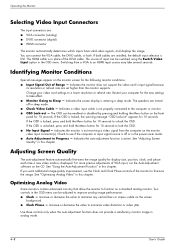
... monitor does not support the video card's input signal because its resolution or refresh rate are : ■ VGA connector (analog) ■ DVI-D connector (digital) ■ HDMI connector The monitor automatically determines which inputs have valid video signals, and displays the image. See "Optimizing Analog Video" in this chapter. The OSD can connect the VGA cable, the DVI-D cable, or both cables are turned off or in the power-saver mode. ■ Auto Adjustment in analog mode. 4-8 User's Guide If the OSD is DVI. Check to see if the computer or input signal source...
... monitor does not support the video card's input signal because its resolution or refresh rate are : ■ VGA connector (analog) ■ DVI-D connector (digital) ■ HDMI connector The monitor automatically determines which inputs have valid video signals, and displays the image. See "Optimizing Analog Video" in this chapter. The OSD can connect the VGA cable, the DVI-D cable, or both cables are turned off or in the power-saver mode. ■ Auto Adjustment in analog mode. 4-8 User's Guide If the OSD is DVI. Check to see if the computer or input signal source...
User's Guide w2228h, 2229h w2448h, w2448hc, w2558hc LCD Display
Page 33
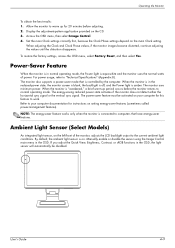
... supports a power-saver mode that is connected to computers that have energy-saver features. NOTE: The energy-saver feature works only when the monitor is controlled by the computer. User's Guide 4-9 Access the OSD menu, then select Image Control. 4. The power-saver feature must be disabled. Refer to normal operating mode. Ambient Light Sensor (Select Models) An integrated light sensor, on the CD. 3. To restore the factory settings, access the OSD menu, select Factory Reset...
... supports a power-saver mode that is connected to computers that have energy-saver features. NOTE: The energy-saver feature works only when the monitor is controlled by the computer. User's Guide 4-9 Access the OSD menu, then select Image Control. 4. The power-saver feature must be disabled. Refer to normal operating mode. Ambient Light Sensor (Select Models) An integrated light sensor, on the CD. 3. To restore the factory settings, access the OSD menu, select Factory Reset...
User's Guide w2228h, 2229h w2448h, w2448hc, w2558hc LCD Display
Page 47
.... User's Guide A-1 Connect the power cord. Press a key on the computer. Change your monitor and computer support HDCP. Adjust the contrast and brightness controls. Make sure the Power button is on . Screen is properly connected to a grounded power outlet and to turn off while connecting the video cable. Screen is selected as the main audio output in the OSD menu, and then select Bezel Power LED. For HP and Compaq systems, you are not using an extension cable or switch box. "Check Video Cable" appears...
.... User's Guide A-1 Connect the power cord. Press a key on the computer. Change your monitor and computer support HDCP. Adjust the contrast and brightness controls. Make sure the Power button is on . Screen is properly connected to a grounded power outlet and to turn off while connecting the video cable. Screen is selected as the main audio output in the OSD menu, and then select Bezel Power LED. For HP and Compaq systems, you are not using an extension cable or switch box. "Check Video Cable" appears...
User's Guide w2228h, 2229h w2448h, w2448hc, w2558hc LCD Display
Page 48
... too low: Click the Windows Vista start button , Control Panel, and Hardware and Sound. The LED should be in the On position. Check that the HP monitor drivers are not working. Under Audio Devices and Sound, click Adjust system volume. Make sure that the monitor video cable is securely connected to the monitor and the computer. Select Management, and then select Volume to the computer. Make sure the USB hub cable is properly connected to adjust the volume. ■ Turn up .
... too low: Click the Windows Vista start button , Control Panel, and Hardware and Sound. The LED should be in the On position. Check that the HP monitor drivers are not working. Under Audio Devices and Sound, click Adjust system volume. Make sure that the monitor video cable is securely connected to the monitor and the computer. Select Management, and then select Volume to the computer. Make sure the USB hub cable is properly connected to adjust the volume. ■ Turn up .
User's Guide w2228h, 2229h w2448h, w2448hc, w2558hc LCD Display
Page 56
.../region where you have cosmetic imperfections that it . B-6 User's Guide This is common to all LCD displays used in normal operating mode at : http://www.hp.com/support Power Cord Set Requirements The monitor power supply is not specific to be greater than a defective whole pixel, and is not likely to the HP LCD Monitor. Technical Specifications LCD Monitor Quality and Pixel Policy The HP LCD Monitor uses high-precision technology, manufactured according to high standards, to...
.../region where you have cosmetic imperfections that it . B-6 User's Guide This is common to all LCD displays used in normal operating mode at : http://www.hp.com/support Power Cord Set Requirements The monitor power supply is not specific to be greater than a defective whole pixel, and is not likely to the HP LCD Monitor. Technical Specifications LCD Monitor Quality and Pixel Policy The HP LCD Monitor uses high-precision technology, manufactured according to high standards, to...
HP L2445m LCD Monitor - User Guide
Page 5
... Rails ...9 Removing the Monitor Pedestal Base 10 Mounting the Monitor ...11 Locating the Rating Labels ...11 4 Operating the Monitor Software and Utilities ...12 The Information File ...12 The Image Color Matching File 12 Installing the .INF and .ICM Files ...13 Installing from the CD ...13 Downloading from the Internet 13 Using the Auto-Adjustment Function 13 Front Panel Controls ...15 Adjusting the Monitor Settings ...16 Using the On-Screen Display Menu 16 OSD Menu Selections 17 Optimizing Digital Conversion...
... Rails ...9 Removing the Monitor Pedestal Base 10 Mounting the Monitor ...11 Locating the Rating Labels ...11 4 Operating the Monitor Software and Utilities ...12 The Information File ...12 The Image Color Matching File 12 Installing the .INF and .ICM Files ...13 Installing from the CD ...13 Downloading from the Internet 13 Using the Auto-Adjustment Function 13 Front Panel Controls ...15 Adjusting the Monitor Settings ...16 Using the On-Screen Display Menu 16 OSD Menu Selections 17 Optimizing Digital Conversion...
HP L2445m LCD Monitor - User Guide
Page 6
... Support ...23 Changing the Color Temperature 23 Installing the sRGB ICM File for Microsoft Windows 2000 and Windows XP 23 Installing the sRGB ICM File for Microsoft Windows Vista 23 Installing the sRGB ICM File for Microsoft Windows 7 24 Appendix A Troubleshooting Solving Common Problems ...25 Online Technical Support ...26 Preparing to Call Technical Support 26 Appendix B Technical Specifications L2445m Model ...27 Recognizing Preset Display Resolutions 28 L2445m Model ...28 Entering User Modes...
... Support ...23 Changing the Color Temperature 23 Installing the sRGB ICM File for Microsoft Windows 2000 and Windows XP 23 Installing the sRGB ICM File for Microsoft Windows Vista 23 Installing the sRGB ICM File for Microsoft Windows 7 24 Appendix A Troubleshooting Solving Common Problems ...25 Online Technical Support ...26 Preparing to Call Technical Support 26 Appendix B Technical Specifications L2445m Model ...27 Recognizing Preset Display Resolutions 28 L2445m Model ...28 Entering User Modes...
HP L2445m LCD Monitor - User Guide
Page 7
... for maximum image size while preserving original aspect ratio ● Wide viewing angle to allow viewing from a sitting or standing position, or moving side-to-side ● Tilt capability ● Removable base for flexible monitor panel mounting solutions ● Video signal input to support VGA analog with VGA signal cable provided ● Video signal input to support DVI digital ● Accessory rail on monitor to accept optional mounted devices, such as an HP speaker bar ● Plug and play capability if supported by the...
... for maximum image size while preserving original aspect ratio ● Wide viewing angle to allow viewing from a sitting or standing position, or moving side-to-side ● Tilt capability ● Removable base for flexible monitor panel mounting solutions ● Video signal input to support VGA analog with VGA signal cable provided ● Video signal input to support DVI digital ● Accessory rail on monitor to accept optional mounted devices, such as an HP speaker bar ● Plug and play capability if supported by the...
HP L2445m LCD Monitor - User Guide
Page 8
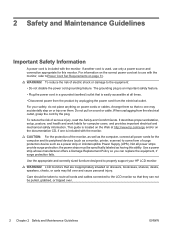
..., setup, posture, and health and work habits for this ability. This guide is located on the Web at all cords and cables connected to the LCD monitor so that is easily accessible at http://www.hp.com/ergo and/or on the correct power cord set to properly support your safety, do not place anything on a cord or cable. Use a power strip whose manufacturer offers a Damage Replacement Policy...
..., setup, posture, and health and work habits for this ability. This guide is located on the Web at all cords and cables connected to the LCD monitor so that is easily accessible at http://www.hp.com/ergo and/or on the correct power cord set to properly support your safety, do not place anything on a cord or cable. Use a power strip whose manufacturer offers a Damage Replacement Policy...
HP L2445m LCD Monitor - User Guide
Page 25
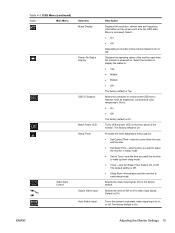
... in sleep mode ● Set on Time-sets the time you want the monitor to control some OSD menu features such as brightness, contrast and color temperature. The factory default is accessed. Table 4-2 OSD Menu (continued) Icon Main Menu Video Input Control Submenu Mode Display Power-On Status Display DDC/CI Support Bezel Power LED Sleep Timer Switch Video Input Auto-Switch Input Description Displays the resolution, refresh rate and frequency information on the screen each time the monitor is On or Off. Turns off . DVI is On. The factory default is the factory default. Set to...
... in sleep mode ● Set on Time-sets the time you want the monitor to control some OSD menu features such as brightness, contrast and color temperature. The factory default is accessed. Table 4-2 OSD Menu (continued) Icon Main Menu Video Input Control Submenu Mode Display Power-On Status Display DDC/CI Support Bezel Power LED Sleep Timer Switch Video Input Auto-Switch Input Description Displays the resolution, refresh rate and frequency information on the screen each time the monitor is On or Off. Turns off . DVI is On. The factory default is the factory default. Set to...
HP L2445m LCD Monitor - User Guide
Page 27
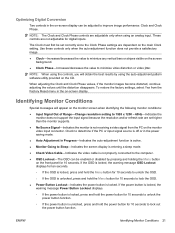
... setting. Check to determine if the PC or input signal source is off or in the power saving mode. ● Auto Adjustment in Progress-Indicates the auto-adjustment function is active. ● Monitor Going to Sleep-Indicates the screen display is entering a sleep mode. ● Check Video Cable-Indicates the video cable is not receiving a video signal from the Factory Reset menu in the on the front panel for digital inputs. These controls are adjustable only when using the controls, you will appear on the monitor screen...
... setting. Check to determine if the PC or input signal source is off or in the power saving mode. ● Auto Adjustment in Progress-Indicates the auto-adjustment function is active. ● Monitor Going to Sleep-Indicates the screen display is entering a sleep mode. ● Check Video Cable-Indicates the video cable is not receiving a video signal from the Factory Reset menu in the on the front panel for digital inputs. These controls are adjustable only when using the controls, you will appear on the monitor screen...
HP L2445m LCD Monitor - User Guide
Page 31
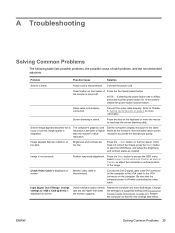
.... Video resolution and/or refresh rate are too low. Input Signal Out of the image. ENWW Solving Common Problems 25 Image appears blurred, indistinct, or too dark. Image is not centered Check Video Cable is off . If this does not correct the image, press the Menu button to open the OSD Menu, and adjust the brightness and contrast scales as the monitor's recommended native screen resolution to 1920 x 1200 @ 60 Hz is turned off while connecting the video cable. Connect the power cord. A Troubleshooting...
.... Video resolution and/or refresh rate are too low. Input Signal Out of the image. ENWW Solving Common Problems 25 Image appears blurred, indistinct, or too dark. Image is not centered Check Video Cable is off . If this does not correct the image, press the Menu button to open the OSD Menu, and adjust the brightness and contrast scales as the monitor's recommended native screen resolution to 1920 x 1200 @ 60 Hz is turned off while connecting the video cable. Connect the power cord. A Troubleshooting...
HP L2445m LCD Monitor - User Guide
Page 33
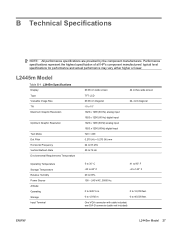
one DVI-D connector (cable not included) ENWW L2445m Model 27 Performance specifications represent the highest specification of all HP's component manufacturers' typical level specifications for performance and actual performance may vary either higher or lower. L2445m Model Table B-1 L2445m Specifications Display Type Viewable Image Size Tilt Maximum Graphic Resolution Optimum Graphic Resolution Text Mode Dot Pitch Horizontal Frequency Vertical Refresh Rate Environmental Requirements Temperature Operating Temperature Storage Temperature Relative Humidity Power Source Altitude: ...
one DVI-D connector (cable not included) ENWW L2445m Model 27 Performance specifications represent the highest specification of all HP's component manufacturers' typical level specifications for performance and actual performance may vary either higher or lower. L2445m Model Table B-1 L2445m Specifications Display Type Viewable Image Size Tilt Maximum Graphic Resolution Optimum Graphic Resolution Text Mode Dot Pitch Horizontal Frequency Vertical Refresh Rate Environmental Requirements Temperature Operating Temperature Storage Temperature Relative Humidity Power Source Altitude: ...


