
HP Notebook Hard Drives & Solid State Drives Identifying, Preventing, Diagnosing and Recovering from Drive Failures Care and Mai
Page 6
... driver: http://www8.hp.com/us/en/support-drivers.html Installing SATA drivers SATA Native Mode is a storage interface technology that could affect hard disk drive performance and reliability. Procedures for lower power consumption on computer systems equipped with Intel Matrix Storage Manager Technology. The latest device driver versions address multiple known issues that provides up to the Intel Matrix Storage Manager driver are configured with Serial ATA hard disk drives. Updates...
... driver: http://www8.hp.com/us/en/support-drivers.html Installing SATA drivers SATA Native Mode is a storage interface technology that could affect hard disk drive performance and reliability. Procedures for lower power consumption on computer systems equipped with Intel Matrix Storage Manager Technology. The latest device driver versions address multiple known issues that provides up to the Intel Matrix Storage Manager driver are configured with Serial ATA hard disk drives. Updates...
HP Split 13 x2 PC Maintenance and Service Guide
Page 6
...Volume button board 47 TouchScreen board 48 NFC module 49 Audio/power connector board 51 Vibrator module 52 Docking connecter board 53 Display panel cable 55 Card reader board 56 Speakers 57 Wireless antennas 58 System board 60 Keyboard base component replacement procedures 63 Bottom cover 63 Keyboard base battery 65 TouchPad 67 Audio/USB board 68 Power connector board 69 Hard drive 71 Hinge assembly 73 5 Using Setup Utility (BIOS) and HP PC Hardware Diagnostics (UEFI 75 Starting Setup Utility (BIOS) ...75 Updating the BIOS ...75 Determining the BIOS version 75 Downloading...
...Volume button board 47 TouchScreen board 48 NFC module 49 Audio/power connector board 51 Vibrator module 52 Docking connecter board 53 Display panel cable 55 Card reader board 56 Speakers 57 Wireless antennas 58 System board 60 Keyboard base component replacement procedures 63 Bottom cover 63 Keyboard base battery 65 TouchPad 67 Audio/USB board 68 Power connector board 69 Hard drive 71 Hinge assembly 73 5 Using Setup Utility (BIOS) and HP PC Hardware Diagnostics (UEFI 75 Starting Setup Utility (BIOS) ...75 Updating the BIOS ...75 Determining the BIOS version 75 Downloading...

HP Split 13 x2 PC Maintenance and Service Guide
Page 42
... tablet. Make special note of each screw size and location during removal and replacement. Turn off or in the Cable Kit, spare part number 736883-001. If you . 34 Chapter 4 Removal and replacement preliminary requirements Disconnect all external devices from the tablet. 3. Disconnect the power from the tablet by an authorized service provider. Place the tablet on page 21 for authorized service provider only parts. Accessing these...
... tablet. Make special note of each screw size and location during removal and replacement. Turn off or in the Cable Kit, spare part number 736883-001. If you . 34 Chapter 4 Removal and replacement preliminary requirements Disconnect all external devices from the tablet. 3. Disconnect the power from the tablet by an authorized service provider. Place the tablet on page 21 for authorized service provider only parts. Accessing these...

HP Split 13 x2 PC Maintenance and Service Guide
Page 71
This chapter provides removal and replacement procedures for authorized service provider only parts. Turn off or in Hibernation, turn the tablet on, and then shut it down through the operating system. 2. Remove the bottom cover: 1. NOTE: The rubber feet are available in this chapter should only be removed, replaced, and/or loosened when servicing the keyboard base. Keyboard base component replacement procedures CAUTION: Keyboard base components described...
This chapter provides removal and replacement procedures for authorized service provider only parts. Turn off or in Hibernation, turn the tablet on, and then shut it down through the operating system. 2. Remove the bottom cover: 1. NOTE: The rubber feet are available in this chapter should only be removed, replaced, and/or loosened when servicing the keyboard base. Keyboard base component replacement procedures CAUTION: Keyboard base components described...

HP Split 13 x2 PC Maintenance and Service Guide
Page 84
... installation, download and install a BIOS update only when the computer is connected to a network, consult the network administrator before installing any software updates, especially system BIOS updates. b. From the Start screen, type e, and then select File Explorer. 2. The hard drive designation is running on -screen instructions. 4. Complete the installation by unplugging the power cord from the computer by following the on-screen instructions. 76 Chapter 5 Using Setup Utility (BIOS) and HP PC Hardware Diagnostics (UEFI) At the download area, follow these instructions...
... installation, download and install a BIOS update only when the computer is connected to a network, consult the network administrator before installing any software updates, especially system BIOS updates. b. From the Start screen, type e, and then select File Explorer. 2. The hard drive designation is running on -screen instructions. 4. Complete the installation by unplugging the power cord from the computer by following the on-screen instructions. 76 Chapter 5 Using Setup Utility (BIOS) and HP PC Hardware Diagnostics (UEFI) At the download area, follow these instructions...

HP Split 13 x2 PC Maintenance and Service Guide
Page 91
... the HP Minimized Image Recovery option from the HP Recovery media. From the Start screen, type h, and then select Help and Support. ● If you want a quick and easy way to recover the system without losing your personal information, settings, or apps that best matches your situation and level of HP Recovery media to restore the factory image to reclaim hard drive space, HP Recovery Manager offers the Remove Recovery Partition option. For more information, see Recovering using a minimized...
... the HP Minimized Image Recovery option from the HP Recovery media. From the Start screen, type h, and then select Help and Support. ● If you want a quick and easy way to recover the system without losing your personal information, settings, or apps that best matches your situation and level of HP Recovery media to restore the factory image to reclaim hard drive space, HP Recovery Manager offers the Remove Recovery Partition option. For more information, see Recovering using a minimized...

HP Split 13 x2 PC Maintenance and Service Guide
Page 99
... part number 58 audio, product description 2 audio-in jack 8, 13 audio-out jack 8, 13 audio/power connector board removal 51 spare part number 18, 25, 51 audio/USB board removal 68 spare part number 20, 25, 68 B back cover removal 34 spare part number 18, 24, 34 battery removal 36, 65 spare part numbers 17, 20, 24, 36, 65 bottom cover removal 63 spare part number 20, 24, 63 buttons power 7 TouchPad 12 Window 6 C Cable Kit contents 21 spare part number 21, 25 cables, service considerations 30 caps lock light 11 card reader board removal 56 spare part number 18...
... part number 58 audio, product description 2 audio-in jack 8, 13 audio-out jack 8, 13 audio/power connector board removal 51 spare part number 18, 25, 51 audio/USB board removal 68 spare part number 20, 25, 68 B back cover removal 34 spare part number 18, 24, 34 battery removal 36, 65 spare part numbers 17, 20, 24, 36, 65 bottom cover removal 63 spare part number 20, 24, 63 buttons power 7 TouchPad 12 Window 6 C Cable Kit contents 21 spare part number 21, 25 cables, service considerations 30 caps lock light 11 card reader board removal 56 spare part number 18...

HP Split 13 x2 PC Maintenance and Service Guide
Page 100
..., 69 power cord set requirements 88 spare part numbers 24 power requirements, product description 3 processor, product description 1 product description audio 2 chipset 1 display panel 1 Ethernet 2 external media cards 2 graphics 1 memory module 1 microphone 2 operating system 3 optical drive 1 ports 3 power requirements 3 processors 1 product name 1 security 3 sensors 2 serviceability 3 storage 1 video 2 wireless 2 product name 1 proximity sensor module removal 37 spare part number 17, 25, 37 R release latch 9 removal/replacement procedures 34, 63 right-side components 14 RJ45-to-USB adapter...
..., 69 power cord set requirements 88 spare part numbers 24 power requirements, product description 3 processor, product description 1 product description audio 2 chipset 1 display panel 1 Ethernet 2 external media cards 2 graphics 1 memory module 1 microphone 2 operating system 3 optical drive 1 ports 3 power requirements 3 processors 1 product name 1 security 3 sensors 2 serviceability 3 storage 1 video 2 wireless 2 product name 1 proximity sensor module removal 37 spare part number 17, 25, 37 R release latch 9 removal/replacement procedures 34, 63 right-side components 14 RJ45-to-USB adapter...

User Guide
Page 5
... ...6 Display ...8 Keyboard base ...10 Top ...10 TouchPad ...11 Lights ...12 Keys ...13 Right side ...14 Left side ...15 Releasing the tablet from the keyboard base 16 Changing your tablet's settings ...16 Changing your tablet's view 16 Adjusting your tablet's autorotate lock 16 Adjusting your tablet's screen brightness 17 Locating system information ...17 3 Connecting to a network ...18 Connecting to a wireless network ...18 Using the wireless controls 18 Using the wireless button 18 Using operating system controls 19 Sharing data and drives and accessing software...
... ...6 Display ...8 Keyboard base ...10 Top ...10 TouchPad ...11 Lights ...12 Keys ...13 Right side ...14 Left side ...15 Releasing the tablet from the keyboard base 16 Changing your tablet's settings ...16 Changing your tablet's view 16 Adjusting your tablet's autorotate lock 16 Adjusting your tablet's screen brightness 17 Locating system information ...17 3 Connecting to a network ...18 Connecting to a wireless network ...18 Using the wireless controls 18 Using the wireless button 18 Using operating system controls 19 Sharing data and drives and accessing software...

User Guide
Page 8
... updates 64 Installing HP and third-party software updates 64 Securing your wireless network ...64 Backing up your software applications and information 64 9 Using Setup Utility (BIOS) and HP PC Hardware Diagnostics (UEFI 65 Starting Setup Utility (BIOS) ...65 Updating the BIOS ...65 Determining the BIOS version 65 Downloading a BIOS update 66 Using HP PC Hardware Diagnostics (UEFI 66 Downloading HP PC Hardware Diagnostics (UEFI) to a USB device 67 10 Backing up, restoring, and recovering ...68 Creating recovery media and backups 68 Creating HP Recovery media 69 Restore and recovery...
... updates 64 Installing HP and third-party software updates 64 Securing your wireless network ...64 Backing up your software applications and information 64 9 Using Setup Utility (BIOS) and HP PC Hardware Diagnostics (UEFI 65 Starting Setup Utility (BIOS) ...65 Updating the BIOS ...65 Determining the BIOS version 65 Downloading a BIOS update 66 Using HP PC Hardware Diagnostics (UEFI 66 Downloading HP PC Hardware Diagnostics (UEFI) to a USB device 67 10 Backing up, restoring, and recovering ...68 Creating recovery media and backups 68 Creating HP Recovery media 69 Restore and recovery...

User Guide
Page 29
From the Start screen, type n, and then select Settings. 2. For more information, from the right edge of the TouchPad or touch screen to a network, and diagnose and repair network problems. To use operating system controls: Mode Steps 1. From the Windows desktop, open File Explorer. 2. To share drives on the same network: 1. Select Change advanced sharing settings to a wireless network 19 Using operating system controls The Network and Sharing Center allows you are not limited to using only the information...
From the Start screen, type n, and then select Settings. 2. For more information, from the right edge of the TouchPad or touch screen to a network, and diagnose and repair network problems. To use operating system controls: Mode Steps 1. From the Windows desktop, open File Explorer. 2. To share drives on the same network: 1. Select Change advanced sharing settings to a wireless network 19 Using operating system controls The Network and Sharing Center allows you are not limited to using only the information...
User Guide
Page 45
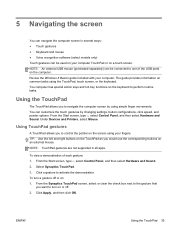
... Start screen, type c, select Control Panel, and then select Hardware and Sound. 2. Select Synaptics TouchPad. 3. Under Devices and Printers, select Mouse. Click Apply, and then click OK. To view a demonstration of the USB ports on common tasks using the TouchPad, touch screen, or the keyboard. From the Synaptics TouchPad screen, select or clear the check box next to navigate the computer screen by changing settings, button configurations, click speed, and pointer options. ENWW Using the TouchPad 35 Using TouchPad gestures A TouchPad...
... Start screen, type c, select Control Panel, and then select Hardware and Sound. 2. Select Synaptics TouchPad. 3. Under Devices and Printers, select Mouse. Click Apply, and then click OK. To view a demonstration of the USB ports on common tasks using the TouchPad, touch screen, or the keyboard. From the Synaptics TouchPad screen, select or clear the check box next to navigate the computer screen by changing settings, button configurations, click speed, and pointer options. ENWW Using the TouchPad 35 Using TouchPad gestures A TouchPad...
User Guide
Page 61
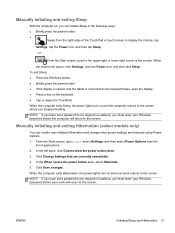
... Windows password before your work returns to the screen. NOTE: If you have set a password to be required on wakeup, you must enter your Windows password before the computer will return to display the charms, tap Settings, tap the Power icon, and then tap Sleep. - Manually initiating and exiting Sleep With the computer on, you can enable user-initiated Hibernation and change other power settings and timeouts using Power Options. 1. From the Start screen, type power, select Settings...
... Windows password before your work returns to the screen. NOTE: If you have set a password to be required on wakeup, you must enter your Windows password before the computer will return to display the charms, tap Settings, tap the Power icon, and then tap Sleep. - Manually initiating and exiting Sleep With the computer on, you can enable user-initiated Hibernation and change other power settings and timeouts using Power Options. 1. From the Start screen, type power, select Settings...
User Guide
Page 68
NOTE: It is always changing, and updating programs and drivers allows your hard drive at any time. HP recommends defragmenting your computer to download the latest versions of HP programs and drivers. Follow the on -screen instructions. From the Start screen, type d, and then type disk in the search box. Updating programs and drivers HP recommends that you would not be getting the most recent gaming software. Select Settings, and then select...
NOTE: It is always changing, and updating programs and drivers allows your hard drive at any time. HP recommends defragmenting your computer to download the latest versions of HP programs and drivers. Follow the on -screen instructions. From the Start screen, type d, and then type disk in the search box. Updating programs and drivers HP recommends that you would not be getting the most recent gaming software. Select Settings, and then select...

User Guide
Page 72
...TPM Embedded Security device (select models only) TPM (Trusted Platform Module) provides additional security for your computer and information ENWW To set , entered, changed , or deleted. NOTE: Your administrator password is not interchangeable with an administrator password set in Setup Utility. Use the arrow keys to access Setup Utility (BIOS) contents. Protects administrator-level access to a Windows user account. Setting Windows passwords Password User password Administrator password Function Protects access to computer contents. To start Setup Utility (BIOS), turn on or restart...
...TPM Embedded Security device (select models only) TPM (Trusted Platform Module) provides additional security for your computer and information ENWW To set , entered, changed , or deleted. NOTE: Your administrator password is not interchangeable with an administrator password set in Setup Utility. Use the arrow keys to access Setup Utility (BIOS) contents. Protects administrator-level access to a Windows user account. Setting Windows passwords Password User password Administrator password Function Protects access to computer contents. To start Setup Utility (BIOS), turn on or restart...

User Guide
Page 73
..., from the Start screen, type support, and then select the HP Support Assistant app. Antivirus software can select Available. ● If you use your computer to access email, a network, or the Internet, you upgrade the security software trial offer or purchase the software of your choice in order to fully protect your computer. An antivirus program may be kept up to cancel the action. Enabled/Disabled ●...
..., from the Start screen, type support, and then select the HP Support Assistant app. Antivirus software can select Available. ● If you use your computer to access email, a network, or the Internet, you upgrade the security software trial offer or purchase the software of your choice in order to fully protect your computer. An antivirus program may be kept up to cancel the action. Enabled/Disabled ●...
User Guide
Page 76
... no instructions are revealed, follow these steps: a. From the Start screen, type e, and then select File Explorer. 2. Using the hard drive path you to run diagnostic tests to a network, consult the network administrator before installing any device, cable, or cord. 1. Click Updates and tune-ups, and then click Check for example, filename.exe). If the update is connected to reliable external power using the AC adapter. BIOS installation procedures vary. The BIOS installation...
... no instructions are revealed, follow these steps: a. From the Start screen, type e, and then select File Explorer. 2. Using the hard drive path you to run diagnostic tests to a network, consult the network administrator before installing any device, cable, or cord. 1. Click Updates and tune-ups, and then click Check for example, filename.exe). If the update is connected to reliable external power using the AC adapter. BIOS installation procedures vary. The BIOS installation...

User Guide
Page 80
... HP Recovery partition (select models only) or HP Recovery media. See Using Windows Refresh for installation through the Drivers and Applications Reinstall option in the image continue to recover the computer's original factory partitioning and content, you to another drive. From the Start screen, type h, and then select Help and Support. ● If you have replaced the hard drive, you want to be available for quick and easy recovery on -screen instructions. ● If you want to restore...
... HP Recovery partition (select models only) or HP Recovery media. See Using Windows Refresh for installation through the Drivers and Applications Reinstall option in the image continue to recover the computer's original factory partitioning and content, you to another drive. From the Start screen, type h, and then select Help and Support. ● If you have replaced the hard drive, you want to be available for quick and easy recovery on -screen instructions. ● If you want to restore...
User Guide
Page 87
... 2 H HDMI port connecting 33 identifying 14, 26 HDMI, configuring audio 34 headphones, connecting 31 Hibernation exiting 51 initiated during critical battery level 53 initiating 51 high-definition devices, connecting 33, 34 hot keys bass settings 48 description 48 reveal system information 48 using 48 HP and third-party software updates, installing 64 HP Mobile Broadband, disabled 22 HP PC Hardware Diagnostics (UEFI) downloading 67 HP Recovery Manager correcting boot problems 73 starting 73 HP Recovery media creating 69 recovery 73 HP Recovery partition recovery 73 removing 74 I input power 75...
... 2 H HDMI port connecting 33 identifying 14, 26 HDMI, configuring audio 34 headphones, connecting 31 Hibernation exiting 51 initiated during critical battery level 53 initiating 51 high-definition devices, connecting 33, 34 hot keys bass settings 48 description 48 reveal system information 48 using 48 HP and third-party software updates, installing 64 HP Mobile Broadband, disabled 22 HP PC Hardware Diagnostics (UEFI) downloading 67 HP Recovery Manager correcting boot problems 73 starting 73 HP Recovery media creating 69 recovery 73 HP Recovery partition recovery 73 removing 74 I input power 75...
User Guide
Page 88
... P passwords Setup Utility (BIOS) 62 Windows 62 pinching touch screen gesture 43 pinching TouchPad gesture 37 ports 34 HDMI 14, 26, 33 Intel Wireless Display 34 USB 3.0 14, 15, 27 power button, identifying 6 power connector, identifying 7, 14 power meter 52 power, battery 52 product name and number, computer 17 public WLAN connection 21 R recovery discs 69, 73 HP Recovery Manager 72 media 73 options 68 refresh 71 starting 73 supported discs 69 system 72 USB flash drive 73 using HP Recovery media 69 recovery media creating 69 creating using HP Recovery Manager 69 recovery partition, removing 74...
... P passwords Setup Utility (BIOS) 62 Windows 62 pinching touch screen gesture 43 pinching TouchPad gesture 37 ports 34 HDMI 14, 26, 33 Intel Wireless Display 34 USB 3.0 14, 15, 27 power button, identifying 6 power connector, identifying 7, 14 power meter 52 power, battery 52 product name and number, computer 17 public WLAN connection 21 R recovery discs 69, 73 HP Recovery Manager 72 media 73 options 68 refresh 71 starting 73 supported discs 69 system 72 USB flash drive 73 using HP Recovery media 69 recovery media creating 69 creating using HP Recovery Manager 69 recovery partition, removing 74...


