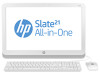
HP Slate 21 All-in-One User Guide
Page 5
Table of contents 1 Product features ...1 Front components ...2 Rear components ...3 2 Setting up the hardware ...4 Preparing for desk use ...4 Preparing for wall mounting ...4 Connecting the cables ...7 Adjusting the tilt ...10 Turning on the all-in-one for the first time 11 Using the touchscreen ...12 One-finger slide ......
HP Slate 21 All-in-One User Guide
Page 7
...) diagonal viewable area LED display with select models ● Video Electronics Standards Association (VESA) standard mounting holes for flexible mounting solutions, including wall-mounting ● Full Internet capability 1 1 Product features The HP Slate 21 All-in-One provides easy, simple access to 70 degrees ● 2 point optical touchscreen that uses 3 cameras ● NvidiaTegra 4 Quad Core (T40S) processor...
HP Slate 21 All-in-One User Guide
Page 10
... that the power is intended to the all-in-one and all attached accessories, and then follow the instructions below for your configuration. Preparing for wall mounting NOTE: This all-in-one for desk use : 1. Preparing for desktop use To assemble the all-in-one is turned off to be supported by... UL or CSA Listed wall mount bracket. Be sure to place the all-in-one to a mounting fixture such as a wall mount or swing arm. You can install the all-in-one on a desktop or...
HP Slate 21 All-in-One User Guide
Page 11
Preparing for wall mounting 5 Remove the two screws that secures the stand to the all-in-one (1), and then lift up the bottom of the stand slightly and remove it from the all -in one . 3. Lift and rotate the stand until it is positioned straight up so you can access the screw that secure the stand to the all -in -one (2). 2.