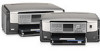
Setup Guide
Page 1
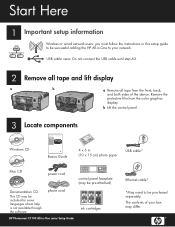
...panel faceplate (may be pre-attached) Documentation CD This CD may differ. b Lift the control panel. 3 Locate components HP Photosmart C7100 All-in-One series Basics Guide Windows CD Basics Guide 4 x 6 in -One series Setup Guide ink cartridges Ethernet cable* *May need to your box may be purchased separately. The contents of the ... 1 Important setup information Wireless or wired network users: you must follow the instructions in this setup guide to be successful adding the HP All-in-One to be included for some languages where help is not available through the software.
...panel faceplate (may be pre-attached) Documentation CD This CD may differ. b Lift the control panel. 3 Locate components HP Photosmart C7100 All-in-One series Basics Guide Windows CD Basics Guide 4 x 6 in -One series Setup Guide ink cartridges Ethernet cable* *May need to your box may be purchased separately. The contents of the ... 1 Important setup information Wireless or wired network users: you must follow the instructions in this setup guide to be successful adding the HP All-in-One to be included for some languages where help is not available through the software.
Setup Guide
Page 7
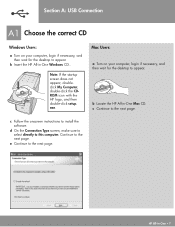
...: a Turn on your computer, login if necessary, and then wait for the desktop to appear b Insert the HP All-in-One Windows CD.. c Continue to the next page. Section A: USB Connection A1 Choose the correct CD Windows Users: a Turn on your computer, login if necessary, and then wait for the desktop to appear. Note...
...: a Turn on your computer, login if necessary, and then wait for the desktop to appear b Insert the HP All-in-One Windows CD.. c Continue to the next page. Section A: USB Connection A1 Choose the correct CD Windows Users: a Turn on your computer, login if necessary, and then wait for the desktop to appear. Note...
Setup Guide
Page 8
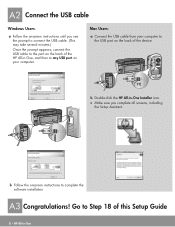
...the device. Mac Users: a Connect the USB cable from your computer to any USB port on the back of this Setup Guide 8 • HP All-in-One c Make sure you see the prompt to connect the USB cable. (This may take several minutes.) Once the prompt appears, connect the USB ...cable to the port on the back of the HP All-in -One Installer icon. A2 Connect the USB cable Windows Users: a Follow the onscreen instructions until you complete all screens, including the Setup Assistant. A3 Congratulations!
...the device. Mac Users: a Connect the USB cable from your computer to any USB port on the back of this Setup Guide 8 • HP All-in-One c Make sure you see the prompt to connect the USB cable. (This may take several minutes.) Once the prompt appears, connect the USB ...cable to the port on the back of the HP All-in -One Installer icon. A2 Connect the USB cable Windows Users: a Follow the onscreen instructions until you complete all screens, including the Setup Assistant. A3 Congratulations!

Setup Guide
Page 10
...Remember to turn them back on additional computers, go to step 14. B3 Congratulations! Go to Step 16 of this Setup Guide 10 • HP All-in -One Mac CD. Mac Users: a Turn on your computer, login if necessary, and then wait for the desktop to appear. Then continue with the....exe. c Double-click the HP All-in -One CD Note: If the startup screen does not appear, doubleclick My Computer, doubleclick the CD-ROM icon with the HP software installation. d Make sure you that access is attempting to access your network. B2 Choose the correct CD Windows Users: a Turn on your ...
...Remember to turn them back on additional computers, go to step 14. B3 Congratulations! Go to Step 16 of this Setup Guide 10 • HP All-in -One Mac CD. Mac Users: a Turn on your computer, login if necessary, and then wait for the desktop to appear. Then continue with the....exe. c Double-click the HP All-in -One CD Note: If the startup screen does not appear, doubleclick My Computer, doubleclick the CD-ROM icon with the HP software installation. d Make sure you that access is attempting to access your network. B2 Choose the correct CD Windows Users: a Turn on your ...

Setup Guide
Page 13
...the startup screen does not appear, doubleclick My Computer, doubleclick the CD-ROM icon with the HP software installation. c Follow the onscreen instructions to Step 16 of this Setup Guide HP All-in -One Windows CD Mac Users: a Turn on your computer, login if necessary, and then wait for the... desktop to step 14. b Insert the HP All-in -One installer icon. You should be disabled. Follow the onscreen instructions. c Double-click the HP All-in -One Mac CD. C3 Insert the correct CD Windows Users: a Turn on your network. d On the Connection Type screen,...
...the startup screen does not appear, doubleclick My Computer, doubleclick the CD-ROM icon with the HP software installation. c Follow the onscreen instructions to Step 16 of this Setup Guide HP All-in -One Windows CD Mac Users: a Turn on your computer, login if necessary, and then wait for the... desktop to step 14. b Insert the HP All-in -One installer icon. You should be disabled. Follow the onscreen instructions. c Double-click the HP All-in -One Mac CD. C3 Insert the correct CD Windows Users: a Turn on your network. d On the Connection Type screen,...
Setup Guide
Page 14
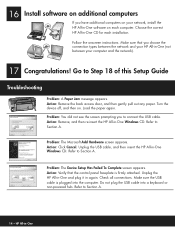
... the network and your computer and the network). 17 Congratulations! Check all connections. Follow the onscreen instructions. Go to Section A. Refer to Section A. 14 • HP All-in -One Windows CD. Refer to Step 18 of this Setup Guide Troubleshooting Problem: A Paper Jam message appears. Unplug the USB cable, and then insert the... into a keyboard or non-powered hub. Turn the device off, and then on. Problem: The Microsoft Add Hardware screen appears. Refer to Section A. Unplug the HP All-in-One and plug it in -One Windows CD.
... the network and your computer and the network). 17 Congratulations! Check all connections. Follow the onscreen instructions. Go to Section A. Refer to Section A. 14 • HP All-in -One Windows CD. Refer to Step 18 of this Setup Guide Troubleshooting Problem: A Paper Jam message appears. Unplug the USB cable, and then insert the... into a keyboard or non-powered hub. Turn the device off, and then on. Problem: The Microsoft Add Hardware screen appears. Refer to Section A. Unplug the HP All-in-One and plug it in -One Windows CD.

Basics Guide
Page 3
...® and Pentium® are trademarks of the United States Environmental Protection Agency. Windows®, Windows NT®, Windows ME®, Windows XP®, and Windows 2000® are US registered marks of Adobe Systems Incorporated. Nothing herein should be liable for HP products and services are set forth in the United States and other countries...
...® and Pentium® are trademarks of the United States Environmental Protection Agency. Windows®, Windows NT®, Windows ME®, Windows XP®, and Windows 2000® are US registered marks of Adobe Systems Incorporated. Nothing herein should be liable for HP products and services are set forth in the United States and other countries...

Basics Guide
Page 10
...By default, this button to turn the feature off and on . Zoom In: Zooms in -One to make prints of a photo or multiple photos at the same time on . If you are zooming in -One overview (continued) Label 20 21 22 23 24 25 26 27 28 29 Name and Description...basic software features, such as saving, viewing, and sharing your photos or to print. Use the HP Photosmart software You can use the HP Photosmart software (Windows) or the HP Photosmart Mac software (Mac) that you installed with the HP All-in to show more of your photos. Cancel: Stops the current operation and returns to ...
...By default, this button to turn the feature off and on . Zoom In: Zooms in -One to make prints of a photo or multiple photos at the same time on . If you are zooming in -One overview (continued) Label 20 21 22 23 24 25 26 27 28 29 Name and Description...basic software features, such as saving, viewing, and sharing your photos or to print. Use the HP Photosmart software You can use the HP Photosmart software (Windows) or the HP Photosmart Mac software (Mac) that you installed with the HP All-in to show more of your photos. Cancel: Stops the current operation and returns to ...
Basics Guide
Page 11
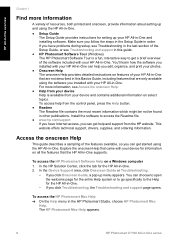
... of the software included with your HP All-in order. The HP Photosmart Mac Help appears. 8 HP Photosmart C7100 All-in -One. 2. You'll learn how the software you installed with your HP All-in-One can get help you installed with your photos. ● Onscreen Help The onscreen Help provides detailed instructions on a Windows computer 1. This website offers technical...
... of the software included with your HP All-in order. The HP Photosmart Mac Help appears. 8 HP Photosmart C7100 All-in -One. 2. You'll learn how the software you installed with your HP All-in-One can get help you installed with your photos. ● Onscreen Help The onscreen Help provides detailed instructions on a Windows computer 1. This website offers technical...

Basics Guide
Page 15
... Firewall or Windows Firewall is found on the network, the Printers Found screen appears. If a Windows Security Alert appears for instructions. If more than one printer is enabled. Select the HP All-in-One you disabled ...HP Photosmart C7100 All-in -One into the CD-ROM drive on the network. 5. In the Authenticate dialog, enter the Administrator password used to open the necessary ports and continue with the HP All-in -One is correct. From the HP Installer dialog, select your firewall documentation for a program published by Hewlett-Packard, please unblock this printer...
... Firewall or Windows Firewall is found on the network, the Printers Found screen appears. If a Windows Security Alert appears for instructions. If more than one printer is enabled. Select the HP All-in-One you disabled ...HP Photosmart C7100 All-in -One into the CD-ROM drive on the network. 5. In the Authenticate dialog, enter the Administrator password used to open the necessary ports and continue with the HP All-in -One is correct. From the HP Installer dialog, select your firewall documentation for a program published by Hewlett-Packard, please unblock this printer...
Basics Guide
Page 19
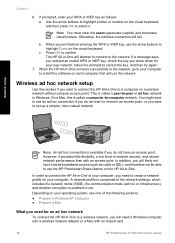
...profile is comprised of network security, and slower network performance than with an Airport card. 16 HP Photosmart C7100 All-in -One to a wireless network, you are finished entering the WPA or WEP key, use the HP Photosmart Share feature on your computer. When you will likely not have an access point. Press OK...) and lowercase (small) letters. b. If a message says you entered an invalid WPA or WEP key, check the key you will need a Windows computer with a wireless network adapter or a Mac with an access point. In addition, you wrote down for an ad hoc network To connect the...
...profile is comprised of network security, and slower network performance than with an Airport card. 16 HP Photosmart C7100 All-in -One to a wireless network, you are finished entering the WPA or WEP key, use the HP Photosmart Share feature on your computer. When you will likely not have an access point. Press OK...) and lowercase (small) letters. b. If a message says you entered an invalid WPA or WEP key, check the key you will need a Windows computer with a wireless network adapter or a Mac with an access point. In addition, you wrote down for an ad hoc network To connect the...
Basics Guide
Page 20
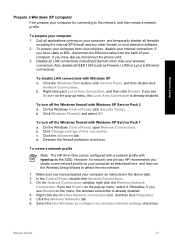
...) to the network, and then create a network profile. b. On the Windows Control Panel, click Security Center. d. To create a network profile Note The HP All-in the above task. 2. On the Network Connections window, right-click the Wireless Network Connection. If you see Enable on your wireless...you have prepared your computer as instructed in -One comes configured with a network profile with Windows XP a. If you have cable or DSL, disconnect the Ethernet cable from virus infection, disable your computer for security and privacy HP recommends you see Disable on the menu, the...
...) to the network, and then create a network profile. b. On the Windows Control Panel, click Security Center. d. To create a network profile Note The HP All-in the above task. 2. On the Network Connections window, right-click the Wireless Network Connection. If you see Enable on your wireless...you have prepared your computer as instructed in -One comes configured with a network profile with Windows XP a. If you have cable or DSL, disconnect the Ethernet cable from virus infection, disable your computer for security and privacy HP recommends you see Disable on the menu, the...
Basics Guide
Page 21
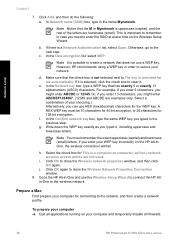
... then create a network profile. This is possible to create a network that the M in order to close the Wireless Network Properties Connection window. 8. In the Confirm network key box, type the same WEP key you might enter ABCDEF1234567. (12345 and ABCDE are not used. Note... only. Prepare a Mac First prepare your WEP key incorrectly on your network. To prepare your computer ➔ Quit all firewalls. 18 HP Photosmart C7100 All-in-One series c. Note It is important to -computer (ad hoc) network; For example, if you enter 5 characters, you typed in the...
... then create a network profile. This is possible to create a network that the M in order to close the Wireless Network Properties Connection window. 8. In the Confirm network key box, type the same WEP key you might enter ABCDEF1234567. (12345 and ABCDE are not used. Note... only. Prepare a Mac First prepare your WEP key incorrectly on your network. To prepare your computer ➔ Quit all firewalls. 18 HP Photosmart C7100 All-in-One series c. Note It is important to -computer (ad hoc) network; For example, if you enter 5 characters, you typed in the...
Basics Guide
Page 22
...turned on your initials). Enable Allow the computer to the wireless network. Note Notice that you have an operating system other than Windows XP, HP recommends that the M in -One and use the default Automatic setting. 6. For example, if you enter 5 characters, you can type the name Mynetwork (or...Show AirPort must be selected in the Name box and enter a new network name. Enable Show Airport status in -One comes configured with a network profile with your HP Allin-One to create networks. In the Channel box, use the Wireless Setup Wizard to connect your wireless LAN card. To ...
...turned on your initials). Enable Allow the computer to the wireless network. Note Notice that you have an operating system other than Windows XP, HP recommends that the M in -One and use the default Automatic setting. 6. For example, if you enter 5 characters, you can type the name Mynetwork (or...Show AirPort must be selected in the Name box and enter a new network name. Enable Show Airport status in -One comes configured with a network profile with your HP Allin-One to create networks. In the Channel box, use the Wireless Setup Wizard to connect your wireless LAN card. To ...
Basics Guide
Page 25
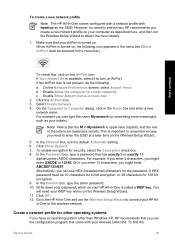
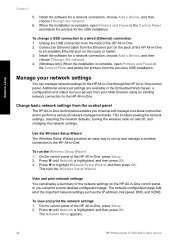
... connection, choose Add a Device, and then choose Through the network. 4. (Windows only) When the installation is highlighted, and then press OK. Change basic network settings from the control panel The HP All-in -One control panel. To run the Wireless Setup Wizard 1. To view and print the...Setup Wizard, and then press OK. This runs the Wireless Setup Wizard. Network setup Chapter 2 5. The Network Menu appears. 22 HP Photosmart C7100 All-in the Control Panel and delete the printers for a network connection, choose Add a Device, and then choose Through the network. 6.
... connection, choose Add a Device, and then choose Through the network. 4. (Windows only) When the installation is highlighted, and then press OK. Change basic network settings from the control panel The HP All-in -One control panel. To run the Wireless Setup Wizard 1. To view and print the...Setup Wizard, and then press OK. This runs the Wireless Setup Wizard. Network setup Chapter 2 5. The Network Menu appears. 22 HP Photosmart C7100 All-in the Control Panel and delete the printers for a network connection, choose Add a Device, and then choose Through the network. 6.
Basics Guide
Page 37
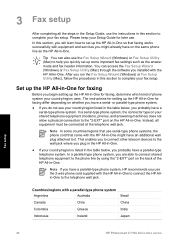
... Fax setup 34 HP Photosmart C7100 All-in -One for later use. Countries/regions with the HP All-in -One. Note In some important fax settings such as the HP All-in -One might already have a parallel-type telephone system. Note If you have a parallel-type phone system, HP recommends you run the Fax Setup Wizard (Windows) or Fax Setup...
... Fax setup 34 HP Photosmart C7100 All-in -One for later use. Countries/regions with the HP All-in -One. Note In some important fax settings such as the HP All-in -One might already have a parallel-type telephone system. Note If you have a parallel-type phone system, HP recommends you run the Fax Setup Wizard (Windows) or Fax Setup...
Basics Guide
Page 64
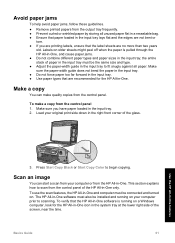
... when the paper is running on a Windows computer, look for the HP All-in the input tray lays flat and the edges are not bent or torn. ● If you have paper loaded in the input tray to scan from the control panel of the HP All-in the system tray at the...; Do not force paper too far forward in the input tray. ● Use paper types that the label sheets are recommended for the HP All-in-One icon in -One only. Avoid paper jams To help avoid paper jams, follow these guidelines. ● Remove printed papers from the output tray frequently. ● Prevent...
... when the paper is running on a Windows computer, look for the HP All-in the input tray lays flat and the edges are not bent or torn. ● If you have paper loaded in the input tray to scan from the control panel of the HP All-in the system tray at the...; Do not force paper too far forward in the input tray. ● Use paper types that the label sheets are recommended for the HP All-in-One icon in -One only. Avoid paper jams To help avoid paper jams, follow these guidelines. ● Remove printed papers from the output tray frequently. ● Prevent...
Basics Guide
Page 65
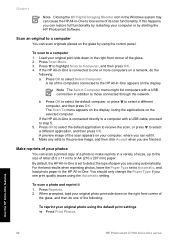
... and then do the following : To reprint your photos You can cause the HP All-in-One to lose some of its scan functionality. Press Scan Menu. 3. Press Reprints. 2. Use the HP All-in-One features 62 HP Photosmart C7100 All-in addition to those connected through the network. To scan to select Select...your original photo using the control panel. You should only change the Paper Type if you are finished. Chapter 4 Note Closing the HP Digital Imaging Monitor icon in the Windows system tray can scan a printed copy of a photo to make reprints in a variety of sizes, up to the size of ...
... and then do the following : To reprint your photos You can cause the HP All-in-One to lose some of its scan functionality. Press Scan Menu. 3. Press Reprints. 2. Use the HP All-in-One features 62 HP Photosmart C7100 All-in addition to those connected through the network. To scan to select Select...your original photo using the control panel. You should only change the Paper Type if you are finished. Chapter 4 Note Closing the HP Digital Imaging Monitor icon in the Windows system tray can scan a printed copy of a photo to make reprints in a variety of sizes, up to the size of ...
Basics Guide
Page 70
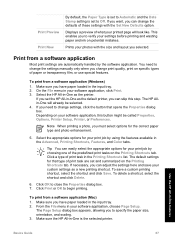
...the predefined print tasks on potential mistakes. If necessary, you have paper loaded in the input tray. 2. To print from a software application (Windows) 1. Depending on the Printing Shortcuts tab. Print Preview Print Now By default, the Paper Type is set to Automatic and the Date Stamp ... and click Delete. 6. Displays a preview of print task are automatically handled by the software application. If you set the HP All-in -One as the default printer, you have paper loaded in the input tray. 2. The Page Setup dialog box appears, allowing you can skip this button...
...the predefined print tasks on potential mistakes. If necessary, you have paper loaded in the input tray. 2. To print from a software application (Windows) 1. Depending on the Printing Shortcuts tab. Print Preview Print Now By default, the Paper Type is set to Automatic and the Date Stamp ... and click Delete. 6. Displays a preview of print task are automatically handled by the software application. If you set the HP All-in -One as the default printer, you have paper loaded in the input tray. 2. The Page Setup dialog box appears, allowing you can skip this button...
Basics Guide
Page 77
...Uninstall and reinstall the software If your computer. 5. On the Windows taskbar, click Start, Settings, Control Panel. 2. Do not connect the HP All-in -One to your computer. Do not simply delete the HP All-in -One series For more troubleshooting information, see the inside back cover of... this guide. Make sure to your software. Specific information is complete, the HP Digital Imaging Monitor icon appears in the Windows system tray. 74 HP Photosmart C7100 All-in -One application files ...
...Uninstall and reinstall the software If your computer. 5. On the Windows taskbar, click Start, Settings, Control Panel. 2. Do not connect the HP All-in -One to your computer. Do not simply delete the HP All-in -One series For more troubleshooting information, see the inside back cover of... this guide. Make sure to your software. Specific information is complete, the HP Digital Imaging Monitor icon appears in the Windows system tray. 74 HP Photosmart C7100 All-in -One application files ...


