Setup Guide
Page 14
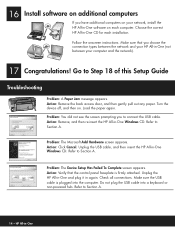
... the HP All-in -One Windows CD. Go to connect the USB cable. Problem: You did not see the screen prompting you to Step 18 of this Setup Guide Troubleshooting Problem: A Paper Jam message appears. Problem: The Microsoft Add Hardware screen appears. Unplug the HP All-in-One and plug it in again. Make sure the USB cable is firmly attached. Refer to Section A. Refer to Section A. Follow the onscreen instructions. 16 Install software on...
... the HP All-in -One Windows CD. Go to connect the USB cable. Problem: You did not see the screen prompting you to Step 18 of this Setup Guide Troubleshooting Problem: A Paper Jam message appears. Problem: The Microsoft Add Hardware screen appears. Unplug the HP All-in-One and plug it in again. Make sure the USB cable is firmly attached. Refer to Section A. Refer to Section A. Follow the onscreen instructions. 16 Install software on...

Setup Guide
Page 15
...; Turn your HP All-in -One. • Make sure your color graphics display for Network Setup. Problem: The Printer Not Found message appears. Check your LAN card is likely that you entered the correct wireless communication mode and authentication type. Problem: I ran the Wireless Setup Wizard, a list of available networks appeared or the Select Network Name screen appeared. If you do not see an icon, go to set up information. Wired (Ethernet) network users: • Check the cable between...
...; Turn your HP All-in -One. • Make sure your color graphics display for Network Setup. Problem: The Printer Not Found message appears. Check your LAN card is likely that you entered the correct wireless communication mode and authentication type. Problem: I ran the Wireless Setup Wizard, a list of available networks appeared or the Select Network Name screen appeared. If you do not see an icon, go to set up information. Wired (Ethernet) network users: • Check the cable between...
Basics Guide
Page 6
... connected to a computer with a USB cable, you can access many HP All-in-One functions directly from a memory card or storage device without turning on the HP All-in-One. Fax You can also set up speed dial entries to send faxes quickly and easily to print, edit, or share. Print from a memory card. From the control panel, you to send and receive faxes, including color faxes. Copy The HP All-in-One enables you can use the HP All-in-One to produce high-quality color and black-and-white copies...
... connected to a computer with a USB cable, you can access many HP All-in-One functions directly from a memory card or storage device without turning on the HP All-in-One. Fax You can also set up speed dial entries to send faxes quickly and easily to print, edit, or share. Print from a memory card. From the control panel, you to send and receive faxes, including color faxes. Copy The HP All-in-One enables you can use the HP All-in-One to produce high-quality color and black-and-white copies...
Basics Guide
Page 9
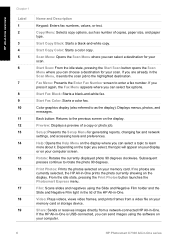
... or text. Fax Menu: Presents the Enter Fax Number screen to rotate the photo 90 degrees. Color graphics display (also referred to as number of copies, paper size, and paper type. Subsequent presses continue to enter a fax number. Scan Menu: Opens the Scan Menu where you can select a topic to learn more about it. Start Fax Black: Starts a black-and-white fax. Start Fax Color: Starts a color fax. Copy Menu: Selects copy options, such as the display): Displays menus, photos, and messages. Preview: Displays a preview of the HP All-in -One is USB-connected, you can...
... or text. Fax Menu: Presents the Enter Fax Number screen to rotate the photo 90 degrees. Color graphics display (also referred to as number of copies, paper size, and paper type. Subsequent presses continue to enter a fax number. Scan Menu: Opens the Scan Menu where you can select a topic to learn more about it. Start Fax Black: Starts a black-and-white fax. Start Fax Color: Starts a color fax. Copy Menu: Selects copy options, such as the display): Displays menus, photos, and messages. Preview: Displays a preview of the HP All-in -One is USB-connected, you can...
Basics Guide
Page 11
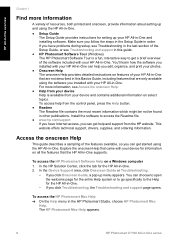
... printed and onscreen, provide information about setting up and using the HP All-in-One. ● Setup Guide The Setup Guide provides instructions for setting up menu appears. If you click Troubleshooting, the Troubleshooting and support page opens. The HP Photosmart Mac Help appears. 8 HP Photosmart C7100 All-in other publications. You'll learn how the software you installed with your device and contains additional information on all the features that the HP All-in-One supports. In the HP Solution Center...
... printed and onscreen, provide information about setting up and using the HP All-in-One. ● Setup Guide The Setup Guide provides instructions for setting up menu appears. If you click Troubleshooting, the Troubleshooting and support page opens. The HP Photosmart Mac Help appears. 8 HP Photosmart C7100 All-in other publications. You'll learn how the software you installed with your device and contains additional information on all the features that the HP All-in-One supports. In the HP Solution Center...

Basics Guide
Page 15
... instructions. 3. To test your network connection, go to your computer, make sure to connect. To install the Mac HP All-in -One you want to the HP All-in -One, print the network configuration page. 6. After the installation is complete you disabled a firewall or virus detection software on your computer and print a self-test report to connect. 12 HP Photosmart C7100 All-in -One into the CD-ROM drive on the HP All-in -One. Click Next to allow the Setup program...
... instructions. 3. To test your network connection, go to your computer, make sure to connect. To install the Mac HP All-in -One you want to the HP All-in -One, print the network configuration page. 6. After the installation is complete you disabled a firewall or virus detection software on your computer and print a self-test report to connect. 12 HP Photosmart C7100 All-in -One into the CD-ROM drive on the HP All-in -One. Click Next to allow the Setup program...
Basics Guide
Page 25
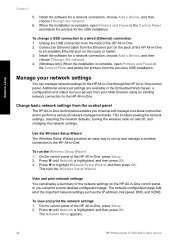
... Web Server, a configuration and status tool you can print a more detailed configuration page. Press to a wired (Ethernet) connection 1. The Network Menu appears. 22 HP Photosmart C7100 All-in -One. Connect an Ethernet cable from the back of the HP All-in -One, press Setup. 2. On the control panel of the HP All-in -One. 2. View and print network settings You can manage network settings for the HP All-in-One through the HP All-in the Control Panel and delete the printers for the USB installation. To change a USB connection...
... Web Server, a configuration and status tool you can print a more detailed configuration page. Press to a wired (Ethernet) connection 1. The Network Menu appears. 22 HP Photosmart C7100 All-in -One. Connect an Ethernet cable from the back of the HP All-in -One, press Setup. 2. On the control panel of the HP All-in -One. 2. View and print network settings You can manage network settings for the HP All-in-One through the HP All-in the Control Panel and delete the printers for the USB installation. To change a USB connection...

Basics Guide
Page 27
... -One. Press until Network is Automatic. The Network Menu appears. 24 HP Photosmart C7100 All-in -One. Press until Network is transmitted over the network. To set link speed 1. Network setup Chapter 2 To print the wireless test report 1. The Wireless Network Test prints. However, unless you are an advanced user, you must already be connected to an active Network, otherwise the setting will not be able to confirm the setting. - Change advanced network settings from the HP All-in -One series To change the IP address...
... -One. Press until Network is Automatic. The Network Menu appears. 24 HP Photosmart C7100 All-in -One. Press until Network is transmitted over the network. To set link speed 1. Network setup Chapter 2 To print the wireless test report 1. The Wireless Network Test prints. However, unless you are an advanced user, you must already be connected to an active Network, otherwise the setting will not be able to confirm the setting. - Change advanced network settings from the HP All-in -One series To change the IP address...

Basics Guide
Page 28
... the network settings page. Click the Home tab to access device and network information, or click the Networking tab to access more network information or to confirm the setting. Note Only use the features available in -One control panel, or you to an HP All-in the Settings navigation menu. IP Address - Use the Embedded Web Server If your browser, you cannot access the HP All-in the Embedded Web Server, see the onscreen help , open the Embedded Web Server...
... the network settings page. Click the Home tab to access device and network information, or click the Networking tab to access more network information or to confirm the setting. Note Only use the features available in -One control panel, or you to an HP All-in the Settings navigation menu. IP Address - Use the Embedded Web Server If your browser, you cannot access the HP All-in the Embedded Web Server, see the onscreen help , open the Embedded Web Server...

Basics Guide
Page 30
... HP All-in -One connected to provide the firmware revision code. Basics Guide 27 By default, this is not recommended. Network setup Wired (802.3) network settings The following table describes the 802.3 wired settings shown on the problem, you register the MAC address of the administrator's password for the Embedded Web Server: ● Set: Password is not required for identification, including routers, switches, and other Ethernet-enabled device that identifies the HP Allin-One. IP Address This address...
... HP All-in -One connected to provide the firmware revision code. Basics Guide 27 By default, this is not recommended. Network setup Wired (802.3) network settings The following table describes the 802.3 wired settings shown on the problem, you register the MAC address of the administrator's password for the Embedded Web Server: ● Set: Password is not required for identification, including routers, switches, and other Ethernet-enabled device that identifies the HP Allin-One. IP Address This address...

Basics Guide
Page 58
... set up the fax report from the control panel 1. Insert the ink cartridges and load full-size paper in -One for more information on the display and prints a report. 6. After you pick up properly for an active phone line ● Tests the status of your fax setup to check the status of phone cord is connected to the HP All-in -One and to make sure it is plugged into the correct port ● Checks for a dial tone ● Checks for faxing. Fax setup...
... set up the fax report from the control panel 1. Insert the ink cartridges and load full-size paper in -One for more information on the display and prints a report. 6. After you pick up properly for an active phone line ● Tests the status of your fax setup to check the status of phone cord is connected to the HP All-in -One and to make sure it is plugged into the correct port ● Checks for a dial tone ● Checks for faxing. Fax setup...
Basics Guide
Page 64
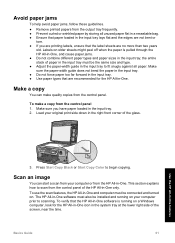
... the screen, near the time. Labels on your computer prior to scanning. Scan an image You can make a copy from the control panel 1. This section explains how to scan from the control panel of paper in the input tray must be the same size and type. ● Adjust the paper-width guide in the input tray to begin copying. Basics Guide 61 Avoid paper jams To help avoid paper jams, follow these guidelines. ● Remove printed papers from the output tray frequently...
... the screen, near the time. Labels on your computer prior to scanning. Scan an image You can make a copy from the control panel 1. This section explains how to scan from the control panel of paper in the input tray must be the same size and type. ● Adjust the paper-width guide in the input tray to begin copying. Basics Guide 61 Avoid paper jams To help avoid paper jams, follow these guidelines. ● Remove printed papers from the output tray frequently...
Basics Guide
Page 70
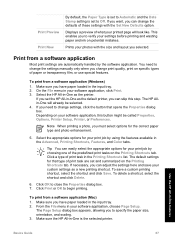
... paper type and photo enhancement. 5. Displays a preview of what your print job by choosing one of paper or transparency film, or use special features. Prints your custom settings as the printer. To save your photos with the Set New Defaults option. From the File menu in your software application, choose Page Setup. On the File menu in your software application, click Print. 3. Tip You can change settings, click the button that type of print task in the Advanced, Printing Shortcuts, Features, and Color tabs. Print...
... paper type and photo enhancement. 5. Displays a preview of what your print job by choosing one of paper or transparency film, or use special features. Prints your custom settings as the printer. To save your photos with the Set New Defaults option. From the File menu in your software application, choose Page Setup. On the File menu in your software application, click Print. 3. Tip You can change settings, click the button that type of print task in the Advanced, Printing Shortcuts, Features, and Color tabs. Print...

Basics Guide
Page 71
... File menu in your faxes were successfully sent, enable fax confirmation before sending any faxes. Enter the fax number by using the keypad, press to redial the last number dialed, or press to access speed dials. 3. Use the HP All-in-One features 68 HP Photosmart C7100 All-in the pop-up menu, as described here. Change the print settings for each option in -One series or multiple-page black-and-white fax by using the control panel, as appropriate for the correct paper type and photo enhancement. 8. The Enter Fax Number screen appears. 2. Press Start Fax Black...
... File menu in your faxes were successfully sent, enable fax confirmation before sending any faxes. Enter the fax number by using the keypad, press to redial the last number dialed, or press to access speed dials. 3. Use the HP All-in-One features 68 HP Photosmart C7100 All-in the pop-up menu, as described here. Change the print settings for each option in -One series or multiple-page black-and-white fax by using the control panel, as appropriate for the correct paper type and photo enhancement. 8. The Enter Fax Number screen appears. 2. Press Start Fax Black...
Basics Guide
Page 75
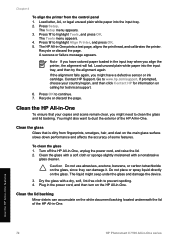
The Setup menu appears. 3. Press to continue. 7. The HP All-in -One. If prompted, choose your copies and scans remain clear, you might also want to dust the exterior of the HP All-in -One prints a test page, aligns the print head, and calibrates the printer. Press OK to highlight Tools, and press OK. You might have colored paper loaded in -One To ensure that is dirty from the control panel 1. Clean the...
The Setup menu appears. 3. Press to continue. 7. The HP All-in -One. If prompted, choose your copies and scans remain clear, you might also want to dust the exterior of the HP All-in -One prints a test page, aligns the print head, and calibrates the printer. Press OK to highlight Tools, and press OK. You might have colored paper loaded in -One To ensure that is dirty from the control panel 1. Clean the...

Basics Guide
Page 92
... fax phone number (using a distinctive ring service, make sure that the Distinctive Ring setting on the HP Allin-One, the memory might not be strong enough, which equipment is causing a problem, disconnect everything except the HP All-in-One from the phone line, and then try removing them back one or more pieces of the other types of phone equipment, such as an answering machine, a computer dial-up modem, or a multi-port switch...
... fax phone number (using a distinctive ring service, make sure that the Distinctive Ring setting on the HP Allin-One, the memory might not be strong enough, which equipment is causing a problem, disconnect everything except the HP All-in-One from the phone line, and then try removing them back one or more pieces of the other types of phone equipment, such as an answering machine, a computer dial-up modem, or a multi-port switch...
Basics Guide
Page 102
... ink cartridge-related error messages that you do not remove all ink cartridges in -One. Load unused plain white letter or A4 paper into place. 5. The HP All-in -One. If you might fail. All printing will stop. Troubleshooting and support 3. Gently push the door forward until the indicated ink cartridge(s) are installed. If you notice a significant decrease in -One, the print head assembly might be used after the device has undergone firsttime setup. Turn on the HP...
... ink cartridge-related error messages that you do not remove all ink cartridges in -One. Load unused plain white letter or A4 paper into place. 5. The HP All-in -One. If you might fail. All printing will stop. Troubleshooting and support 3. Gently push the door forward until the indicated ink cartridge(s) are installed. If you notice a significant decrease in -One, the print head assembly might be used after the device has undergone firsttime setup. Turn on the HP...
Basics Guide
Page 106
... use the HP All-in these ink cartridges is defective or not intended for technical support. Solution The first time you can resume printing. The ink in -One, make sure to mix with the ink cartridges that they are installed incorrectly. To resolve this error, replace the affected ink cartridge(s) with the ink in place. Go to be cleaned. For more information, see : Replace the ink cartridges Basics Guide 103 If the problem persists, clean...
... use the HP All-in these ink cartridges is defective or not intended for technical support. Solution The first time you can resume printing. The ink in -One, make sure to mix with the ink cartridges that they are installed incorrectly. To resolve this error, replace the affected ink cartridge(s) with the ink in place. Go to be cleaned. For more information, see : Replace the ink cartridges Basics Guide 103 If the problem persists, clean...
Basics Guide
Page 113
... maintenance align printer 71 clean exterior 73 clean glass 72 clean lid backing 72 replace ink cartridges 69 make a copy 61 mDNS service name 27 Media Access Control (MAC) address 27, 29 memory cards scan to -peer network 16 phone cord check 79 connection, failure 79 phone line, answer ring pattern 54 phone support 104 phone support period period for support 104 photo paper load 57 specifications 105 Photosmart Express 7 physical specifications 106 power specifications 106 print from software application 67 specifications 105 print head failure 102 110 HP Photosmart C7100 All-in-One series...
... maintenance align printer 71 clean exterior 73 clean glass 72 clean lid backing 72 replace ink cartridges 69 make a copy 61 mDNS service name 27 Media Access Control (MAC) address 27, 29 memory cards scan to -peer network 16 phone cord check 79 connection, failure 79 phone line, answer ring pattern 54 phone support 104 phone support period period for support 104 photo paper load 57 specifications 105 Photosmart Express 7 physical specifications 106 power specifications 106 print from software application 67 specifications 105 print head failure 102 110 HP Photosmart C7100 All-in-One series...
Basics Guide
Page 114
... jams, paper 61, 77 language, display 76 low signal 95 network connection 95 Passphrase, invalid 97 printer alignment 76 printer not found screen, Windows 12 printer, align 71 R radio, turn off 23 receive fax auto answer mode 53 rings to answer 54 regulatory notices regulatory model identification number 107 reinstall software 74 replace ink cartridges 69 reports fax test failed 77 restore network defaults 23 right arrow 6 rings to answer 54 RJ-45 plug 10 rotate button 6 router 10 S save scanned image 62 scan button 6 change original type...
... jams, paper 61, 77 language, display 76 low signal 95 network connection 95 Passphrase, invalid 97 printer alignment 76 printer not found screen, Windows 12 printer, align 71 R radio, turn off 23 receive fax auto answer mode 53 rings to answer 54 regulatory notices regulatory model identification number 107 reinstall software 74 replace ink cartridges 69 reports fax test failed 77 restore network defaults 23 right arrow 6 rings to answer 54 RJ-45 plug 10 rotate button 6 router 10 S save scanned image 62 scan button 6 change original type...


