
HP Notebook Hard Drives & Solid State Drives Identifying, Preventing, Diagnosing and Recovering from Drive Failures Care and Mai
Page 6
Procedures for adding SATA drivers to RIS (Remote Installation Service) installation points include: Adding SATA drivers to installation CDs, building an image, and switching to SATA AHCI mode Using Sysprep with Serial ATA hard disk drives. Page 6 Intel Matrix Storage Manager Driver provides support for the SATA Advanced Host Controller (AHCI) Interface. Updates to the Intel Matrix Storage Manager driver are configured with Intel® Application Accelerator drivers. The Intel Matrix...
Procedures for adding SATA drivers to RIS (Remote Installation Service) installation points include: Adding SATA drivers to installation CDs, building an image, and switching to SATA AHCI mode Using Sysprep with Serial ATA hard disk drives. Page 6 Intel Matrix Storage Manager Driver provides support for the SATA Advanced Host Controller (AHCI) Interface. Updates to the Intel Matrix Storage Manager driver are configured with Intel® Application Accelerator drivers. The Intel Matrix...

Regulatory, Safety and Environmental Notices User Guide
Page 33
... not disassemble, crush, or puncture; User-replaceable battery notices WARNING! Do not assume it from HP should be used batteries according to block airflow. Keep the battery away from the computer. WARNING! WARNING! It describes proper workstation setup, posture, and health and work habits for notebook computers WARNING! The computer and the AC adapter comply with the computer. do not allow another hard...
... not disassemble, crush, or puncture; User-replaceable battery notices WARNING! Do not assume it from HP should be used batteries according to block airflow. Keep the battery away from the computer. WARNING! WARNING! It describes proper workstation setup, posture, and health and work habits for notebook computers WARNING! The computer and the AC adapter comply with the computer. do not allow another hard...

Regulatory, Safety and Environmental Notices User Guide
Page 37
... removing a battery, refer to temperatures higher than other headphones, even if the volume control setting is not handled properly. Contact a qualified Taiwanese recycler for extended durations can damage one's hearing. For your own safety, before re-energizing the equipment. Replace and secure the enclosure before using headsets or earphones, always reset the volume. Changing the default audio or equalizer settings might lead to HP...
... removing a battery, refer to temperatures higher than other headphones, even if the volume control setting is not handled properly. Contact a qualified Taiwanese recycler for extended durations can damage one's hearing. For your own safety, before re-energizing the equipment. Replace and secure the enclosure before using headsets or earphones, always reset the volume. Changing the default audio or equalizer settings might lead to HP...

Regulatory, Safety and Environmental Notices User Guide
Page 54
...device, including the mouse or keyboard. Power management allows a computer to 30 minutes (varies by the U.S. Brazil hardware recycling information Não descarte o produto eletrônico em lixo comum HEWLETT PACKARD BRASIL LTDA (HP) AV. Less than or equal to automatically enter a low power "sleep" mode, or other low power mode, after a defined period of inactivity. GALPÃO B-PARTE...http://www.hp.com.br/ reciclar ENERGY STAR® Certification (select models only) ENERGY STAR is supported by operating system product will exit sleep mode when user interacts with...
...device, including the mouse or keyboard. Power management allows a computer to 30 minutes (varies by the U.S. Brazil hardware recycling information Não descarte o produto eletrônico em lixo comum HEWLETT PACKARD BRASIL LTDA (HP) AV. Less than or equal to automatically enter a low power "sleep" mode, or other low power mode, after a defined period of inactivity. GALPÃO B-PARTE...http://www.hp.com.br/ reciclar ENERGY STAR® Certification (select models only) ENERGY STAR is supported by operating system product will exit sleep mode when user interacts with...

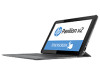
HP Pavilion x2 Detachable PC (model number 10-k0XX)
Page 7
... Studio Sound Audio codec ALC5642 HD webcam: 1/6-in (1280×800), Antiglare (AG), light-emitting diode (LED), WXGA, TouchScreen display panel Internal graphics: Intel 7th generation graphics and media encode/decode engine 2D/ 3D graphics Supports DX11, OpenGL 3.0 (OGL 3.0), OpenCL 1.2 (OCL 1.2), and OpenGLES 2.0 (OGLES 2.0) On-board; 1 Product description Category Product Name Processor Panel Graphics Memory Mass storage Audio and video Sensor Wireless networking External expansion Ports Keyboard Description HP Pavilion x2 Detachable PC (model number 10...
... Studio Sound Audio codec ALC5642 HD webcam: 1/6-in (1280×800), Antiglare (AG), light-emitting diode (LED), WXGA, TouchScreen display panel Internal graphics: Intel 7th generation graphics and media encode/decode engine 2D/ 3D graphics Supports DX11, OpenGL 3.0 (OGL 3.0), OpenCL 1.2 (OCL 1.2), and OpenGLES 2.0 (OGLES 2.0) On-board; 1 Product description Category Product Name Processor Panel Graphics Memory Mass storage Audio and video Sensor Wireless networking External expansion Ports Keyboard Description HP Pavilion x2 Detachable PC (model number 10...

HP Pavilion x2 Detachable PC (model number 10-k0XX)
Page 42
... the on -screen instructions. 4. Click your hard drive where the BIOS update is complete. NOTE: After a message on -screen instructions. During the download and installation, follow these steps: 1. The BIOS installation begins. 5. You will need this path when you recorded earlier, open the folder on your hard drive. 36 Chapter 6 Using Setup Utility (BIOS) and HP PC Hardware Diagnostics (UEFI) Complete the installation by unplugging the power cord from your tablet. Turn on your hard drive designation. 1.
... the on -screen instructions. 4. Click your hard drive where the BIOS update is complete. NOTE: After a message on -screen instructions. During the download and installation, follow these steps: 1. The BIOS installation begins. 5. You will need this path when you recorded earlier, open the folder on your hard drive. 36 Chapter 6 Using Setup Utility (BIOS) and HP PC Hardware Diagnostics (UEFI) Complete the installation by unplugging the power cord from your tablet. Turn on your hard drive designation. 1.
HP Pavilion x2 Detachable PC (model number 10-k0XX)
Page 43
... operating system. 5. In the Diagnostic section, click HP UEFI Support Environment. - Using HP PC Hardware Diagnostics (UEFI) 37 When the diagnostic tool opens, use the keyboard arrow keys to a USB device on the tablet, and then press f2. Provides access to http://hp.com/go/techcenter/pcdiags. 2. The BIOS searches three places for downloading HP PC Hardware Diagnostics (UEFI) are provided in the following order: a. There are two options to download HP...
... operating system. 5. In the Diagnostic section, click HP UEFI Support Environment. - Using HP PC Hardware Diagnostics (UEFI) 37 When the diagnostic tool opens, use the keyboard arrow keys to a USB device on the tablet, and then press f2. Provides access to http://hp.com/go/techcenter/pcdiags. 2. The BIOS searches three places for downloading HP PC Hardware Diagnostics (UEFI) are provided in the following order: a. There are two options to download HP...

HP Pavilion x2 Detachable PC (model number 10-k0XX)
Page 53
...plastic parts 15 serviceability, product description 2 Speaker Kit, spare part number 9, 12, 30 speakers location 4 removal 30 spare part number 9, 12, 30 system board removal 26 spare part numbers 9, 13, 26 T tablet major components 9 specifications 38 Thermal Material Kit, spare part number 9, 12, 26 tools required 15 top edge components 5 touch board, spare part number 13 transporting guidelines 17 U USB 3.0 port 7 V video, product description 1 volume button 7 W webcam light 4 webcam module removal 29 spare part number 9, 12, 29 webcam, location 4 Windows key 7 wireless networking, product...
...plastic parts 15 serviceability, product description 2 Speaker Kit, spare part number 9, 12, 30 speakers location 4 removal 30 spare part number 9, 12, 30 system board removal 26 spare part numbers 9, 13, 26 T tablet major components 9 specifications 38 Thermal Material Kit, spare part number 9, 12, 26 tools required 15 top edge components 5 touch board, spare part number 13 transporting guidelines 17 U USB 3.0 port 7 V video, product description 1 volume button 7 W webcam light 4 webcam module removal 29 spare part number 9, 12, 29 webcam, location 4 Windows key 7 wireless networking, product...

User Guide
Page 7
... 4 Locating hardware ...4 Locating software ...4 Right edge ...5 Left edge ...7 Display ...8 Top edge ...9 Bottom edge ...9 Labels ...10 Changing your tablet's settings ...11 Changing your tablet's view 11 Adjusting your tablet's autorotate lock 11 Adjusting your tablet's screen brightness 11 3 Using the keyboard base ...12 Keyboard base components ...12 Keys ...12 Lights ...13 Connecting the tablet to the keyboard base 14 Folding the keyboard base into a stand 14 4 Connecting to a network ...15 Connecting to a wireless network ...15 Using the wireless controls 15 Using operating system...
... 4 Locating hardware ...4 Locating software ...4 Right edge ...5 Left edge ...7 Display ...8 Top edge ...9 Bottom edge ...9 Labels ...10 Changing your tablet's settings ...11 Changing your tablet's view 11 Adjusting your tablet's autorotate lock 11 Adjusting your tablet's screen brightness 11 3 Using the keyboard base ...12 Keyboard base components ...12 Keys ...12 Lights ...13 Connecting the tablet to the keyboard base 14 Folding the keyboard base into a stand 14 4 Connecting to a network ...15 Connecting to a wireless network ...15 Using the wireless controls 15 Using operating system...

User Guide
Page 9
... display (All-in-Ones or Notebooks 38 Cleaning the sides or cover 38 Cleaning the TouchPad, keyboard, or mouse 38 Traveling with or shipping your tablet 38 9 Securing your tablet and information ...40 Using passwords ...40 Setting Windows passwords 41 Setting Setup Utility (BIOS) passwords 41 Using Internet security software ...41 Using antivirus software ...42 Using firewall software ...42 Installing software updates ...42 Installing critical security updates 42 Installing HP and third-party software updates 42 Securing your wireless network ...43 Backing up your software...
... display (All-in-Ones or Notebooks 38 Cleaning the sides or cover 38 Cleaning the TouchPad, keyboard, or mouse 38 Traveling with or shipping your tablet 38 9 Securing your tablet and information ...40 Using passwords ...40 Setting Windows passwords 41 Setting Setup Utility (BIOS) passwords 41 Using Internet security software ...41 Using antivirus software ...42 Using firewall software ...42 Installing software updates ...42 Installing critical security updates 42 Installing HP and third-party software updates 42 Securing your wireless network ...43 Backing up your software...

User Guide
Page 25
... each other Bluetooth-enabled devices such as airports, restaurants, coffee shops, hotels, and universities. Sharing data and drives and accessing software When your tablet is part of a network, you to set up a connection or network, connect to a network, and diagnose and repair network problems. To use operating system controls: 1. In a WLAN, the mobile wireless device in Help and Support. 4 Connecting to a network Your tablet can explore the globe and access information from the Start screen, type help, and...
... each other Bluetooth-enabled devices such as airports, restaurants, coffee shops, hotels, and universities. Sharing data and drives and accessing software When your tablet is part of a network, you to set up a connection or network, connect to a network, and diagnose and repair network problems. To use operating system controls: 1. In a WLAN, the mobile wireless device in Help and Support. 4 Connecting to a network Your tablet can explore the globe and access information from the Start screen, type help, and...
User Guide
Page 35
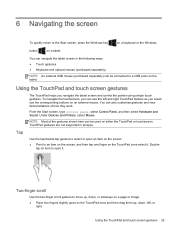
... the Start screen, type control panel, select Control Panel, and then select Hardware and Sound. Under Devices and Printers, select Mouse. Tap Use the tap/double-tap gesture to select or open it . TouchPad gestures are not supported in the following ways: ● Touch gestures ● Keyboard and optional mouse (purchased separately) NOTE: An external USB mouse (purchased separately) can navigate the tablet screen in all apps. Two-finger scroll Use the two-finger scroll gesture...
... the Start screen, type control panel, select Control Panel, and then select Hardware and Sound. Under Devices and Printers, select Mouse. Tap Use the tap/double-tap gesture to select or open it . TouchPad gestures are not supported in the following ways: ● Touch gestures ● Keyboard and optional mouse (purchased separately) NOTE: An external USB mouse (purchased separately) can navigate the tablet screen in all apps. Two-finger scroll Use the two-finger scroll gesture...
User Guide
Page 42
... Sleep in options. 4. From the Start screen, type power options, then select Power options. 2. In the When I press the power button area, select Hibernate. 5. Click Save changes. 32 Chapter 7 Managing power Click Save changes. Setting password protection on the keyboard. ● Tap or swipe the TouchPad. Select Settings, select PC Settings, and then select Change PC settings. 3. Click Change Settings that are currently unavailable. 4. When the tablet exits Hibernation, the power lights turn on wakeup, you must enter your work...
... Sleep in options. 4. From the Start screen, type power options, then select Power options. 2. In the When I press the power button area, select Hibernate. 5. Click Save changes. 32 Chapter 7 Managing power Click Save changes. Setting password protection on the keyboard. ● Tap or swipe the TouchPad. Select Settings, select PC Settings, and then select Change PC settings. 3. Click Change Settings that are currently unavailable. 4. When the tablet exits Hibernation, the power lights turn on wakeup, you must enter your work...
User Guide
Page 43
... of your battery should be easily replaced by users themselves. Finding battery information To monitor the status of the battery in HP Support Assistant. Tablet battery life varies, depending on power management settings, programs running on the tablet, screen brightness, external devices connected to a USB port. If Battery Check indicates that are not plugged into external power, the tablet runs on the Windows desktop, point over the power meter icon. ● To use Power Options, click the power meter...
... of your battery should be easily replaced by users themselves. Finding battery information To monitor the status of the battery in HP Support Assistant. Tablet battery life varies, depending on power management settings, programs running on the tablet, screen brightness, external devices connected to a USB port. If Battery Check indicates that are not plugged into external power, the tablet runs on the Windows desktop, point over the power meter icon. ● To use Power Options, click the power meter...

User Guide
Page 51
... Using Internet security software 41 Setting Windows passwords Password User password Administrator password Function Protects access to tablet contents. NOTE: If you enter the power-on password at the first password check, you must enter the administrator password to access Setup Utility (BIOS). ● Must be used to access email, a network, or the Internet, you cannot access Setup Utility (BIOS). To start Setup Utility (BIOS), turn on password is not revealed as a trial offer. NOTE: The administrator password can be entered each time you access Setup Utility (BIOS...
... Using Internet security software 41 Setting Windows passwords Password User password Administrator password Function Protects access to tablet contents. NOTE: If you enter the power-on password at the first password check, you must enter the administrator password to access Setup Utility (BIOS). ● Must be used to access email, a network, or the Internet, you cannot access Setup Utility (BIOS). To start Setup Utility (BIOS), turn on password is not revealed as a trial offer. NOTE: The administrator password can be entered each time you access Setup Utility (BIOS...

User Guide
Page 52
... tablet from the Start screen, type control panel, and then select Control Panel. Select System and Security, select Windows Update, select Change settings, and then follow the on your tablet and/or network, or it is strongly recommended that you upgrade the security software trial offer or purchase the software of your tablet. Installing HP and third-party software updates HP recommends that you regularly update the software and drivers that does not...
... tablet from the Start screen, type control panel, and then select Control Panel. Select System and Security, select Windows Update, select Change settings, and then follow the on your tablet and/or network, or it is strongly recommended that you upgrade the security software trial offer or purchase the software of your tablet. Installing HP and third-party software updates HP recommends that you regularly update the software and drivers that does not...

User Guide
Page 55
.... Turn on -screen instructions. 4. You may need to an optional power source. Connect an optional USB keyboard (purchased separately) to a network, consult the network administrator before installing any software updates, especially system BIOS updates. From the Start screen, type file, and then select File Explorer. 2. Click your BIOS, make a note of the path to the location on your selection to the tablet or an unsuccessful installation, download and install a BIOS update only when the tablet is downloaded. The BIOS installation begins...
.... Turn on -screen instructions. 4. You may need to an optional power source. Connect an optional USB keyboard (purchased separately) to a network, consult the network administrator before installing any software updates, especially system BIOS updates. From the Start screen, type file, and then select File Explorer. 2. Click your BIOS, make a note of the path to the location on your selection to the tablet or an unsuccessful installation, download and install a BIOS update only when the tablet is downloaded. The BIOS installation begins...
User Guide
Page 56
..., quickly press the Windows button on -screen instructions. b. Go to a USB device NOTE: Instructions for downloading HP PC Hardware Diagnostics (UEFI) are provided in the following order: a. Click the UEFI Download link, and then select Run. Click Download, and then select Run. 46 Chapter 10 Using Setup Utility (BIOS) and HP PC Hardware Diagnostics (UEFI) To start HP PC Hardware Diagnostics UEFI: 1. There are caused by the operating system or other software components. Using HP PC Hardware Diagnostics (UEFI) HP...
..., quickly press the Windows button on -screen instructions. b. Go to a USB device NOTE: Instructions for downloading HP PC Hardware Diagnostics (UEFI) are provided in the following order: a. Click the UEFI Download link, and then select Run. Click Download, and then select Run. 46 Chapter 10 Using Setup Utility (BIOS) and HP PC Hardware Diagnostics (UEFI) To start HP PC Hardware Diagnostics UEFI: 1. There are caused by the operating system or other software components. Using HP PC Hardware Diagnostics (UEFI) HP...
User Guide
Page 62
..., connecting 22, 24 HP and third-party software updates, installing 42 HP PC Hardware Diagnostics (UEFI) downloading 46 using 46 HP Recovery Manager correcting boot problems 49 HP Recovery media creating 47 recovery 49 HP resources 2 B backing up software and information 43 backups 47 battery discharging 33 low battery levels 34 battery information, finding 33 battery power 33 BIOS determining version 44 downloading an update 45 updating 44 Bluetooth device 15, 18 Bluetooth label 10 boot order changing 49 bottom 10 brightness adjusting 11 D deleted files restoring 48 Disk Cleanup software 37...
..., connecting 22, 24 HP and third-party software updates, installing 42 HP PC Hardware Diagnostics (UEFI) downloading 46 using 46 HP Recovery Manager correcting boot problems 49 HP Recovery media creating 47 recovery 49 HP resources 2 B backing up software and information 43 backups 47 battery discharging 33 low battery levels 34 battery information, finding 33 battery power 33 BIOS determining version 44 downloading an update 45 updating 44 Bluetooth device 15, 18 Bluetooth label 10 boot order changing 49 bottom 10 brightness adjusting 11 D deleted files restoring 48 Disk Cleanup software 37...
User Guide
Page 63
... 10 left-edge swipe TouchPad and touch screen gesture 27 lights caps lock 13 mute 13 locating information hardware 4 software 4 low battery level 34 M maintenance Disk Cleanup 37 memory card reader, identifying 5, 6, 20 memory card, identifying 5, 6 microphones, identifying 9 Miracast 24 mouse, external setting preferences 25 mute light, identifying 13 O one-finger slide touch screen gesture 27 operating environment 50 original system recovery 48 P passwords Setup Utility (BIOS) 41 Windows 41 pen holding 29 identifying 29 ports HDMI 5, 6, 20, 22 Miracast 24 USB 3.0 5, 6 power battery 33 power...
... 10 left-edge swipe TouchPad and touch screen gesture 27 lights caps lock 13 mute 13 locating information hardware 4 software 4 low battery level 34 M maintenance Disk Cleanup 37 memory card reader, identifying 5, 6, 20 memory card, identifying 5, 6 microphones, identifying 9 Miracast 24 mouse, external setting preferences 25 mute light, identifying 13 O one-finger slide touch screen gesture 27 operating environment 50 original system recovery 48 P passwords Setup Utility (BIOS) 41 Windows 41 pen holding 29 identifying 29 ports HDMI 5, 6, 20, 22 Miracast 24 USB 3.0 5, 6 power battery 33 power...


