
HP Notebook Hard Drives & Solid State Drives Identifying, Preventing, Diagnosing and Recovering from Drive Failures Care and Mai
Page 6
... Matrix Storage Technology driver HP offers the Intel Matrix Storage Manager driver for notebook PC models that are released to address known issues. Page 6 Procedures for adding SATA drivers to RIS (Remote Installation Service) installation points include: Adding SATA drivers to installation CDs, building an image, and switching to 150MB/sec transfer rate for disk traffic, and provides link power management with Serial ATA hard disk drives. The Intel...
... Matrix Storage Technology driver HP offers the Intel Matrix Storage Manager driver for notebook PC models that are released to address known issues. Page 6 Procedures for adding SATA drivers to RIS (Remote Installation Service) installation points include: Adding SATA drivers to installation CDs, building an image, and switching to 150MB/sec transfer rate for disk traffic, and provides link power management with Serial ATA hard disk drives. The Intel...
User Guide
Page 5
... to know your computer ...4 Finding your hardware and software information 4 Front ...4 Right side ...5 Left side ...7 Display ...8 Top ...9 TouchPad ...9 Lights ...10 Buttons and speakers ...11 Keys ...12 Bottom ...13 Labels ...14 3 Connecting to a network ...15 Connecting to a wireless network ...16 Using the wireless controls 16 Using the wireless button 16 Using HP Connection Manager (select models only 17 Using operating system controls 17 Using a WLAN ...17 Using an Internet service provider 17 Setting up a WLAN 18 Configuring a wireless router 18 Protecting your WLAN 18...
... to know your computer ...4 Finding your hardware and software information 4 Front ...4 Right side ...5 Left side ...7 Display ...8 Top ...9 TouchPad ...9 Lights ...10 Buttons and speakers ...11 Keys ...12 Bottom ...13 Labels ...14 3 Connecting to a network ...15 Connecting to a wireless network ...16 Using the wireless controls 16 Using the wireless button 16 Using HP Connection Manager (select models only 17 Using operating system controls 17 Using a WLAN ...17 Using an Internet service provider 17 Setting up a WLAN 18 Configuring a wireless router 18 Protecting your WLAN 18...
User Guide
Page 7
... 7 Managing and sharing information ...46 Using a USB device ...47 Connecting a USB device 47 Removing a USB device ...48 Connecting a powered USB device 48 Inserting and removing a digital storage card 49 Using optical drives ...50 Inserting an optical disc ...51 Removing an optical disc 52 Sharing drives on the network 53 8 Maintaining your computer ...54 Improving performance ...55 Handling drives ...55 Replacing a hard drive ...56 Using HP 3D DriveGuard (select models only 58 Using Disk Defragmenter 59 Using Disk Cleanup ...59 Adding or replacing memory modules 60 Updating programs...
... 7 Managing and sharing information ...46 Using a USB device ...47 Connecting a USB device 47 Removing a USB device ...48 Connecting a powered USB device 48 Inserting and removing a digital storage card 49 Using optical drives ...50 Inserting an optical disc ...51 Removing an optical disc 52 Sharing drives on the network 53 8 Maintaining your computer ...54 Improving performance ...55 Handling drives ...55 Replacing a hard drive ...56 Using HP 3D DriveGuard (select models only 58 Using Disk Defragmenter 59 Using Disk Cleanup ...59 Adding or replacing memory modules 60 Updating programs...

User Guide
Page 8
...68 Using firewall software ...68 Installing software updates ...69 Installing Windows security updates 69 Installing HP and third-party software updates 69 Securing your wireless network ...70 Backing up your software applications and information 70 Using an optional security cable lock 70 10 Using Setup Utility (BIOS) and System Diagnostics 71 Starting Setup Utility (BIOS) ...72 Updating the BIOS ...72 Determining the BIOS version 72 Downloading a BIOS update 73 Using System Diagnostics ...74 11 Backing up, restoring, and recovering ...75 Creating backups ...76 Creating recovery media...
...68 Using firewall software ...68 Installing software updates ...69 Installing Windows security updates 69 Installing HP and third-party software updates 69 Securing your wireless network ...70 Backing up your software applications and information 70 Using an optional security cable lock 70 10 Using Setup Utility (BIOS) and System Diagnostics 71 Starting Setup Utility (BIOS) ...72 Updating the BIOS ...72 Determining the BIOS version 72 Downloading a BIOS update 73 Using System Diagnostics ...74 11 Backing up, restoring, and recovering ...75 Creating backups ...76 Creating recovery media...

User Guide
Page 9
Changing the computer boot order 82 12 Specifications ...83 Input power ...83 Operating environment ...84 13 Troubleshooting and support ...85 Troubleshooting ...86 Disc drive problems ...86 Wireless connection problems 86 Cannot connect to a WLAN 87 Cannot connect to a preferred network 87 Current network security codes are unavailable 87 WLAN connection is very weak 88 Cannot connect to the wireless router 88 Network status icon is not displayed 88 Audio problems ...89 Power management problems 89 Resolving a low battery level 89 Resolving a low...
Changing the computer boot order 82 12 Specifications ...83 Input power ...83 Operating environment ...84 13 Troubleshooting and support ...85 Troubleshooting ...86 Disc drive problems ...86 Wireless connection problems 86 Cannot connect to a WLAN 87 Cannot connect to a preferred network 87 Current network security codes are unavailable 87 WLAN connection is very weak 88 Cannot connect to the wireless router 88 Network status icon is not displayed 88 Audio problems ...89 Power management problems 89 Resolving a low battery level 89 Resolving a low...

User Guide
Page 15
..., see Using a USB device on . ● Blinking white: The computer is in Hibernation. Connects a network cable. The computer shuts off power to the display and other unneeded components. ● Off: The computer is off or in the Sleep state, which is being accessed. ● Off: The optical drive is on page 47. Right side Component (1) (2) Optical drive Optical drive light (3) Optical drive eject button (4) Power light (5) Hard drive light (6) USB 2.0 port (7) RJ-45 (network) jack (8) Power connector...
..., see Using a USB device on . ● Blinking white: The computer is in Hibernation. Connects a network cable. The computer shuts off power to the display and other unneeded components. ● Off: The computer is off or in the Sleep state, which is being accessed. ● Off: The optical drive is on page 47. Right side Component (1) (2) Optical drive Optical drive light (3) Optical drive eject button (4) Power light (5) Hard drive light (6) USB 2.0 port (7) RJ-45 (network) jack (8) Power connector...
User Guide
Page 27
... using HP Connection Manager, see the HP Connection Manager software Help. To use the WLAN device in the notification area, at the far right of hardware or software. HP Connection Manager allows you to a WLAN infrastructure (provided through a service provider or a public or corporate network). Using a WLAN With a WLAN device, you are setting up Internet access in a safe place. NOTE: Your ISP will help set up the modem, install a network cable to connect your wireless computer to use operating system controls, select Start > Control Panel > Network...
... using HP Connection Manager, see the HP Connection Manager software Help. To use the WLAN device in the notification area, at the far right of hardware or software. HP Connection Manager allows you to a WLAN infrastructure (provided through a service provider or a public or corporate network). Using a WLAN With a WLAN device, you are setting up Internet access in a safe place. NOTE: Your ISP will help set up the modem, install a network cable to connect your wireless computer to use operating system controls, select Start > Control Panel > Network...

User Guide
Page 32
...) Webcam light Speakers (2) USB 2.0 port Optical drive b key Integrated subwoofer fn key Audio-out (headphone) jack Audio-in (microphone) jack USB 3.0 ports (2) HDMI port External monitor port Description On: The webcam is an enhanced audio feature that provides a deep, controlled bass while maintaining a clear sound. Connects an optional USB device. Beats Audio is enabled by selecting Start > Control Panel > Hardware and Sound > Beats Audio Control Panel. For additional safety information, see Using a USB device on page 47. Produce sound. WARNING! Connects an optional computer...
...) Webcam light Speakers (2) USB 2.0 port Optical drive b key Integrated subwoofer fn key Audio-out (headphone) jack Audio-in (microphone) jack USB 3.0 ports (2) HDMI port External monitor port Description On: The webcam is an enhanced audio feature that provides a deep, controlled bass while maintaining a clear sound. Connects an optional USB device. Beats Audio is enabled by selecting Start > Control Panel > Hardware and Sound > Beats Audio Control Panel. For additional safety information, see Using a USB device on page 47. Produce sound. WARNING! Connects an optional computer...

User Guide
Page 35
...'s instructions if you have a video graphics array (VGA) port, which allows you to connect a high-definition monitor or TV. Using video Your HP computer is connected to the correct port on the computer, using the correct cable. To enhance your computer, without needing to the computer's VGA port. IMPORTANT: Be sure that the external device is a powerful video device that enables you press f4, the display state changes. Using video 25 To connect a monitor or projector: 1. Connect...
...'s instructions if you have a video graphics array (VGA) port, which allows you to connect a high-definition monitor or TV. Using video Your HP computer is connected to the correct port on the computer, using the correct cable. To enhance your computer, without needing to the computer's VGA port. IMPORTANT: Be sure that the external device is a powerful video device that enables you press f4, the display state changes. Using video 25 To connect a monitor or projector: 1. Connect...
User Guide
Page 39
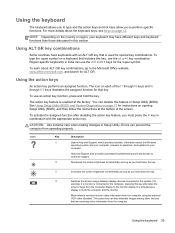
... to a simultaneous display on page 71 for special key combinations. CAUTION: Use extreme care when making changes in Setup Utility (BIOS). Help and Support also provides automated troubleshooting tools and access to the system. This action key can prevent the computer from the computer display to the monitor display to perform specific functions. f2 Decreases the screen brightness incrementally as long as you hold the key. Using the keyboard 29 For more...
... to a simultaneous display on page 71 for special key combinations. CAUTION: Use extreme care when making changes in Setup Utility (BIOS). Help and Support also provides automated troubleshooting tools and access to the system. This action key can prevent the computer from the computer display to the monitor display to perform specific functions. f2 Decreases the screen brightness incrementally as long as you hold the key. Using the keyboard 29 For more...

User Guide
Page 52
...; If Hibernation is disabled, and the computer is not being used or charged. ● Turn off wireless devices when you are not using them. ● Disconnect unused external devices that you are not plugged into an external power source, such as an external hard drive connected to maximize battery life ● Information on battery types, specifications, life cycles, and capacity To access battery information, select Start > Help and Support > Learn > Power Plans: Frequently Asked...
...; If Hibernation is disabled, and the computer is not being used or charged. ● Turn off wireless devices when you are not using them. ● Disconnect unused external devices that you are not plugged into an external power source, such as an external hard drive connected to maximize battery life ● Information on battery types, specifications, life cycles, and capacity To access battery information, select Start > Help and Support > Learn > Power Plans: Frequently Asked...

User Guide
Page 55
... immediately available to replace the battery or access components inside the computer ● When you are unable to a USB or video port ● When the computer will be unused and disconnected from external power. ● On models with a user-replaceable battery, remove the battery. Select Start > Shut down . You do not have to wait while updates are connecting an external hardware device that does not connect to use the Windows Shut down the...
... immediately available to replace the battery or access components inside the computer ● When you are unable to a USB or video port ● When the computer will be unused and disconnected from external power. ● On models with a user-replaceable battery, remove the battery. Select Start > Shut down . You do not have to wait while updates are connecting an external hardware device that does not connect to use the Windows Shut down the...

User Guide
Page 69
... to free up disk space and help the computer run more efficiently. Select Start > All Programs > Accessories > System Tools > Disk Defragmenter. 3. Follow the on -screen instructions. Disk Defragmenter consolidates (or physically reorganizes) the fragmented files and folders on your drive is not necessary to AC power. 2. HP recommends defragmenting your computer manually at least once a month. A fragmented drive means data on the hard drive...
... to free up disk space and help the computer run more efficiently. Select Start > All Programs > Accessories > System Tools > Disk Defragmenter. 3. Follow the on -screen instructions. Disk Defragmenter consolidates (or physically reorganizes) the fragmented files and folders on your drive is not necessary to AC power. 2. HP recommends defragmenting your computer manually at least once a month. A fragmented drive means data on the hard drive...

User Guide
Page 76
... passwords can be set in Windows or in the HP Setup Utility (BIOS) that is preinstalled on the computer. ● When creating passwords, follow requirements set up and recover files. ● Manage passwords, user accounts, and parental controls. ● Maintain your computer and install the latest HP and Windows updates. You may find it in a file on your computer. Several types of passwords can be set. Use the following security tasks: ● Set up Internet...
... passwords can be set in Windows or in the HP Setup Utility (BIOS) that is preinstalled on the computer. ● When creating passwords, follow requirements set up and recover files. ● Manage passwords, user accounts, and parental controls. ● Maintain your computer and install the latest HP and Windows updates. You may find it in a file on your computer. Several types of passwords can be set. Use the following security tasks: ● Set up Internet...

User Guide
Page 77
...A power-on -screen instructions. Use the arrow keys to access Setup Utility (BIOS) contents. Setting Setup Utility (BIOS) passwords Password Administrator password Power-on password Function ● Must be used to select Security, and then follow the on password is not displayed as it is displayed in Setup Utility (BIOS): 1. To set , entered, changed , or deleted. Use the arrow keys and follow the on password in the lower-left corner of the screen, press esc. 2. Open Setup Utility (BIOS) by turning on page 39 for Startup Menu" message is displayed...
...A power-on -screen instructions. Use the arrow keys to access Setup Utility (BIOS) contents. Setting Setup Utility (BIOS) passwords Password Administrator password Power-on password Function ● Must be used to select Security, and then follow the on password is not displayed as it is displayed in Setup Utility (BIOS): 1. To set , entered, changed , or deleted. Use the arrow keys and follow the on password in the lower-left corner of the screen, press esc. 2. Open Setup Utility (BIOS) by turning on page 39 for Startup Menu" message is displayed...

User Guide
Page 83
... locate the update later, after the download is downloaded. Follow the on your hard drive. Make a note of the path to the location on -screen instructions to download your computer to a network, consult the network administrator before installing any device, cable, or cord. 1. If no instructions are ready to install the update. The hard drive designation is connected to reliable external power using the AC adapter. Using the hard drive path you recorded earlier, open the folder on -screen instructions. The BIOS installation begins. 5. Updating...
... locate the update later, after the download is downloaded. Follow the on your hard drive. Make a note of the path to the location on -screen instructions to download your computer to a network, consult the network administrator before installing any device, cable, or cord. 1. If no instructions are ready to install the update. The hard drive designation is connected to reliable external power using the AC adapter. Using the hard drive path you recorded earlier, open the folder on -screen instructions. The BIOS installation begins. 5. Updating...

User Guide
Page 98
A list showing the available WLANs is displayed. A Windows "Device not Found" error message may also be displayed. Select Start > Control Panel > Network and Internet > Network and Sharing Center. 2. Click OK to reestablish all connection values: 1. Click a network, and then click Remove. Click the Security tab and enter the correct wireless encryption data into the Network security key box. 5. If the connection does not improve, try forcing the device to save these settings. Select...
A list showing the available WLANs is displayed. A Windows "Device not Found" error message may also be displayed. Select Start > Control Panel > Network and Internet > Network and Sharing Center. 2. Click OK to reestablish all connection values: 1. Click a network, and then click Remove. Click the Security tab and enter the correct wireless encryption data into the Network security key box. 5. If the connection does not improve, try forcing the device to save these settings. Select...

User Guide
Page 103
... battery temperature 43 Beats Audio 12, 22, 24 Beats Audio Control Panel 24 Beats Audio hot key 24 BIOS determining version 72 downloading an update 73 updating 72 Bluetooth device 16 Bluetooth label 14 boot order changing 82 buttons left TouchPad 9, 31 optical drive eject 5 power 11 right TouchPad 9, 31 C cables USB 47 caps lock light, identifying 10 caring for your computer 63 Certificate of Authenticity label 14 checking audio functions 24 cleaning your computer 63 components bottom 13 display...
... battery temperature 43 Beats Audio 12, 22, 24 Beats Audio Control Panel 24 Beats Audio hot key 24 BIOS determining version 72 downloading an update 73 updating 72 Bluetooth device 16 Bluetooth label 14 boot order changing 82 buttons left TouchPad 9, 31 optical drive eject 5 power 11 right TouchPad 9, 31 C cables USB 47 caps lock light, identifying 10 caring for your computer 63 Certificate of Authenticity label 14 checking audio functions 24 cleaning your computer 63 components bottom 13 display...

User Guide
Page 104
...69 HP Connection Manager software 17 HP Recovery Manager 81 hubs 47 I input power 83 installing critical security updates 69 optional security cable lock 70 integrated webcam light, identifying 8, 21 Intel Wireless Display 27 internal microphones, identifying 8, 21 Internet connection setup 18 Internet security software, using 68 J jacks audio-in (microphone) 7 audio-out (headphone) 7 network 5 RJ-45 (network) 5 K keys action 12 b 12, 22 esc 12 fn 12, 22 Windows applications 12 Windows logo 12 L labels Bluetooth 14 Microsoft Certificate of Authenticity 14 regulatory 14 serial number 14 service...
...69 HP Connection Manager software 17 HP Recovery Manager 81 hubs 47 I input power 83 installing critical security updates 69 optional security cable lock 70 integrated webcam light, identifying 8, 21 Intel Wireless Display 27 internal microphones, identifying 8, 21 Internet connection setup 18 Internet security software, using 68 J jacks audio-in (microphone) 7 audio-out (headphone) 7 network 5 RJ-45 (network) 5 K keys action 12 b 12, 22 esc 12 fn 12, 22 Windows applications 12 Windows logo 12 L labels Bluetooth 14 Microsoft Certificate of Authenticity 14 regulatory 14 serial number 14 service...
User Guide
Page 105
... 89 troubleshooting; S scrolling TouchPad gesture 34 security cable lock, installing 70 security cable slot, identifying 6 security, wireless 18 serial number 14 serial number, computer 14 service labels locating 14 setting password protection on wakeup 39 setup of WLAN 18 Setup Utility (BIOS) passwords 67 shutdown 45 Sleep exiting 38 initiating 38 slots Digital Media 4 security cable 6 software CyberLink PowerDVD 27 Disk Cleanup 59 Disk Defragmenter 59 HP Connection Manager 17 software updates, installing 69 speakers, identifying 22 storing a battery 43 subwoofer, identifying 13, 22 supported...
... 89 troubleshooting; S scrolling TouchPad gesture 34 security cable lock, installing 70 security cable slot, identifying 6 security, wireless 18 serial number 14 serial number, computer 14 service labels locating 14 setting password protection on wakeup 39 setup of WLAN 18 Setup Utility (BIOS) passwords 67 shutdown 45 Sleep exiting 38 initiating 38 slots Digital Media 4 security cable 6 software CyberLink PowerDVD 27 Disk Cleanup 59 Disk Defragmenter 59 HP Connection Manager 17 software updates, installing 69 speakers, identifying 22 storing a battery 43 subwoofer, identifying 13, 22 supported...


