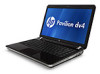

HP Notebook Reference Guide - Windows 7
Page 7
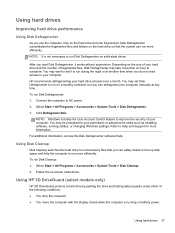
... a USB device ...32 Using 1394 devices (select models only 32 Connecting a 1394 device 32 Removing a 1394 device 33 Using an eSATA device (select models only 33 Connecting an eSATA device 33 Removing an eSATA device 34 Using optional external devices ...34 Using optional external drives 34 Using the expansion port (select models only 34 6 Drives ...36 Handling drives ...36 Using hard drives ...37 Improving hard drive performance 37 Using Disk Defragmenter 37 Using Disk Cleanup 37 Using HP 3D DriveGuard (select models only 37 Identifying HP 3D DriveGuard status 38 Managing power...
... a USB device ...32 Using 1394 devices (select models only 32 Connecting a 1394 device 32 Removing a 1394 device 33 Using an eSATA device (select models only 33 Connecting an eSATA device 33 Removing an eSATA device 34 Using optional external devices ...34 Using optional external drives 34 Using the expansion port (select models only 34 6 Drives ...36 Handling drives ...36 Using hard drives ...37 Improving hard drive performance 37 Using Disk Defragmenter 37 Using Disk Cleanup 37 Using HP 3D DriveGuard (select models only 37 Identifying HP 3D DriveGuard status 38 Managing power...
HP Notebook Reference Guide - Windows 7
Page 17
.... Close the display. 3. Remove the battery. 6. Press in Hibernation, turn the computer on by pressing the power button. Reconnect external power and external devices. 9. Disconnect all external devices connected to the SIM slot on the computer. Unplug the power cord from the AC outlet. 5. If a SIM is not replaced. 8. CAUTION: When inserting a SIM, position the card to match the icon next to the computer. 4. GPS satellites deliver location, speed...
.... Close the display. 3. Remove the battery. 6. Press in Hibernation, turn the computer on by pressing the power button. Reconnect external power and external devices. 9. Disconnect all external devices connected to the SIM slot on the computer. Unplug the power cord from the AC outlet. 5. If a SIM is not replaced. 8. CAUTION: When inserting a SIM, position the card to match the icon next to the computer. 4. GPS satellites deliver location, speed...
HP Notebook Reference Guide - Windows 7
Page 28
... Sleep state or in the sequence provided: ● Press ctrl+alt+delete, and then click the Power button. ● Press and hold the power button for at least 5 seconds. ● Disconnect the computer from external power and remove the battery. 18 Chapter 4 Power management Select Start > Shut down . If the computer is unresponsive and you are connecting an external hardware device that does not connect to a USB or video port...
... Sleep state or in the sequence provided: ● Press ctrl+alt+delete, and then click the Power button. ● Press and hold the power button for at least 5 seconds. ● Disconnect the computer from external power and remove the battery. 18 Chapter 4 Power management Select Start > Shut down . If the computer is unresponsive and you are connecting an external hardware device that does not connect to a USB or video port...
HP Notebook Reference Guide - Windows 7
Page 29
... Sleep: ● Briefly press the power button. ● If the display is initiated, the power lights blink and the screen clears. When Sleep is closed, open the display. ● Press a key on the keyboard. ● Tap or swipe the TouchPad. Your work is saved to memory, letting you must enter your Windows password before your work is set at the factory to initiate Hibernation after a period of inactivity when running on battery power or on external power...
... Sleep: ● Briefly press the power button. ● If the display is initiated, the power lights blink and the screen clears. When Sleep is closed, open the display. ● Press a key on the keyboard. ● Tap or swipe the TouchPad. Your work is saved to memory, letting you must enter your Windows password before your work is set at the factory to initiate Hibernation after a period of inactivity when running on battery power or on external power...

HP Notebook Reference Guide - Windows 7
Page 35
... display brightness is automatically decreased to charge. ● If the computer is not charging properly or when the battery storage capacity has reached a weak condition. External AC power is possibly covered by HP, or a compatible AC adapter purchased from HP. Connect the computer to the Regulatory, Safety and Environmental Notices for more . Replacing the battery In Windows 7, Battery Check in the computer box. WARNING! do not disassemble...
... display brightness is automatically decreased to charge. ● If the computer is not charging properly or when the battery storage capacity has reached a weak condition. External AC power is possibly covered by HP, or a compatible AC adapter purchased from HP. Connect the computer to the Regulatory, Safety and Environmental Notices for more . Replacing the battery In Windows 7, Battery Check in the computer box. WARNING! do not disassemble...

HP Notebook Reference Guide - Windows 7
Page 44
... unresponsive system, use , refer to safely remove the device. 1. NOTE: HP external USB optical drives should be connected to the equipment when connecting a powered device, be sure that additional ports and connectors can be added by connecting the drive to the computer. 2. Using optional external devices NOTE: For more information about required software and drivers, or to learn which computer port to use the following types: ● 1.44-megabyte diskette drive ● Hard drive module (a hard drive with the device. 2. CAUTION...
... unresponsive system, use , refer to safely remove the device. 1. NOTE: HP external USB optical drives should be connected to the equipment when connecting a powered device, be sure that additional ports and connectors can be added by connecting the drive to the computer. 2. Using optional external devices NOTE: For more information about required software and drivers, or to learn which computer port to use the following types: ● 1.44-megabyte diskette drive ● Hard drive module (a hard drive with the device. 2. CAUTION...
HP Notebook Reference Guide - Windows 7
Page 47
... on -screen instructions. You may be prompted for tasks such as installing software, running on the hard drive become fragmented. HP recommends defragmenting your permission or password for your hard drive at any time. Using HP 3D DriveGuard (select models only) HP 3D DriveGuard protects a hard drive by parking the drive and halting data requests under either of fragmented files, Disk Defragmenter may set it works without supervision. Select Start > All...
... on -screen instructions. You may be prompted for tasks such as installing software, running on the hard drive become fragmented. HP recommends defragmenting your permission or password for your hard drive at any time. Using HP 3D DriveGuard (select models only) HP 3D DriveGuard protects a hard drive by parking the drive and halting data requests under either of fragmented files, Disk Defragmenter may set it works without supervision. Select Start > All...
HP Notebook Reference Guide - Windows 7
Page 54
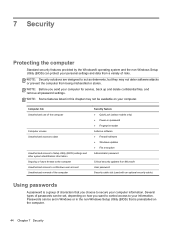
...; Windows updates ● File encryption Administrator password Critical security updates from Microsoft User password Security cable slot (used with an optional security cable) Using passwords A password is preinstalled on the computer. 44 Chapter 7 Security 7 Security Protecting the computer Standard security features provided by the Windows® operating system and the non-Windows Setup Utility (BIOS) can protect your computer information. Several types of risks. Passwords can be set , depending on your computer for service...
...; Windows updates ● File encryption Administrator password Critical security updates from Microsoft User password Security cable slot (used with an optional security cable) Using passwords A password is preinstalled on the computer. 44 Chapter 7 Security 7 Security Protecting the computer Standard security features provided by the Windows® operating system and the non-Windows Setup Utility (BIOS) can protect your computer information. Several types of risks. Passwords can be set , depending on your computer for service...
HP Notebook Reference Guide - Windows 7
Page 55
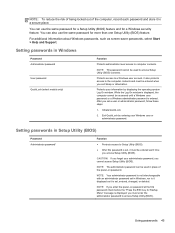
... access Setup Utility (BIOS). Exit QuickLock by displaying the operating system Log On window. NOTE: Your administrator password is not interchangeable with an administrator password set , it must be used to access Setup Utility (BIOS) contents. NOTE: If you enter the power-on password. CAUTION: If you forget your Windows user or administrator password. Using passwords 45 Setting passwords in Windows, nor is it displayed as screen-saver passwords, select Start > Help and Support. After you access Setup Utility (BIOS). NOTE: The administrator password can also use...
... access Setup Utility (BIOS). Exit QuickLock by displaying the operating system Log On window. NOTE: Your administrator password is not interchangeable with an administrator password set , it must be used to access Setup Utility (BIOS) contents. NOTE: If you enter the power-on password. CAUTION: If you forget your Windows user or administrator password. Using passwords 45 Setting passwords in Windows, nor is it displayed as screen-saver passwords, select Start > Help and Support. After you access Setup Utility (BIOS). NOTE: The administrator password can also use...
HP Notebook Reference Guide - Windows 7
Page 61
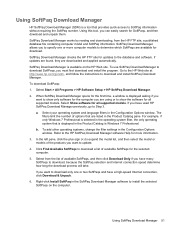
... you are available for all supported models. Refer to download and install SoftPaq Download Manager. SoftPaq Download Manager works by reading and downloading, from the list of options that are downloaded and applied automatically. Select Start > All Programs > HP Software Setup > HP SoftPaq Download Manager. 2. a. Select from the HP FTP site, a published database file containing computer model and SoftPaq information. When SoftPaq Download Manager opens for the first time, a window is displayed asking if you to specify...
... you are available for all supported models. Refer to download and install SoftPaq Download Manager. SoftPaq Download Manager works by reading and downloading, from the list of options that are downloaded and applied automatically. Select Start > All Programs > HP Software Setup > HP SoftPaq Download Manager. 2. a. Select from the HP FTP site, a published database file containing computer model and SoftPaq information. When SoftPaq Download Manager opens for the first time, a window is displayed asking if you to specify...
HP Notebook Reference Guide - Windows 7
Page 63
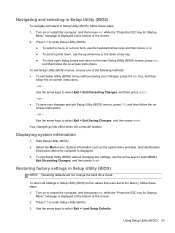
Start Setup Utility (BIOS). 2. To return all settings in Setup Utility (BIOS) to select Exit > Exit Saving Changes, and then press enter. Select the Main menu. Using Setup Utility (BIOS) 53 Turn on -screen instructions. or - Use the arrow keys to the values that were set at the bottom of the screen. 2. To exit Setup Utility (BIOS) without saving your changes and exit Setup Utility (BIOS) menus, press f10, and then follow the onscreen instructions. - Restoring factory settings in Setup Utility (BIOS), follow these steps: 1. Turn on -screen instructions. - Use the...
Start Setup Utility (BIOS). 2. To return all settings in Setup Utility (BIOS) to select Exit > Exit Saving Changes, and then press enter. Select the Main menu. Using Setup Utility (BIOS) 53 Turn on -screen instructions. or - Use the arrow keys to the values that were set at the bottom of the screen. 2. To exit Setup Utility (BIOS) without saving your changes and exit Setup Utility (BIOS) menus, press f10, and then follow the onscreen instructions. - Restoring factory settings in Setup Utility (BIOS), follow these steps: 1. Turn on -screen instructions. - Use the...
HP Notebook Reference Guide - Windows 7
Page 65
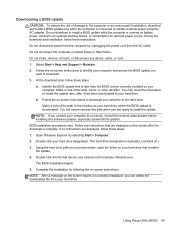
... your computer. Complete the installation by selecting Start > Computer. 2. You may need to access this information to download your hard drive designation. Open Windows Explorer by following the on battery power, docked in an optional docking device, or connected to reliable external power using the AC adapter. Using Setup Utility (BIOS) 55 Follow the on-screen instructions to locate the update later, after the download is later than the BIOS version currently installed on your hard drive. NOTE: If you can...
... your computer. Complete the installation by selecting Start > Computer. 2. You may need to access this information to download your hard drive designation. Open Windows Explorer by following the on battery power, docked in an optional docking device, or connected to reliable external power using the AC adapter. Using Setup Utility (BIOS) 55 Follow the on-screen instructions to locate the update later, after the download is later than the BIOS version currently installed on your hard drive. NOTE: If you can...
HP Notebook Reference Guide - Windows 7
Page 71
...displaying remaining charge 23 disposing 25 low battery levels 23 replacing 25 storing 24 Battery Check 22 battery information, finding 22 battery power 22 battery temperature 24 BIOS determining version 54 downloading an update 55 updating 54 Bluetooth device 2, 8 buttons media 13 power 18 volume 14 C cables 1394 32 eSATA 33 USB 31 checking audio functions 14 computer, traveling 24, 57 configuring audio for HDMI 17 configuring ExpressCards 28 connecting to a wired network 8 connecting to an existing wireless network 4 Connection Manager 3 conservation, power 24 creating a wireless connection...
...displaying remaining charge 23 disposing 25 low battery levels 23 replacing 25 storing 24 Battery Check 22 battery information, finding 22 battery power 22 battery temperature 24 BIOS determining version 54 downloading an update 55 updating 54 Bluetooth device 2, 8 buttons media 13 power 18 volume 14 C cables 1394 32 eSATA 33 USB 31 checking audio functions 14 computer, traveling 24, 57 configuring audio for HDMI 17 configuring ExpressCards 28 connecting to a wired network 8 connecting to an existing wireless network 4 Connection Manager 3 conservation, power 24 creating a wireless connection...
HP Notebook Reference Guide - Windows 7
Page 72
...9 connecting a modem cable adapter 9 selecting a location setting 10 N network cable, connecting 11 network icon 2 O operating system controls 4 optical disc inserting 39 removing 40 optical drive 34 optional external devices, using 34 P passwords set in Setup Utility (BIOS) 45 set in Windows 45 ports DisplayPort 15 expansion 34 external monitor 15 HDMI 16 Intel Wireless Display 17 VGA 15 power battery 22 conserving 24 options 19 power button 18 power meter 20 power plans customizing 21 selecting 20 viewing current 20 power switch 18 power-on password creating 47 entering 47 managing 47 power...
...9 connecting a modem cable adapter 9 selecting a location setting 10 N network cable, connecting 11 network icon 2 O operating system controls 4 optical disc inserting 39 removing 40 optical drive 34 optional external devices, using 34 P passwords set in Setup Utility (BIOS) 45 set in Windows 45 ports DisplayPort 15 expansion 34 external monitor 15 HDMI 16 Intel Wireless Display 17 VGA 15 power battery 22 conserving 24 options 19 power button 18 power meter 20 power plans customizing 21 selecting 20 viewing current 20 power switch 18 power-on password creating 47 entering 47 managing 47 power...

HP Notebook Hard Drives & Solid State Drives Identifying, Preventing, Diagnosing and Recovering from Drive Failures Care and Mai
Page 6
... Manager Driver provides support for disk traffic, and provides link power management with Serial ATA hard disk drives. Updates to the Intel Matrix Storage Manager driver are configured with SATA in AHCI or NATIVE mode Adding SATA drivers using WinPE can be located at the following URL: http://bizsupport2.austin.hp.com/bc/docs/support/SupportManual/c01600726/c01600726.pdf. Page 6 Intel Matrix Storage Technology driver HP offers the Intel Matrix Storage Manager driver for notebook PC models...
... Manager Driver provides support for disk traffic, and provides link power management with Serial ATA hard disk drives. Updates to the Intel Matrix Storage Manager driver are configured with SATA in AHCI or NATIVE mode Adding SATA drivers using WinPE can be located at the following URL: http://bizsupport2.austin.hp.com/bc/docs/support/SupportManual/c01600726/c01600726.pdf. Page 6 Intel Matrix Storage Technology driver HP offers the Intel Matrix Storage Manager driver for notebook PC models...

Getting Started Hp Notebook - Windows 7
Page 16
... is off during routine operation. Connects an optional video or audio device, such as a deterrent, but it may not prevent the computer from being accessed. ● Amber: HP 3D DriveGuard has temporarily parked the hard drive. Left side Component (1) Security cable slot (2) Vents (2) (3) External monitor port (4) RJ-45 (network) jack (5) HDMI port (6) USB ports (2) (7) Power light (8) Hard drive light Description Attaches an optional security cable to know your computer NOTE: For information on . ● Blinking white: The computer is...
... is off during routine operation. Connects an optional video or audio device, such as a deterrent, but it may not prevent the computer from being accessed. ● Amber: HP 3D DriveGuard has temporarily parked the hard drive. Left side Component (1) Security cable slot (2) Vents (2) (3) External monitor port (4) RJ-45 (network) jack (5) HDMI port (6) USB ports (2) (7) Power light (8) Hard drive light Description Attaches an optional security cable to know your computer NOTE: For information on . ● Blinking white: The computer is...
Getting Started Hp Notebook - Windows 7
Page 27
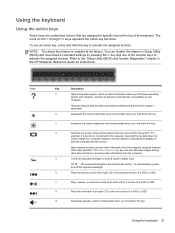
... external VGA video standard. Refer to the "Setup Utility (BIOS) and System Diagnostics" chapter in Setup Utility (BIOS) and revert back to standard settings by pressing the fn key and one of a DVD or a BD. f3 Increases the screen brightness level incrementally when you hold this key. The switch screen image key can disable this key. Using the keyboard Using the action keys Action keys are customized actions that are assigned to specific keys at the factory...
... external VGA video standard. Refer to the "Setup Utility (BIOS) and System Diagnostics" chapter in Setup Utility (BIOS) and revert back to standard settings by pressing the fn key and one of a DVD or a BD. f3 Increases the screen brightness level incrementally when you hold this key. The switch screen image key can disable this key. Using the keyboard Using the action keys Action keys are customized actions that are assigned to specific keys at the factory...

Getting Started Hp Notebook - Windows 7
Page 28
... can use an external USB mouse (purchased separately) by connecting it to one finger across the TouchPad in Windows to customize settings for pointing devices, such as button configuration, click speed, and pointer options. Using pointing devices NOTE: In addition to go. Use the left and right TouchPad buttons like the buttons on or off. To access Mouse Properties, select Start > Devices and Printers. Using the TouchPad NOTE: The TouchPad on the computer. Setting pointing device preferences Use Mouse...
... can use an external USB mouse (purchased separately) by connecting it to one finger across the TouchPad in Windows to customize settings for pointing devices, such as button configuration, click speed, and pointer options. Using pointing devices NOTE: In addition to go. Use the left and right TouchPad buttons like the buttons on or off. To access Mouse Properties, select Start > Devices and Printers. Using the TouchPad NOTE: The TouchPad on the computer. Setting pointing device preferences Use Mouse...
Getting Started Hp Notebook - Windows 7
Page 45
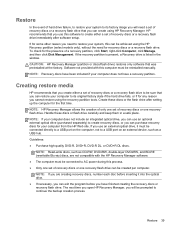
... original factory state if the hard drive fails, or if for the presence of recovery discs or a recovery flash drive immediately after setting up the computer for recovery discs or a recovery flash drive. Create these discs or flash drive carefully and keep them in the window. If the recovery partition is present, a Recovery drive is listed in a safe place. NOTE: If you have a recovery partition. CAUTION: HP Recovery Manager (partition or discs/flash drive) restores only software that you use an external optical drive, it must be connected directly to a USB port...
... original factory state if the hard drive fails, or if for the presence of recovery discs or a recovery flash drive immediately after setting up the computer for recovery discs or a recovery flash drive. Create these discs or flash drive carefully and keep them in the window. If the recovery partition is present, a Recovery drive is listed in a safe place. NOTE: If you have a recovery partition. CAUTION: HP Recovery Manager (partition or discs/flash drive) restores only software that you use an external optical drive, it must be connected directly to a USB port...
Getting Started Hp Notebook - Windows 7
Page 55
... 12 display 11 front 8 left side 10 right side 9 top 4 connector, power 9 D DC plug of external HP power supply 47 Digital Media Slot, identifying 8 E esc key, identifying 7 external monitor port 10 F f11 40 fn key, identifying 7 H hard drive installing 32 removing 30 hard drive bay, identifying 13 hard drive light 10 HDMI port, identifying 10 headphone (audio-out) jack 9 HP Recovery Manager 40 I input power 47 integrated webcam light, identifying 11 internal microphones, identifying 11 Internet connection setup 18 ISP, using 17 J jacks audio-in (microphone) 9 audio-out (headphone) 9 network...
... 12 display 11 front 8 left side 10 right side 9 top 4 connector, power 9 D DC plug of external HP power supply 47 Digital Media Slot, identifying 8 E esc key, identifying 7 external monitor port 10 F f11 40 fn key, identifying 7 H hard drive installing 32 removing 30 hard drive bay, identifying 13 hard drive light 10 HDMI port, identifying 10 headphone (audio-out) jack 9 HP Recovery Manager 40 I input power 47 integrated webcam light, identifying 11 internal microphones, identifying 11 Internet connection setup 18 ISP, using 17 J jacks audio-in (microphone) 9 audio-out (headphone) 9 network...


