User Guide
Page 5
...Locating software ...5 Right side ...6 Left side ...7 Display ...9 Top ...10 TouchPad ...10 Lights ...11 Buttons and speakers ...12 Keys ...13 Bottom ...14 Labels ...15 3 Connecting to a network ...17 Connecting to a wireless network ...17 Using the wireless controls 17 Using the wireless button 17 Using operating system controls 17 Sharing data and drives and accessing software 18 Using a WLAN ...18 Using an Internet service provider 19 Setting up a WLAN 19 Configuring a wireless router 19 Protecting your WLAN 20 Connecting to a WLAN 20 Using Bluetooth wireless devices (select models...
...Locating software ...5 Right side ...6 Left side ...7 Display ...9 Top ...10 TouchPad ...10 Lights ...11 Buttons and speakers ...12 Keys ...13 Bottom ...14 Labels ...15 3 Connecting to a network ...17 Connecting to a wireless network ...17 Using the wireless controls 17 Using the wireless button 17 Using operating system controls 17 Sharing data and drives and accessing software 18 Using a WLAN ...18 Using an Internet service provider 19 Setting up a WLAN 19 Configuring a wireless router 19 Protecting your WLAN 20 Connecting to a WLAN 20 Using Bluetooth wireless devices (select models...
User Guide
Page 7
... Replacing a user-replaceable battery 44 Running on external AC power ...45 Troubleshooting power problems 45 HP CoolSense ...46 Refreshing your software content with Intel Smart Connect Technology (select models only 46 Shutting down (turning off) the computer 46 7 Maintaining your computer ...48 Improving performance ...48 Using HP 3D DriveGuard (select models only 48 Identifying HP 3D DriveGuard status 48 Using Disk Defragmenter 49 Using Disk Cleanup ...49 Adding or replacing memory modules 50 Updating programs and drivers...
... Replacing a user-replaceable battery 44 Running on external AC power ...45 Troubleshooting power problems 45 HP CoolSense ...46 Refreshing your software content with Intel Smart Connect Technology (select models only 46 Shutting down (turning off) the computer 46 7 Maintaining your computer ...48 Improving performance ...48 Using HP 3D DriveGuard (select models only 48 Identifying HP 3D DriveGuard status 48 Using Disk Defragmenter 49 Using Disk Cleanup ...49 Adding or replacing memory modules 50 Updating programs and drivers...
User Guide
Page 8
...updates 57 Installing HP and third-party software updates 57 Securing your wireless network ...58 Backing up your software applications and information 58 Using an optional security cable lock 58 9 Using Setup Utility (BIOS) and HP PC Hardware Diagnostics (UEFI 59 Starting Setup Utility (BIOS) ...59 Updating the BIOS ...59 Determining the BIOS version 59 Downloading a BIOS update 60 Using HP PC Hardware Diagnostics (UEFI 60 Downloading HP PC Hardware Diagnostics (UEFI) to a USB device 61 10 Backing up, restoring, and recovering ...62 Creating recovery media and backups 62 Creating HP...
...updates 57 Installing HP and third-party software updates 57 Securing your wireless network ...58 Backing up your software applications and information 58 Using an optional security cable lock 58 9 Using Setup Utility (BIOS) and HP PC Hardware Diagnostics (UEFI 59 Starting Setup Utility (BIOS) ...59 Updating the BIOS ...59 Determining the BIOS version 59 Downloading a BIOS update 60 Using HP PC Hardware Diagnostics (UEFI 60 Downloading HP PC Hardware Diagnostics (UEFI) to a USB device 61 10 Backing up, restoring, and recovering ...62 Creating recovery media and backups 62 Creating HP...
User Guide
Page 27
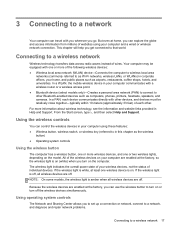
... . Connecting to a wireless network Wireless technology transfers data across radio waves instead of websites using these features: ● Wireless button, wireless switch, or wireless key (referred to turn on or turn on the model. In a PAN, each other Bluetooth-enabled devices such as Wi-Fi networks, wireless LANs, or WLANs) in Help and Support. If the wireless light is on . Using operating system controls The Network and Sharing Center allows you get connected to a wireless network 17 The wireless light indicates the overall power...
... . Connecting to a wireless network Wireless technology transfers data across radio waves instead of websites using these features: ● Wireless button, wireless switch, or wireless key (referred to turn on or turn on the model. In a PAN, each other Bluetooth-enabled devices such as Wi-Fi networks, wireless LANs, or WLANs) in Help and Support. If the wireless light is on . Using operating system controls The Network and Sharing Center allows you get connected to a wireless network 17 The wireless light indicates the overall power...
User Guide
Page 31
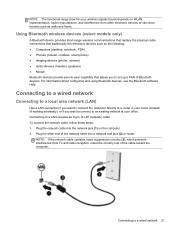
... end of the network cable into the network jack (1) on the computer. 2. Connecting to a LAN requires an 8-pin, RJ-45 (network) cable. Using Bluetooth wireless devices (select models only) A Bluetooth device provides short-range wireless communications that replace the physical cable connections that traditionally link electronic devices such as the following: ● Computers (desktop, notebook, PDA) ● Phones (cellular, cordless, smart phone) ● Imaging devices (printer, camera) ● Audio devices (headset, speakers) ● Mouse Bluetooth devices provide peer...
... end of the network cable into the network jack (1) on the computer. 2. Connecting to a LAN requires an 8-pin, RJ-45 (network) cable. Using Bluetooth wireless devices (select models only) A Bluetooth device provides short-range wireless communications that replace the physical cable connections that traditionally link electronic devices such as the following: ● Computers (desktop, notebook, PDA) ● Phones (cellular, cordless, smart phone) ● Imaging devices (printer, camera) ● Audio devices (headset, speakers) ● Mouse Bluetooth devices provide peer...

User Guide
Page 39
... a touch screen (select models only). To view a demonstration of the USB ports on an external mouse. Review the Windows 8 Basics guide included with simple finger movements. To turn on common tasks using your computer. TIP: Use the left and right buttons on the TouchPad as you to perform routine tasks. From the Start screen, type c, select Control Panel, and then select Hardware and Sound. 2. A TouchPad allows you to control the pointer on an external mouse. Using the TouchPad...
... a touch screen (select models only). To view a demonstration of the USB ports on an external mouse. Review the Windows 8 Basics guide included with simple finger movements. To turn on common tasks using your computer. TIP: Use the left and right buttons on the TouchPad as you to perform routine tasks. From the Start screen, type c, select Control Panel, and then select Hardware and Sound. 2. A TouchPad allows you to control the pointer on an external mouse. Using the TouchPad...

User Guide
Page 48
... making changes in Setup Utility. f8 Increases speaker volume incrementally as long as you hold down the key. instructions on opening Setup Utility (BIOS), and then follow the instructions at the bottom of a DVD or a BD. f3 Increases the screen brightness incrementally as long as you hold down the key. f9 Plays the previous track of an audio CD or the previous section of the screen. f12 Turns the wireless...
... making changes in Setup Utility. f8 Increases speaker volume incrementally as long as you hold down the key. instructions on opening Setup Utility (BIOS), and then follow the instructions at the bottom of a DVD or a BD. f3 Increases the screen brightness incrementally as long as you hold down the key. f9 Plays the previous track of an audio CD or the previous section of the screen. f12 Turns the wireless...

User Guide
Page 51
... need to create or change a user account password, go to step 5. 5. In the left pane, click Choose what the power button does. 3. Click Save changes. When the computer exits Hibernation, the power lights turn on and your work returns to the screen. From the Start screen, type power, select Settings, and then select Power Options. 2. Manually initiating and exiting Sleep You can enable user-initiated Hibernation and change your Windows password before your work will return to the screen...
... need to create or change a user account password, go to step 5. 5. In the left pane, click Choose what the power button does. 3. Click Save changes. When the computer exits Hibernation, the power lights turn on and your work returns to the screen. From the Start screen, type power, select Settings, and then select Power Options. 2. Manually initiating and exiting Sleep You can enable user-initiated Hibernation and change your Windows password before your work will return to the screen...

User Guide
Page 53
Reset the battery release lock (2) to a USB port. ● Stop, disable, or remove any external media cards that is no longer holding a charge, run Battery Check in Power Options. ● Remove a user-replaceable battery from the Start screen, type support, select the HP Support Assistant app, and then select Battery and performance. Running on the Windows desktop shows a low or critical battery notification. Finding battery information To monitor the status of your work, initiate Sleep or shut down the computer. HP Support Assistant provides...
Reset the battery release lock (2) to a USB port. ● Stop, disable, or remove any external media cards that is no longer holding a charge, run Battery Check in Power Options. ● Remove a user-replaceable battery from the Start screen, type support, select the HP Support Assistant app, and then select Battery and performance. Running on the Windows desktop shows a low or critical battery notification. Finding battery information To monitor the status of your work, initiate Sleep or shut down the computer. HP Support Assistant provides...

User Guide
Page 59
... the on -screen instructions. For additional information, access the Disk Defragmenter software Help. From the Start screen, type d, and then type disk in the search box. Select Settings, and then select Free up disk space and help the computer run on your drive is not necessary to complete. Select Settings, and then select Defragment and optimize your drives. 3. Improving performance 49 HP recommends defragmenting your hard drive at any...
... the on -screen instructions. For additional information, access the Disk Defragmenter software Help. From the Start screen, type d, and then type disk in the search box. Select Settings, and then select Free up disk space and help the computer run on your drive is not necessary to complete. Select Settings, and then select Defragment and optimize your drives. 3. Improving performance 49 HP recommends defragmenting your hard drive at any...
User Guide
Page 67
..., utilities, or the operating system, or cause them , and in order to fully protect your home network to protect all data sent to http://www.hp.com/go /contactHP. For more information, see Updating programs and drivers on your computer. Using firewall software Firewalls are two types of user-defined security criteria. To download the latest versions, go to and from the Start screen, type support...
..., utilities, or the operating system, or cause them , and in order to fully protect your home network to protect all data sent to http://www.hp.com/go /contactHP. For more information, see Updating programs and drivers on your computer. Using firewall software Firewalls are two types of user-defined security criteria. To download the latest versions, go to and from the Start screen, type support...
User Guide
Page 70
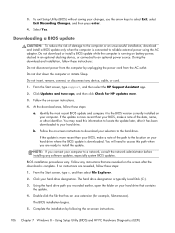
... the on -screen instructions. 4. Do not insert, remove, connect, or disconnect any software updates, especially system BIOS updates. Follow the on -screen instructions to download your hard drive where the BIOS update is complete. Click your hard drive. You will need this path when you are caused by following the on your BIOS, make a note of the date, name, or other software components. 60 Chapter 9 Using Setup Utility (BIOS) and HP PC Hardware Diagnostics (UEFI) Downloading a BIOS update CAUTION: To...
... the on -screen instructions. 4. Do not insert, remove, connect, or disconnect any software updates, especially system BIOS updates. Follow the on -screen instructions to download your hard drive where the BIOS update is complete. Click your hard drive. You will need this path when you are caused by following the on your BIOS, make a note of the date, name, or other software components. 60 Chapter 9 Using Setup Utility (BIOS) and HP PC Hardware Diagnostics (UEFI) Downloading a BIOS update CAUTION: To...
User Guide
Page 74
..., see Creating HP Recovery media on page 66. From the Start screen, type h, and then select Help and Support. ● If you need to restore your personal files and data, you can use the Factory Reset option of Windows Refresh or a reinstallation. Minimized Image Recovery installs only drivers and hardware-enabling applications. For more information, see Recovering using HP Recovery Manager on your information from the HP Recovery partition (select models only) or use the Drivers and Applications Reinstall option of expertise...
..., see Creating HP Recovery media on page 66. From the Start screen, type h, and then select Help and Support. ● If you need to restore your personal files and data, you can use the Factory Reset option of Windows Refresh or a reinstallation. Minimized Image Recovery installs only drivers and hardware-enabling applications. For more information, see Recovering using HP Recovery Manager on your information from the HP Recovery partition (select models only) or use the Drivers and Applications Reinstall option of expertise...
User Guide
Page 81
... 14 hard drive light, identifying 6 HDMI port connecting 27 identifying 7, 23 HDMI, configuring audio 28 headphones, connecting 24 Hibernation exiting 41 initiated during critical battery level 44 initiating 41 high-definition devices, connecting 27, 28 hot keys description 39 reveal system information 39 using 39 HP 3D DriveGuard 48 HP and third-party software updates, installing 57 HP PC Hardware Diagnostics (UEFI) downloading 61 using 60 HP Recovery Manager correcting boot problems 67 starting 67 HP Recovery media creating 63 recovery 67 HP Recovery partition recovery 66 HP Recovery...
... 14 hard drive light, identifying 6 HDMI port connecting 27 identifying 7, 23 HDMI, configuring audio 28 headphones, connecting 24 Hibernation exiting 41 initiated during critical battery level 44 initiating 41 high-definition devices, connecting 27, 28 hot keys description 39 reveal system information 39 using 39 HP 3D DriveGuard 48 HP and third-party software updates, installing 57 HP PC Hardware Diagnostics (UEFI) downloading 61 using 60 HP Recovery Manager correcting boot problems 67 starting 67 HP Recovery media creating 63 recovery 67 HP Recovery partition recovery 66 HP Recovery...
User Guide
Page 82
... Setup Utility (BIOS) 56 Windows 56 pinching touch screen gesture 35 pinching TouchPad gesture 31 ports external monitor 26 HDMI 7, 23, 27 Intel Wireless Display 28 USB 2.0 6, 23 USB 3.0 8, 23 VGA 26 power button, identifying 12 power connector, identifying 7 power lights, identifying 6, 11 power, battery 42 PowerDVD 28 product name and number, computer 15 public WLAN connection 20 R recovery discs 63, 67 HP Recovery Manager 66 media 67 options 62 refresh 65 starting 67 supported discs 63 system 66 USB flash drive 67 using HP Recovery media 63 recovery media creating 63 creating using HP...
... Setup Utility (BIOS) 56 Windows 56 pinching touch screen gesture 35 pinching TouchPad gesture 31 ports external monitor 26 HDMI 7, 23, 27 Intel Wireless Display 28 USB 2.0 6, 23 USB 3.0 8, 23 VGA 26 power button, identifying 12 power connector, identifying 7 power lights, identifying 6, 11 power, battery 42 PowerDVD 28 product name and number, computer 15 public WLAN connection 20 R recovery discs 63, 67 HP Recovery Manager 66 media 67 options 62 refresh 65 starting 67 supported discs 63 system 66 USB flash drive 67 using HP Recovery media 63 recovery media creating 63 creating using HP...
Maintenance and Service Guide
Page 116
... BIOS version currently installed on -screen instructions. 4. Using Setup Utility (BIOS) and HP PC Hardware Diagnostics (UEFI) To exit Setup Utility (BIOS) without saving your changes, use the arrow keys to your BIOS, make a note of damage to the computer or an unsuccessful installation, download and install a BIOS update only when the computer is complete. Do not shut down the computer or initiate Sleep. Follow the on your computer to an optional power source. You will need...
... BIOS version currently installed on -screen instructions. 4. Using Setup Utility (BIOS) and HP PC Hardware Diagnostics (UEFI) To exit Setup Utility (BIOS) without saving your changes, use the arrow keys to your BIOS, make a note of damage to the computer or an unsuccessful installation, download and install a BIOS update only when the computer is complete. Do not shut down the computer or initiate Sleep. Follow the on your computer to an optional power source. You will need...
Maintenance and Service Guide
Page 120
... Main menu. Access the page on the computer, you are packaged in compressed files called SoftPaqs. Follow the on battery power, or connected to download your hard drive. Make a note of the date, name, or other system information is running on -screen instructions to an optional power source. You will need this path when you need to reliable external power using Setup Utility. 1. Most BIOS updates on your hard drive where the BIOS update is not displayed, use...
... Main menu. Access the page on the computer, you are packaged in compressed files called SoftPaqs. Follow the on battery power, or connected to download your hard drive. Make a note of the date, name, or other system information is running on -screen instructions to an optional power source. You will need this path when you need to reliable external power using Setup Utility. 1. Most BIOS updates on your hard drive where the BIOS update is not displayed, use...
Maintenance and Service Guide
Page 129
... recovery options: ● System Recovery-Reinstalls the original operating system, and then configures the settings for the programs that was installed at the factory. ● Minimized Image Recovery-Reinstalls the operating system and all information from the hard drive and re-creating the partitions. Using the HP Recovery media you created, you need to correct a problem with a preinstalled application or driver, use the Factory Reset option of HP Recovery media to restore the factory image to reclaim hard drive space, HP Recovery Manager offers the Remove Recovery Partition option...
... recovery options: ● System Recovery-Reinstalls the original operating system, and then configures the settings for the programs that was installed at the factory. ● Minimized Image Recovery-Reinstalls the operating system and all information from the hard drive and re-creating the partitions. Using the HP Recovery media you created, you need to correct a problem with a preinstalled application or driver, use the Factory Reset option of HP Recovery media to restore the factory image to reclaim hard drive space, HP Recovery Manager offers the Remove Recovery Partition option...
Maintenance and Service Guide
Page 140
... models 121 I integrated webcam, identifying 12 internal microphones, identifying 12 J jacks audio-in (microphone) 8 audio-out (headphone) 8 network 10 RJ-45 (network) 10 K keyboard product description removal 62 spare part numbers 41, 42, 62 keys action 16 esc 16 fn 16 Windows 16 5 23, 40, L labels Bluetooth 20 regulatory 20 serial number 19 service 19 wireless certification 20 WLAN 20 latch, battery release 17 lights AC adapter 10 caps lock 14 hard drive 8 mute 14 network 10 power 8, 14 RJ-45 (network) 10 wireless 14 M memory card reader...
... models 121 I integrated webcam, identifying 12 internal microphones, identifying 12 J jacks audio-in (microphone) 8 audio-out (headphone) 8 network 10 RJ-45 (network) 10 K keyboard product description removal 62 spare part numbers 41, 42, 62 keys action 16 esc 16 fn 16 Windows 16 5 23, 40, L labels Bluetooth 20 regulatory 20 serial number 19 service 19 wireless certification 20 WLAN 20 latch, battery release 17 lights AC adapter 10 caps lock 14 hard drive 8 mute 14 network 10 power 8, 14 RJ-45 (network) 10 wireless 14 M memory card reader...
Maintenance and Service Guide
Page 141
... part numbers 31, 34 power lights, identifying 8, 14 power requirements, product description 5 processor product description 1 product description audio 4 chipset 2 display panel 3 Ethernet 4 external media cards 5 graphics 2 hard drive 4 keyboard 5 memory module 3 microphone 4 operating system 6 optical drive 4 pointing device 5 ports 5 power requirements 5 processors 1 product name 1 security 6 serviceability 6 video 4 wireless 4 product name 1 product name and number, computer 19 R recovery discs for Windows 8 computer models 117, 121 for Windows 8 computer models 119 HP Recovery Manager...
... part numbers 31, 34 power lights, identifying 8, 14 power requirements, product description 5 processor product description 1 product description audio 4 chipset 2 display panel 3 Ethernet 4 external media cards 5 graphics 2 hard drive 4 keyboard 5 memory module 3 microphone 4 operating system 6 optical drive 4 pointing device 5 ports 5 power requirements 5 processors 1 product name 1 security 6 serviceability 6 video 4 wireless 4 product name 1 product name and number, computer 19 R recovery discs for Windows 8 computer models 117, 121 for Windows 8 computer models 119 HP Recovery Manager...


