
17-g099 AMD Models - Maintenance and Service Guide
Page 6
... cover ...32 Remove Display ...35 Hard drive ...36 WLAN module ...37 RTC battery ...40 Memory module ...41 Fan ...42 Heat sink assembly ...43 Optical drive connector ...47 System board ...48 USB board ...51 Speakers ...52 Power button board ...53 Power connector ...54 TouchPad ...55 Display assembly, non-touch ...57 Display assembly, touch ...62 7 Computer Setup (BIOS), TPM, and HP Sure Start - Windows 10 69 Using Computer Setup ...69 Starting Computer Setup ...69 Navigating and selecting in Computer Setup 70 Restoring factory settings in Computer Setup 76 Updating the BIOS...
... cover ...32 Remove Display ...35 Hard drive ...36 WLAN module ...37 RTC battery ...40 Memory module ...41 Fan ...42 Heat sink assembly ...43 Optical drive connector ...47 System board ...48 USB board ...51 Speakers ...52 Power button board ...53 Power connector ...54 TouchPad ...55 Display assembly, non-touch ...57 Display assembly, touch ...62 7 Computer Setup (BIOS), TPM, and HP Sure Start - Windows 10 69 Using Computer Setup ...69 Starting Computer Setup ...69 Navigating and selecting in Computer Setup 70 Restoring factory settings in Computer Setup 76 Updating the BIOS...
17-g099 AMD Models - Maintenance and Service Guide
Page 7
... quick and easy recovery 101 Remove everything and reinstall Windows 101 vii Using MultiBoot ...78 About the boot device order ...78 Choosing MultiBoot preferences ...78 Setting a new boot order in Computer Setup 79 Dynamically choosing a boot device using HP Recovery Manager 94 What you need to know before you get started 94 Using the HP Recovery partition (select products only 95 Using HP Recovery media to a USB device 83 11 Specifications ...87 Computer specifications ...87 43.9-cm (17.3-in Windows 8.1 83 Downloading HP PC Hardware Diagnostics (UEFI) to recover...
... quick and easy recovery 101 Remove everything and reinstall Windows 101 vii Using MultiBoot ...78 About the boot device order ...78 Choosing MultiBoot preferences ...78 Setting a new boot order in Computer Setup 79 Dynamically choosing a boot device using HP Recovery Manager 94 What you need to know before you get started 94 Using the HP Recovery partition (select products only 95 Using HP Recovery media to a USB device 83 11 Specifications ...87 Computer specifications ...87 43.9-cm (17.3-in Windows 8.1 83 Downloading HP PC Hardware Diagnostics (UEFI) to recover...
17-g099 AMD Models - Maintenance and Service Guide
Page 11
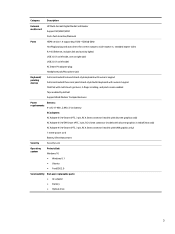
... nPFC, 3 pin, RC 4.5mm connector (models with UMA graphics only) 1 meter power cord Battery life enhancement Security Security Lock Operating system Preinstalled: Windows 10 ● Windows 8.1 ● Ubuntu ● FreeDOS 2.0 Serviceability End-user replaceable parts: ● AC adapter ● Battery ● Optical drive 3 Category Description External media card HP Multi-Format Digital Media Card Reader Support SD/SDHC/SDXC Push-Push Insertion/Removal Ports HDMI version 1.4 supporting 1920 ×1200 @ 60Hz Hot Plug/unplug and auto detect for...
... nPFC, 3 pin, RC 4.5mm connector (models with UMA graphics only) 1 meter power cord Battery life enhancement Security Security Lock Operating system Preinstalled: Windows 10 ● Windows 8.1 ● Ubuntu ● FreeDOS 2.0 Serviceability End-user replaceable parts: ● AC adapter ● Battery ● Optical drive 3 Category Description External media card HP Multi-Format Digital Media Card Reader Support SD/SDHC/SDXC Push-Push Insertion/Removal Ports HDMI version 1.4 supporting 1920 ×1200 @ 60Hz Hot Plug/unplug and auto detect for...
17-g099 AMD Models - Maintenance and Service Guide
Page 35
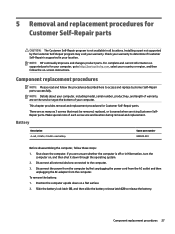
... supported parts for your computer, go to access and replace Customer Self-Repair parts successfully. NOTE: HP continually improves and changes product parts. Disconnect all locations. Component replacement procedures 27 Shut down through the operating system. 2. Slide the battery lock latch (1), and then slide the battery release latch (2) to the computer. 3. NOTE: Details about your computer. 5 Removal and replacement procedures for Customer Self-Repair parts CAUTION: The Customer Self-Repair...
... supported parts for your computer, go to access and replace Customer Self-Repair parts successfully. NOTE: HP continually improves and changes product parts. Disconnect all locations. Component replacement procedures 27 Shut down through the operating system. 2. Slide the battery lock latch (1), and then slide the battery release latch (2) to the computer. 3. NOTE: Details about your computer. 5 Removal and replacement procedures for Customer Self-Repair parts CAUTION: The Customer Self-Repair...
17-g099 AMD Models - Maintenance and Service Guide
Page 46
... ac 1x1 WiFi + Bluetooth 4.0 Combo Adapter Spare part number 792608-005 806723-005 CAUTION: To prevent an unresponsive system, replace the wireless module only with a wireless module authorized for Authorized Service Provider parts If you replace the module and then receive a warning message, remove the module to the WLAN module Main terminal. The #2 WLAN antenna cable is connected to restore device functionality, and then contact support. NOTE: The #1 WLAN antenna cable is connected to the...
... ac 1x1 WiFi + Bluetooth 4.0 Combo Adapter Spare part number 792608-005 806723-005 CAUTION: To prevent an unresponsive system, replace the wireless module only with a wireless module authorized for Authorized Service Provider parts If you replace the module and then receive a warning message, remove the module to the WLAN module Main terminal. The #2 WLAN antenna cable is connected to restore device functionality, and then contact support. NOTE: The #1 WLAN antenna cable is connected to the...
17-g099 AMD Models - Maintenance and Service Guide
Page 77
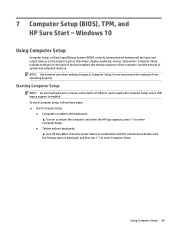
... external keyboard or mouse connected to enter Computer Setup. Errors can be used with keyboards: ▲ Turn on the system (such as disk drives, display, keyboard, mouse, and printer). Press the power button in Computer Setup. To start Computer Setup, follow these steps: ▲ Start Computer Setup. ● Computers or tablets with Computer Setup only if USB legacy support is displayed, and then tap F10 to a USB port can prevent the computer from operating properly. 7 Computer Setup (BIOS), TPM, and HP Sure Start...
... external keyboard or mouse connected to enter Computer Setup. Errors can be used with keyboards: ▲ Turn on the system (such as disk drives, display, keyboard, mouse, and printer). Press the power button in Computer Setup. To start Computer Setup, follow these steps: ▲ Start Computer Setup. ● Computers or tablets with Computer Setup only if USB legacy support is displayed, and then tap F10 to a USB port can prevent the computer from operating properly. 7 Computer Setup (BIOS), TPM, and HP Sure Start...
17-g099 AMD Models - Maintenance and Service Guide
Page 78
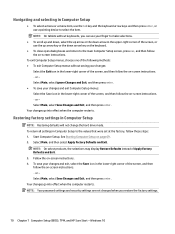
... on-screen instructions. ‒ or - NOTE: On tablets without saving your changes and exit, select the Save icon in Computer Setup NOTE: Restoring defaults will not change the hard drive mode. Select Main, and then select Apply Factory Defaults and Exit. Follow the on page 69. 2. Navigating and selecting in Computer Setup ● To select a menu or a menu item, use the tab key and the keyboard arrow keys and...
... on-screen instructions. ‒ or - NOTE: On tablets without saving your changes and exit, select the Save icon in Computer Setup NOTE: Restoring defaults will not change the hard drive mode. Select Main, and then select Apply Factory Defaults and Exit. Follow the on page 69. 2. Navigating and selecting in Computer Setup ● To select a menu or a menu item, use the tab key and the keyboard arrow keys and...
17-g099 AMD Models - Maintenance and Service Guide
Page 79
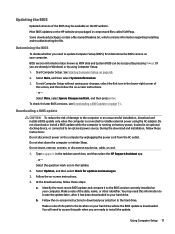
... changes, select the Exit icon in compressed files called SoftPaqs. Make a note of the screen, and then follow these instructions: Do not disconnect power on the HP website are already in an optional docking device, or connected to the hard drive. Type support in the taskbar. 2. See Starting Computer Setup on -screen instructions. 4. Some download packages contain a file named Readme.txt, which contains information regarding installing and troubleshooting the file. Downloading a BIOS update...
... changes, select the Exit icon in compressed files called SoftPaqs. Make a note of the screen, and then follow these instructions: Do not disconnect power on the HP website are already in an optional docking device, or connected to the hard drive. Type support in the taskbar. 2. See Starting Computer Setup on -screen instructions. 4. Some download packages contain a file named Readme.txt, which contains information regarding installing and troubleshooting the file. Downloading a BIOS update...
17-g099 AMD Models - Maintenance and Service Guide
Page 80
... BIOS installation begins. 5. Follow any software updates, especially system BIOS updates. Select your hard drive. Access the Boot Device Options menu: ● Computers or tablets with the volume down button until the Startup menu is displayed, and then tap F9 to enter the Boot Device Options menu. ● Tablets without keyboards: ▲ Turn off the tablet. NOTE: If you connect your computer to a network, consult the network administrator before installing any instructions that are revealed, follow these steps: 1. Changing the boot order using the...
... BIOS installation begins. 5. Follow any software updates, especially system BIOS updates. Select your hard drive. Access the Boot Device Options menu: ● Computers or tablets with the volume down button until the Startup menu is displayed, and then tap F9 to enter the Boot Device Options menu. ● Tablets without keyboards: ▲ Turn off the tablet. NOTE: If you connect your computer to a network, consult the network administrator before installing any instructions that are revealed, follow these steps: 1. Changing the boot order using the...
17-g099 AMD Models - Maintenance and Service Guide
Page 83
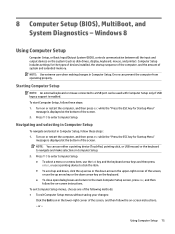
... when making changes in Computer Setup. 2. NOTE: You can prevent the computer from operating properly. Using Computer Setup 75 8 Computer Setup (BIOS), MultiBoot, and System Diagnostics - Turn on the keyboard. ● To close open dialog boxes and return to navigate and make selections in Computer Setup. Computer Setup includes settings for Startup Menu" message is displayed at the bottom of system and extended memory. Turn on the system (such as disk drives, display, keyboard, mouse...
... when making changes in Computer Setup. 2. NOTE: You can prevent the computer from operating properly. Using Computer Setup 75 8 Computer Setup (BIOS), MultiBoot, and System Diagnostics - Turn on the keyboard. ● To close open dialog boxes and return to navigate and make selections in Computer Setup. Computer Setup includes settings for Startup Menu" message is displayed at the bottom of system and extended memory. Turn on the system (such as disk drives, display, keyboard, mouse...
17-g099 AMD Models - Maintenance and Service Guide
Page 85
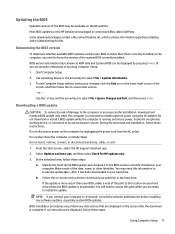
... optional docking device, or connected to an optional power source. Start Computer Setup. 2. To exit Computer Setup without saving your changes, click the Exit icon in compressed files called SoftPaqs. Use the tab key and the arrow keys to select File > System Information. 3. Do not download or install a BIOS update while the computer is complete. Do not insert, remove, connect, or disconnect any instructions that are displayed, follow these steps: Using...
... optional docking device, or connected to an optional power source. Start Computer Setup. 2. To exit Computer Setup without saving your changes, click the Exit icon in compressed files called SoftPaqs. Use the tab key and the arrow keys to select File > System Information. 3. Do not download or install a BIOS update while the computer is complete. Do not insert, remove, connect, or disconnect any instructions that are displayed, follow these steps: Using...
17-g099 AMD Models - Maintenance and Service Guide
Page 86
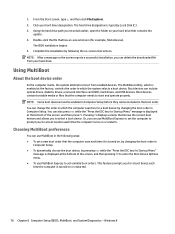
... the update. 4. From the Start screen, type e, and then click File Explorer. 2. Boot devices contain bootable media or files that shows the current boot devices and allows you for Startup Menu" message is turned on , by changing the boot order in which is typically Local Disk (C:). 3. The BIOS installation begins. 5. Complete the installation by changing the boot order in Computer Setup before they can include optical drives, diskette drives, a network interface card (NIC), hard drives, and USB devices. Windows 8 Pressing f9 displays a menu that...
... the update. 4. From the Start screen, type e, and then click File Explorer. 2. Boot devices contain bootable media or files that shows the current boot devices and allows you for Startup Menu" message is turned on , by changing the boot order in which is typically Local Disk (C:). 3. The BIOS installation begins. 5. Complete the installation by changing the boot order in Computer Setup before they can include optical drives, diskette drives, a network interface card (NIC), hard drives, and USB devices. Windows 8 Pressing f9 displays a menu that...
17-g099 AMD Models - Maintenance and Service Guide
Page 93
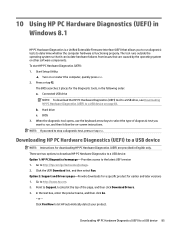
Start Setup Utility: ▲ Turn on -screen instructions. When the diagnostic tool opens, use the keyboard arrow keys to select the type of the page, and then click Download Drivers. 3. In the text box, enter the product name, and then click Go. - Downloading HP PC Hardware Diagnostics (UEFI) to the latest UEFI version 1. 10 Using HP PC Hardware Diagnostics (UEFI) in Windows 8.1 HP PC Hardware Diagnostics is functioning properly. NOTE: If you to run , and...
Start Setup Utility: ▲ Turn on -screen instructions. When the diagnostic tool opens, use the keyboard arrow keys to select the type of the page, and then click Download Drivers. 3. In the text box, enter the product name, and then click Go. - Downloading HP PC Hardware Diagnostics (UEFI) to the latest UEFI version 1. 10 Using HP PC Hardware Diagnostics (UEFI) in Windows 8.1 HP PC Hardware Diagnostics is functioning properly. NOTE: If you to run , and...
17-g099 AMD Models - Maintenance and Service Guide
Page 101
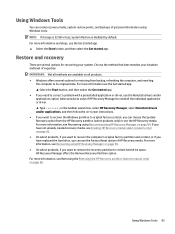
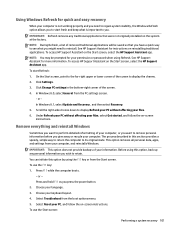
Using Windows Tools You can create recovery media, system restore points, and backups of HP Recovery media. For more information, see Creating HP Recovery media (select products only) on -screen instructions. ● If you want to recover the Windows partition to original factory content, you can choose the System Recovery option from backup, refreshing the computer, and resetting the computer to reclaim hard drive space, HP Recovery Manager offers the Remove Recovery Partition option. If you have not already created recovery media, see Removing the Removing the HP Recovery ...
Using Windows Tools You can create recovery media, system restore points, and backups of HP Recovery media. For more information, see Creating HP Recovery media (select products only) on -screen instructions. ● If you want to recover the Windows partition to original factory content, you can choose the System Recovery option from backup, refreshing the computer, and resetting the computer to reclaim hard drive space, HP Recovery Manager offers the Remove Recovery Partition option. If you have not already created recovery media, see Removing the Removing the HP Recovery ...
17-g099 AMD Models - Maintenance and Service Guide
Page 104
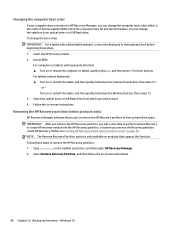
... support this function. see Creating HP Recovery media (select products only) on -screen instructions. You can change the boot order: IMPORTANT: For a tablet with keyboards attached: ▲ Turn on or restart the tablet, and then quickly hold down button; Access BIOS: For computers or tablets with a detachable keyboard, connect the keyboard to an optical drive or a USB flash drive. Select Remove Recovery Partition, and then follow the on or restart the tablet, and then quickly hold down the volume...
... support this function. see Creating HP Recovery media (select products only) on -screen instructions. You can change the boot order: IMPORTANT: For a tablet with keyboards attached: ▲ Turn on or restart the tablet, and then quickly hold down button; Access BIOS: For computers or tablets with a detachable keyboard, connect the keyboard to an optical drive or a USB flash drive. Select Remove Recovery Partition, and then follow the on or restart the tablet, and then quickly hold down the volume...
17-g099 AMD Models - Maintenance and Service Guide
Page 107
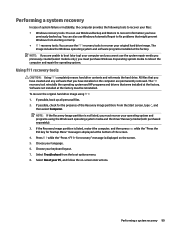
...-screen instructions. Select Troubleshoot from starting correctly. ● f11 recovery tools: You can use Windows Backup and Restore to recover information you must be reinstalled. Select Reset your language. 6. You can also use Windows Automatic Repair to fix problems that might prevent Windows from the boot options menu. 8. If the Recovery Image partition is listed, restart the computer, and then press esc while the "Press the ESC key for recovery" message is displayed at the factory must recover...
...-screen instructions. Select Troubleshoot from starting correctly. ● f11 recovery tools: You can use Windows Backup and Restore to recover information you must be reinstalled. Select Reset your language. 6. You can also use Windows Automatic Repair to fix problems that might prevent Windows from the boot options menu. 8. If the Recovery Image partition is listed, restart the computer, and then press esc while the "Press the ESC key for recovery" message is displayed at the factory must recover...
17-g099 AMD Models - Maintenance and Service Guide
Page 109
... display the charms. 2. On the Start screen, point to the far-right upper or lower corner of removed traditional applications will be prompted for your language. 3. or In Windows 8.1, select Update and Recovery , and then select Recovery. 5. Select Reset your PC, and follow the on -screen instructions. See HP Support Assistant for instructions on the system at the factory. Click Settings. 3. Choose your permission or password when using...
... display the charms. 2. On the Start screen, point to the far-right upper or lower corner of removed traditional applications will be prompted for your language. 3. or In Windows 8.1, select Update and Recovery , and then select Recovery. 5. Select Reset your PC, and follow the on -screen instructions. See HP Support Assistant for instructions on the system at the factory. Click Settings. 3. Choose your permission or password when using...
17-g099 AMD Models - Maintenance and Service Guide
Page 117
... 14 battery release latch 14 BIOS determining version 77 downloading an update 77 updating 77 bottom cover illustrated 18 removing 32 buttons left TouchPad 10 power 12 right TouchPad 10 C cables, service considerations 23 caps lock light, identifying 11 chipset, product description 1 components bottom 14 display 8, 9 left side 7 right side 6 top 10 computer major components, illustrated 15 computer reset 101 Computer Setup navigating and selecting 75 restoring default settings 76 computer specifications...
... 14 battery release latch 14 BIOS determining version 77 downloading an update 77 updating 77 bottom cover illustrated 18 removing 32 buttons left TouchPad 10 power 12 right TouchPad 10 C cables, service considerations 23 caps lock light, identifying 11 chipset, product description 1 components bottom 14 display 8, 9 left side 7 right side 6 top 10 computer major components, illustrated 15 computer reset 101 Computer Setup navigating and selecting 75 restoring default settings 76 computer specifications...
17-g099 AMD Models - Maintenance and Service Guide
Page 118
... description audio 2 chipset 1 display panel 1 Ethernet 2 external media cards 3 graphics 1 hard drive 2 internal card expansion 2 keyboard 3 memory module 1 microphone 2 operating system 3 optical drive 2 pointing device 3 ports 3 power requirements 3 processor 1 product name 1 security 3 sensors 2 serviceability 3 video 2 wireless 2 product name 1 R recovery 101 recovery partition 99 recycle computer 101 refresh 101 removal/replacement preliminaries 23 procedures 27, 31 remove everything and reinstall Windows 101 reset computer 101 steps 101 restoring the hard drive 99 RJ-45 (network) jack...
... description audio 2 chipset 1 display panel 1 Ethernet 2 external media cards 3 graphics 1 hard drive 2 internal card expansion 2 keyboard 3 memory module 1 microphone 2 operating system 3 optical drive 2 pointing device 3 ports 3 power requirements 3 processor 1 product name 1 security 3 sensors 2 serviceability 3 video 2 wireless 2 product name 1 R recovery 101 recovery partition 99 recycle computer 101 refresh 101 removal/replacement preliminaries 23 procedures 27, 31 remove everything and reinstall Windows 101 reset computer 101 steps 101 restoring the hard drive 99 RJ-45 (network) jack...
17-g099 AMD Models - Maintenance and Service Guide
Page 119
... serviceability, product description 3 setup utility navigating and selecting 75 restoring default settings 76 slots memory card reader 7 security cable 6 speakers identifying 12 illustrated 17 removing 52 specifications computer 87 display 88 DVD±RW SuperMulti DL Drive 90 hard drive 89 optical drive 90 system board removing 48 spare part number 17, 48 System Diagnostics 81 T tools required 23 top cover illustrated 16, 32 TouchPad buttons 10 removing 55 spare part number 16, 55 TouchPad bracket spare part number 16 TouchPad rear bracket spare part number 16 TouchPad...
... serviceability, product description 3 setup utility navigating and selecting 75 restoring default settings 76 slots memory card reader 7 security cable 6 speakers identifying 12 illustrated 17 removing 52 specifications computer 87 display 88 DVD±RW SuperMulti DL Drive 90 hard drive 89 optical drive 90 system board removing 48 spare part number 17, 48 System Diagnostics 81 T tools required 23 top cover illustrated 16, 32 TouchPad buttons 10 removing 55 spare part number 16, 55 TouchPad bracket spare part number 16 TouchPad rear bracket spare part number 16 TouchPad...


