
HP Notebook Hard Drives & Solid State Drives Identifying, Preventing, Diagnosing and Recovering from Drive Failures Care and Mai
Page 6
... (Remote Installation Service) installation points include: Adding SATA drivers to installation CDs, building an image, and switching to SATA AHCI mode Using Sysprep with Intel® Application Accelerator drivers. Updates to the Intel Matrix Storage Manager driver are configured with Serial ATA hard disk drives. The Intel Matrix Storage Technology solution technology provides improved performance and reliability, as well as support for the SATA Advanced Host Controller...
... (Remote Installation Service) installation points include: Adding SATA drivers to installation CDs, building an image, and switching to SATA AHCI mode Using Sysprep with Intel® Application Accelerator drivers. Updates to the Intel Matrix Storage Manager driver are configured with Serial ATA hard disk drives. The Intel Matrix Storage Technology solution technology provides improved performance and reliability, as well as support for the SATA Advanced Host Controller...
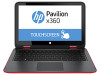
HP Pavilion x360 Convertible PC Maintenance and Service Guide
Page 6
Keyboard/top cover ...34 TouchPad ...37 Battery ...38 Hard drive ...39 WLAN module ...41 Audio/USB board ...43 Fan ...44 Speakers ...45 Power button board ...46 Display assembly ...47 Power connector cable ...55 System board ...56 Heat sink ...59 Memory module ...61 6 Using Setup Utility (BIOS) and HP PC Hardware Diagnostics (UEFI 63 Starting Setup Utility (BIOS) ...63 Updating the BIOS ...63 Determining the BIOS version 63 Downloading a BIOS update 64 Using HP PC Hardware Diagnostics (UEFI 65 Downloading HP PC Hardware Diagnostics (UEFI) to a USB device 65 7 Specifications ...66 8 ...
Keyboard/top cover ...34 TouchPad ...37 Battery ...38 Hard drive ...39 WLAN module ...41 Audio/USB board ...43 Fan ...44 Speakers ...45 Power button board ...46 Display assembly ...47 Power connector cable ...55 System board ...56 Heat sink ...59 Memory module ...61 6 Using Setup Utility (BIOS) and HP PC Hardware Diagnostics (UEFI 63 Starting Setup Utility (BIOS) ...63 Updating the BIOS ...63 Determining the BIOS version 63 Downloading a BIOS update 64 Using HP PC Hardware Diagnostics (UEFI 65 Downloading HP PC Hardware Diagnostics (UEFI) to a USB device 65 7 Specifications ...66 8 ...
HP Pavilion x360 Convertible PC Maintenance and Service Guide
Page 72
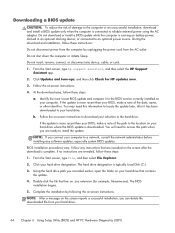
... installation, download and install a BIOS update only when the computer is connected to reliable external power using the AC adapter. Follow any device, cable, or cord. 1. At the download area, follow these instructions: Do not disconnect power from the AC outlet. Follow the on-screen instructions to download your selection to an optional power source. Using the hard drive path you can delete the downloaded file from your hard drive. 64 Chapter 6 Using Setup Utility (BIOS) and HP PC Hardware Diagnostics (UEFI) Downloading a BIOS update...
... installation, download and install a BIOS update only when the computer is connected to reliable external power using the AC adapter. Follow any device, cable, or cord. 1. At the download area, follow these instructions: Do not disconnect power from the AC outlet. Follow the on-screen instructions to download your selection to an optional power source. Using the hard drive path you can delete the downloaded file from your hard drive. 64 Chapter 6 Using Setup Utility (BIOS) and HP PC Hardware Diagnostics (UEFI) Downloading a BIOS update...
HP Pavilion x360 Convertible PC Maintenance and Service Guide
Page 77
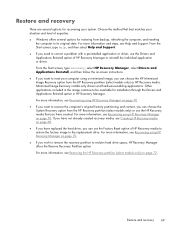
... Help and Support. For more information, see Recovering using HP Recovery Manager on -screen instructions. ● If you want to recover the computer's original factory partitioning and content, you can choose the System Recovery option from the HP Recovery partition (select models only) or use the Factory Reset option of expertise: ● Windows offers several options for recovering your computer using a minimized image, you wish to remove the recovery partition to reset your system. From the Start screen, type recovery, select HP Recovery Manager, select Drivers and...
... Help and Support. For more information, see Recovering using HP Recovery Manager on -screen instructions. ● If you want to recover the computer's original factory partitioning and content, you can choose the System Recovery option from the HP Recovery partition (select models only) or use the Factory Reset option of expertise: ● Windows offers several options for recovering your computer using a minimized image, you wish to remove the recovery partition to reset your system. From the Start screen, type recovery, select HP Recovery Manager, select Drivers and...

HP Pavilion x360 Convertible PC Maintenance and Service Guide
Page 84
Index A AC adapter light 14 AC adapter, spare part numbers 22, 23 action keys 9 antenna location 6 removal 54 spare part number 21, 26, 55 Antenna Kit, spare part number 21, 26, 55 audio, product description 3 audio-in jack 13 audio-out jack 13 audio/USB board removal 43 spare part number 19, 26, 43 B battery removal 38 spare part number 19, 24, 38 bottom components 15 bottom cover, spare part numbers 20, 26, 27, 28 buttons components 8 power 8, 12 TouchPad 11 volume 13 Windows 7 C cables, service considerations 29 caps lock light 10 chipset...
Index A AC adapter light 14 AC adapter, spare part numbers 22, 23 action keys 9 antenna location 6 removal 54 spare part number 21, 26, 55 Antenna Kit, spare part number 21, 26, 55 audio, product description 3 audio-in jack 13 audio-out jack 13 audio/USB board removal 43 spare part number 19, 26, 43 B battery removal 38 spare part number 19, 24, 38 bottom components 15 bottom cover, spare part numbers 20, 26, 27, 28 buttons components 8 power 8, 12 TouchPad 11 volume 13 Windows 7 C cables, service considerations 29 caps lock light 10 chipset...
HP Pavilion x360 Convertible PC Maintenance and Service Guide
Page 85
... network jack/status 14 power 10 RJ-45 jack/status 14 webcam 6 M memory card reader 14 memory module removal 61 spare part numbers 19, 23, 61 memory, product description 2 microphone location 6 product description 3 microphone jack 13 model name 1 mute light 10 N network jack/status lights 14 O operating system, product description 5 optical drive product description 3 spare part number 22, 23 P packaging guidelines 31 pen, spare part number 22, 27 plastic parts, service considerations 29 ports HDMI 14 product description 4 USB 2.0 12 USB 3.0 14 power button 8, 12 power button board removal...
... network jack/status 14 power 10 RJ-45 jack/status 14 webcam 6 M memory card reader 14 memory module removal 61 spare part numbers 19, 23, 61 memory, product description 2 microphone location 6 product description 3 microphone jack 13 model name 1 mute light 10 N network jack/status lights 14 O operating system, product description 5 optical drive product description 3 spare part number 22, 23 P packaging guidelines 31 pen, spare part number 22, 27 plastic parts, service considerations 29 ports HDMI 14 product description 4 USB 2.0 12 USB 3.0 14 power button 8, 12 power button board removal...
User Guide
Page 5
... side ...7 Display ...9 Display modes ...10 Top ...11 TouchPad ...11 Lights ...12 Buttons and speakers ...13 Keys ...14 Bottom ...15 Labels ...15 3 Connecting to a network ...17 Connecting to a wireless network ...17 Using the wireless controls 17 Using the wireless button 17 Using operating system controls 17 Sharing data and drives and accessing software 18 Using a WLAN ...18 Using an Internet service provider 18 Setting up a WLAN 19 Configuring a wireless router 19 Protecting your WLAN 19 Connecting to a WLAN 20 Using Bluetooth wireless devices (select models only 20 Connecting to...
... side ...7 Display ...9 Display modes ...10 Top ...11 TouchPad ...11 Lights ...12 Buttons and speakers ...13 Keys ...14 Bottom ...15 Labels ...15 3 Connecting to a network ...17 Connecting to a wireless network ...17 Using the wireless controls 17 Using the wireless button 17 Using operating system controls 17 Sharing data and drives and accessing software 18 Using a WLAN ...18 Using an Internet service provider 18 Setting up a WLAN 19 Configuring a wireless router 19 Protecting your WLAN 19 Connecting to a WLAN 20 Using Bluetooth wireless devices (select models only 20 Connecting to...
User Guide
Page 8
...updates 54 Installing HP and third-party software updates 54 Securing your wireless network ...55 Backing up your software applications and information 55 Using an optional security cable lock 55 9 Using Setup Utility (BIOS) and HP PC Hardware Diagnostics (UEFI 56 Starting Setup Utility (BIOS) ...56 Updating the BIOS ...56 Determining the BIOS version 56 Downloading a BIOS update 57 Using HP PC Hardware Diagnostics (UEFI 57 Downloading HP PC Hardware Diagnostics (UEFI) to a USB device 58 10 Backing up, restoring, and recovering ...59 Creating recovery media and backups 59 Creating HP...
...updates 54 Installing HP and third-party software updates 54 Securing your wireless network ...55 Backing up your software applications and information 55 Using an optional security cable lock 55 9 Using Setup Utility (BIOS) and HP PC Hardware Diagnostics (UEFI 56 Starting Setup Utility (BIOS) ...56 Updating the BIOS ...56 Determining the BIOS version 56 Downloading a BIOS update 57 Using HP PC Hardware Diagnostics (UEFI 57 Downloading HP PC Hardware Diagnostics (UEFI) to a USB device 58 10 Backing up, restoring, and recovering ...59 Creating recovery media and backups 59 Creating HP...
User Guide
Page 25
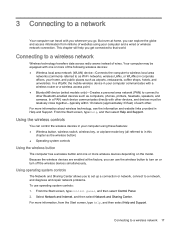
... wherever you to set up a connection or network, connect to a network, and diagnose and repair network problems. To use the wireless button to turn off the wireless devices simultaneously. For more of wires. Connecting to in this chapter as computers, phones, printers, headsets, speakers, and cameras. From the Start screen, type help , and then select Help and Support. From the Start screen, type control panel, and then select Control Panel. 2. In a WLAN, the mobile wireless device in your computer...
... wherever you to set up a connection or network, connect to a network, and diagnose and repair network problems. To use the wireless button to turn off the wireless devices simultaneously. For more of wires. Connecting to in this chapter as computers, phones, printers, headsets, speakers, and cameras. From the Start screen, type help , and then select Help and Support. From the Start screen, type control panel, and then select Control Panel. 2. In a WLAN, the mobile wireless device in your computer...
User Guide
Page 47
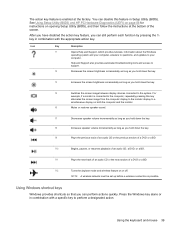
... pressing the fn key in Setup Utility (BIOS). f4 Switches the screen image between display devices connected to perform a designated action. f6 Mutes or restores speaker sound. NOTE: A wireless network must be set up before a wireless connection is enabled at the bottom of an audio CD, a DVD, or a BD. Using Windows shortcut keys Windows provides shortcuts so that you can disable this key alternates the screen image from the computer display to the monitor display to the computer, repeatedly...
... pressing the fn key in Setup Utility (BIOS). f4 Switches the screen image between display devices connected to perform a designated action. f6 Mutes or restores speaker sound. NOTE: A wireless network must be set up before a wireless connection is enabled at the bottom of an audio CD, a DVD, or a BD. Using Windows shortcut keys Windows provides shortcuts so that you can disable this key alternates the screen image from the computer display to the monitor display to the computer, repeatedly...
User Guide
Page 50
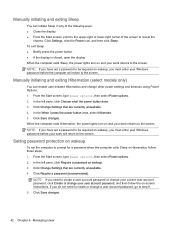
... timeouts using Power Options. 1. In the left pane, click Choose what the power button does. 3. Click Change Settings that are currently unavailable. 4. From the Start screen, type power options, then select Power options. 2. Manually initiating and exiting Sleep You can enable user-initiated Hibernation and change a user account password, go to step 5. 5. When the computer exits Sleep, the power lights turn on wakeup, you do not need to create a user account password or change your current user account password, click Create or change your work...
... timeouts using Power Options. 1. In the left pane, click Choose what the power button does. 3. Click Change Settings that are currently unavailable. 4. From the Start screen, type power options, then select Power options. 2. Manually initiating and exiting Sleep You can enable user-initiated Hibernation and change a user account password, go to step 5. 5. When the computer exits Sleep, the power lights turn on wakeup, you do not need to create a user account password or change your current user account password, click Create or change your work...
User Guide
Page 51
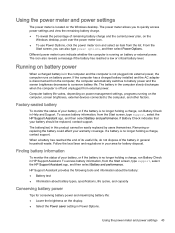
... support. Removing or replacing the battery could affect your battery should be easily replaced by users themselves. Finding battery information To monitor the status of remaining battery charge and the current power plan, on the computer, screen brightness, external devices connected to conserve battery life. To access battery information, from the Start screen, type support, select the HP Support Assistant app, and then select Battery and performance. The battery(ies) in Power Options. When a battery has reached the end of its useful...
... support. Removing or replacing the battery could affect your battery should be easily replaced by users themselves. Finding battery information To monitor the status of remaining battery charge and the current power plan, on the computer, screen brightness, external devices connected to conserve battery life. To access battery information, from the Start screen, type support, select the HP Support Assistant app, and then select Battery and performance. The battery(ies) in Power Options. When a battery has reached the end of its useful...
User Guide
Page 57
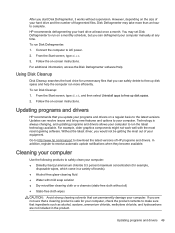
... a cleaning product is always changing, and updating programs and drivers allows your computer to make sure that you update your programs and drivers on -screen instructions. In addition, register to download the latest versions of HP programs and drivers. Using Disk Cleanup Disk Cleanup searches the hard drive for your computer, check the product contents to run more than an hour to AC power. 2. Follow the on...
... a cleaning product is always changing, and updating programs and drivers allows your computer to make sure that you update your programs and drivers on -screen instructions. In addition, register to download the latest versions of HP programs and drivers. Using Disk Cleanup Disk Cleanup searches the hard drive for your computer, check the product contents to run more than an hour to AC power. 2. Follow the on...
User Guide
Page 60
... confidential files, and then remove all password settings. IMPORTANT: Some security features listed in a file on your computer. Do not store passwords in this chapter may find it in the HP Setup Utility (BIOS) that you set in Windows or in a secure place away from a variety of risks, such as screen-saver passwords, from the Start screen, type hp support assistant, and then select the HP Support Assistant app. 52...
... confidential files, and then remove all password settings. IMPORTANT: Some security features listed in a file on your computer. Do not store passwords in this chapter may find it in the HP Setup Utility (BIOS) that you set in Windows or in a secure place away from a variety of risks, such as screen-saver passwords, from the Start screen, type hp support assistant, and then select the HP Support Assistant app. 52...

User Guide
Page 62
... recommended that you can be a combination of both hardware and software. Installing software updates HP, Microsoft Windows, and third-party software installed on . ● Network-based firewalls-Installed between your DSL or cable modem and your home network to protect all critical updates from the Start screen, type hp support assistant, and then select the HP Support Assistant app. You can be software you receive an alert. An antivirus program may be...
... recommended that you can be a combination of both hardware and software. Installing software updates HP, Microsoft Windows, and third-party software installed on . ● Network-based firewalls-Installed between your DSL or cable modem and your home network to protect all critical updates from the Start screen, type hp support assistant, and then select the HP Support Assistant app. You can be software you receive an alert. An antivirus program may be...

User Guide
Page 65
... earlier, open the folder on battery power, docked in an optional docking device, or connected to determine whether the computer hardware is running on your hard drive designation. Do not download or install a BIOS update while the computer is functioning properly. NOTE: After a message on -screen instructions. 4. From the Start screen, type hp support assistant, and then select the HP Support Assistant app. 2. Using HP PC Hardware Diagnostics (UEFI) HP PC Hardware Diagnostics is typically Local Disk (C:). 3. BIOS installation procedures vary...
... earlier, open the folder on battery power, docked in an optional docking device, or connected to determine whether the computer hardware is running on your hard drive designation. Do not download or install a BIOS update while the computer is functioning properly. NOTE: After a message on -screen instructions. 4. From the Start screen, type hp support assistant, and then select the HP Support Assistant app. 2. Using HP PC Hardware Diagnostics (UEFI) HP PC Hardware Diagnostics is typically Local Disk (C:). 3. BIOS installation procedures vary...

User Guide
Page 69
... System Recovery and Minimized Image Recovery. If you have not already created recovery media, see Creating HP Recovery media on page 61. ● If you wish to remove the recovery partition to the replacement drive. IMPORTANT: HP Recovery Manager does not automatically provide backups of the following recovery options: ● System Recovery-Reinstalls the original operating system, and then configures the settings for recovery discs or a recovery USB flash drive. For more information, see Recovering using the HP Recovery partition (select models only). Restore and recovery 61...
... System Recovery and Minimized Image Recovery. If you have not already created recovery media, see Creating HP Recovery media on page 61. ● If you wish to remove the recovery partition to the replacement drive. IMPORTANT: HP Recovery Manager does not automatically provide backups of the following recovery options: ● System Recovery-Reinstalls the original operating system, and then configures the settings for recovery discs or a recovery USB flash drive. For more information, see Recovering using the HP Recovery partition (select models only). Restore and recovery 61...
User Guide
Page 70
...HP Recovery Manager. 2. To start HP Recovery Manager from the HP Recovery partition: IMPORTANT: For tablets, connect to the keyboard dock before you remove the Recovery partition, create HP Recovery media; Insert the HP Recovery media that you press the power button. 2. Follow the on -screen instructions. Select the optical drive or USB flash drive you want to remove the HP Recovery partition: 1. In addition, you can use the Windows Refresh option or the Windows option to free up , restoring, and recovering see Creating HP Recovery media on page 62. 3. Using HP Recovery media...
...HP Recovery Manager. 2. To start HP Recovery Manager from the HP Recovery partition: IMPORTANT: For tablets, connect to the keyboard dock before you remove the Recovery partition, create HP Recovery media; Insert the HP Recovery media that you press the power button. 2. Follow the on -screen instructions. Select the optical drive or USB flash drive you want to remove the HP Recovery partition: 1. In addition, you can use the Windows Refresh option or the Windows option to free up , restoring, and recovering see Creating HP Recovery media on page 62. 3. Using HP Recovery media...
User Guide
Page 73
... do 1 H hard drive HP 3D DriveGuard 48 hard drive light 6 HDMI configuring audio 26 HDMI port connecting 25 identifying 6, 23 headphones and microphones, connecting 24 Hibernation exiting 42 initiated during critical battery level 44 initiating 42 high-definition devices, connecting 25, 27 hot keys description 40 using 40 HP 3D DriveGuard 48 HP and third-party software updates, installing 54 HP PC Hardware Diagnostics (UEFI) downloading 58 using 58 HP Recovery Manager correcting boot problems 62 starting 62 HP Recovery media creating 59 recovery 62 HP Recovery partition recovery 61 removing 62...
... do 1 H hard drive HP 3D DriveGuard 48 hard drive light 6 HDMI configuring audio 26 HDMI port connecting 25 identifying 6, 23 headphones and microphones, connecting 24 Hibernation exiting 42 initiated during critical battery level 44 initiating 42 high-definition devices, connecting 25, 27 hot keys description 40 using 40 HP 3D DriveGuard 48 HP and third-party software updates, installing 54 HP PC Hardware Diagnostics (UEFI) downloading 58 using 58 HP Recovery Manager correcting boot problems 62 starting 62 HP Recovery media creating 59 recovery 62 HP Recovery partition recovery 61 removing 62...

User Guide
Page 74
... setting preferences 28 mute light, identifying 12 N network jack, identifying 6, 22 O operating environment 63 original system recovery 61 P passwords Setup Utility (BIOS) 53 Windows 53 ports HDMI 6, 23, 25 Miracast 27 USB 2.0 7, 23 USB 3.0 6, 23 power battery 43 power button, identifying 7, 13 power connector, identifying 6 power lights, identifying 12 product name and number, computer 15 public WLAN connection 20 R recovery discs 59, 62 HP Recovery Manager 61 media 62 options 60 starting 62 supported discs 59 system 61 USB flash drive 62 using HP Recovery media 60 recovery media creating...
... setting preferences 28 mute light, identifying 12 N network jack, identifying 6, 22 O operating environment 63 original system recovery 61 P passwords Setup Utility (BIOS) 53 Windows 53 ports HDMI 6, 23, 25 Miracast 27 USB 2.0 7, 23 USB 3.0 6, 23 power battery 43 power button, identifying 7, 13 power connector, identifying 6 power lights, identifying 12 product name and number, computer 15 public WLAN connection 20 R recovery discs 59, 62 HP Recovery Manager 61 media 62 options 60 starting 62 supported discs 59 system 61 USB flash drive 62 using HP Recovery media 60 recovery media creating...


