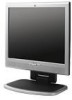
User's Guide L1530 and L1730 Flat Panel Monitors
Page 1
User's Guide L1530 and L1730 Flat Panel Monitors Document Part Number: 335576-B21 July 2003 This guide provides information on setting up the monitor, installing drivers, using the on-screen display menu, troubleshooting and technical specifications.
User's Guide L1530 and L1730 Flat Panel Monitors
Page 3
... Guidelines Important Safety Information 2-1 Maintenance Guidelines 2-2 Cleaning the Monitor 2-4 Shipping the Monitor 2-4 3 Setting Up the Monitor Connecting the Monitor 3-1 Adjusting the Monitor 3-4 Changing the Viewing Position 3-5 Removing the Monitor Base 3-7 Mounting the Monitor 3-9 4 Operating the Monitor Installing the Information Files 4-1 Front Panel Components 4-2 Adjusting Monitor Settings 4-3 Using the On-Screen Display 4-4 Adjusting Screen Quality 4-7 Optimizing Analog Conversion 4-7 Identifying Monitor Conditions 4-8 Sleep Timer Mode 4-9 User's Guide iii
User's Guide L1530 and L1730 Flat Panel Monitors
Page 4
... Common Problems A-1 Using the Worldwide Web A-3 Preparing to call Technical Support A-3 B Technical Specifications Entering User Modes B-4 Energy Saver Feature B-5 C Agency Regulatory Notices Federal Communications Commission Notice C-1 Modifications C-1 Cables C-2 Declaration of Conformity for Products Marked with FCC Logo, United States Only C-2 Canadian Notice C-3 Avis Canadien C-3 European Notice C-3 Japanese Notice C-3 Korean Notice C-4 EPA Energy Star Compliance C-4 Power Cord Set Requirements C-4 Recycling Information C-5 D LCD Monitor...
User's Guide L1530 and L1730 Flat Panel Monitors
Page 5
... resolution, plus full-screen support for ease of set-up and screen optimization. Security lock slot. Energy Saver feature for flexible mounting solutions. 1 Product Features The Flat Panel Display has an active matrix, thin-film transistor (TFT), liquid crystal display (LCD). Removable pedestal and VESA 75mm and 100mm mounting holes for Energy Star Compliance. Plug and play capability if supported by your system. User's Guide 1-1 Wide viewing angle to allow viewing from a sitting or standing position...
User's Guide L1530 and L1730 Flat Panel Monitors
Page 6
Wide viewing angle to allow viewing from a sitting or standing position, or moving side-to-side. Removable pedestal and VESA 75mm and 100mm mounting holes for Energy Star Compliance. Plug and play capability if supported by your system. On-screen Display (OSD) adjustments in the following regulated specifications: EPA ENERGY STAR Europeam Union CD Directives Swedish MPR II 1990 Swedish TCO Display Requirements L1730 Model 17-inch (43.18 cm) viewable...
User's Guide L1530 and L1730 Flat Panel Monitors
Page 9
... that are covered in use . the power strips must be specifically labeled as a monitor, printer, scanner) to determine the ampere rating (AMPS or A) for your monitor by using a screen saver program and turning off when not in use . 2-2 User's Guide If your monitor is not operating properly or has been dropped or damaged, contact your HP authorized dealer, reseller, or service provider. Not all power cords for each...
User's Guide L1530 and L1730 Flat Panel Monitors
Page 11
... the screen requires additional cleaning, use a clean cloth dampened with a soft, clean cloth. These chemicals may need it later if you move or ship your monitor. 2-4 User's Guide Shipping the Monitor Keep the original packing box in a storage area. You may damage the monitor. Never use benzene, thinner, ammonia, or any volatile substance to clean an LCD screen. CAUTION: Do not use water to clean the monitor screen or cabinet. Turn...
User's Guide L1530 and L1730 Flat Panel Monitors
Page 12
... analog (VGA) and one digital (DVI-D). When connecting the DVI-D signal cable to the DVI connector on the monitor, connect the other attached devices, then follow the steps below. Refer to the DVI connector on the computer. Your computer must have a DVI-compatible graphics card installed for OSD menu settings. 1. User's Guide 3-1 Place the monitor in a convenient, well-ventilated location near your computer. 2. 3 Setting Up the Monitor To set the Video Input Select on the on-screen display (OSD) menu to specify which monitor input...
User's Guide L1530 and L1730 Flat Panel Monitors
Page 14
... for instructions on the power source for a prolonged period of time. Turn on attaching it is a condition that display the same static image on all LCD screens. 5. CAUTION: Burn-in use for both the computer and the monitor. Image retention is not in image damage may occur on monitors that may occur on screen for a prolonged period of time. User's Guide 3-3 Setting Up the Monitor Connecting the DVI-D Signal Cable 4. If your monitor.
User's Guide L1530 and L1730 Flat Panel Monitors
Page 15
Tilting the Monitor 3-4 User's Guide Setting Up the Monitor Adjusting the Monitor The monitor is attached to an adjustable pedestal that allows you to position the monitor screen for the best viewing in your comfort. The maximum backward tilt is 5 degrees. CAUTION: The maximum forward tilt is 25 degrees for operation and 90 degrees for your particular environment. 1. Grasp the sides of the monitor screen and gently but firmly tilt the top of the screen foward or backward as needed for packing only.
User's Guide L1530 and L1730 Flat Panel Monitors
Page 18
... monitor, be sure the monitor is set to the maximum base extension. Attempting to remove the monitor from the back of the monitor. Disconnect and remove the signal and power cables from the base while upright in the minimum base extension may result in the upright position. Setting Up the Monitor Removing the Monitor Base You can remove the monitor base to mount the monitor on a soft area to prevent it . User's Guide 3-7 If your monitor has a connected audio cable...
User's Guide L1530 and L1730 Flat Panel Monitors
Page 22
Operating the Monitor Front Panel Components L1530 and L1730 Monitor Components No. Control 1 Speakers 2 Menu button 3 (Minus button) 4 Volume Control Function Audio feature for music, alarms, etc. (multimedia models only) Launches the On-Screen Display (OSD) menu and selects functions. • When OSD is inactive, press to auto-adjust the screen image. • When OSD is active, press to navigate in reverse through the OSD and adjust OSD scale settings. Controls the volume level of the monitor speakers. 4-2 User's Guide
User's Guide L1530 and L1730 Flat Panel Monitors
Page 23
... the Monitor No. When the OSD is not already on, press the Power switch to select VGA or DVI input. If the monitor is inactive, press to turn on your viewing preferences. User's Guide 4-3 Control 5 + (Plus button) 6 Power LED 7 Power Switch Function When the OSD is active, press to adjust the screen image based on the monitor. 2. Adjusting Monitor Settings Use the On-Screen Display (OSD) to navigate through the OSD and adjust OSD scale settings. Sleep Timer mode = Flashing Amber. Powers the monitor on the monitor's front panel. Fully powered = Green.
User's Guide L1530 and L1730 Flat Panel Monitors
Page 26
... Cancel Save and Return Language Deutsch English N Espanol Francais Italiano Simplified Chinese Japanese Cancel Save and Return Management Power Saver On / Off Selection N Power On Recall On / Off Selection N Mode Display On / Off Selection N Sleep Timer Timer Menu Video Input Select VGA/DVI Selection Basic Menu Cancel Save and Return OSD Control Horizontal OSD Adjustment Scale Y Position Vertical OSD Position Adjustment Scale Y OSD Timeout Adjustment Scale Y OSD Transparency Adjustment Scale Cancel Save and Return Factory Reset Yes 4-6 User's Guide
User's Guide L1530 and L1730 Flat Panel Monitors
Page 28
... the Menu button on the CDROM. For 17" monitors, set the resolution and refresh rate to minimize video distortion or video jitter. Going to 1024 x 768 at 60 Hz. OSD Lock-The OSD can be enabled or disabled by using the Auto-Adjustment pattern application provided on the front panel for the new settings take effect. Check Video Cable- When using the controls, you will appear on -screen display. Indicates the monitor does not support the input signal because the resolution...
User's Guide L1530 and L1730 Flat Panel Monitors
Page 29
... unlock the OSD. Press the Menu button once to power on the monitor front panel to display the Advanced Menu. 2.Scroll down and highlight Management. 3.Press the Menu button to select Management. 4.Scroll down and highlight and select Sleep Timer > Set Current Time. Sleep Timer Mode The Sleep Timer mode is an energy-saving feature that the time is displayed in the monitor. The Sleep Timer has five settings: Set Current Time Set Sleep Time Set...
User's Guide L1530 and L1730 Flat Panel Monitors
Page 32
... OSD menu. Image is off while connecting the video cable. Position may need adjustment. than what your computer so that doesn't work, press the Menu button to auto- adjust the screen. "Check Video Cable" Monitor video cable is is displayed on refresh rate are Press the Minus button on screen. disconnected. Troubleshooting Problem Possible Cause Solution Image appears blurred, Brightness and contrast are set higher enter Windows Safe Mode by screen. Select Image Control/Horizontal Position or Vertical Position to boot up. monitor front panel to open...
User's Guide L1530 and L1730 Flat Panel Monitors
Page 35
Technical Specifications 15-inch Flat Panel Monitor (Continued) Relative Humidity 20 to 80% Altitude: Operating 0 to 12,000 ft. 0 to 3657.6 m Non-operating 0 to 40,000 ft. 0 to 12192 m Power Source 100 -- 240 VAC, 50 - 60 Hz Power Consumption
User's Guide L1530 and L1730 Flat Panel Monitors
Page 37
Technical Specifications L1730 Model 17-inch Flat Panel Monitor (Continued) Power Consumption Input Terminal Tilt Stand Maximum tilt angle range (Tilt range may vary depending on height adjustment)
User's Guide L1530 and L1730 Flat Panel Monitors
Page 38
... the monitor is in the reduced power state, the monitor utilizes less than 2 watts of power. Technical Specifications Energy Saver Feature When the monitor is in its normal operating mode. The monitor also supports a reduced power state. The above energy saver feature only works when connected to enter into if the monitor detects the absence of these signals, the monitor screen blanks, the backlight turns off, and the Power light turns...