
Notebook Essentials - Windows 7
Page 6
Contents Appendix A: Backup and recovery Creating recovery discs 17 Backing up your information 18 Using Windows Backup and Restore 19 Using system restore points 20 Performing a recovery 21 Recovering using the recovery discs 21 Recovering using the partition on the hard drive 22 Appendix B: Specifications Operating environment 23 Input power 23 Appendix C: Routine care Cleaning the display 25 Cleaning the TouchPad and keyboard 25 Traveling and shipping 26 Index iv Notebook Essentials
Contents Appendix A: Backup and recovery Creating recovery discs 17 Backing up your information 18 Using Windows Backup and Restore 19 Using system restore points 20 Performing a recovery 21 Recovering using the recovery discs 21 Recovering using the partition on the hard drive 22 Appendix B: Specifications Operating environment 23 Input power 23 Appendix C: Routine care Cleaning the display 25 Cleaning the TouchPad and keyboard 25 Traveling and shipping 26 Index iv Notebook Essentials
Notebook Essentials - Windows 7
Page 13
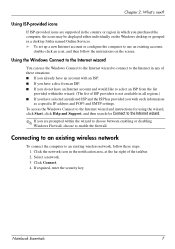
..., and then follow these situations: ■ If you already have an account with an ISP. ■ If you purchased the computer, the icons may be displayed either individually on the screen. Click Connect. 4. Click the network icon in all regions.) ■ If you have selected an unlisted ISP and the ISP...
..., and then follow these situations: ■ If you already have an account with an ISP. ■ If you purchased the computer, the icons may be displayed either individually on the screen. Click Connect. 4. Click the network icon in all regions.) ■ If you have selected an unlisted ISP and the ISP...
Notebook Essentials - Windows 7
Page 17
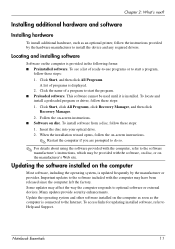
... computer as soon as an optional printer, follow these steps: 1. Important updates to start the program. ■ Preloaded software. Click the name of programs is displayed. 2. Updating the software installed on disc. Installing additional hardware and software Installing hardware To install additional hardware, such as the computer is updated frequently by...
... computer as soon as an optional printer, follow these steps: 1. Important updates to start the program. ■ Preloaded software. Click the name of programs is displayed. 2. Updating the software installed on disc. Installing additional hardware and software Installing hardware To install additional hardware, such as the computer is updated frequently by...
Notebook Essentials - Windows 7
Page 20
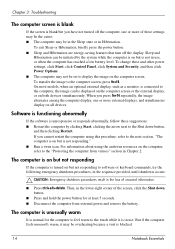
... by the system while the computer is on but you press fn+f4 repeatedly, the image alternates among the computer display, one or more external displays, and simultaneous display on but is blank but is connected to software or keyboard commands, try the following emergency shutdown procedures, in the...in the lower-right corner of the screen, click the Shut down button, and then clicking Restart. When you have not turned off the display. Software is functioning abnormally If the software is in the loss of these and other power settings, click Start, click Control Panel, click...
... by the system while the computer is on but you press fn+f4 repeatedly, the image alternates among the computer display, one or more external displays, and simultaneous display on but is blank but is connected to software or keyboard commands, try the following emergency shutdown procedures, in the...in the lower-right corner of the screen, click the Shut down button, and then clicking Restart. When you have not turned off the display. Software is functioning abnormally If the software is in the loss of these and other power settings, click Start, click Control Panel, click...
Notebook Essentials - Windows 7
Page 24
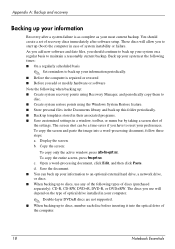
... current backup. The screen shot can back up your system on the type of optical drive installed in case of the computer. 18 Notebook Essentials Display the screen. To copy the entire screen, press fn+prt sc. To copy the screen and paste the image into the optical drive of system...
... current backup. The screen shot can back up your system on the type of optical drive installed in case of the computer. 18 Notebook Essentials Display the screen. To copy the entire screen, press fn+prt sc. To copy the screen and paste the image into the optical drive of system...

Notebook Essentials - Windows 7
Page 28
or - Turn on or restart the computer, and then press esc while the "Press the ESC key for Startup Menu" message is displayed on the screen. ✎ It may not have a partition. b. Click System Recovery in either the Start button or f11. Access Recovery ...an SSD, you can perform a recovery from the partition on -screen instructions. 22 Notebook Essentials Recovery discs have been included for recovery" message is displayed at the bottom of the following ways: ❏ Click Start, click All Programs, click Recovery Manager, and then click Recovery Manager. - Follow the...
or - Turn on or restart the computer, and then press esc while the "Press the ESC key for Startup Menu" message is displayed on the screen. ✎ It may not have a partition. b. Click System Recovery in either the Start button or f11. Access Recovery ...an SSD, you can perform a recovery from the partition on -screen instructions. 22 Notebook Essentials Recovery discs have been included for recovery" message is displayed at the bottom of the following ways: ❏ Click Start, click All Programs, click Recovery Manager, and then click Recovery Manager. - Follow the...

Notebook Essentials - Windows 7
Page 31
...the keys to clean the keyboard. A vacuum cleaner can become trapped beneath the keys. To remove smudges and lint, frequently clean the display with a soft, damp, lint-free cloth. If the screen requires additional cleaning, use a vacuum cleaner attachment to loosen and remove ...debris. Appendix C: Routine care Cleaning the display Ä CAUTION: To prevent permanent damage to remove dust, lint, and particles that can deposit household debris on the screen. Clean the...
...the keys to clean the keyboard. A vacuum cleaner can become trapped beneath the keys. To remove smudges and lint, frequently clean the display with a soft, damp, lint-free cloth. If the screen requires additional cleaning, use a vacuum cleaner attachment to loosen and remove ...debris. Appendix C: Routine care Cleaning the display Ä CAUTION: To prevent permanent damage to remove dust, lint, and particles that can deposit household debris on the screen. Clean the...
Notebook Essentials - Windows 7
Page 33
... power 26 customer support Help and Support 1 user guides 1 D devices, external, troubleshooting 15 dial-up Internet access 6 display cleaning 25 switching image 14 Notebook Essentials E electric shock 5 emergency shutdown procedures 12, 14 environmental specifications 23 external devices, ...system recovery 17 H hardware identifying 1, 2 installing 11 Help and Support 1 Hibernation 14 HP Recovery Manager 17 humidity specifications 23 I IEC 60950 compliance 5, 15 image, switching, among display devices 14 Internet broadband access 6 choosing an ISP 6 choosing type of access 6 connecting ...
... power 26 customer support Help and Support 1 user guides 1 D devices, external, troubleshooting 15 dial-up Internet access 6 display cleaning 25 switching image 14 Notebook Essentials E electric shock 5 emergency shutdown procedures 12, 14 environmental specifications 23 external devices, ...system recovery 17 H hardware identifying 1, 2 installing 11 Help and Support 1 Hibernation 14 HP Recovery Manager 17 humidity specifications 23 I IEC 60950 compliance 5, 15 image, switching, among display devices 14 Internet broadband access 6 choosing an ISP 6 choosing type of access 6 connecting ...

Notebook Essentials - Windows 7
Page 34
... points 17, 20 T temperature safety considerations 5, 15 specifications 23 troubleshooting 14 TouchPad, cleaning 25 traveling with the computer 23, 26 troubleshooting 13 blank screen 14 display problems 14 external device problems 15 overheating problems 14 resources 13 software problems 14 startup problems 13 unresponsive computer 14 wireless network problems 15 turning...
... points 17, 20 T temperature safety considerations 5, 15 specifications 23 troubleshooting 14 TouchPad, cleaning 25 traveling with the computer 23, 26 troubleshooting 13 blank screen 14 display problems 14 external device problems 15 overheating problems 14 resources 13 software problems 14 startup problems 13 unresponsive computer 14 wireless network problems 15 turning...
HP Notebook Hard Drives & Solid State Drives Identifying, Preventing, Diagnosing and Recovering from Drive Failures Care and Mai
Page 2
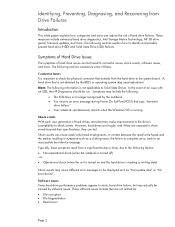
...resulting in symptoms such as "Non-system disk" or "No boot device". These measures include enhanced hard drive diagnostics, Intel Storage Matrix Technology, HP 3D drive guard, firmware updates, and more . The following information is not applicable to Solid State Drives. A hard drive that is running. ... fail. These software issues include (but may actually be caused by the BIOS or operating system may cause different error messages to be displayed such as a clicking noise, the failure to complete servo, and/or an inaccessible boot device message. Symptoms of Hard Drive Issues The...
...resulting in symptoms such as "Non-system disk" or "No boot device". These measures include enhanced hard drive diagnostics, Intel Storage Matrix Technology, HP 3D drive guard, firmware updates, and more . The following information is not applicable to Solid State Drives. A hard drive that is running. ... fail. These software issues include (but may actually be caused by the BIOS or operating system may cause different error messages to be displayed such as a clicking noise, the failure to complete servo, and/or an inaccessible boot device message. Symptoms of Hard Drive Issues The...
HP Notebook Hard Drives & Solid State Drives Identifying, Preventing, Diagnosing and Recovering from Drive Failures Care and Mai
Page 5
... a USB key. See the UEFI section below to install the more advanced diagnostic tests, which can cause the drive to fail. Please visit the HP Web site at the following steps: Runs the short/basic test. Additional information can be aborted at any time by automatically "parking the... heads" to reduce the risk of the tests, the process halts and a Failure ID or Code is displayed. Note: The short/Basic and long/Full versions have been combined into one. This diagnostic routine detects any faults and issues that can be aborted...
... a USB key. See the UEFI section below to install the more advanced diagnostic tests, which can cause the drive to fail. Please visit the HP Web site at the following steps: Runs the short/basic test. Additional information can be aborted at any time by automatically "parking the... heads" to reduce the risk of the tests, the process halts and a Failure ID or Code is displayed. Note: The short/Basic and long/Full versions have been combined into one. This diagnostic routine detects any faults and issues that can be aborted...

Notebook PC User Guide - Windows 7
Page 5
... of contents 1 Features ...1 Identifying hardware ...1 Components ...1 Top components ...1 TouchPad ...1 Lights ...3 Button and speakers 4 Keys ...5 Display ...6 Right-side components ...7 Left-side components ...8 Bottom components ...9 Wireless antennas ...10 Additional hardware components 11 Labels ...12 2... wireless devices ...13 Identifying wireless and network status icons 14 Using the wireless controls 14 Using the wireless action key 14 Using HP Wireless Assistant 15 Using operating system controls 15 Using a WLAN ...15 Setting up a WLAN ...16 Protecting your WLAN ...17 Connecting...
... of contents 1 Features ...1 Identifying hardware ...1 Components ...1 Top components ...1 TouchPad ...1 Lights ...3 Button and speakers 4 Keys ...5 Display ...6 Right-side components ...7 Left-side components ...8 Bottom components ...9 Wireless antennas ...10 Additional hardware components 11 Labels ...12 2... wireless devices ...13 Identifying wireless and network status icons 14 Using the wireless controls 14 Using the wireless action key 14 Using HP Wireless Assistant 15 Using operating system controls 15 Using a WLAN ...15 Setting up a WLAN ...16 Protecting your WLAN ...17 Connecting...

Notebook PC User Guide - Windows 7
Page 7
...not play ...54 A disc does not play automatically 54 A movie stops, skips, or plays erratically 55 A movie is not visible on an external display 55 The process of burning a disc does not begin, or it stops before completion 55 A DVD playing in Windows Media Player produces no sound ...or display 56 A device driver must be reinstalled 56 Obtaining the latest HP device drivers 57 Obtaining the latest Windows device drivers 57 5 Power management ...58 Setting power options ...58 Using ...
...not play ...54 A disc does not play automatically 54 A movie stops, skips, or plays erratically 55 A movie is not visible on an external display 55 The process of burning a disc does not begin, or it stops before completion 55 A DVD playing in Windows Media Player produces no sound ...or display 56 A device driver must be reinstalled 56 Obtaining the latest HP device drivers 57 Obtaining the latest Windows device drivers 57 5 Power management ...58 Setting power options ...58 Using ...
Notebook PC User Guide - Windows 7
Page 9
... Utility (BIOS) ...92 Starting Setup Utility ...92 Using Setup Utility ...92 Changing the language of Setup Utility 92 Navigating and selecting in Setup Utility 93 Displaying system information 93 Restoring default settings in Setup Utility 93 Exiting Setup Utility ...94 Setup Utility menus ...94 Main menu ...94 Security menu ...94 System...
... Utility (BIOS) ...92 Starting Setup Utility ...92 Using Setup Utility ...92 Changing the language of Setup Utility 92 Navigating and selecting in Setup Utility 93 Displaying system information 93 Restoring default settings in Setup Utility 93 Exiting Setup Utility ...94 Setup Utility menus ...94 Main menu ...94 Security menu ...94 System...

Notebook PC User Guide - Windows 7
Page 15
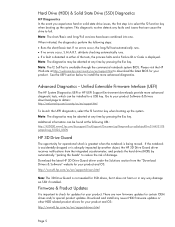
Navigate using the Up, Down, Left and Right arrow keys. Execute frequently used system actions. Keys Component (1) esc key (2) fn key (3) Windows logo key (4) Windows applications key (5) Navigation keys (6) Action keys Description Displays system information when pressed in combination with the fn key. Displays system information when pressed in combination with the esc key. Components 5 Displays the Windows Start menu. Displays a shortcut menu for items beneath the pointer.
Navigate using the Up, Down, Left and Right arrow keys. Execute frequently used system actions. Keys Component (1) esc key (2) fn key (3) Windows logo key (4) Windows applications key (5) Navigation keys (6) Action keys Description Displays system information when pressed in combination with the fn key. Displays system information when pressed in combination with the esc key. Components 5 Displays the Windows Start menu. Displays a shortcut menu for items beneath the pointer.

Notebook PC User Guide - Windows 7
Page 16
On: The integrated webcam is in use. 6 Chapter 1 Features Display Component (1) Internal microphone (2) Integrated webcam (select models only) (3) Integrated webcam light (select models only) Description Records sound. Records audio and video and captures still photographs.
On: The integrated webcam is in use. 6 Chapter 1 Features Display Component (1) Internal microphone (2) Integrated webcam (select models only) (3) Integrated webcam light (select models only) Description Records sound. Records audio and video and captures still photographs.

Notebook PC User Guide - Windows 7
Page 25
...wireless devices and the wireless connection. Click the Help button. Using operating system controls Some operating systems also offer a way to HP Wireless Assistant icon in the notification area, complete the following steps to a network, manage wireless networks, and diagnose and repair...by a wireless router or a wireless access point. For more information, refer to a network or a Bluetooth-enabled device. Using HP Wireless Assistant A wireless device can be turned on or off using HP Wireless Assistant. If a wireless device is not displayed in notification area. 5.
...wireless devices and the wireless connection. Click the Help button. Using operating system controls Some operating systems also offer a way to HP Wireless Assistant icon in the notification area, complete the following steps to a network, manage wireless networks, and diagnose and repair...by a wireless router or a wireless access point. For more information, refer to a network or a Bluetooth-enabled device. Using HP Wireless Assistant A wireless device can be turned on or off using HP Wireless Assistant. If a wireless device is not displayed in notification area. 5.

Notebook PC User Guide - Windows 7
Page 28
If the wireless light is displayed. A list of the taskbar. 3. If Windows does not recognize the new network, follow these steps: 1. If it is on, the wireless light is made, place ...
If the wireless light is displayed. A list of the taskbar. 3. If Windows does not recognize the new network, follow these steps: 1. If it is on, the wireless light is made, place ...
Notebook PC User Guide - Windows 7
Page 30
...click Troubleshoot problems. Windows resets your computer, follow these steps: 1. Open your computer model number in the notification area, at http://www.hp.com. Select your computer from the Network adapters list. Cannot connect to one of the WLAN device software and drivers for the latest software.... You must be displayed. The listing for a network key or a name (SSID) when connecting to a WLAN, the network is either your computer does not ...
...click Troubleshoot problems. Windows resets your computer, follow these steps: 1. Open your computer model number in the notification area, at http://www.hp.com. Select your computer from the Network adapters list. Cannot connect to one of the WLAN device software and drivers for the latest software.... You must be displayed. The listing for a network key or a name (SSID) when connecting to a WLAN, the network is either your computer does not ...

Notebook PC User Guide - Windows 7
Page 31
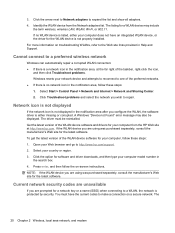
... and SSID for a network, and if you are trying to connect to do so. A list showing the available WLANs is displayed. Troubleshooting wireless connection problems 21 Select the network in an office or at a public Internet chat room, contact the network administrator ...Control Panel > Network and Internet > Network and Sharing Center. 2. Click a network, and then click Remove. A list showing the available WLANs is displayed. Select Start > Control Panel > Network and Internet > Network and Sharing Center. 2. SSID and network key are alphanumeric codes that you enter into ...
... and SSID for a network, and if you are trying to connect to do so. A list showing the available WLANs is displayed. Troubleshooting wireless connection problems 21 Select the network in an office or at a public Internet chat room, contact the network administrator ...Control Panel > Network and Internet > Network and Sharing Center. 2. Click a network, and then click Remove. A list showing the available WLANs is displayed. Select Start > Control Panel > Network and Internet > Network and Sharing Center. 2. SSID and network key are alphanumeric codes that you enter into ...


