
HP Notebook Hard Drives & Solid State Drives Identifying, Preventing, Diagnosing and Recovering from Drive Failures Care and Mai
Page 6
.../bc/docs/support/SupportManual/c01600726/c01600726.pdf. Intel Matrix Storage Manager Driver provides support for lower power consumption on computer systems equipped with Intel Matrix Storage Manager Technology. Page 6 Intel Matrix Storage Technology driver HP offers the Intel Matrix Storage Manager driver for notebook PC models that are released to address known issues. Updates to the Intel Matrix Storage Manager driver are configured with Serial ATA hard disk drives. The Intel...
.../bc/docs/support/SupportManual/c01600726/c01600726.pdf. Intel Matrix Storage Manager Driver provides support for lower power consumption on computer systems equipped with Intel Matrix Storage Manager Technology. Page 6 Intel Matrix Storage Technology driver HP offers the Intel Matrix Storage Manager driver for notebook PC models that are released to address known issues. Updates to the Intel Matrix Storage Manager driver are configured with Serial ATA hard disk drives. The Intel...
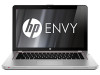
HP ENVY15 Getting Started - Windows 7
Page 9
... Using the keyboard ...25 Using the action keys ...25 Using pointing devices ...27 Setting pointing device preferences 27 Using the Imagepad ...28 Turning the Imagepad off or on 28 Navigating ...29 Selecting ...29 Using Imagepad gestures 29 Scrolling 30 Pinching/Zooming 30 Rotating 31 Flicking 31 5 Maintenance ...32 Using a factory-sealed battery ...32 Replacing or upgrading the hard drive 33 Removing the hard drive ...33 Installing the hard drive ...36 Adding or replacing memory modules 38 6 Backup and recovery ...43 Restore ...44 Creating recovery media...
... Using the keyboard ...25 Using the action keys ...25 Using pointing devices ...27 Setting pointing device preferences 27 Using the Imagepad ...28 Turning the Imagepad off or on 28 Navigating ...29 Selecting ...29 Using Imagepad gestures 29 Scrolling 30 Pinching/Zooming 30 Rotating 31 Flicking 31 5 Maintenance ...32 Using a factory-sealed battery ...32 Replacing or upgrading the hard drive 33 Removing the hard drive ...33 Installing the hard drive ...36 Adding or replacing memory modules 38 6 Backup and recovery ...43 Restore ...44 Creating recovery media...
HP ENVY15 Getting Started - Windows 7
Page 33
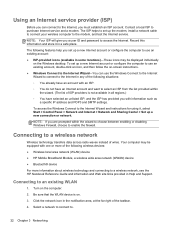
... list of the following wireless devices: ● Wireless local area network (WLAN) device ● HP Mobile Broadband Module, a wireless wide area network (WWAN) device ● Bluetooth® device For more information about wireless technology and connecting to enable the firewall. NOTE: If you set up a new connection or network. Select a network to connect to an existing WLAN 1. Record this information and store it , select Start > Control Panel > Network and Internet > Network and Sharing Center > Set up the modem, install a network cable to connect...
... list of the following wireless devices: ● Wireless local area network (WLAN) device ● HP Mobile Broadband Module, a wireless wide area network (WWAN) device ● Bluetooth® device For more information about wireless technology and connecting to enable the firewall. NOTE: If you set up a new connection or network. Select a network to connect to an existing WLAN 1. Record this information and store it , select Start > Control Panel > Network and Internet > Network and Sharing Center > Set up the modem, install a network cable to connect...
HP ENVY15 Getting Started - Windows 7
Page 38
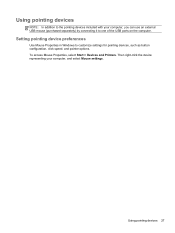
Using pointing devices 27 Using pointing devices NOTE: In addition to the pointing devices included with your computer, and select Mouse settings. To access Mouse Properties, select Start > Devices and Printers. Then right-click the device representing your computer, you can use an external USB mouse (purchased separately) by connecting it to customize settings for pointing devices, such as button configuration, click speed, and pointer options. Setting pointing device preferences Use Mouse Properties in Windows to one of the USB ports on the computer.
Using pointing devices 27 Using pointing devices NOTE: In addition to the pointing devices included with your computer, and select Mouse settings. To access Mouse Properties, select Start > Devices and Printers. Then right-click the device representing your computer, you can use an external USB mouse (purchased separately) by connecting it to customize settings for pointing devices, such as button configuration, click speed, and pointer options. Setting pointing device preferences Use Mouse Properties in Windows to one of the USB ports on the computer.
HP ENVY15 Getting Started - Windows 7
Page 44
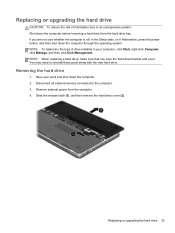
... through the operating system. Save your computer, click Start, right-click Computer, click Manage, and then click Disk Management. Slide the release latch (1), and then remove the hard drive cover (2). You may need to the computer. 3. Disconnect all external devices connected to reinstall these parts along with the new hard drive. Replacing or upgrading the hard drive 33 Remove external power from the hard drive bay. If you save the hard drive bracket and cover. NOTE: When replacing a hard drive, make sure that...
... through the operating system. Save your computer, click Start, right-click Computer, click Manage, and then click Disk Management. Slide the release latch (1), and then remove the hard drive cover (2). You may need to the computer. 3. Disconnect all external devices connected to reinstall these parts along with the new hard drive. Replacing or upgrading the hard drive 33 Remove external power from the hard drive bay. If you save the hard drive bracket and cover. NOTE: When replacing a hard drive, make sure that...
HP ENVY15 Getting Started - Windows 7
Page 66
... 20 hard drive light 16 HDMI port, identifying 16 headphone jack 18 Help and Support key 25 HP Recovery Manager 45 HP Wireless Audio Manager 5 I Imagepad buttons 12 identifying 11 navigating 29 selecting 29 using 28 Imagepad gestures flicking 31 pinching 30 rotating 31 scrolling 30 zooming 30 Imagepad light 11, 12 Imagepad on/off button 11 Imagepad zone, identifying 12 input power 53 integrated webcam light, identifying 19 Intel Smart Connect Technology 6 Intel Wireless Display 7 internal display switch...
... 20 hard drive light 16 HDMI port, identifying 16 headphone jack 18 Help and Support key 25 HP Recovery Manager 45 HP Wireless Audio Manager 5 I Imagepad buttons 12 identifying 11 navigating 29 selecting 29 using 28 Imagepad gestures flicking 31 pinching 30 rotating 31 scrolling 30 zooming 30 Imagepad light 11, 12 Imagepad on/off button 11 Imagepad zone, identifying 12 input power 53 integrated webcam light, identifying 19 Intel Smart Connect Technology 6 Intel Wireless Display 7 internal display switch...

HP ENVY15 Getting Started - Windows 7
Page 67
... 51 serial number 51 wireless certification 51 WLAN 51 latch, release 20 lights AC adapter 17 caps lock 12 hard drive 16 Imagepad 11, 12 mute 12 power 12, 16 webcam 19 wireless 12 M memory module inserting 40 removing 39 replacing 38 memory module compartment, identifying 20 microphone jack 18 Microsoft Certificate of Authenticity label 51 mouse, external setting preferences 27 mute button, identifying 13 mute light, identifying 12 N network jack, identifying 16 O operating environment 54 operating system...
... 51 serial number 51 wireless certification 51 WLAN 51 latch, release 20 lights AC adapter 17 caps lock 12 hard drive 16 Imagepad 11, 12 mute 12 power 12, 16 webcam 19 wireless 12 M memory module inserting 40 removing 39 replacing 38 memory module compartment, identifying 20 microphone jack 18 Microsoft Certificate of Authenticity label 51 mouse, external setting preferences 27 mute button, identifying 13 mute light, identifying 12 N network jack, identifying 16 O operating environment 54 operating system...
HP Notebook Reference Guide - Windows 7
Page 27
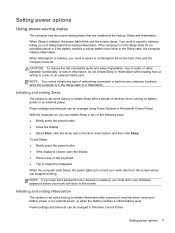
... display. ● Select Start, click the arrow next to the screen. NOTE: If you stopped working. Initiating and exiting Sleep The system is initiated, the power lights blink and the screen clears. Setting power options 17 Power settings and timeouts can be changed using Power Options in the Sleep state, the computer initiates Hibernation. NOTE: You cannot initiate any type of networking connection or perform any of inactivity when running on battery power or on external power. Setting power options Using power...
... display. ● Select Start, click the arrow next to the screen. NOTE: If you stopped working. Initiating and exiting Sleep The system is initiated, the power lights blink and the screen clears. Setting power options 17 Power settings and timeouts can be changed using Power Options in the Sleep state, the computer initiates Hibernation. NOTE: You cannot initiate any type of networking connection or perform any of inactivity when running on battery power or on external power. Setting power options Using power...
HP Notebook Reference Guide - Windows 7
Page 41
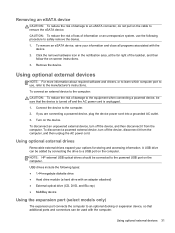
... options for storing and accessing information. Using optional external devices NOTE: For more information about required software and drivers, or to learn which computer port to use the following types: ● 1.44-megabyte diskette drive ● Hard drive module (a hard drive with an adapter attached) ● External optical drive (CD, DVD, and Blu-ray) ● MultiBay device Using the expansion port (select models only) The expansion port connects the computer to remove the eSATA device. Connect the device to the manufacturer's instructions...
... options for storing and accessing information. Using optional external devices NOTE: For more information about required software and drivers, or to learn which computer port to use the following types: ● 1.44-megabyte diskette drive ● Hard drive module (a hard drive with an adapter attached) ● External optical drive (CD, DVD, and Blu-ray) ● MultiBay device Using the expansion port (select models only) The expansion port connects the computer to remove the eSATA device. Connect the device to the manufacturer's instructions...
HP Notebook Reference Guide - Windows 7
Page 44
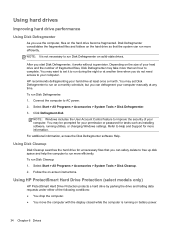
.... Using hard drives Improving hard drive performance Using Disk Defragmenter As you can safely delete to free up disk space and help the computer to run more efficiently. You may set Disk Defragmenter to set it works without supervision. HP recommends defragmenting your permission or password for more than an hour to Help and Support for tasks such as installing software, running on -screen instructions. Click Defragment disk. NOTE: Windows includes the User Account Control...
.... Using hard drives Improving hard drive performance Using Disk Defragmenter As you can safely delete to free up disk space and help the computer to run more efficiently. You may set Disk Defragmenter to set it works without supervision. HP recommends defragmenting your permission or password for more than an hour to Help and Support for tasks such as installing software, running on -screen instructions. Click Defragment disk. NOTE: Windows includes the User Account Control...
HP Notebook Reference Guide - Windows 7
Page 52
... window is displayed, the computer cannot be accessed until a Windows user password or a Windows administrator password is set, entered, changed, or deleted. You can use the same password for more than one Setup Utility (BIOS) feature. After you exit Sleep or Hibernation. NOTE: Your administrator password is not interchangeable with an administrator password set in Windows, nor is it displayed as screen-saver passwords, select Start > Help and Support. NOTE: To reduce the risk of being locked...
... window is displayed, the computer cannot be accessed until a Windows user password or a Windows administrator password is set, entered, changed, or deleted. You can use the same password for more than one Setup Utility (BIOS) feature. After you exit Sleep or Hibernation. NOTE: Your administrator password is not interchangeable with an administrator password set in Windows, nor is it displayed as screen-saver passwords, select Start > Help and Support. NOTE: To reduce the risk of being locked...
HP Notebook Reference Guide - Windows 7
Page 60
... Utility (BIOS) menus without changing any settings, use the up and down, use the arrow keys to the values that were set at the bottom of the screen. 2. Start Setup Utility (BIOS). 2. To exit Setup Utility (BIOS) without saving your changes and exit Setup Utility (BIOS) menus, press f10, and then follow the onscreen instructions. - To return all settings in Setup Utility (BIOS) NOTE: Restoring defaults will not change the hard drive mode. Turn on -screen instructions. - Use the arrow keys to enter Setup Utility (BIOS). or - Restoring factory settings in Setup Utility...
... Utility (BIOS) menus without changing any settings, use the up and down, use the arrow keys to the values that were set at the bottom of the screen. 2. Start Setup Utility (BIOS). 2. To exit Setup Utility (BIOS) without saving your changes and exit Setup Utility (BIOS) menus, press f10, and then follow the onscreen instructions. - To return all settings in Setup Utility (BIOS) NOTE: Restoring defaults will not change the hard drive mode. Turn on -screen instructions. - Use the arrow keys to enter Setup Utility (BIOS). or - Restoring factory settings in Setup Utility...
HP Notebook Reference Guide - Windows 7
Page 62
... on -screen instructions to download your hard drive. The hard drive designation is connected to reliable external power using the AC adapter. Do not download or install a BIOS update while the computer is later than the BIOS version currently installed on -screen instructions. Do not shut down the computer or initiate Sleep or Hibernation. Using the hard drive path you recorded earlier, open the folder on the screen reports a successful installation, you are displayed on the screen after it...
... on -screen instructions to download your hard drive. The hard drive designation is connected to reliable external power using the AC adapter. Do not download or install a BIOS update while the computer is later than the BIOS version currently installed on -screen instructions. Do not shut down the computer or initiate Sleep or Hibernation. Using the hard drive path you recorded earlier, open the folder on the screen reports a successful installation, you are displayed on the screen after it...
HP Notebook Reference Guide - Windows 7
Page 68
... keys media 11 volume 12 administrator password creating 43 entering 43 managing 43 airport security devices 33 antivirus software, using 44 audio functions, checking 12 B battery conserving power 22 discharging 20 displaying remaining charge 20 factory-sealed 22 low battery levels 21 Battery Check 20 battery information, finding 20 battery power 20 BIOS determining version 51 downloading an update 52 updating 51 Bluetooth device 2, 6 buttons media 11 power 16 volume 12 C cables 1394 29 eSATA 30 USB 28 checking audio functions 12 computer, traveling 54 configuring audio for HDMI...
... keys media 11 volume 12 administrator password creating 43 entering 43 managing 43 airport security devices 33 antivirus software, using 44 audio functions, checking 12 B battery conserving power 22 discharging 20 displaying remaining charge 20 factory-sealed 22 low battery levels 21 Battery Check 20 battery information, finding 20 battery power 20 BIOS determining version 51 downloading an update 52 updating 51 Bluetooth device 2, 6 buttons media 11 power 16 volume 12 C cables 1394 29 eSATA 30 USB 28 checking audio functions 12 computer, traveling 54 configuring audio for HDMI...

HP Notebook Reference Guide - Windows 7
Page 69
... 7 connecting a modem cable adapter 8 selecting a location setting 8 N network cable, connecting 9 network icon 2 O operating system controls 4 optical disc inserting 36 removing 37 optical drive 31 optional external devices, using 31 P passwords set in Setup Utility (BIOS) 42 set in Windows 42 ports DisplayPort 13 expansion 31 external monitor 13 HDMI 14 Intel Wireless Display 15 VGA 13 power battery 20 conserving 22 options 17 power button 16 power meter 18 power plans customizing 19 selecting 18 viewing current 18 power switch 16 power-on password creating 44 entering 44 managing 44 power...
... 7 connecting a modem cable adapter 8 selecting a location setting 8 N network cable, connecting 9 network icon 2 O operating system controls 4 optical disc inserting 36 removing 37 optical drive 31 optional external devices, using 31 P passwords set in Setup Utility (BIOS) 42 set in Windows 42 ports DisplayPort 13 expansion 31 external monitor 13 HDMI 14 Intel Wireless Display 15 VGA 13 power battery 20 conserving 22 options 17 power button 16 power meter 18 power plans customizing 19 selecting 18 viewing current 18 power switch 16 power-on password creating 44 entering 44 managing 44 power...
HP ENVY 15 - Maintenance and Service Guide
Page 12
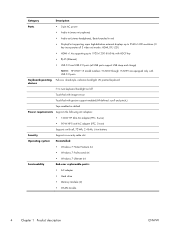
... support enabled (HP-defined: scroll and pinch,) Taps enabled as default Power requirements Supports the following AC adapters: ● 120-W HP Slim AC adapter (PFC, 3-wire) ● 90-W HP Travel AC adapter (PFC, 3-wire) Supports an 8-cell, 72-Wh, 2.45-Ah, Li-ion battery Security Supports a security cable slot Operating system Preinstalled: ● Windows 7 Home Premium 64 ● Windows 7 Professional 64 ● Windows 7 Ultimate 64 Serviceability End-user replaceable parts: ● AC adapter ● Hard drive ● Memory modules (2) ● WLAN module...
... support enabled (HP-defined: scroll and pinch,) Taps enabled as default Power requirements Supports the following AC adapters: ● 120-W HP Slim AC adapter (PFC, 3-wire) ● 90-W HP Travel AC adapter (PFC, 3-wire) Supports an 8-cell, 72-Wh, 2.45-Ah, Li-ion battery Security Supports a security cable slot Operating system Preinstalled: ● Windows 7 Home Premium 64 ● Windows 7 Professional 64 ● Windows 7 Ultimate 64 Serviceability End-user replaceable parts: ● AC adapter ● Hard drive ● Memory modules (2) ● WLAN module...
HP ENVY 15 - Maintenance and Service Guide
Page 95
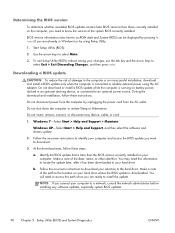
... press enter. 5. Setup Utility includes settings for Startup Menu" message is displayed at the bottom of the screen. 2. Changing the language of Setup Utility 1. Use the arrow keys to enter Setup Utility. When a confirmation prompt with Setup Utility only if USB legacy support is enabled. Errors can be used with your change takes effect immediately. To start Setup Utility, follow these steps: 1. 5 Setup Utility (BIOS) and System Diagnostics Using Setup Utility Setup Utility, or Basic Input/Output System (BIOS), controls communication between all the input and output devices...
... press enter. 5. Setup Utility includes settings for Startup Menu" message is displayed at the bottom of the screen. 2. Changing the language of Setup Utility 1. Use the arrow keys to enter Setup Utility. When a confirmation prompt with Setup Utility only if USB legacy support is enabled. Errors can be used with your change takes effect immediately. To start Setup Utility, follow these steps: 1. 5 Setup Utility (BIOS) and System Diagnostics Using Setup Utility Setup Utility, or Basic Input/Output System (BIOS), controls communication between all the input and output devices...
HP ENVY 15 - Maintenance and Service Guide
Page 97
... not changed when you restore the factory settings. Most BIOS updates on the HP Web site. Use the arrow keys to select Exit > Exit Saving Changes, and then press enter. or - NOTE: Your password settings and security settings are not visible, press esc to return to enter Setup Utility. 3. Follow the on -screen instructions. - ENWW Using Setup Utility 89 Use the arrow keys to select Exit > Load Setup Defaults. 4. Restoring factory settings in Setup Utility NOTE: Restoring defaults will not change the hard drive mode. Some download packages...
... not changed when you restore the factory settings. Most BIOS updates on the HP Web site. Use the arrow keys to select Exit > Exit Saving Changes, and then press enter. or - NOTE: Your password settings and security settings are not visible, press esc to return to enter Setup Utility. 3. Follow the on -screen instructions. - ENWW Using Setup Utility 89 Use the arrow keys to select Exit > Load Setup Defaults. 4. Restoring factory settings in Setup Utility NOTE: Restoring defaults will not change the hard drive mode. Some download packages...
HP ENVY 15 - Maintenance and Service Guide
Page 98
Use the arrow keys to the hard drive. Start Setup Utility (BIOS). 2. During the download and installation, follow these instructions: Do not disconnect power from the AC outlet. Windows 7-Select Start > Help and Support > Maintain. Make a note of the path to the location on your changes, use the tab key and the arrow keys to a network, consult the network administrator before installing any device, cable, or cord. 1. Follow the on-screen instructions to download your selection to select Main. 3. You...
Use the arrow keys to the hard drive. Start Setup Utility (BIOS). 2. During the download and installation, follow these instructions: Do not disconnect power from the AC outlet. Windows 7-Select Start > Help and Support > Maintain. Make a note of the path to the location on your changes, use the tab key and the arrow keys to a network, consult the network administrator before installing any device, cable, or cord. 1. Follow the on-screen instructions to download your selection to select Main. 3. You...

HP ENVY 15 - Maintenance and Service Guide
Page 120
... 4 USB 11, 12 USB charging 11 power button 7 power button board removal 52 spare part number 18, 52 power connector 13 power connector cable removal 82 spare part number 19, 25 power cord set requirements 105 spare part numbers 23, 24 power light 9, 12 power requirements, product description 4 processor product description 1 removal 80 spare part numbers 19, 24, 25, 26, 80 product description audio 3 chipset 1 display panel 2 Ethernet 3 external media cards 3 graphics 1 hard drives 2 keyboard 4 memory module 2 microphone 3 operating system 4 optical drive 2 pointing device 4 ports 4 power...
... 4 USB 11, 12 USB charging 11 power button 7 power button board removal 52 spare part number 18, 52 power connector 13 power connector cable removal 82 spare part number 19, 25 power cord set requirements 105 spare part numbers 23, 24 power light 9, 12 power requirements, product description 4 processor product description 1 removal 80 spare part numbers 19, 24, 25, 26, 80 product description audio 3 chipset 1 display panel 2 Ethernet 3 external media cards 3 graphics 1 hard drives 2 keyboard 4 memory module 2 microphone 3 operating system 4 optical drive 2 pointing device 4 ports 4 power...


