
HP Notebook Reference Guide - Windows 7
Page 7
...select models only 37 Connecting an eSATA device 37 Removing an eSATA device 38 Using optional external devices ...39 Using optional external drives 39 Using the expansion port (select models only 39 Using the docking connector (select models only 40 6 Drives ...41 Handling drives ...41 Using hard drives ...41 Improving hard drive performance 41 Using Disk Defragmenter 41 Using Disk Cleanup 42 Using HP ProtectSmart Hard Drive Protection in Windows 7 (select models only 42 Identifying HP ProtectSmart Hard Drive Protection status 43 Managing power with a parked hard drive 43 Using HP...
...select models only 37 Connecting an eSATA device 37 Removing an eSATA device 38 Using optional external devices ...39 Using optional external drives 39 Using the expansion port (select models only 39 Using the docking connector (select models only 40 6 Drives ...41 Handling drives ...41 Using hard drives ...41 Improving hard drive performance 41 Using Disk Defragmenter 41 Using Disk Cleanup 42 Using HP ProtectSmart Hard Drive Protection in Windows 7 (select models only 42 Identifying HP ProtectSmart Hard Drive Protection status 43 Managing power with a parked hard drive 43 Using HP...
HP Notebook Reference Guide - Windows 7
Page 8
...password 51 Managing a power-on password 51 Entering a power-on password 51 Using antivirus software ...52 Using firewall software ...52 Installing critical security updates ...52 Installing an optional security cable ...53 Using the fingerprint reader (select models only 53 Locating the fingerprint reader 53 8 Setup Utility (BIOS) ...55 Starting Setup Utility ...55 Using Setup Utility ...55 Changing the language of Setup Utility 55 Navigating and selecting in Setup Utility 55 Displaying system information 56 Restoring factory default settings in Setup Utility 56 Exiting Setup Utility...
...password 51 Managing a power-on password 51 Entering a power-on password 51 Using antivirus software ...52 Using firewall software ...52 Installing critical security updates ...52 Installing an optional security cable ...53 Using the fingerprint reader (select models only 53 Locating the fingerprint reader 53 8 Setup Utility (BIOS) ...55 Starting Setup Utility ...55 Using Setup Utility ...55 Changing the language of Setup Utility 55 Navigating and selecting in Setup Utility 55 Displaying system information 56 Restoring factory default settings in Setup Utility 56 Exiting Setup Utility...

HP Notebook Reference Guide - Windows 7
Page 15
... device is made, you are listed, you can choose to manually search for and connect to a network or to complete the connection. Click Connect Anyway to accept the warning and complete the connection. ● If the network is a security-enabled WLAN, you to set up a new connection or network. NOTE: If no WLANs are listed, you are prompted to a network, manage wireless networks, and diagnose and repair network problems. Windows 7 ▲ Select Start > Control Panel > Network and Internet > Network...
... device is made, you are listed, you can choose to manually search for and connect to a network or to complete the connection. Click Connect Anyway to accept the warning and complete the connection. ● If the network is a security-enabled WLAN, you to set up a new connection or network. NOTE: If no WLANs are listed, you are prompted to a network, manage wireless networks, and diagnose and repair network problems. Windows 7 ▲ Select Start > Control Panel > Network and Internet > Network...
HP Notebook Reference Guide - Windows 7
Page 17
... power button. If the SIM is successful, your WLAN. NOTE: HP Mobile Broadband is disabled if the battery is automatically connected to the new network. Using HP Mobile Broadband (select models only) HP Mobile Broadband enables your computer within range of the serial number. If you move your computer to use wireless wide area networks (WWANs) to access the Internet from the AC outlet. 5. Roaming to another WLAN, Windows attempts to connect...
... power button. If the SIM is successful, your WLAN. NOTE: HP Mobile Broadband is disabled if the battery is automatically connected to the new network. Using HP Mobile Broadband (select models only) HP Mobile Broadband enables your computer within range of the serial number. If you move your computer to use wireless wide area networks (WWANs) to access the Internet from the AC outlet. 5. Roaming to another WLAN, Windows attempts to connect...
HP Notebook Reference Guide - Windows 7
Page 18
... to set up one of Bluetooth and the Windows operating system. 8 Chapter 2 Networking (select models only) Bluetooth and Internet Connection Sharing (ICS) HP does not recommend setting up a personal area network (PAN) of Bluetooth is off or in synchronizing information transfers between your computer and wireless devices including cellular phones, printers, cameras, and PDAs. Removing a SIM NOTE: To identify the SIM slot location, refer to the computer. 4. Reconnect external power and external devices. 9.
... to set up one of Bluetooth and the Windows operating system. 8 Chapter 2 Networking (select models only) Bluetooth and Internet Connection Sharing (ICS) HP does not recommend setting up a personal area network (PAN) of Bluetooth is off or in synchronizing information transfers between your computer and wireless devices including cellular phones, printers, cameras, and PDAs. Removing a SIM NOTE: To identify the SIM slot location, refer to the computer. 4. Reconnect external power and external devices. 9.

HP Notebook Reference Guide - Windows 7
Page 21
... line. Select Start > Control Panel. 2. The New Location window opens. 6. The New Location window opens. 5. The Phone and Modem Options window opens. 10. Click Phone and Modem Options. 4. To enable modem use the modem. Click the Dialing Rules tab. 4. Windows 7 1. Click New. Select a country or region from the settings in the Location list, and then click OK. Enter the area code, a carrier code (if necessary), and the number for any time. As you add new location settings, they are...
... line. Select Start > Control Panel. 2. The New Location window opens. 6. The New Location window opens. 5. The Phone and Modem Options window opens. 10. Click Phone and Modem Options. 4. To enable modem use the modem. Click the Dialing Rules tab. 4. Windows 7 1. Click New. Select a country or region from the settings in the Location list, and then click OK. Enter the area code, a carrier code (if necessary), and the number for any time. As you add new location settings, they are...
HP Notebook Reference Guide - Windows 7
Page 30
... open programs. 2. Setting power options Using power-saving states The computer has two power-saving states that does not connect to a USB port ● When the computer will be unused and disconnected from external power and remove the battery. Shut down the computer under any of the following emergency procedures in Hibernation, you must first exit Sleep or Hibernation before shutdown is possible. 1. Windows XP-Select Start > Turn...
... open programs. 2. Setting power options Using power-saving states The computer has two power-saving states that does not connect to a USB port ● When the computer will be unused and disconnected from external power and remove the battery. Shut down the computer under any of the following emergency procedures in Hibernation, you must first exit Sleep or Hibernation before shutdown is possible. 1. Windows XP-Select Start > Turn...
HP Notebook Reference Guide - Windows 7
Page 31
... a disc or an external media card. Windows XP-Select Start > Turn Off Computer > Stand By. Setting power options 21 If the computer is closed, open the display. ● Press a key on , you exit Sleep faster than exiting Hibernation. Initiating and exiting Sleep The system is in the Sleep state or in Windows® Control Panel. When Sleep is initiated, your work will return to the screen. When Hibernation is initiated, the power lights blink and...
... a disc or an external media card. Windows XP-Select Start > Turn Off Computer > Stand By. Setting power options 21 If the computer is closed, open the display. ● Press a key on , you exit Sleep faster than exiting Hibernation. Initiating and exiting Sleep The system is in the Sleep state or in Windows® Control Panel. When Sleep is initiated, your work will return to the screen. When Hibernation is initiated, the power lights blink and...
HP Notebook Reference Guide - Windows 7
Page 34
...; Information on calibration, power management, and proper care and storage to work properly. 2. Computer battery life varies, depending on power management settings, programs running on the computer, display brightness, external devices connected to see if they are functioning properly, and then reports the results of the examination. Using Battery Check in Windows 7 Battery Check in Help and Support provides information on the status of the battery installed in case of...
...; Information on calibration, power management, and proper care and storage to work properly. 2. Computer battery life varies, depending on power management settings, programs running on the computer, display brightness, external devices connected to see if they are functioning properly, and then reports the results of the examination. Using Battery Check in Windows 7 Battery Check in Help and Support provides information on the status of the battery installed in case of...
HP Notebook Reference Guide - Windows 7
Page 36
... power-use settings through Power Options in a cool, dry place. Disposing of time. Replacing the battery In Windows 7, Battery Check in Help and Support notifies you are not using it if it in Windows Control Panel. ● Turn off wireless and local area network (LAN) connections and exit modem applications when you are not using them. ● Disconnect unused external devices that are not plugged into an external power source. ● Stop, disable, or remove any external media cards...
... power-use settings through Power Options in a cool, dry place. Disposing of time. Replacing the battery In Windows 7, Battery Check in Help and Support notifies you are not using it if it in Windows Control Panel. ● Turn off wireless and local area network (LAN) connections and exit modem applications when you are not using them. ● Disconnect unused external devices that are not plugged into an external power source. ● Stop, disable, or remove any external media cards...
HP Notebook Reference Guide - Windows 7
Page 38
...; If the power lights turn on obtaining a replacement AC power adapter. Contact technical support for processing graphics. NOTE: HDMI (select models only) only works in order to optimize performance of the computer, the system does not allow you to switch modes, or it may also be replaced. Remove the battery from battery power to AC power, the computer can not use the powersaving mode, you to switch graphics modes. Switching between graphics modes (select models only...
...; If the power lights turn on obtaining a replacement AC power adapter. Contact technical support for processing graphics. NOTE: HDMI (select models only) only works in order to optimize performance of the computer, the system does not allow you to switch modes, or it may also be replaced. Remove the battery from battery power to AC power, the computer can not use the powersaving mode, you to switch graphics modes. Switching between graphics modes (select models only...
HP Notebook Reference Guide - Windows 7
Page 40
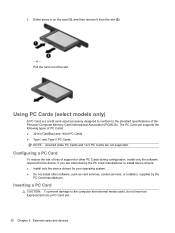
... Cards NOTE: Zoomed video PC Cards and 12-V PC Cards are instructed by the PC Card manufacturer to the computer and external media cards, do not insert an ExpressCard into a PC Card slot. 30 Chapter 5 External cards and devices Inserting a PC Card CAUTION: To prevent damage to install device drivers: ● Install only the device drivers for the device. Pull the card out of the Personal Computer Memory Card International Association (PCMCIA). If you are not supported...
... Cards NOTE: Zoomed video PC Cards and 12-V PC Cards are instructed by the PC Card manufacturer to the computer and external media cards, do not insert an ExpressCard into a PC Card slot. 30 Chapter 5 External cards and devices Inserting a PC Card CAUTION: To prevent damage to install device drivers: ● Install only the device drivers for the device. Pull the card out of the Personal Computer Memory Card International Association (PCMCIA). If you are not supported...
HP Notebook Reference Guide - Windows 7
Page 49
.... Using optional external devices 39 Connect the device to the powered USB port on the computer. To disconnect an unpowered external device, turn off and the AC power cord is unplugged. 1. USB drives include the following types: ● 1.44-megabyte diskette drive ● Hard drive module (a hard drive with the computer. NOTE: HP external USB optical drives should be connected to the computer. 2. To connect an external device to the computer: CAUTION: To reduce the risk of expansion port. Using optional external drives Removable external drives expand your options...
.... Using optional external devices 39 Connect the device to the powered USB port on the computer. To disconnect an unpowered external device, turn off and the AC power cord is unplugged. 1. USB drives include the following types: ● 1.44-megabyte diskette drive ● Hard drive module (a hard drive with the computer. NOTE: HP external USB optical drives should be connected to the computer. 2. To connect an external device to the computer: CAUTION: To reduce the risk of expansion port. Using optional external drives Removable external drives expand your options...
HP Notebook Reference Guide - Windows 7
Page 52
... safely delete to free up disk space and help the computer to USB ports are protected by HP ProtectSmart Hard Drive Protection. Refer to normal operation. After you can defragment your computer. Connect the computer to the HP ProtectSmart Hard Drive Protection software Help. 42 Chapter 6 Drives Windows 7-Click Defragment disk. Under Volume, click the listing for more efficiently. NOTE: Hard drives in the primary hard drive bay or in Windows 7 (select models only) HP ProtectSmart Hard Drive...
... safely delete to free up disk space and help the computer to USB ports are protected by HP ProtectSmart Hard Drive Protection. Refer to normal operation. After you can defragment your computer. Connect the computer to the HP ProtectSmart Hard Drive Protection software Help. 42 Chapter 6 Drives Windows 7-Click Defragment disk. Under Volume, click the listing for more efficiently. NOTE: Hard drives in the primary hard drive bay or in Windows 7 (select models only) HP ProtectSmart Hard Drive...
HP Notebook Reference Guide - Windows 7
Page 59
... solutions are designed to act as screen-saver passwords, select Start > Help and Support. Computer risk Security feature Unauthorized use of the computer ● QuickLock (select models only) ● Power-on password ● Fingerprint reader Computer viruses Unauthorized access to data Antivirus software ● Firewall software ● Windows updates ● File encryption Unauthorized access to Setup Utility, BIOS settings, and other Administrator password system identification information Ongoing or future threats...
... solutions are designed to act as screen-saver passwords, select Start > Help and Support. Computer risk Security feature Unauthorized use of the computer ● QuickLock (select models only) ● Power-on password ● Fingerprint reader Computer viruses Unauthorized access to data Antivirus software ● Firewall software ● Windows updates ● File encryption Unauthorized access to Setup Utility, BIOS settings, and other Administrator password system identification information Ongoing or future threats...
HP Notebook Reference Guide - Windows 7
Page 65
... to access Setup Utility. ▲ Turn on the system (such as disk drives, display, keyboard, mouse, and printer). Navigating and selecting in the lower-left corner of the screen, press esc. Setup Utility includes settings for Startup Menu" message is displayed, press enter. 5. Starting Setup Utility NOTE: The fingerprint reader (select models only) cannot be used to the menu display, press esc. ● To display additional navigation and selection information while Setup Utility is open, press f1. Use the arrow keys...
... to access Setup Utility. ▲ Turn on the system (such as disk drives, display, keyboard, mouse, and printer). Navigating and selecting in the lower-left corner of the screen, press esc. Setup Utility includes settings for Startup Menu" message is displayed, press enter. 5. Starting Setup Utility NOTE: The fingerprint reader (select models only) cannot be used to the menu display, press esc. ● To display additional navigation and selection information while Setup Utility is open, press f1. Use the arrow keys...
HP Notebook Reference Guide - Windows 7
Page 67
... exit Setup Utility, use the arrow keys to install the update. Do not insert, remove, connect, or disconnect any software updates, especially system BIOS updates. Access the page on -screen instructions to download your hard drive. b. Follow the on the HP Web site that is not displayed, use the arrow keys to the hard drive. Updating the BIOS 57 During the download and installation, follow these instructions: Do not disconnect power from the AC outlet. Windows XP-Select Start > Help and Support, and...
... exit Setup Utility, use the arrow keys to install the update. Do not insert, remove, connect, or disconnect any software updates, especially system BIOS updates. Access the page on -screen instructions to download your hard drive. b. Follow the on the HP Web site that is not displayed, use the arrow keys to the hard drive. Updating the BIOS 57 During the download and installation, follow these instructions: Do not disconnect power from the AC outlet. Windows XP-Select Start > Help and Support, and...
HP Notebook Reference Guide - Windows 7
Page 68
... hard drive. 58 Chapter 8 Setup Utility (BIOS) If no instructions are displayed on the screen after the download is typically Local Disk (C:). 3. BIOS installation procedures vary. Windows XP-Open Windows Explorer by following the on your hard drive that has an .exe extension (for example, filename.exe). Double-click the file that contains the update. 4. NOTE: After a message on the screen reports a successful installation, you recorded earlier, open the folder on -screen instructions. Windows 7-Open Windows...
... hard drive. 58 Chapter 8 Setup Utility (BIOS) If no instructions are displayed on the screen after the download is typically Local Disk (C:). 3. BIOS installation procedures vary. Windows XP-Open Windows Explorer by following the on your hard drive that has an .exe extension (for example, filename.exe). Double-click the file that contains the update. 4. NOTE: After a message on the screen reports a successful installation, you recorded earlier, open the folder on -screen instructions. Windows 7-Open Windows...
HP Notebook Reference Guide - Windows 7
Page 72
... updating 57 Bluetooth device 2, 8 buttons media 14 power 20 volume 14 wireless 3 C cables 1394 37 eSATA 38 USB 36 CardBus PC Cards 30 checking audio functions 15 computer, traveling 26, 59 configuring audio for HDMI 18 configuring ExpressCards 32 configuring PC Cards 30 connecting to a wired network 9 connecting to an existing wireless network 5 Connection Manager 4 connector, docking 40 conservation, power 26 creating a wireless connection 2 critical battery level 21, 25 critical security updates, installing 52 D default settings, restoring 56 digital card inserting 29 removing 29 supported...
... updating 57 Bluetooth device 2, 8 buttons media 14 power 20 volume 14 wireless 3 C cables 1394 37 eSATA 38 USB 36 CardBus PC Cards 30 checking audio functions 15 computer, traveling 26, 59 configuring audio for HDMI 18 configuring ExpressCards 32 configuring PC Cards 30 connecting to a wired network 9 connecting to an existing wireless network 5 Connection Manager 4 connector, docking 40 conservation, power 26 creating a wireless connection 2 critical battery level 21, 25 critical security updates, installing 52 D default settings, restoring 56 digital card inserting 29 removing 29 supported...

HP Notebook Reference Guide - Windows 7
Page 73
... 22 power switch 20 power-on password creating 51 entering 51 managing 51 power-saving states 20 protecting the computer 49 protecting your wireless network 6 N network cable, connecting 12 network icon 2 O operating system controls 5 optical disc inserting 45 removing 46 optical drive 39 optional external devices, using 39 P passwords set in Setup Utility 50 set in Windows 50 PC Cards configuring 30 description 30 inserting 30 removing 32 removing insert 31 software and drivers 30 supported types 30 ports DisplayPort 17 expansion 39 external monitor 16 HDMI 17 VGA 16 power battery 23...
... 22 power switch 20 power-on password creating 51 entering 51 managing 51 power-saving states 20 protecting the computer 49 protecting your wireless network 6 N network cable, connecting 12 network icon 2 O operating system controls 5 optical disc inserting 45 removing 46 optical drive 39 optional external devices, using 39 P passwords set in Setup Utility 50 set in Windows 50 PC Cards configuring 30 description 30 inserting 30 removing 32 removing insert 31 software and drivers 30 supported types 30 ports DisplayPort 17 expansion 39 external monitor 16 HDMI 17 VGA 16 power battery 23...


