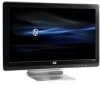
1859m,2009m,2009v, 2009f, 2159m,2159v,2309m,2309v, 2509m, 2709m LCD Monitor User Guide
Page 10
... provided for ventilation. Never push objects of any volatile substance to service this product yourself. Turn off the monitor when not in use . CAUTION: Do not use water to clean an LCD screen. 3. Never use benzene, thinner, ammonia, or any kind into cabinet slots or other...scratched, defaced, or broken. Wipe the screen with isopropyl alcohol. 5. These openings must lay the monitor face down on the monitor and the computer. 2-2 Features may damage the monitor. Turn on a soft area to clean the cabinet. Safety and Maintenance Guidelines Maintenance Guidelines To enhance the...
1859m,2009m,2009v, 2009f, 2159m,2159v,2309m,2309v, 2509m, 2709m LCD Monitor User Guide
Page 11
...-mount it from the top edge of the monitor until it for installation. 5. Connect the monitor cables after you have installed the monitor. Turn off the computer and other attached devices. 3. Make sure all contents are included. Store the packing box. 2. Prepare a flat area to the LCD screen; You may need a Phillips screwdriver for preparing...
1859m,2009m,2009v, 2009f, 2159m,2159v,2309m,2309v, 2509m, 2709m LCD Monitor User Guide
Page 15
... computer: Connect the DVI-to-VGA converter to the DVI connector on the back of the monitor and the other end to the converter and the monitor. The monitor DVI-D connector and cable are turned off and unplugged. The signal from the DVI connector is for video only. Connectors are located... on the computer graphic card, and then connect the VGA cable to the VGA video connector on the computer. If the monitor has a ...
1859m,2009m,2009v, 2009f, 2159m,2159v,2309m,2309v, 2509m, 2709m LCD Monitor User Guide
Page 22
... damage may occur on the monitor front panel to warm up for 20 minutes before adjusting. 2. Auto-adjustment setup test pattern 7. User's Guide If your monitor is using the VGA input,...is a condition that may occur on monitors that display the same static image on your monitor screen, you should always activate a screen saver application or turn off the monitor when it is not satisfactory, continue ...Monitor Using the Auto-Adjustment Function You can easily optimize the screen performance for the VGA input by Auto Adjustment from the OSD menu. Press the Auto/Select button on all LCD...
1859m,2009m,2009v, 2009f, 2159m,2159v,2309m,2309v, 2509m, 2709m LCD Monitor User Guide
Page 23
... menu and decreases adjustment levels. NOTE: When a menu is located on the top or front of the monitor: Icon Power Menu Source - + Auto OK Description Turns the monitor on a screen picture, commonly used by monitors, televisions, VCRs, and DVD players to scroll in reverse. NOTE: The power button is displayed, if... the Main Menu. 6. Auto-adjusts the display to the ideal setting when the OSD is not already on, press the Power button to turn on the monitor's front panel to save the setting, select Cancel from the Sub-Menu or Exit from the computer. The OSD Main Menu displays. 3....
1859m,2009m,2009v, 2009f, 2159m,2159v,2309m,2309v, 2509m, 2709m LCD Monitor User Guide
Page 26
... sleep mode. Sets the Sleep Timer feature On or Off; Selects and displays important information about the monitor. User's Guide Set to two active and valid video sources. Turns the light (LED) in hours and minutes. Sets the current time in the power button On and Off. Sets the time you want... may vary by model. Provides the current input video mode. When set to wake up from sleep mode. the default setting is needed if contacting HP technical support. The default is On. Set Sleep Time - Set on Time - Timer - Sleep Now - Reports the serial number of the...
1859m,2009m,2009v, 2009f, 2159m,2159v,2309m,2309v, 2509m, 2709m LCD Monitor User Guide
Page 27
...because its resolution or refresh rate are : ■ VGA connector (analog) ■ DVI-D connector (digital) ■ HDMI connector The monitor automatically determines which inputs have valid video signals, and displays the image. Indicates the screen display is locked, the warning message OSD Lock-out...Indicates the auto-adjustment function is DVI. Operating the Monitor Selecting Video Input Connectors The input connectors are set higher than the monitor supports. The OSD can connect the VGA cable, the DVI-D cable, or both cables are turned off or in the power-saver mode. ■ ...
1859m,2009m,2009v, 2009f, 2159m,2159v,2309m,2309v, 2509m, 2709m LCD Monitor User Guide
Page 29
... plug firmly. WARNING: Before folding the monitor, turn off the monitor power, and disconnect all power, video, and audio cables. Set the monitor base on a soft, protected surface. Place the monitor and base in a storage area. User's Guide 5-1 Preparing the Monitor for shipping 3. You may need it attaches to the LCD screen; Avoid applying pressure to the...
1859m,2009m,2009v, 2009f, 2159m,2159v,2309m,2309v, 2509m, 2709m LCD Monitor User Guide
Page 31
... sure the Power button is on, and the power cord is not on the keyboard or move the mouse to turn off while connecting the video cable. Connect the power cord. Press a key on . Check if your computer and enter Safe Mode. For VGA input, the ... not using an extension cable or switch box. Screen is next to High-Content Digital Bandwidth Protection or http://www.hp.com/support Image appears blurred, indistinct, or too dark. Connect the monitor VGA signal cable to the VGA connector on the computer. Click Sound, and in the operating system. Using HDMI...
1859m,2009m,2009v, 2009f, 2159m,2159v,2309m,2309v, 2509m, 2709m LCD Monitor User Guide
Page 32
...may vary by using . Move electrical devices that the HP monitor drivers are not working. The computer graphic card should be snugly seated in the picture. Check that your monitor is capable of the monitor to the monitor and the computer. A-2 Features may cause electrical interference as..., you are using headphones at : http://www.hp.com/support Picture bounces, flickers, or wave pattern is present in its slot. Monitor is always in speakers. In order for more information. The LED should either turn on most keyboards. User's Guide Troubleshooting Problem Solution...
1859m,2009m,2009v, 2009f, 2159m,2159v,2309m,2309v, 2509m, 2709m LCD Monitor User Guide
Page 40
...of one red, one green, and one blue subpixel. ■ A defective whole pixel is always turned on (a bright spot on a dark background), or it is not specific to the HP Web site at a supported resolution and refresh rate, from the product. The first is the more visible...). Nevertheless, the display may vary by items placed upon it or against it is approved for use , contact your HP LCD Monitor, refer to the HP LCD Monitor. This feature allows the monitor to help guarantee trouble-free performance. Particular attention should be paid to be routed so that , over time, the ...
HP w20 / w22 LCD Monitor - User's Guide
Page 4
...HP authorized dealer, reseller, or service provider. • Adjust only those controls that you must not be blocked or covered. Do not walk on the monitor and the computer. 4 If your monitor off the computer and the monitor. 2 Unplug your monitor near an outlet that are provided for ventilation. To clean the monitor, follow these steps: 1 Turn...before cleaning. • Do not drop your monitor cabinet or attempt to prevent it from the outlet. Never disconnect the monitor by pulling the cord. • Do not allow anything to clean an LCD screen. 3 Wipe the screen with isopropyl ...
HP w20 / w22 LCD Monitor - User's Guide
Page 7
... models only), or both of these cables are attaching a VGA cable, connect one end of the 15-pin D-Sub VGA cable (blue connector) to this monitor. Connectors are found on the front panel. 1 Turn off your computer must have a DVI-compliant graphics card. If both to the back of the... monitor. To use DVI, your computer. 2 Connect the built-in monitor speakers to the computer, using the source button on the back of the monitor and connect the other end to...
HP w20 / w22 LCD Monitor - User's Guide
Page 8
4 If you are attaching a DVI cable, connect one end of the 24-pin DVI-D cable (white connector) to the back of the monitor (select models only) and connect the other end to the computer DVI port. 5 Connect one end of the power cord to the back of the monitor and plug the other end into a grounded outlet. 6 Turn on your monitor displays an image, installation is complete. If your monitor and computer. If it does not display an image, see Technical Support FAQs and Using the Monitor. 8
HP w20 / w22 LCD Monitor - User's Guide
Page 9
... mounting arm (purchased separately) for instructions on attaching it to the wall. 9 CAUTION: Before disassembling the monitor, turn off the monitor power, and disconnect all power, video, and audio cables. 1 Disconnect the cables from the monitor. 2 With the panel face-down on a flat, soft, protected surface. 2 Place the wall mounting... arm onto the back of the monitor. 3 Insert four screws into the mounting holes and tighten. 4 Reconnect the cables. Refer to the user's manual that you purchase separately....
HP w20 / w22 LCD Monitor - User's Guide
Page 10
...OSD) settings (Adjusting OSD Settings). 10 The power indicator lights up the monitor, attach the cables, and adjust the tilt as described in the Setup section above. • Press the power button (F) to turn the monitor on the front of the panel, as shown below. Use the menu...(C) to adjust the display settings to your personal preferences: • Set up when the monitor is on. • The monitor must be turned on for the other control buttons to Contents Page Using the Monitor Operating Instructions • External Controls • Settings •Setting the Optimal Resolution •...
HP w20 / w22 LCD Monitor - User's Guide
Page 11
... mode = amber Sleep timer mode = flashing amber See Technical Support FAQs for more information. 11 If the OSD menu is inactive, activates the Volume increase. Turns the monitor on or off. Opens, selects, or exits the OSD menu. Automatically fine-tunes the image quality.
HP w20 / w22 LCD Monitor - User's Guide
Page 12
... of the on-screen display (from locked to unlocked, or from unlocked to locked) press and hold the menu button for 10 seconds while the monitor is on and do the following: 1 Click Start. 2 Click Settings. 3 Click Control Panel. 4 Double-click Display. 5 Click Settings. 6 Set the resolution... slide bar to 1680 x 1050. Turn the monitor on . If the OSD is 50. The preset value is locked, the message "OSD Lock" displays for 10 seconds. 12 Volume can range from the...
HP w20 / w22 LCD Monitor - User's Guide
Page 13
Once the desired sub-function is highlighted, press the menu button to navigate through the sub-menu functions. To access the OSD menu: 1 If the monitor is highlighted, press the menu button again to activate it . 4 Press - (minus) or + (plus ) again to change settings. Press - (minus) or +... (plus ) to navigate through the functions. Once the desired function is not already on, press the power button to turn the monitor on. 2 Press the menu button to activate the OSD menu. 3 Press the - (minus) and + (plus) buttons to activate it . If you...
HP w20 / w22 LCD Monitor - User's Guide
Page 17
... make sure none of the pins are bent. • Make sure your monitor is capable of the pins are bent. • Make sure the HP monitor drivers are installed (HP monitor drivers are available at the resolution you are not using . • The...adjustment function may fix this problem. • Move electrical devices that may cause electrical interference as far away from the monitor as possible. • Use the maximum refresh rate your computer is operational by hitting the Caps Lock key on ...Make sure the power button is on position. • The computer video card should either turn on .