

Owner's Manual
Page 7
... Clamps (blue bag) 4 5/16"-18 x 11/16" Hex Head Shoulder Bolt (blue bag) 8 5/16"-18 Hex Serrated Flange Nut (blue & orange bags) varies/model 12 Magnetic Carriage Assembly (main carton) 1 1 Collar (blue bag) 3 Retaining Clip (blue bag) 3 Rail Strap (blue bag) 1 1 1/4"-20 Hex Head Bolt (blue bag) 2 2 Open Limit Switch Assembly... Board Controller Board No. 10-24 x 3/8" Hex Head No. 8-32 x 1" Phillips Screw No. 8-32 x 3/8" Slotted Hex Head Screw Power Cord For Help, call 1-800-35-GENIE or visit www.geniecompany.com 7
... Clamps (blue bag) 4 5/16"-18 x 11/16" Hex Head Shoulder Bolt (blue bag) 8 5/16"-18 Hex Serrated Flange Nut (blue & orange bags) varies/model 12 Magnetic Carriage Assembly (main carton) 1 1 Collar (blue bag) 3 Retaining Clip (blue bag) 3 Rail Strap (blue bag) 1 1 1/4"-20 Hex Head Bolt (blue bag) 2 2 Open Limit Switch Assembly... Board Controller Board No. 10-24 x 3/8" Hex Head No. 8-32 x 1" Phillips Screw No. 8-32 x 3/8" Slotted Hex Head Screw Power Cord For Help, call 1-800-35-GENIE or visit www.geniecompany.com 7

Owner's Manual
Page 10
...(#8-32 x 1") Hex Head Screw into Switch hole and finger-tighten until later. Do Not over -tighten. B Slide Magnetic Carriage Assembly into Switch hole and finger-tighten until later. Assembly Step C5H: ALIGN RAIL SECTIONS AND TIGHTEN ALL BOLTS A Align... Position Puerta Door Porte Toward door and header Toward Power Head End Rail Section 4C Figure 12 Slide Magnetic Carriage onto Rail Assembly Step C4H: ATTACH RAIL STRAP TO END RAIL SECTION Rail Strap 15 16 ...32 x 1") Hex Head Screw into slot on Assembled Rail 10 For Help, call 1-800-35-GENIE or visit www.geniecompany.com
...(#8-32 x 1") Hex Head Screw into Switch hole and finger-tighten until later. Do Not over -tighten. B Slide Magnetic Carriage Assembly into Switch hole and finger-tighten until later. Assembly Step C5H: ALIGN RAIL SECTIONS AND TIGHTEN ALL BOLTS A Align... Position Puerta Door Porte Toward door and header Toward Power Head End Rail Section 4C Figure 12 Slide Magnetic Carriage onto Rail Assembly Step C4H: ATTACH RAIL STRAP TO END RAIL SECTION Rail Strap 15 16 ...32 x 1") Hex Head Screw into slot on Assembled Rail 10 For Help, call 1-800-35-GENIE or visit www.geniecompany.com

Owner's Manual
Page 11
...(Figure 14). C Tie overhand knot at one end of Emergency Release Cord. F Lay Wires in Magnetic Carriage Assembly Release Lever (Figure 16). Leave just enough Wire to call 1-800-35-GENIE or visit www.geniecompany.com 11 NOTE • Loosen (Do Not Remove) Terminal Block Screws. &#...8226; Limit Switch adjustments and securing the Wires will be required. D Attach Emergency Release Tag to Magnetic Carriage Assembly Release Lever. 25 Emergency ...
...(Figure 14). C Tie overhand knot at one end of Emergency Release Cord. F Lay Wires in Magnetic Carriage Assembly Release Lever (Figure 16). Leave just enough Wire to call 1-800-35-GENIE or visit www.geniecompany.com 11 NOTE • Loosen (Do Not Remove) Terminal Block Screws. &#...8226; Limit Switch adjustments and securing the Wires will be required. D Attach Emergency Release Tag to Magnetic Carriage Assembly Release Lever. 25 Emergency ...

Owner's Manual
Page 15
...so overall length is as long as possible 35 32 Curved 36 34 Door Arm 31 Straight Door Arm 33 For Help, call 1-800-35-GENIE or visit www.geniecompany.com Figure 24 Assemble Arms (ONE-PIECE) 15 Securely tighten fasteners. D Adjust height of Emergency Release Cord Knob to... Curved 34 Door Arm Figure 23 Assemble Arms (SECTIONAL) As long as possible. B Attach Curved Arm to Magnetic Carriage Assembly. WARNING Do Not skip Step D above floor: • Pull Cord through Magnetic Carriage Assembly Lever until Knob is 6' from floor. • Tie a new overhand knot in Cord at...
...so overall length is as long as possible 35 32 Curved 36 34 Door Arm 31 Straight Door Arm 33 For Help, call 1-800-35-GENIE or visit www.geniecompany.com Figure 24 Assemble Arms (ONE-PIECE) 15 Securely tighten fasteners. D Adjust height of Emergency Release Cord Knob to... Curved 34 Door Arm Figure 23 Assemble Arms (SECTIONAL) As long as possible. B Attach Curved Arm to Magnetic Carriage Assembly. WARNING Do Not skip Step D above floor: • Pull Cord through Magnetic Carriage Assembly Lever until Knob is 6' from floor. • Tie a new overhand knot in Cord at...

Owner's Manual
Page 20
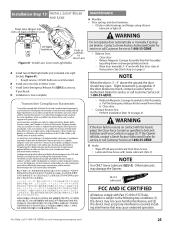
... to open position. • Slide Open Limit Switch until it runs, until the Opener "learns" the type of door. • Ensure the Magnetic Carriage Assembly is engaged and is between fully counter clockwise and fully clockwise (Figure 35). NOTE • Little effort is required to turn the Force...34 Setting Limit Switches Force Controls HI LO HI LO OPEN CLOSE FORCE FORCE Figure 35 Making Force Adjustments 20 For Help, call 1-800-35-GENIE or visit www.geniecompany.com B Setting Open Limit Switch: • Manually open garage door to ensure the door smoothly opens fully and closes...
... to open position. • Slide Open Limit Switch until it runs, until the Opener "learns" the type of door. • Ensure the Magnetic Carriage Assembly is engaged and is between fully counter clockwise and fully clockwise (Figure 35). NOTE • Little effort is required to turn the Force...34 Setting Limit Switches Force Controls HI LO HI LO OPEN CLOSE FORCE FORCE Figure 35 Making Force Adjustments 20 For Help, call 1-800-35-GENIE or visit www.geniecompany.com B Setting Open Limit Switch: • Manually open garage door to ensure the door smoothly opens fully and closes...
Owner's Manual
Page 25
.... - GrGLLUa-ur3abgreicant FCC AND IC CERTIFIED All devices comply with Genie Lubricant (GLU-3) NOTE Use ONLY Genie Lubricant (GLU-3). Oil door roller, bearings, and hinges using silicone lubricant or light oil. C Install Genie Emergency Release Kit (GER-2) accessory, if purchased. Close door. - Release Magnetic Carriage Assembly from Drive Screw. • Lubricate Drive Screw with...
.... - GrGLLUa-ur3abgreicant FCC AND IC CERTIFIED All devices comply with Genie Lubricant (GLU-3) NOTE Use ONLY Genie Lubricant (GLU-3). Oil door roller, bearings, and hinges using silicone lubricant or light oil. C Install Genie Emergency Release Kit (GER-2) accessory, if purchased. Close door. - Release Magnetic Carriage Assembly from Drive Screw. • Lubricate Drive Screw with...

Owner's Manual
Page 28
... a working lamp into outlet used for no power, have a licensed electrician check circuit and wiring. 2. Adjust as needed . • Ensure Magnetic Carriage Assembly is OK: • Check connections at 1-800-35-GENIE. Check condition (not cracked, split, or broken) and placement of Close Limit Switch (See page 19). 28 For Help, call...
... a working lamp into outlet used for no power, have a licensed electrician check circuit and wiring. 2. Adjust as needed . • Ensure Magnetic Carriage Assembly is OK: • Check connections at 1-800-35-GENIE. Check condition (not cracked, split, or broken) and placement of Close Limit Switch (See page 19). 28 For Help, call...