
User Manual (c1433-usermanual-eng)
Page 1
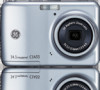
imagination at work GE Digital Camera C1433 / Z4300 User Manual Preparations Basic operation Camera function controls Playback Using the Menus Camera connectivity Appendix
imagination at work GE Digital Camera C1433 / Z4300 User Manual Preparations Basic operation Camera function controls Playback Using the Menus Camera connectivity Appendix

User Manual (c1433-usermanual-eng)
Page 3
... deform, disassemble or modify the batteries. Please do not store photos that are stored in the autogenerated folder in SD card. If the camera will not be used shortens markedly. Keep the batteries out of reach of locations: • In the rain, very humid and dusty places...moisture or extreme temperatures, which may cause irrepairable faults. near motors, transformers or magnets. If you wait for if a malfunction of your digital camera before turing on a wet surface or places where dripping water or sand may come in playback mode. Loss of recordings cannot be exposed ...
... deform, disassemble or modify the batteries. Please do not store photos that are stored in the autogenerated folder in SD card. If the camera will not be used shortens markedly. Keep the batteries out of reach of locations: • In the rain, very humid and dusty places...moisture or extreme temperatures, which may cause irrepairable faults. near motors, transformers or magnets. If you wait for if a malfunction of your digital camera before turing on a wet surface or places where dripping water or sand may come in playback mode. Loss of recordings cannot be exposed ...

User Manual (c1433-usermanual-eng)
Page 4
...as its components may damage the product. • Turn off the camera before using the product. • Do not take apart or attempt to service the camera yourself. • Do not drop or knock the camera. Copyright © Copyright 2010 General Imaging Company All rights reserved. Trademarks...the life of this manual are used for future reference. No part of your camera or damage the batteries. • Do not use or store the camera in any form, by any means, without the prior written permission of General Imaging Company. Safety information Please read this GE digital camera.
...as its components may damage the product. • Turn off the camera before using the product. • Do not take apart or attempt to service the camera yourself. • Do not drop or knock the camera. Copyright © Copyright 2010 General Imaging Company All rights reserved. Trademarks...the life of this manual are used for future reference. No part of your camera or damage the batteries. • Do not use or store the camera in any form, by any means, without the prior written permission of General Imaging Company. Safety information Please read this GE digital camera.

User Manual (c1433-usermanual-eng)
Page 5
... to ensure that the contents of time. • Do not use your GE digital camera. To clean, wipe the camera with instructions on how to use abrasive cleansers, alcohol-based, or solventbased cleaners to clean the camera. • Do not expose the lens to direct sunlight for extended periods.... • Download all pictures and remove the batteries from the camera if you are accurate, however General Imaging Company reserves the right...
... to ensure that the contents of time. • Do not use your GE digital camera. To clean, wipe the camera with instructions on how to use abrasive cleansers, alcohol-based, or solventbased cleaners to clean the camera. • Do not expose the lens to direct sunlight for extended periods.... • Download all pictures and remove the batteries from the camera if you are accurate, however General Imaging Company reserves the right...

User Manual (c1433-usermanual-eng)
Page 20
.... Zoom indicator is hidden after the subject is in Auto Mode Auto mode is the easiest mode to go further at the digital zoom. Press Power to turn the camera on page 44) When the optical zoom reaches its maximum value, release the Zoom button then press it again for it to... take photos. Zoom button Zoom indicator (See "Digital Zoom" on . 2. BASIC OPERATION Shooting in focus. 5. While operating in or out on the subject. 4. The...
.... Zoom indicator is hidden after the subject is in Auto Mode Auto mode is the easiest mode to go further at the digital zoom. Press Power to turn the camera on page 44) When the optical zoom reaches its maximum value, release the Zoom button then press it again for it to... take photos. Zoom button Zoom indicator (See "Digital Zoom" on . 2. BASIC OPERATION Shooting in focus. 5. While operating in or out on the subject. 4. The...

User Manual (c1433-usermanual-eng)
Page 67
...Printer. Press the button to the camera setting menu, select USB connection with a Printer. 1. To find out if a printer is correctly configured to a printer, regardless of brand. Use Up/Down to PC mode automatically from a memory card in a digital camera directly to connect with the Up/Down... button, and press the Right button. 2. After the camera is reset, it will allow you to ensure that the camera is PictBridge compatible, simply look for the PictBridge logo on ...
...Printer. Press the button to the camera setting menu, select USB connection with a Printer. 1. To find out if a printer is correctly configured to a printer, regardless of brand. Use Up/Down to PC mode automatically from a memory card in a digital camera directly to connect with the Up/Down... button, and press the Right button. 2. After the camera is reset, it will allow you to ensure that the camera is PictBridge compatible, simply look for the PictBridge logo on ...

User Manual (c1433-usermanual-eng)
Page 72
The following screen appears. Select Yes to confirm the printing, or Cancel. Disconnect the USB cable from the PictBridge menu. Select Print DPOF from the camera and printer. 69 The "Remove USB cable" message will be displayed. 2. Exit To exit the PictBridge menu, select Exit. Then press the button. Print DPOF (Digital Print Order Format) To use DPOF printing, you must make the selection of photos for printing using the DPOF settings before hand. See "DPOF" section on page 49. 1.
The following screen appears. Select Yes to confirm the printing, or Cancel. Disconnect the USB cable from the PictBridge menu. Select Print DPOF from the camera and printer. 69 The "Remove USB cable" message will be displayed. 2. Exit To exit the PictBridge menu, select Exit. Then press the button. Print DPOF (Digital Print Order Format) To use DPOF printing, you must make the selection of photos for printing using the DPOF settings before hand. See "DPOF" section on page 49. 1.

Technical Specifications (c1433-techspecs)
Page 2
...ge.com/digitalcameras. created from the flash for better viewing. f /6.4 (Tele) 7 elements in 7 groups 3x Normal: 11.81 in. ~ ∞ / 30 cm ~ ∞ (Wide) 39.37in. ~ ∞ / 100 cm ~ ∞ (Tele) Macro: 1.97 in. ~ ∞/ 5 cm ~∞ (Wide Only) Image Stabilization 6x Digital...mm (Tele) ] f /3.5 (Wide) - V 1101 Camera Features C1433 image stabilization panorama stitching red-eye removal AA battery Automatically corrects unintentional camera Automatically stitches three images together In-camera feature removes red-eye sometimes Convenient, easy and no hassle ...
...ge.com/digitalcameras. created from the flash for better viewing. f /6.4 (Tele) 7 elements in 7 groups 3x Normal: 11.81 in. ~ ∞ / 30 cm ~ ∞ (Wide) 39.37in. ~ ∞ / 100 cm ~ ∞ (Tele) Macro: 1.97 in. ~ ∞/ 5 cm ~∞ (Wide Only) Image Stabilization 6x Digital...mm (Tele) ] f /3.5 (Wide) - V 1101 Camera Features C1433 image stabilization panorama stitching red-eye removal AA battery Automatically corrects unintentional camera Automatically stitches three images together In-camera feature removes red-eye sometimes Convenient, easy and no hassle ...


