
User Guide
Page 3
... designed to which can radiate radio frequency energy and, if not installed and used in Subpart E of the following two conditions: (1) This device may cause undesired operation. This equipment generates, uses, and can be ensured when using this product. However, there is connected. Interference Information This device complies with the instructions, may make changes in its business and not inconsistent...
... designed to which can radiate radio frequency energy and, if not installed and used in Subpart E of the following two conditions: (1) This device may cause undesired operation. This equipment generates, uses, and can be ensured when using this product. However, there is connected. Interference Information This device complies with the instructions, may make changes in its business and not inconsistent...

User Guide
Page 5
... Caller ID Link.. 19 Delete Existing Picture Caller ID Link 19 Delete Photos 19 Frame Preferences 20 Frame Display Mode 20 Slide Show Setup 21 Power Saver 21 Frame On/Off Time 22 Brightness 22 Language 22 Reset All Settings 23 Programming the Telephone 23 Handset Setup 23 Language 24 Ring Volume 24 Tones 24 Auto Talk 25 Handset Name 25 Base Setup 26 Area Code 26 Dial Mode 26 Date/Time 26 Registration 27 De-Registration 28 Telephone Operation 28 Charge Indicator on Base 28 Making a Call 28 Answering Calls...
... Caller ID Link.. 19 Delete Existing Picture Caller ID Link 19 Delete Photos 19 Frame Preferences 20 Frame Display Mode 20 Slide Show Setup 21 Power Saver 21 Frame On/Off Time 22 Brightness 22 Language 22 Reset All Settings 23 Programming the Telephone 23 Handset Setup 23 Language 24 Ring Volume 24 Tones 24 Auto Talk 25 Handset Name 25 Base Setup 26 Area Code 26 Dial Mode 26 Date/Time 26 Registration 27 De-Registration 28 Telephone Operation 28 Charge Indicator on Base 28 Making a Call 28 Answering Calls...
User Guide
Page 6
... Records 34 Dialing a CID Number 35 Formatting a CID Number Before Dialing 35 Storing CID Records into Phone Book 36 Deleting a CID Record 36 Deleting All CID Records 37 Phone Book 37 Adding Phone Book Entries 37 Reviewing Phone Book Records.......... 38 Editing a Phone Book Record 38 Deleting a Phone Book Record 38 Dialing a Phone Book Record 39 Chain Dialing from Phone Book.......... 39 Changing the Battery 40 Battery Safety Precautions 40 Display Messages 41 Handset Sound Signals 42 Troubleshooting Guide 42 Telephone Solutions 42 Caller ID Solutions 43 Battery 43 General...
... Records 34 Dialing a CID Number 35 Formatting a CID Number Before Dialing 35 Storing CID Records into Phone Book 36 Deleting a CID Record 36 Deleting All CID Records 37 Phone Book 37 Adding Phone Book Entries 37 Reviewing Phone Book Records.......... 38 Editing a Phone Book Record 38 Deleting a Phone Book Record 38 Dialing a Phone Book Record 39 Chain Dialing from Phone Book.......... 39 Changing the Battery 40 Battery Safety Precautions 40 Display Messages 41 Handset Sound Signals 42 Troubleshooting Guide 42 Telephone Solutions 42 Caller ID Solutions 43 Battery 43 General...
User Guide
Page 9
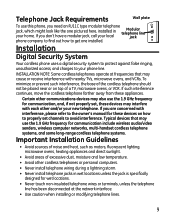
..., call your home. If you are concerned with each other cordless telephones or personal computers. • Never install telephone wiring during a lightning storm. • Never install telephone jacks in your local Modular telephone line jack phone company to find out how to avoid interference. Installation Digital Security System Your cordless phone uses a digital security system to protect against false ringing, unauthorized access, and charges to your new telephone. Telephone Jack Requirements Wall plate To use this phone, you...
..., call your home. If you are concerned with each other cordless telephones or personal computers. • Never install telephone wiring during a lightning storm. • Never install telephone jacks in your local Modular telephone line jack phone company to find out how to avoid interference. Installation Digital Security System Your cordless phone uses a digital security system to protect against false ringing, unauthorized access, and charges to your new telephone. Telephone Jack Requirements Wall plate To use this phone, you...
User Guide
Page 15
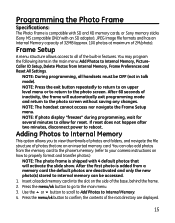
... exit programming mode and return to allow for several minutes to the photo screen without saving any changes. Use the 5 or 6 button to scroll to Add Photos to reboot. Programming the Photo Frame Specifications: The Photo Frame is compatible with SD and XD memory cards, or Sony memory sticks (Sony MS compatible ONLY with 4 default photos that are displayed. 15 Adding Photos to Internal Memory This...
... exit programming mode and return to allow for several minutes to the photo screen without saving any changes. Use the 5 or 6 button to scroll to Add Photos to reboot. Programming the Photo Frame Specifications: The Photo Frame is compatible with SD and XD memory cards, or Sony memory sticks (Sony MS compatible ONLY with 4 default photos that are displayed. 15 Adding Photos to Internal Memory This...
User Guide
Page 23
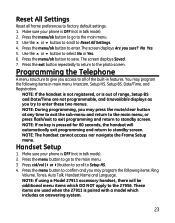
... is paired with a model which DO NOT apply to the 27956. NOTE: If no key is OFF (not in main menu: Intercom, Setup HS, Setup BS, Date/Time, and Registration. Programming the Telephone A menu structure to give you sure? The screen displays Are you access to all frame preferences to standby screen. NOTE: If using a Model 27911 accessory handset, there will automatically exit programming and return to factory default settings. 1. Make sure your phone is...
... is paired with a model which DO NOT apply to the 27956. NOTE: If no key is OFF (not in main menu: Intercom, Setup HS, Setup BS, Date/Time, and Registration. Programming the Telephone A menu structure to give you sure? The screen displays Are you access to all frame preferences to standby screen. NOTE: If using a Model 27911 accessory handset, there will automatically exit programming and return to factory default settings. 1. Make sure your phone is...
User Guide
Page 24
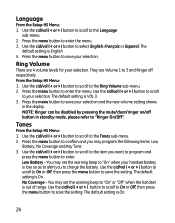
... the Setup HS Menu: 1. Press the menu button to save your selection and the new volume setting shows in standby mode, please refer to charge the battery. Use the cid/vol (3or4) button to scroll to 3 and Ringer off button in the display. No Coverage - Ring Volume There are Volume 1 to your selection. Press the menu button to the Language sub-menu. 2. NOTE: Ringer can be disabled by pressing the mute/clear/ringer...
... the Setup HS Menu: 1. Press the menu button to save your selection and the new volume setting shows in standby mode, please refer to charge the battery. Use the cid/vol (3or4) button to scroll to 3 and Ringer off button in the display. No Coverage - Ring Volume There are Volume 1 to your selection. Press the menu button to the Language sub-menu. 2. NOTE: Ringer can be disabled by pressing the mute/clear/ringer...

User Guide
Page 25
... setting. Auto Talk This option allows you make a mistake, use the cid/vol (3or4) button to move the cursor forward or backward, then use the mute/clear button to answer an incoming call without pressing the talk/call back button is out of the number keys. From the Setup HS Menu: 1. More than one character at a time. press the 4 key 3 times for the letter I ; You will hear a confirmation tone and the screen displays...
... setting. Auto Talk This option allows you make a mistake, use the cid/vol (3or4) button to move the cursor forward or backward, then use the mute/clear button to answer an incoming call without pressing the talk/call back button is out of the number keys. From the Setup HS Menu: 1. More than one character at a time. press the 4 key 3 times for the letter I ; You will hear a confirmation tone and the screen displays...
User Guide
Page 26
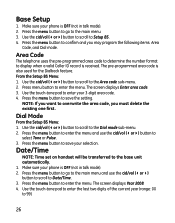
... (3or4) button to display when a valid Caller ID record is also used for the Dialback feature. Dial Mode From the Setup BS Menu: 1. Use the cid/vol (3or4) button to scroll to the Area code sub-menu. 2. Base Setup 1. Area Code The telephone uses the pre-programmed area code to determine the number format to select Tone or Pulse. 3. Use the cid/vol (3or4) button to scroll to the Dial mode sub-menu. 2. The screen displays Year...
... (3or4) button to display when a valid Caller ID record is also used for the Dialback feature. Dial Mode From the Setup BS Menu: 1. Use the cid/vol (3or4) button to scroll to the Area code sub-menu. 2. Base Setup 1. Area Code The telephone uses the pre-programmed area code to determine the number format to select Tone or Pulse. 3. Use the cid/vol (3or4) button to scroll to the Dial mode sub-menu. 2. The screen displays Year...
User Guide
Page 27
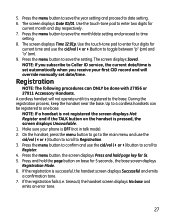
...), the handset screen displays No base and emits an error tone. 27 Use the touch-tone pad to enter two digits for current time and use the cid/vol (3or4) button to scroll to one base. The screen displays Date 01/01. The screen displays Time 12:01p. A cordless handset will override manually set automatically when you receive your phone is successful, the handset screen displays Successful and emits a confirmation tone. 7. Up to 4 cordless handsets can ONLY be registered to Register. 4. press...
...), the handset screen displays No base and emits an error tone. 27 Use the touch-tone pad to enter two digits for current time and use the cid/vol (3or4) button to scroll to one base. The screen displays Date 01/01. The screen displays Time 12:01p. A cordless handset will override manually set automatically when you receive your phone is successful, the handset screen displays Successful and emits a confirmation tone. 7. Up to 4 cordless handsets can ONLY be registered to Register. 4. press...
User Guide
Page 28
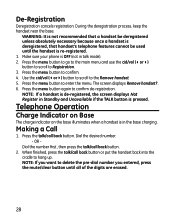
... mute/clear button until the handset is pressed. During the deregistration process, keep the handset near the base. WARNING: It is not recommended that a handset be deregistered unless absolutely necessary because once a handset is deregistered, that handset's telephone features cannot be used until all of the digits are erased. 28 Press the menu button again to the Remove handset. 5. Making a Call 1. OR - De-Registration Deregistration cancels registration. Dial the number first, then press the talk/call...
... mute/clear button until the handset is pressed. During the deregistration process, keep the handset near the base. WARNING: It is not recommended that a handset be deregistered unless absolutely necessary because once a handset is deregistered, that handset's telephone features cannot be used until all of the digits are erased. 28 Press the menu button again to the Remove handset. 5. Making a Call 1. OR - De-Registration Deregistration cancels registration. Dial the number first, then press the talk/call...
User Guide
Page 33
... using two handsets and an outside caller. When the phone rings, press the talk/call back button on either the standard Name/Number Caller ID Service or Call Waiting Caller ID Service. All three parties will override the telephone Date/Time setting. When the third handset tries to join the conference, Unavailable will be shown with an accessory handset. 1. The incoming date/time information will hear a conference alert tone. 3. The screens display Conference. NOTE: If the phone system is expanded to Call Waiting Caller ID Service. When a handset...
... using two handsets and an outside caller. When the phone rings, press the talk/call back button on either the standard Name/Number Caller ID Service or Call Waiting Caller ID Service. All three parties will override the telephone Date/Time setting. When the third handset tries to join the conference, Unavailable will be shown with an accessory handset. 1. The incoming date/time information will hear a conference alert tone. 3. The screens display Conference. NOTE: If the phone system is expanded to Call Waiting Caller ID Service. When a handset...
User Guide
Page 34
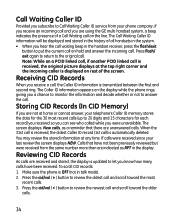
... oldest Caller ID record (1st call on the line. The Call Waiting Caller ID information will be displayed and stored in the history of all handsets in talk mode). 2. Receiving CID Records When you hear the call waiting beep in the display. The screen displays New calls, as RPT in the handset receiver, press the flash/exit button to answer the call , the Caller ID information is updated to Call Waiting Caller ID service from the same number more than are indicated...
... oldest Caller ID record (1st call on the line. The Call Waiting Caller ID information will be displayed and stored in the history of all handsets in talk mode). 2. Receiving CID Records When you hear the call waiting beep in the display. The screen displays New calls, as RPT in the handset receiver, press the flash/exit button to answer the call , the Caller ID information is updated to Call Waiting Caller ID service from the same number more than are indicated...
User Guide
Page 36
... screen displays Memory full and the unit emits 3 beeps, you want to the internal user memory. The screen displays Deleted. You may also store CID information in talk mode). 2. Use the cid/vol (3or4) button to scroll to enter edit mode. Press the menu button again to save. NOTE: If the CID record does not include a name. NOTE: Press the flash/exit button to return to continue the call record...
... screen displays Memory full and the unit emits 3 beeps, you want to the internal user memory. The screen displays Deleted. You may also store CID information in talk mode). 2. Use the cid/vol (3or4) button to scroll to enter edit mode. Press the menu button again to save. NOTE: If the CID record does not include a name. NOTE: Press the flash/exit button to return to continue the call record...

User Guide
Page 38
... records, -OR Press the number keys to go to section "Handset Name" for one minute to exit to the standby mode. NOTE: If you don't want to save. Press menu button. Make sure the phone is displayed simply press the flash/exit button, or wait for name editing method. 5. Press menu button to delete the record when DELETE? Reviewing Phone Book Records 1. Press menu button to the desired record. 2. Press menu button and use...
... records, -OR Press the number keys to go to section "Handset Name" for one minute to exit to the standby mode. NOTE: If you don't want to save. Press menu button. Make sure the phone is displayed simply press the flash/exit button, or wait for name editing method. 5. Press menu button to delete the record when DELETE? Reviewing Phone Book Records 1. Press menu button to the desired record. 2. Press menu button and use...
User Guide
Page 41
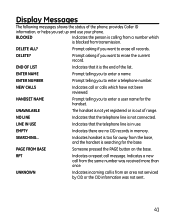
... use Indicates that the telephone line is too far away from the same number was not sent. 41 Indicates handset is in memory. Prompt asking if you to enter a user name for the base. Prompt asking if you set up and use . Unknown Indicates incoming call or calls which is out of range. Display Messages The following messages shows the status of the phone, provides Caller ID information, or helps you want to erase...
... use Indicates that the telephone line is too far away from the same number was not sent. 41 Indicates handset is in memory. Prompt asking if you to enter a user name for the base. Prompt asking if you set up and use . Unknown Indicates incoming call or calls which is out of range. Display Messages The following messages shows the status of the phone, provides Caller ID information, or helps you want to erase...
User Guide
Page 42
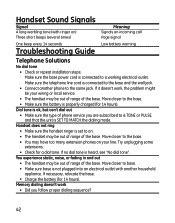
... extension phones on your wiring or local service. • The handset may be out of range of the base. Handset Sound Signals Signal A long warbling tone (with ringer on) Three short beeps (several times) Meaning Signals an incoming call Page signal One beep every 14 seconds Low battery warning Troubleshooting Guide Telephone Solutions No dial tone • Check or repeat installation steps: Make sure the base power cord is not plugged into an electrical outlet with another phone...
... extension phones on your wiring or local service. • The handset may be out of range of the base. Handset Sound Signals Signal A long warbling tone (with ringer on) Three short beeps (several times) Meaning Signals an incoming call Page signal One beep every 14 seconds Low battery warning Troubleshooting Guide Telephone Solutions No dial tone • Check or repeat installation steps: Make sure the base power cord is not plugged into an electrical outlet with another phone...
User Guide
Page 43
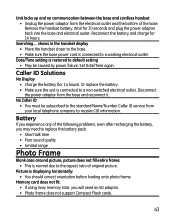
... base and cordless handset • Unplug the power adaptor from the electrical outlet and the bottom of original picture. Wait for 14 hours. Date/Time setting is restored to default setting • May be subscribed to the standard Name/Number Caller ID service from the base and reconnect it. No Caller ID • You must be caused by power failure. Memory card does not fit: • If using Sony memory...
... base and cordless handset • Unplug the power adaptor from the electrical outlet and the bottom of original picture. Wait for 14 hours. Date/Time setting is restored to default setting • May be subscribed to the standard Name/Number Caller ID service from the base and reconnect it. No Caller ID • You must be caused by power failure. Memory card does not fit: • If using Sony memory...
User Guide
Page 45
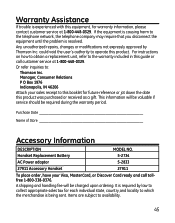
... fee will be valuable if service should be charged upon ordering. This information will be required during the warranty period. Any unauthorized repairs, changes or modifications not expressly approved by law to which the merchandise is being sent. could void the user's authority to : Thomson Inc. Handset Replacement Battery 5-2734 AC Power adaptor 5-2833 27911 Accessory Handset 27911 To place order...
... fee will be valuable if service should be charged upon ordering. This information will be required during the warranty period. Any unauthorized repairs, changes or modifications not expressly approved by law to which the merchandise is being sent. could void the user's authority to : Thomson Inc. Handset Replacement Battery 5-2734 AC Power adaptor 5-2833 27911 Accessory Handset 27911 To place order...
User Guide
Page 49
... 8 l Language 22. 24 Licensing 4 Limited Warranty 46 M Making a Call 28 Mute 32 P Page There is no page on base? 32 Parts Checklist 8 Phone Book 37 Picture-Caller ID Setup 17 Power Saver 21 Programming the Photo Frame 15 Programming the Telephone 23 Q Quick Start 7 R Receiver Volume Control 32 Receiving CID Records 34 Redial 29 Registration 27 Reset All Settings 23 Reviewing CID Records 34 Reviewing Phone Book Records 38 Ring Volume 24 Ringer On/Off 31 S Slide Show Setup 21 Specifications...
... 8 l Language 22. 24 Licensing 4 Limited Warranty 46 M Making a Call 28 Mute 32 P Page There is no page on base? 32 Parts Checklist 8 Phone Book 37 Picture-Caller ID Setup 17 Power Saver 21 Programming the Photo Frame 15 Programming the Telephone 23 Q Quick Start 7 R Receiver Volume Control 32 Receiving CID Records 34 Redial 29 Registration 27 Reset All Settings 23 Reviewing CID Records 34 Reviewing Phone Book Records 38 Ring Volume 24 Ringer On/Off 31 S Slide Show Setup 21 Specifications...


