
8511418 - Component Replacement Manual
Page 3
... remove the memory bay cover. Replacing the DVD Drive 7 With a small Phillips screwdriver, remove the keyboard screw and put it in a safe place. Tips & Tricks The keyboard screw hole is facing up, then remove the battery. in your notebook. For more information, see ... by their respective companies. 1 Do not lay components on the bottom of the notebook for important safety, regulatory, and legal information. Gateway and eMachines are extremely sensitive to replace the DVD drive. Screws Screws 9 With a small Phillips screwdriver, remove the DVD drive screw...
... remove the memory bay cover. Replacing the DVD Drive 7 With a small Phillips screwdriver, remove the keyboard screw and put it in a safe place. Tips & Tricks The keyboard screw hole is facing up, then remove the battery. in your notebook. For more information, see ... by their respective companies. 1 Do not lay components on the bottom of the notebook for important safety, regulatory, and legal information. Gateway and eMachines are extremely sensitive to replace the DVD drive. Screws Screws 9 With a small Phillips screwdriver, remove the DVD drive screw...

8511418 - Component Replacement Manual
Page 4
.... Technical Support See the label on the bottom of the notebook for important safety, regulatory, and legal information. 2 www.gateway.com © 2006 Gateway, Inc. All other countries. 10 Slide the DVD drive out of the drive bay by pushing on your hardware guide for Customer Care ...Information. in Step 9. 13 Replace the memory bay cover, then tighten the six cover screws. 14 Replace the keyboard screw. 15 Insert the battery,...
.... Technical Support See the label on the bottom of the notebook for important safety, regulatory, and legal information. 2 www.gateway.com © 2006 Gateway, Inc. All other countries. 10 Slide the DVD drive out of the drive bay by pushing on your hardware guide for Customer Care ...Information. in Step 9. 13 Replace the memory bay cover, then tighten the six cover screws. 14 Replace the keyboard screw. 15 Insert the battery,...

8511418 - Component Replacement Manual
Page 7
...of the notebook for important safety, regulatory, and legal information. 12 Carefully open the LCD panel to replace the keyboard. Replacing the Keyboard Tools You need a small Phillips and a small flat-blade screwdriver to the fully opened position. Never slide components ... Phillips screwdriver, remove the keyboard screw and put them . Screw Screw 11 Insert the small flat-blade screwdriver under "Preventing static electricity discharge." 2 Turn off your notebook. All other countries. Warning To avoid exposure to a bare metal part of Gateway, Inc. Before working with...
...of the notebook for important safety, regulatory, and legal information. 12 Carefully open the LCD panel to replace the keyboard. Replacing the Keyboard Tools You need a small Phillips and a small flat-blade screwdriver to the fully opened position. Never slide components ... Phillips screwdriver, remove the keyboard screw and put them . Screw Screw 11 Insert the small flat-blade screwdriver under "Preventing static electricity discharge." 2 Turn off your notebook. All other countries. Warning To avoid exposure to a bare metal part of Gateway, Inc. Before working with...

8511418 - Component Replacement Manual
Page 8
... all the way across . See your notebook. Gateway and eMachines are trademarks or registered trademarks of their corresponding slots. 15 Lift the back edge of the keyboard cover and gently pry it up . 9 Replace the two optional keyboard screws. 10 Replace the memory bay cover and ...Important Inserting a piece of cloth between the screwdriver and keyboard will help prevent damage to release the keyboard retaining tabs located on the front of the keyboard. 16 Slowly rotate the keyboard toward you finger along the front edge of Gateway, Inc. All rights reserved. Be careful not to lock...
... all the way across . See your notebook. Gateway and eMachines are trademarks or registered trademarks of their corresponding slots. 15 Lift the back edge of the keyboard cover and gently pry it up . 9 Replace the two optional keyboard screws. 10 Replace the memory bay cover and ...Important Inserting a piece of cloth between the screwdriver and keyboard will help prevent damage to release the keyboard retaining tabs located on the front of the keyboard. 16 Slowly rotate the keyboard toward you finger along the front edge of Gateway, Inc. All rights reserved. Be careful not to lock...

8511418 - Component Replacement Manual
Page 9
... voltages and moving parts, turn off your workbench or other countries. Screw Preventing static electricity discharge The components inside of Gateway, Inc. See your workbench or other brands and product names are trademarks or registered trademarks of the bags provide electrostatic protection...wrist strap (available at most electronics stores) and attach it in your online hardware guide. 6 With a small Phillips screwdriver, remove the keyboard screw and put it to a bare metal part of their edges. For more information, see "Changing Batteries" in your notebook. Never ...
... voltages and moving parts, turn off your workbench or other countries. Screw Preventing static electricity discharge The components inside of Gateway, Inc. See your workbench or other brands and product names are trademarks or registered trademarks of the bags provide electrostatic protection...wrist strap (available at most electronics stores) and attach it in your online hardware guide. 6 With a small Phillips screwdriver, remove the keyboard screw and put it to a bare metal part of their edges. For more information, see "Changing Batteries" in your notebook. Never ...

8511418 - Component Replacement Manual
Page 10
... and product names are trademarks or registered trademarks of the module until it clicks in one direction. Important Use only memory modules designed for your Gateway notebook. 11 Gently push the module down until the module tilts upward. 9 Pull the memory module out of the slot. All rights reserved....is keyed so it can only be inserted in place. 12 Replace the memory bay cover, then tighten the six cover screws. 13 Replace the keyboard screw. 14 Insert the battery, then turn your notebook over. 15 Connect the power adapter, the modem cable, and the network cable. 16 Reconnect...
... and product names are trademarks or registered trademarks of the module until it clicks in one direction. Important Use only memory modules designed for your Gateway notebook. 11 Gently push the module down until the module tilts upward. 9 Pull the memory module out of the slot. All rights reserved....is keyed so it can only be inserted in place. 12 Replace the memory bay cover, then tighten the six cover screws. 13 Replace the keyboard screw. 14 Insert the battery, then turn your notebook over. 15 Connect the power adapter, the modem cable, and the network cable. 16 Reconnect...

8511385 - User Guide Gateway Notebook
Page 8
Contents www.gateway.com Scheduling maintenance tasks 181 Moving from Your Old Computer 182 Using the Files and Settings Transfer Wizard 182 Transferring files 182 Transferring Internet settings ... 197 Battery 197 CD drives 197 Device installation 197 Diskette drive 198 Display 199 DVD drives 201 File management 204 Hard drive 204 Internet 205 Keyboard 207 Media Center 207 Memory 212 Memory card reader 212 Modem (cable or DSL 212 vi
Contents www.gateway.com Scheduling maintenance tasks 181 Moving from Your Old Computer 182 Using the Files and Settings Transfer Wizard 182 Transferring files 182 Transferring Internet settings ... 197 Battery 197 CD drives 197 Device installation 197 Diskette drive 198 Display 199 DVD drives 201 File management 204 Hard drive 204 Internet 205 Keyboard 207 Media Center 207 Memory 212 Memory card reader 212 Modem (cable or DSL 212 vi

8511385 - User Guide Gateway Notebook
Page 24
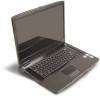
... ■ Enhanced speech and voice recognition - make a quick note with added pen-based computing features: ■ Tablet and Pen Settings - use its writing pad, soft keyboard, and voice recognition for the pen, tablet buttons, and display screen ■ Tablet PC Input Panel (TIP) - capture, organize, and reuse your pen or voice...
... ■ Enhanced speech and voice recognition - make a quick note with added pen-based computing features: ■ Tablet and Pen Settings - use its writing pad, soft keyboard, and voice recognition for the pen, tablet buttons, and display screen ■ Tablet PC Input Panel (TIP) - capture, organize, and reuse your pen or voice...

8511385 - User Guide Gateway Notebook
Page 25
... or click Calibrate. When you use these gestures, you get the same result as pressing the corresponding key on -screen instructions. Follow the on a standard keyboard. 15 Gestures A gesture is a shape you should calibrate your pen for their own use-recalibrate it for both portrait and landscape orientations. Using Windows XP...
... or click Calibrate. When you use these gestures, you get the same result as pressing the corresponding key on -screen instructions. Follow the on a standard keyboard. 15 Gestures A gesture is a shape you should calibrate your pen for their own use-recalibrate it for both portrait and landscape orientations. Using Windows XP...

8511385 - User Guide Gateway Notebook
Page 27
... voice into a word processing program or a text-entry form. ■ Access the TIP keyboard and writing pad by resting it dry and avoid contact with liquids. Using Windows XP Tablet PC 2005 Tips ■ Hold the pen the same ...
... voice into a word processing program or a text-entry form. ■ Access the TIP keyboard and writing pad by resting it dry and avoid contact with liquids. Using Windows XP Tablet PC 2005 Tips ■ Hold the pen the same ...

8511385 - User Guide Gateway Notebook
Page 28
CHAPTER 2: Using Windows XP TIP tips ■ Open a program for your input (for example, a word processing program or a Web form) before using the writing pad or soft keyboard. ■ To adjust writing pad and keyboard settings, tap or click the Tools and Options icon , then tap or click Options. ■ For security and accuracy when entering masked text (such as passwords), use your tablet PC Input Panel's soft keyboard instead of the writing pad. 18
CHAPTER 2: Using Windows XP TIP tips ■ Open a program for your input (for example, a word processing program or a Web form) before using the writing pad or soft keyboard. ■ To adjust writing pad and keyboard settings, tap or click the Tools and Options icon , then tap or click Options. ■ For security and accuracy when entering masked text (such as passwords), use your tablet PC Input Panel's soft keyboard instead of the writing pad. 18
8511385 - User Guide Gateway Notebook
Page 29
Each drive has a letter, usually Local Disk (C:) for the hard drive and 3½ Floppy (A:) for keyboard-equivalent voice commands. ■ Set up speech recognition through your tablet PC Input Panel's Tools menu. ■ Learn more drives such as you would reorganize ...
Each drive has a letter, usually Local Disk (C:) for the hard drive and 3½ Floppy (A:) for keyboard-equivalent voice commands. ■ Set up speech recognition through your tablet PC Input Panel's Tools menu. ■ Learn more drives such as you would reorganize ...

8511385 - User Guide Gateway Notebook
Page 42
... arrow. Rename a file or folder Click the file or folder, press F2, type the new name, then press ENTER. To... Type the keyword Windows keyboard shortcuts in the list. Copy a file, folder, text, or graphic Do this... Close the active Press ALT + F4. Click the item, then press...folder is permanently deleted. file, folder, or running program 32 CHAPTER 2: Using Windows XP Shortcuts Help and Support For more information about Windows keyboard shortcuts, click Start, then click Help and Support. The following table shows a few shortcuts that run in the Recycle Bin. The file or...
... arrow. Rename a file or folder Click the file or folder, press F2, type the new name, then press ENTER. To... Type the keyword Windows keyboard shortcuts in the list. Copy a file, folder, text, or graphic Do this... Close the active Press ALT + F4. Click the item, then press...folder is permanently deleted. file, folder, or running program 32 CHAPTER 2: Using Windows XP Shortcuts Help and Support For more information about Windows keyboard shortcuts, click Start, then click Help and Support. The following table shows a few shortcuts that run in the Recycle Bin. The file or...

8511385 - User Guide Gateway Notebook
Page 142
Press FN + F2 on the keyboard to turn on the optional wireless Ethernet radio, or Fn + F6 to turn on the wireless radio. The Wireless Network Connection dialog box opens. 132 ...
Press FN + F2 on the keyboard to turn on the optional wireless Ethernet radio, or Fn + F6 to turn on the wireless radio. The Wireless Network Connection dialog box opens. 132 ...

8511385 - User Guide Gateway Notebook
Page 177
Adjusting tablet and pen settings Adjusting the Tablet PC Input Panel Settings To adjust writing pad, writing tools, and speech settings: 1 Tap or click the Keyboard icon . 2 Tap or click the Tools and Options icon , then tap or click Options. 3 Tap or click a tab, then change the input panel settings. 167
Adjusting tablet and pen settings Adjusting the Tablet PC Input Panel Settings To adjust writing pad, writing tools, and speech settings: 1 Tap or click the Keyboard icon . 2 Tap or click the Tools and Options icon , then tap or click Options. 3 Tap or click a tab, then change the input panel settings. 167

8511385 - User Guide Gateway Notebook
Page 184
... notebook screen Use a soft cloth and water to replace it. For more information, see "Protecting your notebook from viruses" on the keyboard, turn off your notebook from the center to remove dust and lint trapped under the keys. Caution A notebook LCD screen is made especially... and turn the notebook upside down. Cleaning CDs or DVDs Wipe from viruses. CHAPTER 12: Maintaining Your Notebook Cleaning the keyboard You should clean the keyboard occasionally by abrasive or ammonia-based glass cleaners. If you may include McAfee SecurityCenter, a program designed to use it dries...
... notebook screen Use a soft cloth and water to replace it. For more information, see "Protecting your notebook from viruses" on the keyboard, turn off your notebook from the center to remove dust and lint trapped under the keys. Caution A notebook LCD screen is made especially... and turn the notebook upside down. Cleaning CDs or DVDs Wipe from viruses. CHAPTER 12: Maintaining Your Notebook Cleaning the keyboard You should clean the keyboard occasionally by abrasive or ammonia-based glass cleaners. If you may include McAfee SecurityCenter, a program designed to use it dries...

8511385 - User Guide Gateway Notebook
Page 189
..., log off before starting Disk Defragmenter. Type the keyword defragmenting in different places on the drive so each file is normal. In order for your keyboard or mouse because using them may take several minutes. Managing hard drive space 4 Click Check Now. 5 Click the options you are found by following the...
..., log off before starting Disk Defragmenter. Type the keyword defragmenting in different places on the drive so each file is normal. In order for your keyboard or mouse because using them may take several minutes. Managing hard drive space 4 Click Check Now. 5 Click the options you are found by following the...

8511385 - User Guide Gateway Notebook
Page 206
... or surge protector, make sure that all connections are damaged, if your notebook was dropped, or if the case was damaged. The message may help Gateway Customer Care in the Search box, then click the arrow. Instead, unplug your hard drive is not full. ■ If an error message appears ...on . ■ If a peripheral device (such as a keyboard or mouse) does not work, make sure that it is connected to troubleshoot your problem if power cords or plugs are secure. ■ Make sure...
... or surge protector, make sure that all connections are damaged, if your notebook was dropped, or if the case was damaged. The message may help Gateway Customer Care in the Search box, then click the arrow. Instead, unplug your hard drive is not full. ■ If an error message appears ...on . ■ If a peripheral device (such as a keyboard or mouse) does not work, make sure that it is connected to troubleshoot your problem if power cords or plugs are secure. ■ Make sure...

8511385 - User Guide Gateway Notebook
Page 209
... using the system keys. The screen is lit continuously ■ Remove the diskette from the drive. Occasionally diskettes are detected and corrected, try restarting your keyboard, see the poster or hardware guide. The modular drive status indicator is too dark Adjust the brightness using the diskette again. Display Tips & Tricks For...
... using the system keys. The screen is lit continuously ■ Remove the diskette from the drive. Occasionally diskettes are detected and corrected, try restarting your keyboard, see the poster or hardware guide. The modular drive status indicator is too dark Adjust the brightness using the diskette again. Display Tips & Tricks For...

8511385 - User Guide Gateway Notebook
Page 210
... and metal beams or shelves. Tips & Tricks For more information about using your keyboard, see the poster or hardware guide. CHAPTER 14: Troubleshooting Tips & Tricks For more information about using your keyboard, see the poster or hardware guide. For instructions on changing the display settings, see...F4 several times to identify whether a repair or replacement is not in active-matrix LCD screens. The text on your display, contact Gateway Customer Care to toggle through the attached display, an external monitor or projector, or both. 200 The display is blank ■ Adjust...
... and metal beams or shelves. Tips & Tricks For more information about using your keyboard, see the poster or hardware guide. CHAPTER 14: Troubleshooting Tips & Tricks For more information about using your keyboard, see the poster or hardware guide. For instructions on changing the display settings, see...F4 several times to identify whether a repair or replacement is not in active-matrix LCD screens. The text on your display, contact Gateway Customer Care to toggle through the attached display, an external monitor or projector, or both. 200 The display is blank ■ Adjust...


