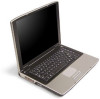
8511369 - Gateway Notebook Hardware Reference
Page 3
Contents Chapter 1: About this reference 1 About this guide 2 Accessing the online User Guide 2 Gateway contact information 2 Gateway model and serial number 2 Microsoft Certificate of Authenticity 3 For more information 3 Chapter 2: Checking Out Your Gateway Notebook 5 Identifying features 6 Front 6 Left 7 Right 8 Back 9 Bottom 10 Keyboard area 11 Connecting the AC adapter 12 Protecting from power source problems...
8511369 - Gateway Notebook Hardware Reference
Page 6
... section is for assistance. The label on the bottom of your notebook contains information that are specific to your model of Gateway notebook. Accessing the online User Guide In addition to -read manual that includes information on your hard drive. Label information varies ...by model, features ordered, and location. Gateway contact information Gateway model and serial number Important The label shown in -depth, easy-to this guide, the online User Guide has been...
8511369 - Gateway Notebook Hardware Reference
Page 14
For more information, see "Gateway model and serial number" on page 38. 10 For more information, see "Replacing the hard drive kit" on page 2. Provides power when your notebook is located ..." on page 27. The hard drive is not plugged into this bay. Install a memory module into AC power. Includes the product model number. CHAPTER 2: Checking Out Your Gateway Notebook Bottom www.gateway.com Battery latch Battery Memory bay Battery lock System label Hard drive bay Component Icon Battery latch Battery Memory bay Battery...
8511369 - Gateway Notebook Hardware Reference
Page 37
... captive. Be careful not to lift the memory bay cover, then remove it. Depending on your model, not all peripheral devices and remove any PC cards. 5 Turn your notebook over so the bottom is marked with a K. www.gateway.com Tips & Tricks The keyboard screw hole is facing up, then remove the battery.
8511369 - Gateway Notebook Hardware Reference
Page 40
CHAPTER 3: Maintaining and Upgrading Your Notebook www.gateway.com Tips & Tricks The keyboard screw hole is facing up. 36 Screw 10 Turn your model, not all screws may be removed). Be careful not to lift the memory bay cover, then remove it in the following picture, then loosen the ...
8511369 - Gateway Notebook Hardware Reference
Page 47
Be careful not to lift the memory bay cover, then remove it. Screw Screw Screw Screw Screw Screw 15 Use the thumb notch to break off the tabs located on your model, not all screws may be captive. 14 Close the LCD panel, turn your notebook over so the bottom is facing up, then loosen the six memory bay cover screws (these screws cannot be removed), then remove the mini-PCI bay cover. 43 www.gateway.com Replacing the keyboard Tips & Tricks Depending on the end of the cover opposite of the thumb notch. 16 Loosen the mini-PCI bay cover screw (this screw cannot be removed).
8511369 - Gateway Notebook Hardware Reference
Page 64
...22 finding specifications 3 Firewire port 8 Fn key 19 folders opening 22 function keys 18 G Gateway model number 2, 10 serial number 2, 3 Support 3 H hard drive bay 10 indicator 17 installing ... connecting 18 features 18 locating 11 replacing 40 USB port 8 keys application 18 60 www.gateway.com arrow 18 battery status 19 brightness 20 directional 18 Fn 19 function 18 LCD brightness ...card reader locating 8 memory card types supported 25 using 25 microphone jack 6 Microsoft Certificate of Authenticity 3 model number 2 modem cable 14 connecting DSL 14 jack 8, 13 monitor port 9 13, 14 mouse USB ...